Super Happy Fun Time cl350 - Seat Build!

quach

New Member
Haven't thought of a proper build name yet...

Anyways! Here is my first full on bike build, my 1970 CL350, I'm actually about 60% through my build at the moment and finally got off my ass to start a build thread so I will be doing alot of backtracking, and it may seem like im moving at a flying pace haha. I picked up this little beast at a swap meet for a couple bucks. She was a bit rough around the edges when I got her, dented tank, covered in dried mud, engine turned over but didn't fire up and none of the electronics worked. It was obvious after closer inspection that this bike had been someones offroader and had been sitting for some time. Here she is the day I rolled her down my driveway.

IMG_1356.jpg


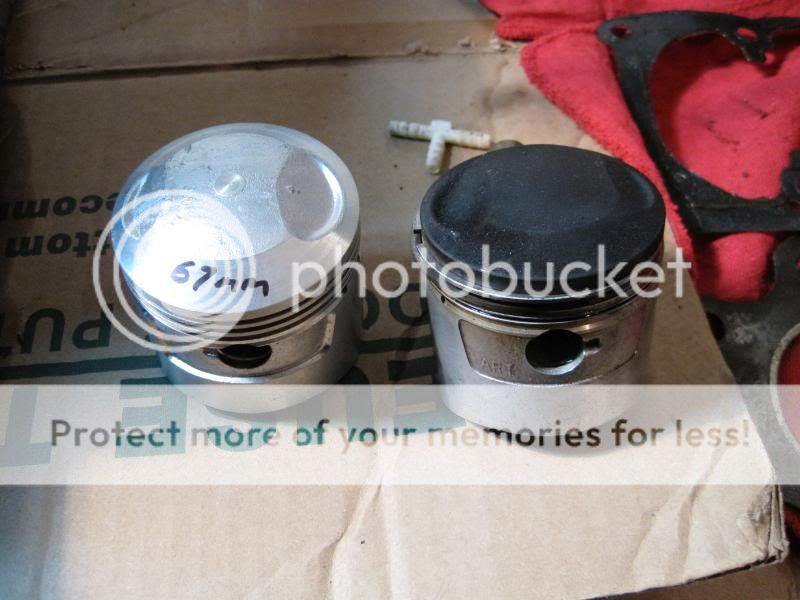
I suspected it would only take a bit of tinkering to get her running, and assumed the main culprit was spark. I went through all the wiring, cleaned up the points and all the contacts, and after two nights of chasing wires she fired right up! What a great feeling it was! and to make things even better, I managed to get all the electronics/lights working too! Soon after getting her running, I ran a compression test and unfortunately saw only 120 psi from both cylinders. Although this was disappointing, I'd always wanted to do an engine rebuild, and saw this as a great learning oppurtunity.

Once I established that this bike had the potential I was looking for, I instantly began the tear down. I was initially planning on doing more of a rat bike cafe racer, but as time passed and I began taking everything apart, I felt this bike deserved to be reborn shiny and new.

IMG_1951.jpg


I did a few photo-chops of the tail section and paint scheme I was thinking of. I will be modeling my seat out of industrial clay (what we use for car design models) and making a plaster mold out of that and fiberglassing my seat. My main gripe with aftermarket seats for cb350's is that the designs of these seats don't flow with the design of the rest of the bike. My plan was to build a seat that was design specifically to mimic the radiuses, volumes and lines of the tank in hopes of bringing the bike together as a single cohesive design. Out of the following, I've decided on the silver and dark grey color scheme.

dark gray, orange wheels
2.jpg


red tank, bronze frame/wheels
bike3.jpg


black frame/wheels, red tank
bike4.jpg


two tone silver, black frame/wheels
bike5.jpg
 
Re: Super Happy Fun Time cl350

Where did you score those pipes?! :eek:

I love the dark grey/orange, mostly because it reminds me of the Street Triple R/KTM SuperDuke.
 
Re: Super Happy Fun Time cl350

Now that I've gotten through all that boring introductory stuff, I can get into the meat of the build and show what I've been up to since then.

Never was a big fan of the CL tanks, so I ordered a early model angular cb350 tank on ebay for 10 bucks. Alittle more rust than I expected, but not terrible. My favorite part was the gorgeous house paint finish on it. Nicely done, didnt even bother to tank off the badges!

IMG_2919.jpg


I proceeded to flush out the rust. and kreem it.

IMG_2924.jpg

IMG_2926.jpg


Then hit it with paint stripper. There were so many layers of house paint on that thing that it looked like a jawbreaker as I was going through it layer by layer! I counted 5 colors, White, blue, yellow, green, and eventually the oem red... Filled up the Honda badge and dents with bondo and primered her up. Ready for paint!

IMG_2942.jpg

IMG_2958.jpg

IMG_2961.jpg

IMG_3033.jpg


Got my batteries in. I will be running the same setup as Chris Fiaccone's bike. Got these batteries from ebay for 7 bucks a pop, they appear to be the same batteries as the ABS ones Chris is running, just a different name.

IMG_2954.jpg

IMG_2955.jpg


Started tearing into the engine, got it all taken apart and checked everything out. Overall not too bad inside. Cam has some light pitting, but don't intend on running the original cam anyways so not an issue. As expected, the cam tensioner was eaten up and battered. Here's a pic of my engine table setup.

IMG_0058.jpg


I managed to score a complete head from a '69 cb350 on ebay for 25 bucks, excited to take it apart and compare to the late model cam.

IMG_0052.jpg


Picked up a set of what I believe are Rocky S12 pistons. Theyre marked ART on the side. They're 3mm oversize, which should bump my displacement to 357cc's. Interestingly, the pistons I pulled were also marked ART, not sure if that is OEM or not?

IMG_0056.jpg


Started chopping the frame. Detabbed all the stuff I wont be needing.

IMG_3079.jpg


Chopped off the rear tail section right behind the shocks and welded in a brace between the shock towers. Alittle worried about tire clearance, but I will be running some stiff 13.5" shocks so the rear should be a bit taller and stiffer. Also tacked in my battery tray using some scrap metal I had around (I know I know, galvanized! never again.) Mocked up my battery setup.

IMG_3105.jpg

IMG_3126.jpg

IMG_3130.jpg


Lots more to come!
 
Re: Super Happy Fun Time cl350

ElHatton said:
Where did you score those pipes?! :eek:

I love the dark grey/orange, mostly because it reminds me of the Street Triple R/KTM SuperDuke.

Pipes came with the bike since I have the street scrambler 350. I may end up doing the orange wheels down the line when I pick up aluminum rims and relace the wheels, but for now I'm sticking with black wheels.
 
Re: Super Happy Fun Time cl350

Very cool. My project is a 71 Scrambler that I got i similar condition. I also got the Rocky S12 pistons and yes Rocky was an OEM manufacturer for Honda back in the day. 3mm is a pretty Hefty bore job. Make sure you have a shop that specializes in that sort of thing do it. It's worth the money. Great job so far. I'm hoping to fire mine up in about 2 weeks.
 
Re: Super Happy Fun Time cl350

djelliott said:
Very cool. My project is a 71 Scrambler that I got i similar condition. I also got the Rocky S12 pistons and yes Rocky was an OEM manufacturer for Honda back in the day. 3mm is a pretty Hefty bore job. Make sure you have a shop that specializes in that sort of thing do it. It's worth the money. Great job so far. I'm hoping to fire mine up in about 2 weeks.

Nice! Do you have a bike build going on here? I'd like to see what you've done to yours. You think I should go to a machinist who specializes in bikes/honda's to have my cylinders bored or will any machine shop that bores/hones work? I don't intend on honing them myself.
 
Re: Super Happy Fun Time cl350

Ahhh, man after my own heart...a white 240sx and a Honda 350. ;D

Looking good quach, look forward to seeing how this turns out.
 
Re: Super Happy Fun Time cl350

quach said:
Nice! Do you have a bike build going on here? I'd like to see what you've done to yours. You think I should go to a machinist who specializes in bikes/honda's to have my cylinders bored or will any machine shop that bores/hones work? I don't intend on honing them myself.

Yep, right here:

http://dotheton.com/index.php?topic=13543.0

Yes, for sure go to a shop that specializes in cylinder boring and honing. It's worth it. Mine cost me about $175 and they did an awesome job. Be sure to bring you pistons and rings.
 
Re: Super Happy Fun Time cl350

quach said:
Pipes came with the bike since I have the street scrambler 350. I may end up doing the orange wheels down the line when I pick up aluminum rims and relace the wheels, but for now I'm sticking with black wheels.

Ah yes, I was talking about the second set you have there, the black upswept ones. I've been looking for a set of pipes that mimic the Zard system on the Thruxton but those seem way more managable.
 
Re: Super Happy Fun Time cl350

This should be a cool build. I like the red and bronze color scheme. It would be cool if you cut out the starter casting bit, like on the bike in the mockup pick. That is the only bike where I have seen that done.
 
Re: Super Happy Fun Time cl350

El thats not his bike thats someone elses bike. Looking good. Like the battery setup. Should be cool keep it up.
 
Re: Super Happy Fun Time cl350

Thanks for all the kind words guys ;D

alpinaclone said:
This should be a cool build. I like the red and bronze color scheme. It would be cool if you cut out the starter casting bit, like on the bike in the mockup pick. That is the only bike where I have seen that done.

I've considered doing this, but I'm not sure what I would do about the left side cover, I would have to weld in some extra metal to close off the gap it would leave, which is unfortunately beyond my current fabrication skills :-\ For now I'm going to run a blockoff plug but I think chopping it off could definitely be a later modification.
 
Re: Super Happy Fun Time cl350

ElHatton said:
Ah yes, I was talking about the second set you have there, the black upswept ones. I've been looking for a set of pipes that mimic the Zard system on the Thruxton but those seem way more managable.

oops, haha sorry, that's not actually my bike, just a pic I pulled off google to do some photochops on. However, I believe those are Jemco pipes that all the 350 racer guys run, I see them all the time on race bikes. Maybe ask the guys over at the WERA forums, there seems to be alot of vintage 350 racers on there who should have more info.
 
Re: Super Happy Fun Time cl350

Got my frame painted. Really happy with how it turned out, I used duplicolor low gloss engine enamel. The photos didnt really capture it well, but everything came out really smooth. I wish I had more time to fill up some of the low spots with metal glaze, but I've got a deadline for this bike (Need to finish before school term starts for me in the summer)

IMG_3135.jpg

IMG_0071.jpg

IMG_0073.jpg

IMG_0074.jpg

IMG_0076.jpg


Sprayed my forks and swingarm with semi gloss black. Wish I had rebuilt my forks before I sprayed them though, I dont know what the fork oil will do to the finish.

IMG_3120.jpg


Also painted my wheels. WHAT A PAIN. Sanded the wheels down with 180 grit sand paper to begin with and cleaned them off with denatured alcohol. Here's my girlfriend giving me a hand, she knows I hate sanding anything, so she offered up some help ;D

IMG_0035.jpg


I then hit the wheels with self etching primer, the primer still had some trouble sticking in some spots, but overall it turned out ok.

IMG_0084.jpg


Then laid down the color. I chose to do gloss black on the wheels. Unfortunately my impatience resulted in me using my buddies can of rustoleum engine enamel (I hate rustoleum rattlecan paint). The finish didn't turn out quite as well as I wanted, but I know these wheels are just temporary until I can afford some aluminum rims and relacing, so I wasn't too upset. Sorry these pics really suck, it was dark.

IMG_0114.jpg

IMG_0110.jpg
 
Re: Super Happy Fun Time cl350

nice job with the paint.

Also, a "girlfriend" who will sand, should quickly be promoted to a "wife" who will sand. Lock that up ;D
 
Re: Super Happy Fun Time cl350 seat build!

So I've been working on my seat for the past couple days. It's coming along nicely, should be done pretty soon. I'm modeling the seat out of industrial clay, which is the same clay used in car studios to build concept cars. I'm a car design student at Art Center College of Design, so this is a medium im very comfortable using, and feel will give me the best end result. My goal was to design a seat that looked integrated into the overall design of the bike, and mimics the volumes, lines, and overall gesture of the gas tank. After I finish the seat in clay, I'm going to make a plaster mold of it in which i will lay fiberglass into.

Keep in mind I'm not building this the proper way that we do it at school and in the design studio, this is due to the fact that I'm working in my garage instead of my studio, and have limited access to all the tools I need.

Started building the armature for the seat out of 1/2" foam core. I wanted to use MDF, but I dont have a tablesaw/bandsaw in my garage so foamcore it was.

IMG_3144.jpg


IMG_3153.jpg


IMG_3148.jpg


then cut out some blocks of blue foam to support the clay, epoxied it to the foamcore seatpan. Then started carving it to roughly the shape i wanted it.

IMG_3147.jpg


IMG_3149.jpg


IMG_3156.jpg


IMG_3163.jpg


IMG_3177.jpg


IMG_3165.jpg


Got my clay out and heated it up to be loaded on. The clay I'm using is some Japanese brand that i got from the guys at Toyota, some of the best I've used so far.

IMG_3154.jpg


An example of what this is used for:

bmw_3coupe_clay.jpg


Loaded up and ready to model

IMG_3183.jpg


After a bit of carving and shaping. I will radius the edges after I've transferred the intersection points to the other side to match the tank.

IMG_3199.jpg


IMG_3205.jpg


IMG_3205.jpg


IMG_3206.jpg


IMG_3207.jpg


Currently working on getting it symmetrical by putting it onto a grid.

IMG_3222.jpg


IMG_3238.jpg


That's about it for now on the seat, it's about 95% there, just gotta fine tune everything and get it ready to be made into a mold. Overall I'm happy with it how its looking, I wish I had my wheels and everything on so I can check the relationship of the seat to the wheels, but I'll just cross my fingers for now and hope it turns out ok haha ;D

Lot's more to come, don't want to overload this post!
 
Back
Top Bottom