Suzuki GS650GL cafe project

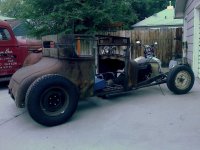
Thanks man! It's just a 2+ garage, about 22'x28'. It's nice though...not tons of room...I'd love to have more, but it's good for bikes. The little Model T hot rod poking it's front wheel into frame makes things tight...it's a bit small for that project, but it works.
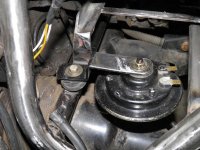
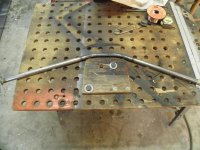
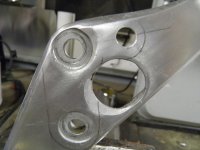
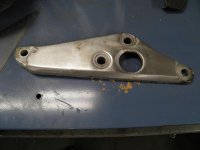
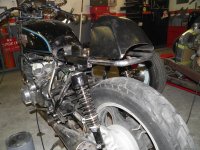
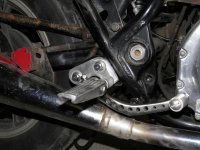
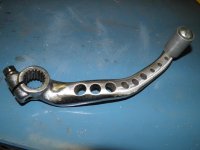
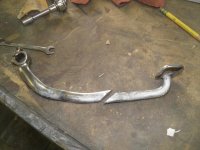
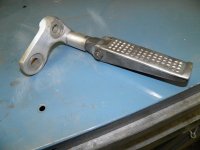
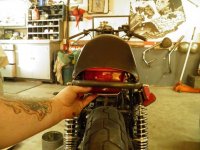
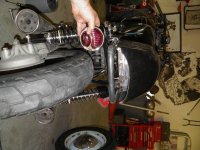
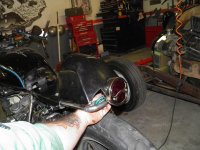
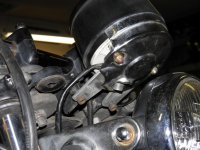
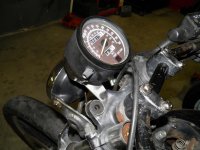
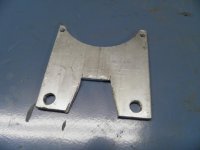
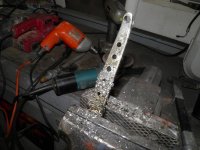
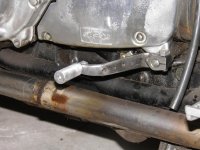
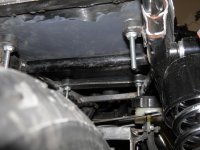
Yeah, I'm making some headway. Everything is in flux at this point still, and much of the bike will come apart for cleanup and painting so everything is dirty and rough right now, but in time I think it'll end up being a really nice bike. I like the overall look of the bike at this point so it's just a matter of getting the small bits sorted out and finding out where everything is going to go and how it's going to mount. Thanks for the comments!
 
Thanks joshzombie. Me too. I hope for a very clean, simple looking bike overall when I'm done. i making a really concious effort all over the bike to eliminate anything that isnt necessary, with the exception of turn signals and a horn and basic switches. I'm also trying to hide things that are necessary, but don't necessarily need to be seen. Once those basics are established, then I can set about making what is left beautiful.
Hoosier...I wish it was an A coupe too...I'd keep it a T over a Duece...never cared for them but A coupes are the hottest IMHO. I've got a long way to go on this little bugger. I have a build thread over at killbillet.com my UN there is 'PO'ed'
 

Attachments

  • 0810121424.jpg
    0810121424.jpg
    120.2 KB · Views: 242
Ok, I've had a pretty busy weekend on the cafe bike. I got my wiring sent off to Sonreir to have him build me a new harness, and in the meantime I've been sorting out details.
First I made a new horn bracket. Next I set to work getting the seatpan mounted. About this time I ran out of MIG gas, so I had to move on to things that didn't require much welding. The flux-cored welds are strong, but require alot of cleanup, so I avoid using it in cases where the weld will show alot.
So I moved on the the rear hoop next. I dont have it welded in place yet, and dont have the positioning nailed down. Part of what I'm waiting for is a decision on taillamp selection/positioning. I have a couple options. Feel free to comment.
After that I started on making the footpeg mounting brackets. I used the OEM muffler mounting brackets as stock. I marked and cut them up into the shape I needed. I had some old Anderson chopper footpegs and cut down and drilled the OEM rear brake pedal. The result is much cleaner, simpler, more compact, and lighter.
 

Attachments

  • newhornbracket.jpg
    newhornbracket.jpg
    97.7 KB · Views: 223
  • seatpanmounting.jpg
    seatpanmounting.jpg
    69.9 KB · Views: 246
  • seatpanmounting1.jpg
    seatpanmounting1.jpg
    96.1 KB · Views: 244
  • rearhoop.jpg
    rearhoop.jpg
    86.9 KB · Views: 241
continuing....
 

Attachments

  • footpegbracket2.jpg
    footpegbracket2.jpg
    55.4 KB · Views: 243
  • footpegbracket1.jpg
    footpegbracket1.jpg
    53.5 KB · Views: 242
  • footpegbracket.jpg
    footpegbracket.jpg
    50.1 KB · Views: 240
  • rearhoop1.jpg
    rearhoop1.jpg
    102.8 KB · Views: 249
still more.......
 

Attachments

  • rearbrakepedal2.jpg
    rearbrakepedal2.jpg
    83.5 KB · Views: 241
  • rearbrakepedal1.jpg
    rearbrakepedal1.jpg
    55.1 KB · Views: 246
  • rearbrakepedal.jpg
    rearbrakepedal.jpg
    77.5 KB · Views: 237
  • footpegbracket3.jpg
    footpegbracket3.jpg
    57.6 KB · Views: 255
taillamp mouning options....gladly take comments on what you think is the best option here
 

Attachments

  • taillamp option1.jpg
    taillamp option1.jpg
    84.4 KB · Views: 228
  • taillamp option2.jpg
    taillamp option2.jpg
    105.5 KB · Views: 807
  • taillamp option3.jpg
    taillamp option3.jpg
    86.9 KB · Views: 235
And lastly I fabbed a new mounting bracket out of some 1/8 inchX3 aluminum plate
 

Attachments

  • speedomount3.jpg
    speedomount3.jpg
    87.8 KB · Views: 240
  • speedomount2.jpg
    speedomount2.jpg
    77.6 KB · Views: 245
  • speedomount1.jpg
    speedomount1.jpg
    43.9 KB · Views: 236
I finished up the left side switchgear yesterday. Just getting around to posting pics today. I do have an issue with the mounting hole for the footpeg to the bracket. It got oversized, and trying to find a way to compensate for this has been challenging. I'm thinking of just welding the hole shut and redrilling it again. Another option might be to use a bushing of some sort. I'll figure something out.

The easiest way to move the shift lever would have been to flip it around and convert to a GP pattern, but my wife will also ride this thing, and she's still getting down a standard shift pattern...I dont want to throw a wrench into her works like that. I think with practice I could get used to it, but I didnt want the headache.
Despite, this, the lever needed to move back about 4 inches. I drilled the lever, cut off the "peg", and bent the lever back to almost a 90, then bent the front part of it back forward. This move the peg location back about 3 inches. I'd have liked it to come back further, and if I alter the peg location on the lever I can, but for now I'm gonna leave it alone. I thought it would make shifting difficult since the leverage on the countershaft has been significantly reduced, but bench tests feel like it's quick and positive....more so than before.
 

Attachments

  • shiftleverdrilled.JPG
    shiftleverdrilled.JPG
    80.9 KB · Views: 229
  • shiftleverdone2.JPG
    shiftleverdone2.JPG
    82 KB · Views: 244
  • lsideswitchgeardone.JPG
    lsideswitchgeardone.JPG
    75.8 KB · Views: 240
Did some work today. I had made a rear hoop using the sand and wooden buck techniques. It came out OK, but I wasnt completely happy. I used the sand bending technique again, but this time I tacked the tubing to a large steel plate, using a couple 1" pipe nipples at my bending points. This one came out much better, if a tad boxy.
I also cleaned up the open ends of the shock mount gussets that got lopped off when I cut the original rear section off the frame. This consisted of merely welding on some strips of scrap 1/8 inch plate and grinding it all smooth. I have some cleanup to do in this area, but it's getting there.


Wow man, this is coming along pretty nicely.

What are you thinking about the tail light? Fwiw, I'm not generally a fan of the old Ford lights.
 
thanks Rich. It's getting there. I'm pleased so far.
As for the taillight, I dont know...been racking my brain for a solution there. I'm honestly not a huge fan of the old Ford lights either. Maybe on a chopper, certainly on an old hot rod, but not so much on this bike. I filled in the curved gap on the lower edge of the tail section, to bring it down flush with the rear hoop. This will give me a broader surface for taillight mounting and I might be able to get some ideas once that area is finalized. For me a taillight should be a "signature" piece....I like something unique that stands out. Problem is, on this bike I want it to have an overall sleek feeling. I'm thinking just an oval flush-mount of some sort. I welcome any suggestions.
 
I like tail lights used on old motorcycles. Not the standard Honda / Suzuki / whatever lights, but the real oddballs. I used a Hodaka lens before on my 650, and plan on using an unknown Suzuki lens again (I thought it was for a T500, but now I'm not so sure). Search around on eBay for something like "vintage Ducati taillight" or something similar. There's some neat stuff, and the reproductions can usually be found fairly cheap.
 
Looking at your bum stopper and hoop, I'm wondering if something like this might work for you? i was thinking of this for mine when I get to that point..

https://www.customdynamics.com/raider_led_turn_signals.htm#Raider_Rear_LED_Turn_Signals_

Or for a very trimmed look, I have this double-banked on my VStar.. another alternative for my GS project..

https://www.customdynamics.com/integrated_led_light_bars.htm

These guys have been great to deal with and were always very attentive to the few issues I had with some various products. They do stand behind their products, customer service top notch. Some items might seem pricey but you do get what you pay for.
 
I really like that first one Seaking...but again it's about cost. Alot of the premise of building this bike is to work with what I have on hand, or stuff I can pick up very inexpensively. That said, $100 for brake/tail/l & r signals isnt a bad deal. We'll see. The other factor I'm dealing with is trying to maintain a 'traditional' look...not that a GS650 cafe bike is 'traditional', but I like the looks of 70s and 80s cafe bikes. I'm still looking. Seaking, maybe we can work a trade for that console we were talking about, if you have any interesting taillamps?
Also, I've decided I am going to do clip-ons. I dont know why it didnt occur to me before, but since I've slid the tubes up in the clamps to lower the front end, I cant position the bars how I want them because they foul on the tops of the tubes. But there is just enough tube poking out the tops of the trees to mount some clip ons to!
Here is the tail section patched in. A little body filler and I think it'll smooth out nice.


Tail lamps, the ones I have in the shop here are from my 2005-2006 Yamahas.. probably not stylish enough for your project.

BUT, I am heading down to the bike shop to return some soda blasted parts to them and I'll see if they have something up in their storage area.. seen a lot of 'neat' looking stuff up there. If so, I'll snap some pics and send those off to you and see what happens after that.. You're looking for either round or slim-wide kind of lens?
 
I honestly dont know what I'm looking for. I think either something oblong or square. Round could work too, but I want something that will basically flush-mount into the tail section if possible. The photos below illustrate some that I like, particularly the one on the black CB750 in the last photo. The main issue I'm going to run into is that my mounting surface is not flat, so I'm afraid I'll have to recess it into the tail section. I think I'll end up with something like the second photo. The other issue I'm running into is liscense plate lighting. I may end up running another small lamp for that, as I dont want the plate hanging below the tail section. anything you can show me is welcome. Thanks!!


Good thing you have nice fab skills ;)

Just tossing some license plate ideas in your direction.. I have buddies who do custom LED trick items and like using my VStar to show case some of their wares..

Commercially available from Customdynamics again..

https://www.customdynamics.com/illuminatorz_licence_plates.htm#LED_Tag_Bolts

tagboltz850.jpg


Look further up the page, you'll see these $20 Vertical Chrome License Plate Illuminator

Same as I have in the drawer here.. (but planning to use on my GS project) They also make good LED lighting effects for the engine area..

index.php


And here's what I used on my VStar, also listed higher up the same page on Customdynamics..
index.php
 
Back
Top Bottom