We noticed you are blocking ads. DO THE TON only works with community supporters. Most are active members of the site with small businesses. Please consider disabling your ad blocking tool and checking out the businesses that help keep our site up and free.
You are using an out of date browser. It may not display this or other websites correctly.
You should upgrade or use an alternative browser.
You should upgrade or use an alternative browser.
Willow...An Evolution
- Thread starter troybilt
- Start date
and you sir are welcomeJustinLonghorn said:Ah, thank you sir.
Yeah Kiley it has just a hint of tan in it. The first go was a little to light for what I was looking for. I think it was more of an off white or antique white. This is rustoliums almond
My94 thank you brother. Glad you fellas approve so far.
Still adding layers to the sides of the tank. Problem is when its as thick as I like to get it, takes forever to cure out.
Maritime
Over 10,000 Posts
very nice! I like that cream with the green frame a lot. If I get to make it down your way before barber I will help you set the points on the big girl, it isn't too bad once you figure it out. I went to take her to work this morning and just got out of the driveway when the clutch cable broke, I have one to replace it cause I knew it was getting bad, but I need smaller hands to get at the attachment at the engine. It's a tight fit for my X-Large mitts.
Thanks fellas
Been livin on some highs but now dealin with some lows(nothing that can't be fixed thanks goodness)...
Decided to try to get her running. Lack of spark on the one side was inverted power wire at the coil. Switched the wires and made an Iv gas bag. She fired over on the second kick. I love the sound of the pipes but she was running like crap. I popped the points cover off and kicked her back over. Fire jumping around like mad. I did the poor mans condenser test and both my condensers are dead. Not sure why?? Kinda strange both would go out at the same time. I'm wondering if having them hooked up right at the coil terminal has something to do with it?? Anyhow, anyone have any thoughts?
More Downer crap...Went to bed thinking I laid the best paint ive ever done. woke this morning to wrinkles. Looks like I'm dealing with off-gassing. I didn't come back and lay any paint. Each coat was 3-10 minutes apart depending upon how heavy the previous coat was. Guess I went past the golden hour. I'm hoping it'll sand out but I'm afraid the wrinkles may also be pulling at the deeper layers.
Maritime
Over 10,000 Posts
That sucks. Are the condensors well grounded? I know my crappy spark was part to do with really rusty condensor contacts. I cleaned them up and did the extra wire to ground and it improved the spark considerably. Does the bike have a ballist resister? or need resister wire? I don't know enough about the system on the 360, so hopefully Kiley can chime in. Hope the pint is salvageable with some sanding.
Yeah to do the test I grounded the condenser to the battery negative and the lead to the positive terminal. it didnt charge at all. this doesnt mean its ground well, only for the test. The Coils have internal resistors so no ballast resistors were needed. I think I remember them having a primary winding of between 2 something ohms and 4ohms.
I've got my fingers crossed on the paint. Its still super soft so the wrinkling could get worse..If so it'll probably be a sanding back to -0- but I hope that's not the case.
I've got my fingers crossed on the paint. Its still super soft so the wrinkling could get worse..If so it'll probably be a sanding back to -0- but I hope that's not the case.
Swagger
Putting boot to ass since 1967!
Shouldn't hurt the condensers, as far as they care electrons are electrons. If they are getting externally damaged (dented cases) then that can cause dielectric breakdown since they are basically just stout capacitors. It does seem odd that they both crapped out at the same time though.......
Bummer on the paint.....too heavy perhaps? Are you running epoxy?
Bummer on the paint.....too heavy perhaps? Are you running epoxy?
Good info on the condencers. Funny I think I miss type capacitors for condencers everytime. Freudian thing I guess. Yeah no apparent outside physical changes (dents etc). Kinda weird unless there is something going on like ...oh crap I just had a thought. I did cut the pigtails short and soldered new leads. They could have got very hot....hmmm that almsot has to be it.
anyhow, The way I understand it they jsut store and release energy. Once full they cant be over charged?( Is this correct?) Then release the energy on trigger and the cycle starts over again??
I found a pretty good read explaining how to checkcapac shit...condenser performance by looking at the points.
If there is a big build up of material on one of the points it means the capacity of that condenser is too big or too small for that set of points (could be other reasons to I guess). If the negative point (grounded or stationary point) loses material, with the build-up on the positive ( Moveable ) point. The condenser capacity is too low. If the build up is on the grounded point ( Stationary ) the capacity is too high. I think its the first I've ever read anyone checking capacitors performance that way
here (good read if anyone wants to check it):
http://www.dansmc.com/bat_coil_ign.htm
anyhow, The way I understand it they jsut store and release energy. Once full they cant be over charged?( Is this correct?) Then release the energy on trigger and the cycle starts over again??
I found a pretty good read explaining how to check
If there is a big build up of material on one of the points it means the capacity of that condenser is too big or too small for that set of points (could be other reasons to I guess). If the negative point (grounded or stationary point) loses material, with the build-up on the positive ( Moveable ) point. The condenser capacity is too low. If the build up is on the grounded point ( Stationary ) the capacity is too high. I think its the first I've ever read anyone checking capacitors performance that way
here (good read if anyone wants to check it):
http://www.dansmc.com/bat_coil_ign.htm
On the paint I believe I just took too long to get it all laid down. I think (I hope) its done off-gassing and I can sand out the wrinkles. The good news is the wrinkles are very near where the cream will meet up with the green or where the green will be. Its taking forever to cure though. I don't think it will be done in the 48 hrs like its supposed to... time will tell
Swagger
Putting boot to ass since 1967!
Wow...that's really a neat trick!
Unless your leads are like 1/4" long and you soldered with a propane torch I think heat probably isn't the issue, though manhandling the leads could maybe have broken them internally...
Well, at least they aren't expensive parts....
Unless your leads are like 1/4" long and you soldered with a propane torch I think heat probably isn't the issue, though manhandling the leads could maybe have broken them internally...
Well, at least they aren't expensive parts....
Yeah thats a pretty cool diagnostic tool especially when your feeling in the dark like am with my set up.
Condensers should be a cheap fix. I'm about to go look at the 750 ;D
I would like to have an idea what might have happened though. I do have a tendency to man handle crap sometimes but I'm still thinking I got them super hot when I soldered em. The leads were probably less thana 1/4 long and my iron gets pretty hot. My guess is I probably couldnt have picked them up for being too hot. I wish I would have touched them right afterwards though but i didn't. Let em cool on the bench
Swagger
Putting boot to ass since 1967!
Oh wow....they really WERE short!
Well I suppose it's possible. If you want to keep then short like that on the next ones, use a pair of needle-nose pliers rubber-banded closed, right against the body on the bare stripped wire. This will act as a heatsink, bleeding off thermal energy before it hits the foil inside the condenser. Do your soldering and leave it for a couple minutes and you should be good..
Well I suppose it's possible. If you want to keep then short like that on the next ones, use a pair of needle-nose pliers rubber-banded closed, right against the body on the bare stripped wire. This will act as a heatsink, bleeding off thermal energy before it hits the foil inside the condenser. Do your soldering and leave it for a couple minutes and you should be good..
Ok friends I have some progress to report but first I need to apologize for my absence lately. Hopefully now that Willow is officially finished (just need to adjust the points and put a clear coat on the tank) hopefully I can be human again and have somewhat of a regular life. The past two nights I worked until the wee hours of the morning fighting with the off gassing paint and a bunch of other stuff I can't even remember right now because I'm ready to fall over from exhaustion, lol.
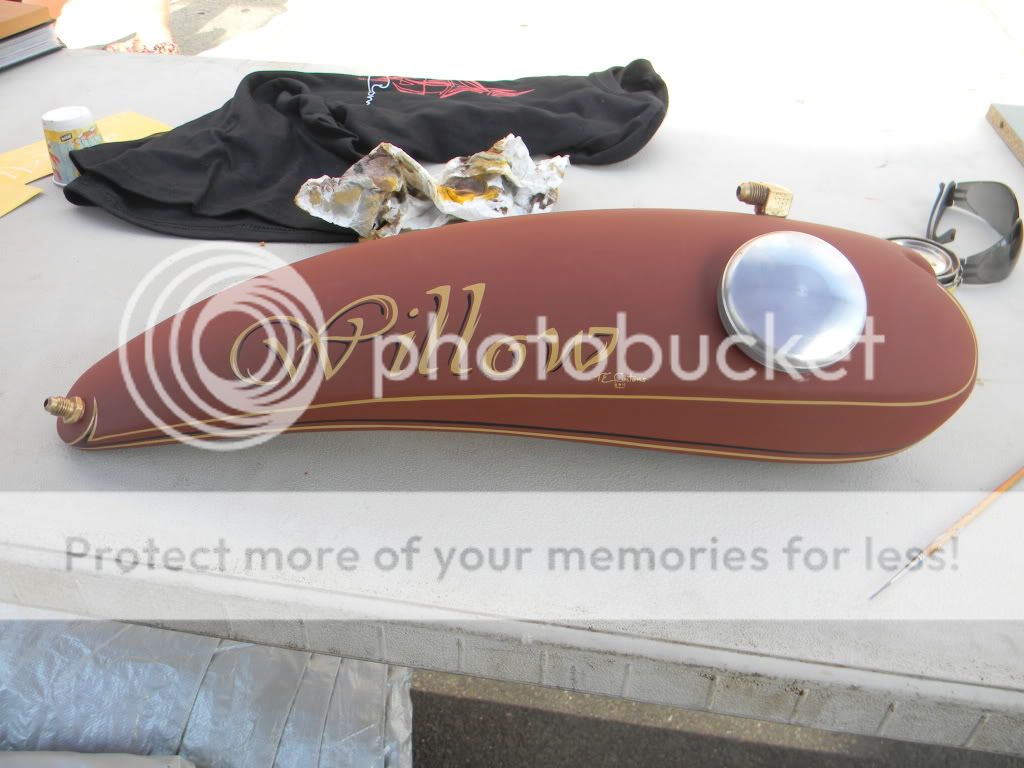
Ended up stripping the tank and headlight bucket back to bare and starting over. I'm a firm believer that things happen for a reason. Also, many of the previous times I was forced to start over I tried to take advantage and make it even better. So this was an opportunity to rethink my colors. Long story short I decided to take willow to The Pittsburgh Mods vs Rockers under primer. I contacted Tyler Elliott of TE custom and made plans to have him do some letting and pin strips on the primer. I hoped the pins and lettering would help pull it all together but without seeing it I wasnt sure. I met up with Tyler at the show and once he started laying down paint I was sold. The color was staying. Entered the bike in the contest in the bobber catagory and hung out at the DTT tent, DEK tent (beatnic's suspension shop) and Achelmy Upholstery tent (Jims' shop) with the bike parked out front. It was incredible meeting up with old friends but also made a ton of new friends. I honestly had no idea what I was in for. The bike kind of put me on celebrity status. I'd perfer to let some of the other describe the scene but all I can say is my head is spinning. Anyhow, it was awesome being able to put faces to my Dtt brothers names!
I guess the big news of the day was Willow ended up taking the Best Bobber category and also Best of Show. I'm freaking blown away. Huge honor bestowed upon me considering the quality of builds there. Since I now can call her Fin I would like to thank everyone for their help, support and love. I especially want to thank Jim at Achelmy Upholstery for building my seat, Jim at Rivr Styx for shaing his wealth of knowledge and helping me mold fiberglass into something other than a contotred blog, Doug (beatnic) of DEK suspension for helping me rebuild my forks and coming up with the idea for the external springs, Tyler from TE Customs for doing the hand pins and lettering, Lee (Swagger) for milling the handle bar mounts, and especially Kanticoy for all the love and support but mostly for not slamming the phone down numerous times, hahaha. Kidding aside, I really appreciated running ideas past you and I can't thank you enough for the all the parts you've sent me. This build would have never happend with out the support I've received from my extended family and I can't thank everyone one enough. This includes all the positive comments and support I've received from everyone following along, So from the bottom of my heart thank you to my Dtt family!
I hope to do a proper photo shoot very soon but until then this is all Ive got.
Late last night ( or I guess it was early this morning haha)


Loaded up and ready to head north to Pittsburgh

Tyler doing his magic


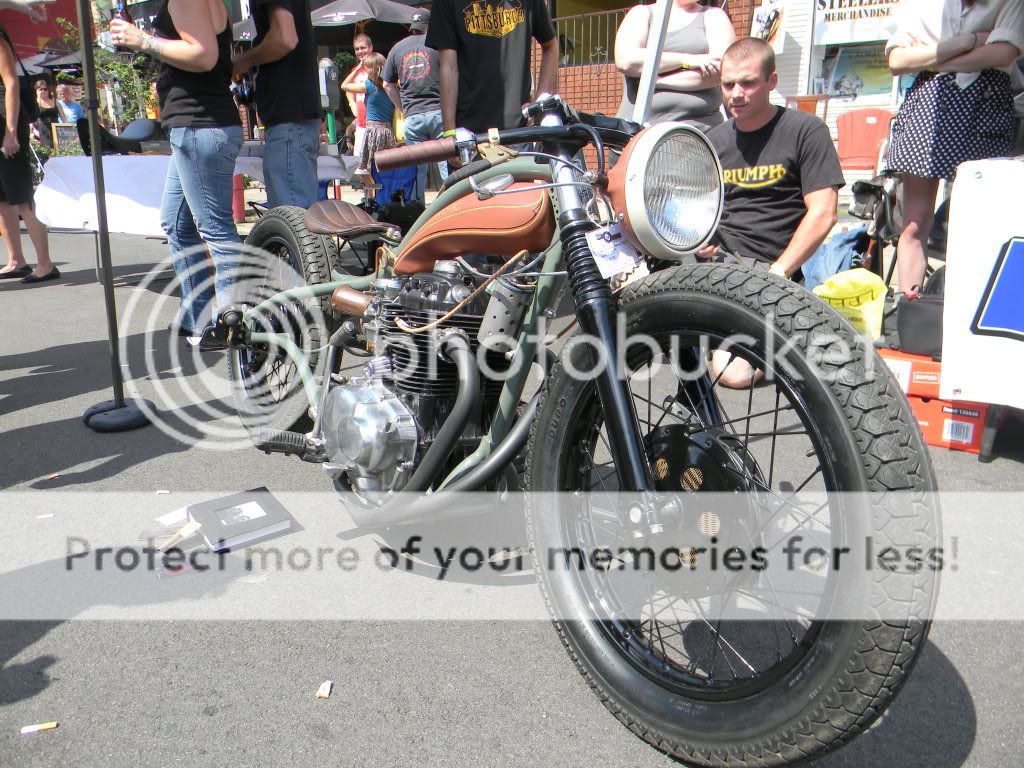
I tried to take pics at the show but to be honest it was often hard to get an opening. She was a pretty popular gal and I just let everyone have their time with her. This is the only pic I took so hopefully others will chime in with more pics

Doug's Pics:
If anyone else has any photos please post em up...
Ended up stripping the tank and headlight bucket back to bare and starting over. I'm a firm believer that things happen for a reason. Also, many of the previous times I was forced to start over I tried to take advantage and make it even better. So this was an opportunity to rethink my colors. Long story short I decided to take willow to The Pittsburgh Mods vs Rockers under primer. I contacted Tyler Elliott of TE custom and made plans to have him do some letting and pin strips on the primer. I hoped the pins and lettering would help pull it all together but without seeing it I wasnt sure. I met up with Tyler at the show and once he started laying down paint I was sold. The color was staying. Entered the bike in the contest in the bobber catagory and hung out at the DTT tent, DEK tent (beatnic's suspension shop) and Achelmy Upholstery tent (Jims' shop) with the bike parked out front. It was incredible meeting up with old friends but also made a ton of new friends. I honestly had no idea what I was in for. The bike kind of put me on celebrity status. I'd perfer to let some of the other describe the scene but all I can say is my head is spinning. Anyhow, it was awesome being able to put faces to my Dtt brothers names!
I guess the big news of the day was Willow ended up taking the Best Bobber category and also Best of Show. I'm freaking blown away. Huge honor bestowed upon me considering the quality of builds there. Since I now can call her Fin I would like to thank everyone for their help, support and love. I especially want to thank Jim at Achelmy Upholstery for building my seat, Jim at Rivr Styx for shaing his wealth of knowledge and helping me mold fiberglass into something other than a contotred blog, Doug (beatnic) of DEK suspension for helping me rebuild my forks and coming up with the idea for the external springs, Tyler from TE Customs for doing the hand pins and lettering, Lee (Swagger) for milling the handle bar mounts, and especially Kanticoy for all the love and support but mostly for not slamming the phone down numerous times, hahaha. Kidding aside, I really appreciated running ideas past you and I can't thank you enough for the all the parts you've sent me. This build would have never happend with out the support I've received from my extended family and I can't thank everyone one enough. This includes all the positive comments and support I've received from everyone following along, So from the bottom of my heart thank you to my Dtt family!
I hope to do a proper photo shoot very soon but until then this is all Ive got.
Late last night ( or I guess it was early this morning haha)
Loaded up and ready to head north to Pittsburgh
Tyler doing his magic
I tried to take pics at the show but to be honest it was often hard to get an opening. She was a pretty popular gal and I just let everyone have their time with her. This is the only pic I took so hopefully others will chime in with more pics
Doug's Pics:
If anyone else has any photos please post em up...
Did the heat sink trick with a hemostat and worked beautifully. Ended up using Cb 750 Condensors. I know their not matched to the coils but I've got a nice big fat blue spark so I she seems food to goSwagger said:Oh wow....they really WERE short!
Well I suppose it's possible. If you want to keep then short like that on the next ones, use a pair of needle-nose pliers rubber-banded closed, right against the body on the bare stripped wire. This will act as a heatsink, bleeding off thermal energy before it hits the foil inside the condenser. Do your soldering and leave it for a couple minutes and you should be good..
Beard said:saw the bike today in person. its absolute artwork.
truely amazing vision on the lines.
Thank you Brother. Awesome to meet you today. Appreciate the kind words and good luck with the wee ones in your life. Seems like you really have your priorities in order!
CresentSon
Over 1,000 Posts
Beautiful. I'm not even gonna try to say more.
beatnic
Coast to Coast
Troy...Willow is beautiful and very deserving of her awards.
Troy was totally oblivious of the people following Willow from the T.E.Customs tent to our area, all trying to get a better look and figure out what just rolled past them. She drew admirers all day.
Congratulations again!
Troy was totally oblivious of the people following Willow from the T.E.Customs tent to our area, all trying to get a better look and figure out what just rolled past them. She drew admirers all day.
Congratulations again!


