We noticed you are blocking ads. DO THE TON only works with community supporters. Most are active members of the site with small businesses. Please consider disabling your ad blocking tool and checking out the businesses that help keep our site up and free.
You are using an out of date browser. It may not display this or other websites correctly.
You should upgrade or use an alternative browser.
You should upgrade or use an alternative browser.
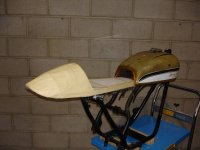
YAMAHA RD CAFE SEAT
- Thread starter Clueless
- Start date


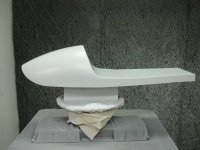
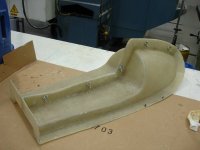
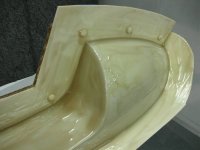
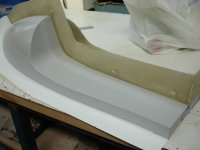
I then set the part up to make a fibre glass mould, I built a wall down the middle useing cardboard which I then covered with a piece of 1mm styrene, I used styrene to form walls to produce a flange on the base and front too. I used plastic screw caps to form locators, these were stuck on useing a hot glue gun.
Attachments
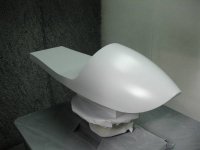
I gave the half to be moulded 3 layers of wax polishing each between coats. I then sprayed a thin layer of PVA release over it to act as an extra barrier. This is not really necessairy but does work very well in preventing the polyester resin from attaking the part.
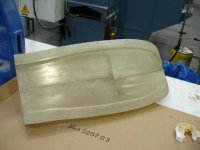
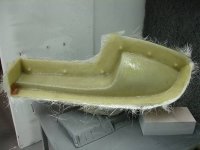
Next up was the laminating, first I gave the part and flanges a coat of gelcoat, once dry enough I sprinkled choppies on to the awkward parts such as locators and sharp corners before covering with 5 layers of 350gram matt.
Next up was the laminating, first I gave the part and flanges a coat of gelcoat, once dry enough I sprinkled choppies on to the awkward parts such as locators and sharp corners before covering with 5 layers of 350gram matt.
Attachments
Hoosier Daddy
Earache my eye...
Curious as well, appears the seam right down the middle may be a PITA to hide.
Gents:
He made a female mould. The male part will be pulled from the female mould. This is the real way to do composite seats which will result in a much lighter, cleaner male seat.
The seam is there so he can unbolt it, and easily pop the male seat out. Otherwise, it's a bitch.
--Chris
He made a female mould. The male part will be pulled from the female mould. This is the real way to do composite seats which will result in a much lighter, cleaner male seat.
The seam is there so he can unbolt it, and easily pop the male seat out. Otherwise, it's a bitch.
--Chris
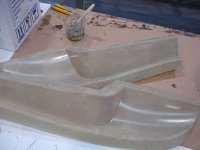
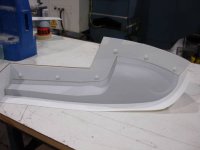
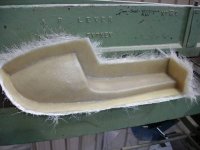
As the first side of the mould went green I trimed the excess fibre glass to the flanges with a craft knife. Once dry I removed the central carboard/styrene flange as the moulded fibre glass now forms the flange with female locators.
I then waxed and polished the part and flanges and sprayed a thin laher of PVA release and repeated the steps for the first half.
I then waxed and polished the part and flanges and sprayed a thin laher of PVA release and repeated the steps for the first half.
Attachments

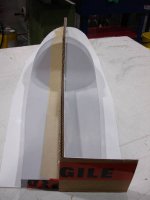
Once again I trimed the excess to the flanges when green, once dry I gave the mould a once over with course sand paper to remove splinters. I then drilled holes in the central flanges to accept M6 bolts, these along with the locators will ensure the mould aligns perfectly. To split the mould I ran a craft knife down the central flange for the inital crack I then inserted and twisted a flat screw driver, the mould split with ease with one side popping off.
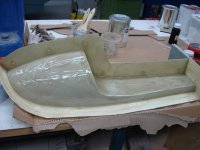
Once both sides of the mould were released from the plug/machined part I re-assembled the mould and trimmed the flanges with a hand grinder.
Once both sides of the mould were released from the plug/machined part I re-assembled the mould and trimmed the flanges with a hand grinder.