Father Son 75 CB200T Rise From the Ruins

Thanks to DTT we are learning about a 2 stroke motor today. That and it is Rockers vs Mods on my sons Birthday weekend. It took him less than an hour to strip it down.

 

Attachments

  • image.jpg
    image.jpg
    1 MB · Views: 326
  • image.jpg
    image.jpg
    880 KB · Views: 316
  • image.jpg
    image.jpg
    899.4 KB · Views: 320
  • image.jpg
    image.jpg
    999.5 KB · Views: 322
Exploring options for mounting upholstered seat pan:
Rubber isolation mounts
http://shop.rycamotors.com/RM-0036.html

http://youtu.be/ZXbeVLR6HGc
 
Lucky was the word for Zeke at the Rockers Vs Mods raffle on his birthday and then Lucky got some leather for her seat.
 

Attachments

  • image.jpg
    image.jpg
    1 MB · Views: 326
We discovered the previous owner didn't bend the tabs back in place on the lock nut for the filter.
 

Attachments

  • image.jpg
    image.jpg
    448.9 KB · Views: 300
We took some baby bottle scrubbers with acetone to the head. Then scotchpadded the head. We sanded the ends of the fins and polished them. Then we wiped everything with denatured alcohol. Masked everything and applied Vaseline to the end of the fins.'Primed with an engine etching primer. Baked it for 20 minutes @170 degrees. Checked and tacked and sprayed the ceramic engine blue and baked same as before. After it cooled we wiped the fins. Next time we will mask it with pinstripe tape. Did a little polishing on the cam and valve covers.
 

Attachments

  • image.jpg
    image.jpg
    966.4 KB · Views: 313
  • image.jpg
    image.jpg
    945.6 KB · Views: 308
  • image.jpg
    image.jpg
    948.1 KB · Views: 326
  • image.jpg
    image.jpg
    916.6 KB · Views: 333
Mock up
 

Attachments

  • image.jpg
    image.jpg
    1.3 MB · Views: 324
  • image.jpg
    image.jpg
    1.3 MB · Views: 329
  • image.jpg
    image.jpg
    1.3 MB · Views: 314
  • image.jpg
    image.jpg
    1.3 MB · Views: 324
Its coming together nicely man. I like the exhaust. Where did you get that headlight bucket? And what made you decide on it, just curious.
 
Luugo86 said:
Its coming together nicely man. I like the exhaust. Where did you get that headlight bucket? And what made you decide on it, just curious.
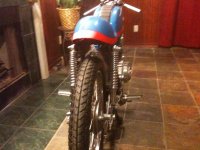
it is a honda rune headlight...kinda retro but progressive liked the line and flow with the rear...and kept it all in the honda family. We think it makes her look like she is winking as she passes on by ;)
 
teazer said:
It's a DYNA on a custom backing plate and a modified rotor and shortened crank nose. OK for a race bike with total loss ignition, not so good on the street. Riddell does a magneto conversion for the 160-175-200 motors that's worth investigating for a race bike. For teh street the easiest solution is a GL1000 Dyna mounted in place of the points.
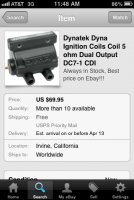
Teazer the Gl1000 dynatek is in the mail. Dynatek said to use the dc7-1 5ohm single coil dual output for a street engine. Any mods necessary for the cb200?
 

Attachments

  • image.jpg
    image.jpg
    49.5 KB · Views: 976
  • image.jpg
    image.jpg
    30.7 KB · Views: 906
5 ohm is correct for the street.

You will remove one of the modules and put it aside as a spare. If you keep the stock mechanical advance, remove the cam and replace it with the rotor. I think you will have to shorten the rotor to get it all aligned.

It's a very easy fit and works with stock coil as well but has a fatter spark with a Dyna coil. Ventilate the "points cover" to get some air in there and you should be golden.
 
teazer said:
5 ohm is correct for the street.

You will remove one of the modules and put it aside as a spare. If you keep the stock mechanical advance, remove the cam and replace it with the rotor. I think you will have to shorten the rotor to get it all aligned.

It's a very easy fit and works with stock coil as well but has a fatter spark with a Dyna coil. Ventilate the "points cover" to get some air in there and you should be golden.
thank you.
 
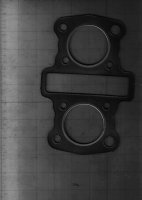
Cb200 gasket scan scale 1"
1. Left Casing
2. Right casing
3. Head at Jug
4. Jug at Casing
 

Attachments

  • CB200 left side casing.jpeg
    CB200 left side casing.jpeg
    808.4 KB · Views: 324
  • CB200 Right side casing.jpeg
    CB200 Right side casing.jpeg
    857.7 KB · Views: 366
  • cb200headgasket.jpeg
    cb200headgasket.jpeg
    721.6 KB · Views: 299
  • CB200jug@case.jpeg
    CB200jug@case.jpeg
    976 KB · Views: 315
cb200 gaskets scale 1"
 

Attachments

  • cb200valve cover.jpeg
    cb200valve cover.jpeg
    981.6 KB · Views: 349
  • cb200earsgas.jpeg
    cb200earsgas.jpeg
    1,002 KB · Views: 439
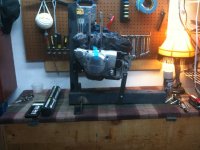
Somebody threw away a 6' piece of angle into one of my work landscape bed and along with a scrap fence...voila...our new engine stand.

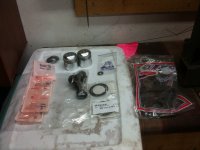
We are ready to assemble the engine. Have a new torque wrench. Installed a new cam chain. Any last words of wisdom? Blue locktite for the cam sprocket. New gaskets, rings, pistons...
 

Attachments

  • image.jpg
    image.jpg
    986.4 KB · Views: 312
  • image.jpg
    image.jpg
    943.5 KB · Views: 292
  • image.jpg
    image.jpg
    1 MB · Views: 288
We checked our end gap for our rings. Our rings came from Cmsl and were all marked with a T and .75. We made sure the markings faced up. Bottom ring is the oil, the second ring is black and has sharp edges, and the top ring has a chamfer edge. We pushed the ring down with the top of a piston down to the second ring mark and made sure the ring was in square.
 

Attachments

  • image.jpg
    image.jpg
    892.7 KB · Views: 301
  • image.jpg
    image.jpg
    46.6 KB · Views: 799
  • image.jpg
    image.jpg
    50.1 KB · Views: 739
  • image.jpg
    image.jpg
    860.7 KB · Views: 287
We then measured until we put in a the next size feeler gauge. We then logged the results. The rings were all installed with the markings face up and a 120 degrees to each other.
 

Attachments

  • image.jpg
    image.jpg
    46 KB · Views: 729
  • image.jpg
    image.jpg
    34.8 KB · Views: 757
  • image.jpg
    image.jpg
    38.9 KB · Views: 749
  • image.jpg
    image.jpg
    773.1 KB · Views: 288
Back
Top Bottom