
We noticed you are blocking ads. DO THE TON only works with community supporters. Most are active members of the site with small businesses. Please consider disabling your ad blocking tool and checking out the businesses that help keep our site up and free.
You are using an out of date browser. It may not display this or other websites correctly.
You should upgrade or use an alternative browser.
You should upgrade or use an alternative browser.
1975 CB360 Freeze-dried Hell Ride
- Thread starter irk miller
- Start date
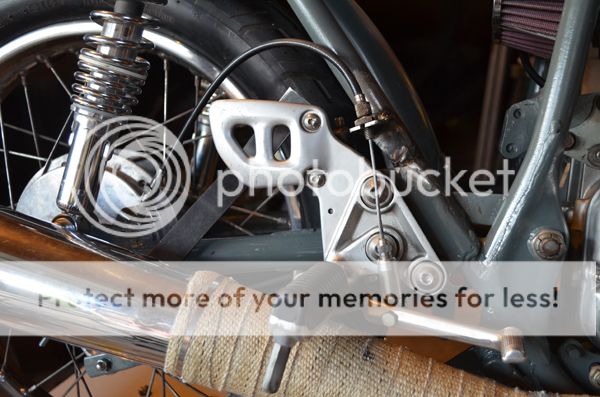
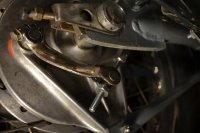
There are adjusters at each end of the housing and an upstop. I'll move the cable's mounting point at the pedal to the arm. It should be good from there. That's the only difference from the set up on the Yamaha.xb33bsa said:so you have test ridden it ?
you need to have a certain mechanical advantage
pedal travel and brake wear is why you need adjusters on the cable housing and inner like on that Yamaha copy that Yamaha
but you really should do some math


Thanks for all the help.xb33bsa said:carry on !!
I'll definitely change the mounting point on the pedal and bring the angle more vertically. But yeah, I was thinking the same thing. I bought the parts with rear set to do it. ;DDesmoBro said:It doesnt look right but if it works rock it.....any day you'll find a monoshock donor set up with disc brake and this set up will be long forgotten.... Get the grinder ready
This is the fourth version of my hayabusa rear set adaptation. The major lesson learned is to do more research and not rely on intuition. While the most basic physics should be obvious, it can easily be overlooked. These are all exercises in engineering principles. I realize what I thought was good response on the last setup wasn't even close, as this setup is clearly more proper.


")
Do you mean a nut with the curved side, like what came stock? I would have to drill and re-tap it to accommodate the new ferrule, which shouldn't be a big deal.crazypj said:Get the proper adjuster nut instead of wing nut and washer
I also notice some setups have a spring between the brake arm and the cable housing. Is this necessary with my setup?
Maritime
Over 10,000 Posts
Look at dirt bike drum brakes that are cable actualted I beleive there is a spring that goes over the cable on the drum end that forces the arm to return, that is what I would do as it will be mostly hidden vrs. the spring on the pedal. Noce setup though.
Like this:
Like this:
Attachments
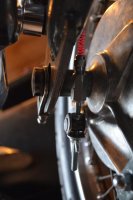
Drilled and tapped the stock adjuster nut to fit the ferrule. Eventually, I'll have to clean up the rust. One thing is for sure, the PO had a special relationship with the wire wheel. This type of business has been all over the bike. The aluminum was gouged something major; front forks especially. Waiting for parts ordered for the shift linkage from Fast From The Past.
Attachments
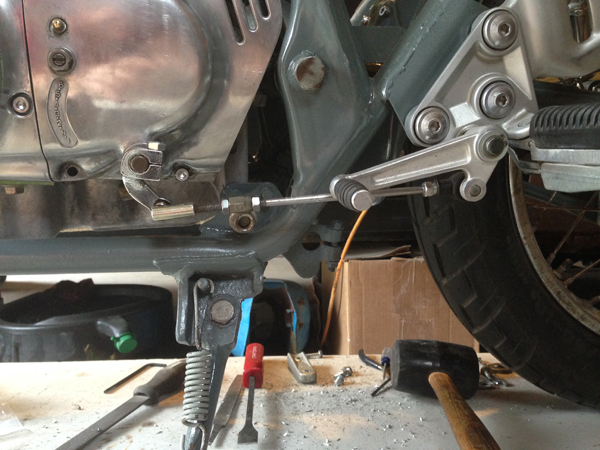
Installed a shift arm from Fast from the Past. Retrofit a linkage to the Hayabusa rear set.
I had to mod the seat a bit to accommodate the battery and electronics, so I took the opportunity to french the mounting screws. Two hex screws + rubber fender washers. I'm using the original battery tray mounting points to mount the seat.

crazypj
Split personality, I fake being smart
deviant said:Installed a shift arm from Fast from the Past. Retrofit a linkage to the Hayabusa rear set.
Your going to have an issue with that linkage. The operating arms need to be as close to parallel as possible


