
We noticed you are blocking ads. DO THE TON only works with community supporters. Most are active members of the site with small businesses. Please consider disabling your ad blocking tool and checking out the businesses that help keep our site up and free.
You are using an out of date browser. It may not display this or other websites correctly.
You should upgrade or use an alternative browser.
You should upgrade or use an alternative browser.
1975 CB400F Project "Replacement Girlfriend"
- Thread starter SONICJK
- Start date
neevo
Over 1,000 Posts
SONICJK said:The little black push button switch on the right side of the top case.
Is it on all years? Don't remember it on my 400.
SONICJK
Reminds me of...me No, I'm sure of it. I hate him
Neevo it may well be the neutral light switch haha I haven't ever run or wired this engine, so I was guessing.
Thanks for the props on the powder guys I appreciate It.
I used my kitchen oven, I know I know it will kill me. But I can count the times in the last year that I have cooked in it on one finger, so I said what the hell. Stunk up the house for a few minutes but opened the doors and all is now well.
Thanks for the props on the powder guys I appreciate It.
I used my kitchen oven, I know I know it will kill me. But I can count the times in the last year that I have cooked in it on one finger, so I said what the hell. Stunk up the house for a few minutes but opened the doors and all is now well.
SONICJK
Reminds me of...me No, I'm sure of it. I hate him
Well I have been insanely busy lately and havent even gotten to touch this thing lately, but I have gathered the necessary parts for the engine reassembly, and I think Ill start on that today, Ill be honest I am a bit intimidated, I didn't anticipate it being so long between tear down and reassembly hopefully it will go smoothly.
")
Nah, it is easy.. just follow the books, take you time, clean and measure everything and replace anything which is out of factory specification. Use plenty of engine assembly lubricant on all moving parts and anti-seize compound on your bolt threads. Use all new seals and gaskets, take notes, right down all your tolerances and take loads of images. Looking great so far.SONICJK said:Well I have been insanely busy lately and havent even gotten to touch this thing lately, but I have gathered the necessary parts for the engine reassembly, and I think Ill start on that today, Ill be honest I am a bit intimidated, I didn't anticipate it being so long between tear down and reassembly hopefully it will go smoothly.
SONICJK
Reminds me of...me No, I'm sure of it. I hate him
Okay so all went well!
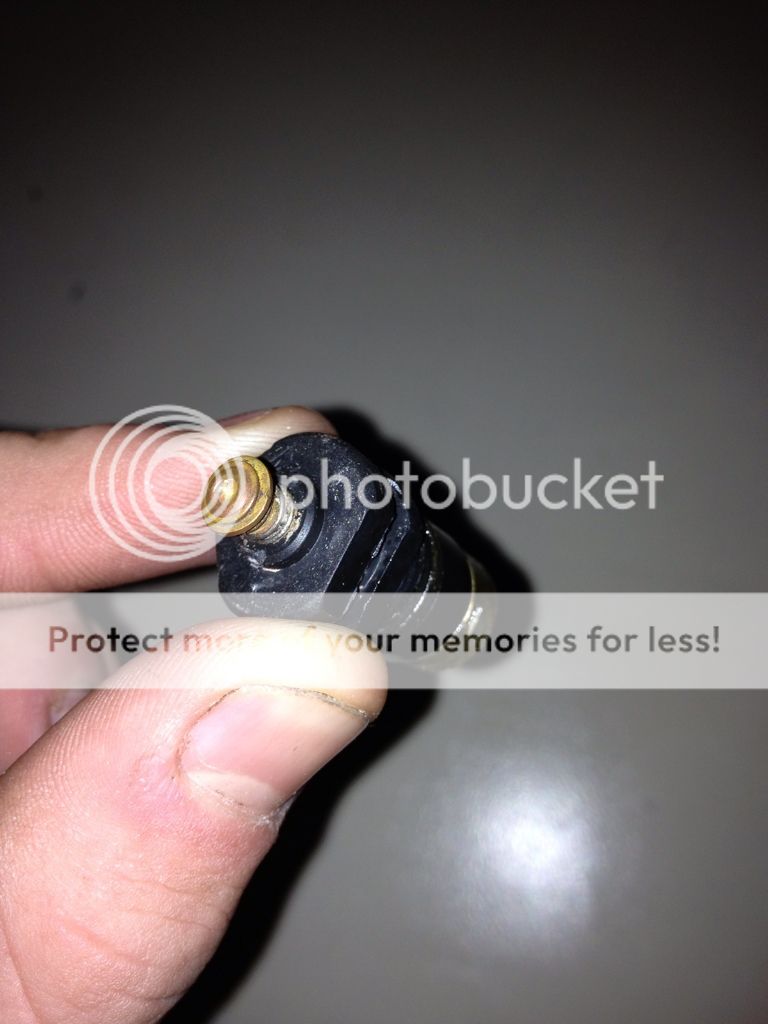
Then I flipped the engine over and hear a rattle. And this little BASTARD was sitting there...loose. And worse, I have no idea what is is.....does anyone have a clue?

Please tell me I can access it from the oil pan hole I so don't want to tear it down again.
Then I flipped the engine over and hear a rattle. And this little BASTARD was sitting there...loose. And worse, I have no idea what is is.....does anyone have a clue?
Please tell me I can access it from the oil pan hole I so don't want to tear it down again.
That is one of three rollers (part #264 in Honda parts manual, OEM# 91101-333-000) inside your drive socket hub (part #138 in you Honda pars manual, OEM# 23112-333-000). I believe you can flip the motor upside down, remove he bottom half, pull the shaft and rotate or remove the drive socket hub and install your roller. Grease it with engine assembly lube so it stays put. Clean each half of the crankcase edges, apply new sealant and put back together.

SONICJK
Reminds me of...me No, I'm sure of it. I hate him
Realized I forgot the damn O-Rings at the base of the Jugs, so i pulled the jugs and installed the O-rings.
WHen i put the jugs back on there was too much resistance so i stopped and pulled them off again, sure enough there was a scratch in the walls and three bent oil rings (WTF) replaced those and bent one more in the process, and FINALLY got the thing back together (after I re-honed the cylinders)
I was so angry that i slammed a hammer into the countertop leaving a nice crack.
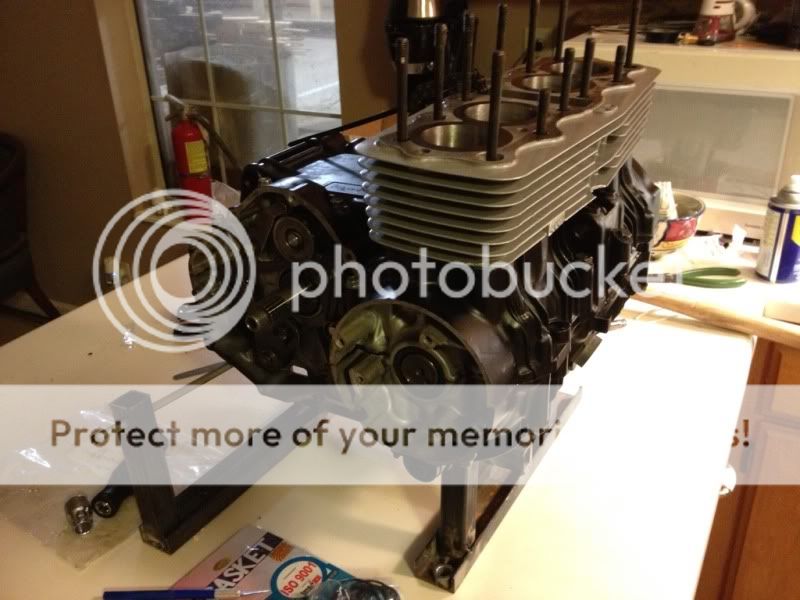
I have come to the conclusion that engines are very simple things, but they are a PAIN IN THE ASS to work on. I always seem to screw something up and it is a bear to fix. After 10+ hours today I have my bottom end back together and the jugs on. Not much to show for my work, i was very close to slamming the thing into the ground and ordering a complete engine from ebay haha.
Tomorrow night hopefully ill be able to get the remaining parts painted and get the top end buttoned up, and get the engine in the frame sometime this week.
WHen i put the jugs back on there was too much resistance so i stopped and pulled them off again, sure enough there was a scratch in the walls and three bent oil rings (WTF) replaced those and bent one more in the process, and FINALLY got the thing back together (after I re-honed the cylinders)
I was so angry that i slammed a hammer into the countertop leaving a nice crack.
I have come to the conclusion that engines are very simple things, but they are a PAIN IN THE ASS to work on. I always seem to screw something up and it is a bear to fix. After 10+ hours today I have my bottom end back together and the jugs on. Not much to show for my work, i was very close to slamming the thing into the ground and ordering a complete engine from ebay haha.
Tomorrow night hopefully ill be able to get the remaining parts painted and get the top end buttoned up, and get the engine in the frame sometime this week.
SONICJK
Reminds me of...me No, I'm sure of it. I hate him
The never ending rebuild continues...
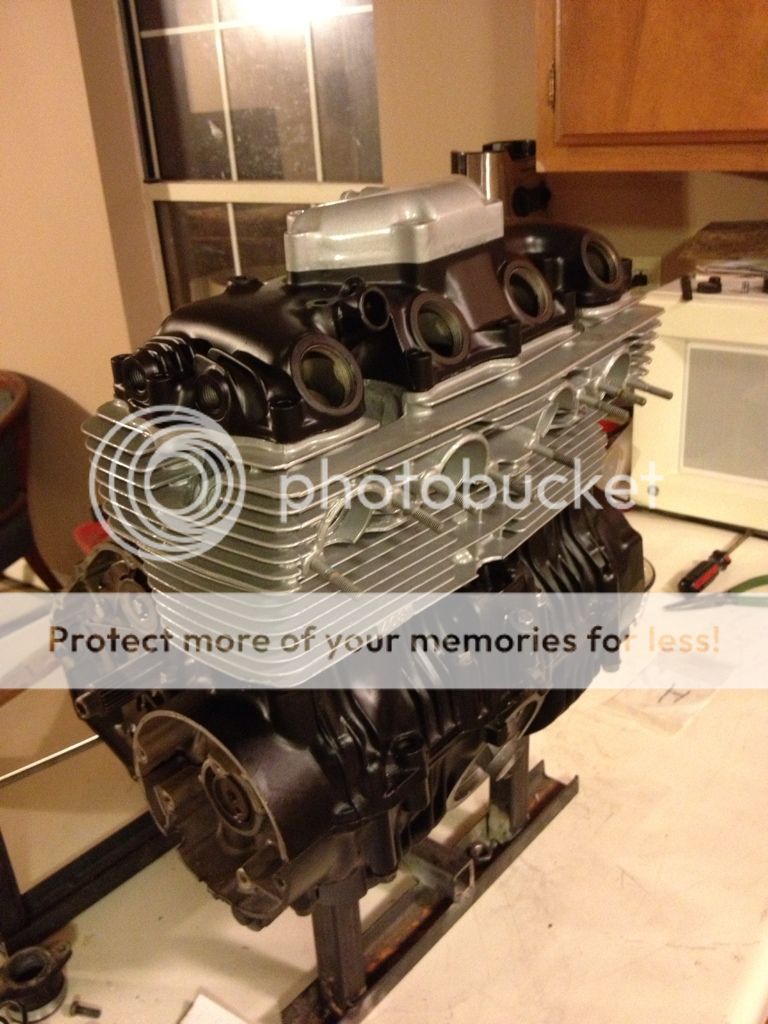
Got my head assembled.
Its loads of fun trying to figure out where the hell the PO put all this stuff. He was meticulous, just not logical. FOr instance the little retainer clips for the valve springs weren't with the valve springs, they were with the rocker arms. Wtf?
All was going well was preparing to put the head on and button up the top end!
And then I see that dipshit apparently used vice grips to remove the 4 dowel pins between the jugs and the head. GREAT.
one of them is totally crushed (flat) and the other three are beyond repair. Really guy? you couldn't just leave them in there like everyone else?
Order placed with bike bandit. 3-5 days before i can do any more. Ugh
Its a really good thing I bought this thing, as im certain the PO would have destroyed this engine trying to "rebuild" it.

crqcycles
Not a lot of cafe's down here in Mexico...
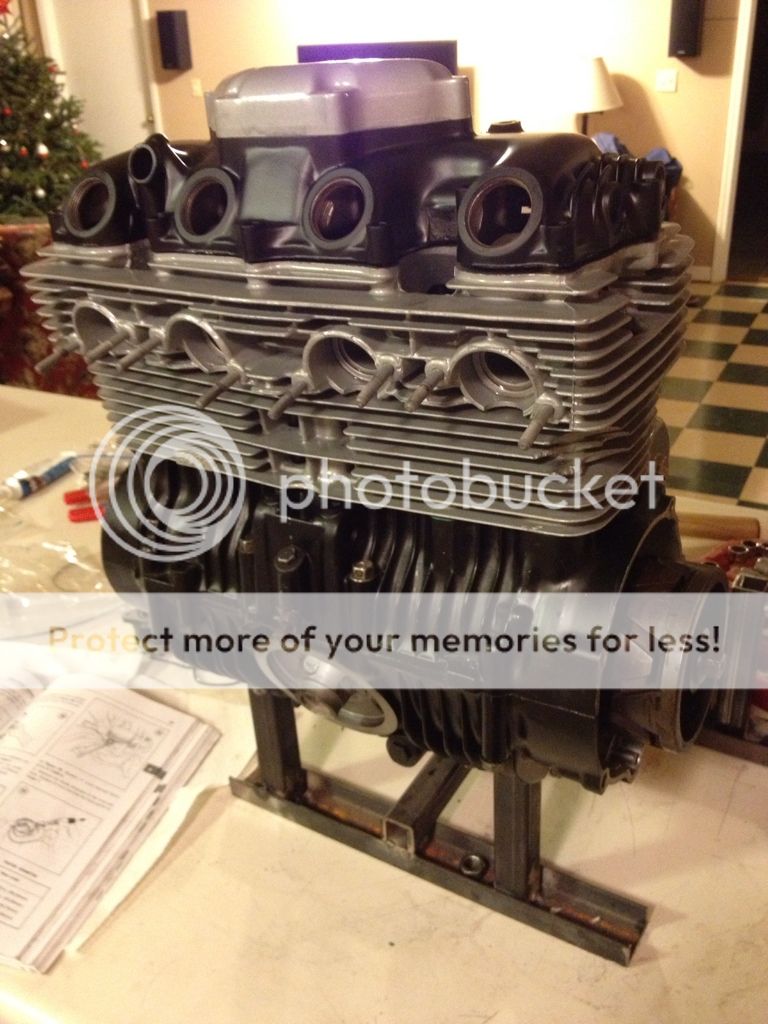
SONICJK said:Some engine porn. This thing is so sexy.
I second the engine porn thing; looks asian to me! Jajajaja


