CB450 Build "Well It's About Time"

Thanks Finn! No worries about the clutch plates. I already have it installed. I got a set from Cycle X with the heavy duty springs. If there is anything that I can do for you or if you have any questions please let me know. I'm in the process of wiring my bike from scratch and I think I have everything worked out.
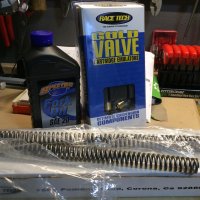
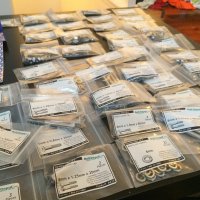
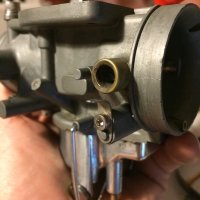
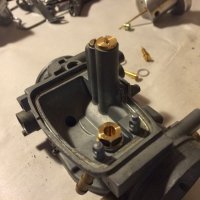
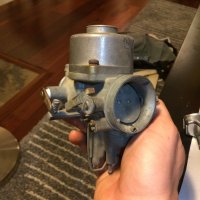
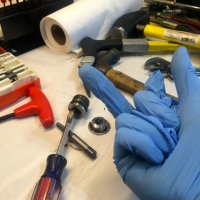
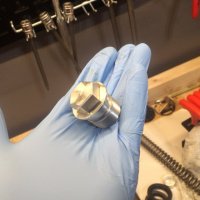
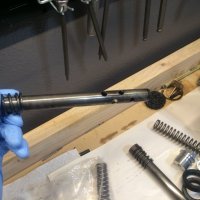
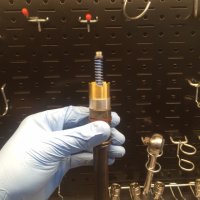
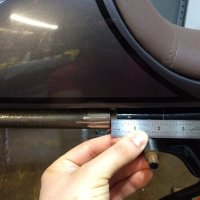
 
Small update, FINALLY got all the old silver paint and yellow primer (yes yellow) off the sliders. Next is sanding and hope to be ready for when my polishing supplies arrive. The pitting and chrome on the top of the forks is pretty bad but shouldn't be a problem surface for paint to stick to :) Reading up on my new internals, getting ready to install them when the sliders are shined up.
 

Attachments

  • IMG_3072.jpg
    IMG_3072.jpg
    628.2 KB · Views: 268
While I was waiting for the cable guy I managed to free this little shit from the clutches of crusty tire and rust seized spokes.
 

Attachments

  • IMG_3079.JPG
    IMG_3079.JPG
    146.2 KB · Views: 1,027
Email update from Benjie too, about to get her stripes put on
 

Attachments

  • P1070827.JPG
    P1070827.JPG
    405.9 KB · Views: 243
Good batch of goodies today: DCC, castle and bolt depot. BTW if anyone hasn't heard of this website bolt depot.com is great. Second time I've used them because you can select SINGLE nuts,bolts,washers,pins and they come individually bagged. I even found a bronze cotter pin
 

Attachments

  • IMG_3085.jpg
    IMG_3085.jpg
    1.8 MB · Views: 256
  • IMG_3086.jpg
    IMG_3086.jpg
    1.4 MB · Views: 264
Polishing gear and carb rebuild kits came in the mail so I finally got to do my carbs. Everything but the joining linkage pretty much done.
 

Attachments

  • IMG_3092.jpg
    IMG_3092.jpg
    1.2 MB · Views: 266
  • IMG_3095.jpg
    IMG_3095.jpg
    1.2 MB · Views: 257
  • IMG_3094.jpg
    IMG_3094.jpg
    1.2 MB · Views: 281
  • IMG_3087.jpg
    IMG_3087.jpg
    1.8 MB · Views: 256
  • IMG_3090.jpg
    IMG_3090.jpg
    1 MB · Views: 250
  • IMG_3089.jpg
    IMG_3089.jpg
    1 MB · Views: 256
  • IMG_3088.jpg
    IMG_3088.jpg
    1.1 MB · Views: 261
Finally getting to the forks before I ran into the worst fork nut ever. Heat, penetrating oil, drilling, .5 inch easy out: all didn't work. Finally got the thing out by hacking the top off and drilling into into it several times then cracking it with a flathead screwdriver and hammer. This is the results of 3 hours of wasted Saturday.
 

Attachments

  • IMG_3114.jpg
    IMG_3114.jpg
    1.4 MB · Views: 278
Gold emulators and springs from RaceTech going into the front. New holes as per the instructions. Ordered some aluminum fork nuts to replaced the originals (since I have to obliterate one..).
 

Attachments

  • IMG_3117.JPG
    IMG_3117.JPG
    50.9 KB · Views: 1,101
  • IMG_3115.JPG
    IMG_3115.JPG
    65.5 KB · Views: 1,070
  • IMG_3116.JPG
    IMG_3116.JPG
    125.1 KB · Views: 1,085
Tank and seat finally in, chopped the frame and test fitted. Followed instructions to the 'T' but I was left with some gap. Can a good welder fill that in?
 

Attachments

  • IMG_3126.jpg
    IMG_3126.jpg
    1.3 MB · Views: 261
  • IMG_3128.jpg
    IMG_3128.jpg
    1.3 MB · Views: 267
  • IMG_3135.jpg
    IMG_3135.jpg
    1.2 MB · Views: 251
  • IMG_3136.jpg
    IMG_3136.jpg
    1.4 MB · Views: 247
Re: CB450 Build "Well It's About Time"

Maybe use a gusset for strength between the two and a slice the same diameter of the tube to fill the gap??


Sent from my iPhone using Tapatalk
 
Drill a hole through the frame and hoop to spot weld the pig (inner tube/slug) in place then have the welder run a bead on both sides of the gaps and then a filler weld between the first two welds and it will be as strong as the original frame, even stronger. ;)
 
cqyqte said:
Drill a hole through the frame and hoop to spot weld the pig (inner tube/slug) in place then have the welder run a bead on both sides of the gaps and then a filler weld between the first two welds and it will be as strong as the original frame, even stronger. ;)

Where's the damn like button. +1 then
 
Just wanted to raise one point, based on the pic of your unassembled front forks. Are you sure that you can fit the Emulators to these forks, as they appear to be the version with the center rod that runs up from the damper through the fork spring to a retainer nut under the fork cap. If they are, I don't think that emulators will fit due to the rod. I had a set on my old CB550 and could not use emulators because of them. Please take a look.
 
mtb1098 said:
Just wanted to raise one point, based on the pic of your unassembled front forks. Are you sure that you can fit the Emulators to these forks, as they appear to be the version with the center rod that runs up from the damper through the fork spring to a retainer nut under the fork cap. If they are, I don't think that emulators will fit due to the rod. I had a set on my old CB550 and could not use emulators because of them. Please take a look.

You're correct, sir. I got a set of 550 forks from ebay and used the internals. Emulators fit inside and the sliders will still hold the 450 front brakes. Hope all the work is worth it
 
I looked around for those but couldn't find any, I think on cmsnl it shows a few of the 500T models having the same internals with the center rod. Interested to see how it works out for you.
 
Back
Top Bottom