Follow along with the video below to see how to install our site as a web app on your home screen.
Note: This feature currently requires accessing the site using the built-in Safari browser.
We noticed you are blocking ads. DO THE TON only works with community supporters. Most are active members of the site with small businesses. Please consider disabling your ad blocking tool and checking out the businesses that help keep our site up and free.
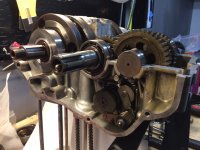
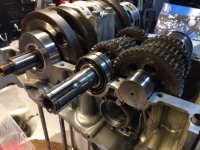
Tonight I took the crank out again, checked all the oil passageways and made sure the one on the end lined up correctly. Really impressed with how clean everything is so far (knock on wood). I saw a few metal shavings on one of the gears so I removed all of them, cleaned them off and put them back with assembly lube after I was sure all the oil holes were clear as well. Put the big oil seal on with a little lube and I hope its safe to say the top half of the crankcase is complete! Now have to read up on what to do first on the lower half -or someone can chime in-
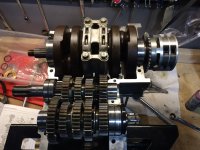
HA! yeah do a really good job looking over all the shifting parts. Make sure the drum has no burs or worn notches in the slots where the pins glide for the forks. Make sure the dogs for the gears are not worn excessively and slide smoothly on the shafts. Make sure the forks are not worn horribly or BENT. Make sure the star on the end of the drum has no groves worn in it where the rollers well for the lack of a better word ROLL. Make sure the LARGE roller is not worn out at all, you will be able to tell as the wheel will move as if the pin holding it is worn.
450s are known for having shifting issues, mainly 2nd gear phantom shifts and poping in and out of gears. Do some research check things over several times. Will save headaches and pain later on should you have to tear things back down again.
Better yet, find a last year set of gears and shift forks with zero miles on them and put them in.... pipe dream I know but they do exist. Ask all the silly questions you can at Honda Twins too if you need to.
Good info, thanks a lot! I'll look over the parts I'm putting back in, the internals so far are in good shape and the guy I bought the bike from said it had 4k original miles on it (yeah right) but maybe its under 10k and if thats the case I think they'll be in decent shape. More pictures to come.
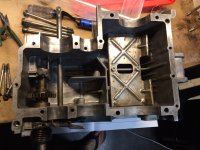
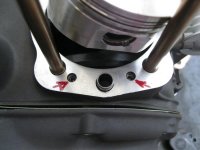
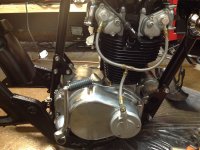
Put in shift drum and forks, kickstarter, and double checked everything again. Cleaned off mating surfaces with acetone twice and put a THIN layer of threebond down before torquing all the bolts to spec in a circular order/diameter. I had all the bolts but one for the top case so instead of having mismatched bolts I put stainless instead, I don't think it looks great but better than the alternative. This is how the motor sits, I think its time to order some 'fun' parts. 8)
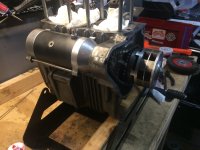
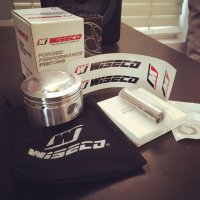
you know that feeling where you know you've done something but you can't actually remember doing it? Well I felt that way about the crank bearing holder bolts so I split the cases again to double check. Anyway its all back together and to make myself feel like i made progress I installed the starter motor that I rebuilt and spruced up. Its temporary and is coming off as soon as the bike is running well. When I build the 360 I remember getting exhausted trying to fix the jetting issues by kicking it 100 times a day. 1.5mm overbore pistons are in the mail
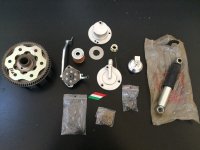
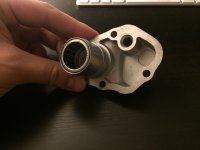
Had a bad day at work, had a bad drive home, to my amazement a package was waiting at my door! Open to find the eBay items I bought this week which include a NOS steering damper from a CL72, a Cappellini lightweight clutch basket, and a Cappellini oil pump! Well shame on me for thinking that the day was getting better I come to find that all the o-rings and hardware for the oil pump are missing. Let me say that I've tried to contact Franco Cappellini himself about general questions in the past and he's simply referred me to his US counterpart who has ignored my previous emails. Writing this person asking to send me the missing parts feels like talking to a brick wall but I'm trying to remain hopeful.
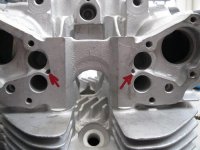
In other news my cylinders are back from the machine shop and look all kinds of gorgeous! I also got my cylinder head vacuum tested and each valve holds 25psi +/- .2psi so I'm going to assume that my torsion bars are in spec and its time to get the thing ported and flow checked. Hope to have other updates after a therapeutic wrench session tonight.
Did what I could installing the pump tonight, but for some reason one of the oil fins is just too wide and the whole lower assembly won't fit all the way in. Before I get out the file I'm going to wait for the o-rings and missing hardware to get here in case it needs to go back. Didn't realize I had to split the cases again for this, that makes 3 and please let it be the last time :
I thought that too, the pickup part that has the mesh screen sits on the bottom of the case and its way too large to fit in the opening on the side. I had to feed it though and then bolt it together, no biggie compared to the fit though. I tried bending the tube a little but its way too thick, better to just pull out the dremel and take a hair off the fin and or pickup. There's plenty of material on both
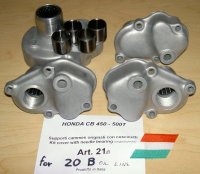
Discussion with Cappellini distributor here in Ca and he agreed to sell me bits from 2 different kits, not I've got all 4 cam covers with needle bearing conversions, external oil feed and mechanical tachometer delete.
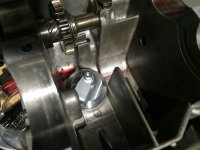
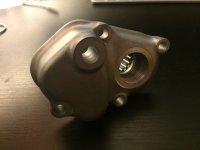
Back to the oil pump, shaved off a little material on the pickup and it just fits with everything bolted up. Checked that the gear was perpendicular with a right angle and called it good.
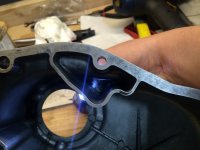
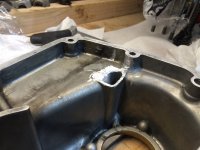
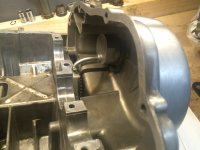
Took out the required material inside cover, I hope its more rather than not enough. Also drilled the new return oil hole, took a picture with a flashlight behind to help show where its tapping into.
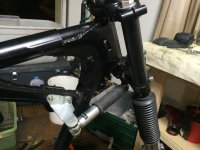
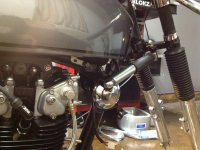
Got my steering damper bracket from CMSNL and did a quick mockup, fits in existing holes and I have full steering travel. I compared the NOS damper to an '05 GSXR750 damper I had laying around and its actually surprising that it takes a little more force to move the NOS damper. I'm guessing its the difference between an offroad damper and a street damper? Anyway, I'm loving the way it looks and I checked to make sure it cleared the tank. I still want to keep my horn but will need to swap sides or even relocate it if I keep the stock ignition key location. Any ideas..?
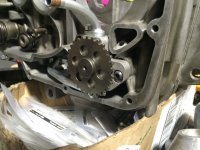
A few updates tonight, been in contact with Franco Cappellini and his US seller to answer questions about the pump install. Really decent responses and talkative about bikes in general, you can tell they love what they do. Clarification about which oil holes to plug which is the last step for the pump itself (besides waiting for the O-rings and hardware they never sent me) so I put everything together to make sure it all lined up.
Got into the cylinder head tonight, replaced the valve seals and made sure the valves glide through the valve guides, only one was sticky so i twisted my 5mm reamer by hand and scraped what seemed to be carbon off the top, smooth as silk!
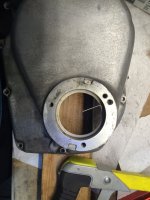
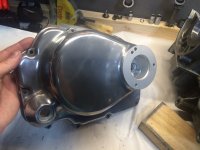
Polished the clutch cover since I'll be putting the pump on soon too. The needle bearing conversion cam towers came in the mail too, pretty cool idea and the parts look really nice. All thats left is to machine the cams to accept the inner races on the journals.
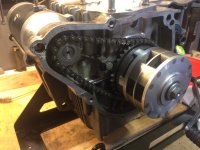
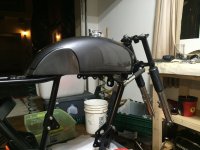
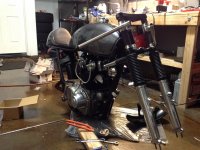
Long time since an update but thought I'd post a few progress pics. I'm working in a tight space so the pics aren't the best, hope to get her on wheels this week and i'll put up some pics from a distance
This site uses cookies to help personalise content, tailor your experience and to keep you logged in if you register.
By continuing to use this site, you are consenting to our use of cookies.


")