
We noticed you are blocking ads. DO THE TON only works with community supporters. Most are active members of the site with small businesses. Please consider disabling your ad blocking tool and checking out the businesses that help keep our site up and free.
You are using an out of date browser. It may not display this or other websites correctly.
You should upgrade or use an alternative browser.
You should upgrade or use an alternative browser.
Down under, an idiot and a 400F
- Thread starter neevo
- Start date

neevo
Over 1,000 Posts
So something strange, the relay on the wireless ignition doesn't seem to be doing anything, always open. Hmmmmm.
I've got a new trigger (RFID) coming so hopefully its just a trigger issue but we'll wait and see.
Either way the controls seem to be working fine, tested the brake light today and its all working. Had a rear light issue but turns out one of the quick release connectors had popped out the block, simple fix!
Edit: we are back in business. Switched the feeds on the relay a bit of jiggery and its working again. The RFID is still stuffed but I was able to get a trigger to the relay to test it properly. All good.
Ren managed to finish up a bit more wiring, headlight is mostly done, just need some more black wire for earths and some connectors for the horn and it should be done")
I've got a new trigger (RFID) coming so hopefully its just a trigger issue but we'll wait and see.
Either way the controls seem to be working fine, tested the brake light today and its all working. Had a rear light issue but turns out one of the quick release connectors had popped out the block, simple fix!
Edit: we are back in business. Switched the feeds on the relay a bit of jiggery and its working again. The RFID is still stuffed but I was able to get a trigger to the relay to test it properly. All good.
Ren managed to finish up a bit more wiring, headlight is mostly done, just need some more black wire for earths and some connectors for the horn and it should be done
neevo said:Are they pressed in at all or just sit up against the rubber and collar in the shock mount?
On these TR1 units we used a top hat arrangement and a smaller dia fixing. However, on the prototype [ 10K miles ] we simply used two alloy spacers sitting up against the bush - worked fine.
neevo
Over 1,000 Posts
beachcomber said:On these TR1 units we used a top hat arrangement and a smaller dia fixing. However, on the prototype [ 10K miles ] we simply used two alloy spacers sitting up against the bush - worked fine.
Sorry to be a pain but can you explain top hat? I assume its got a flanged section (brim) where it connects somewhere.
neevo
Over 1,000 Posts
crazypj said:Sounds like 'top hat' was to reduce diameter of mounting bolt as well as take up 'slack' in the mounting width?
Ah the hat bit slides into the top shock mount hole.
PJ the top mount is rubber with a metal collar. Should I get a bush made that contacts the metal collar only, like you did with my front axel bearing spacers or is a simple collar enough given the limited movement?
neevo
Over 1,000 Posts
crazypj said:There should be enough compliance in the rubber to mount it 'solid', just have it in correct position before tightening bolts
Gotcha! Thanks PJ.
Popped down to see the fantastic gents at Carrington Products in Riverstone NSW today. They are an engineering mob that specialise in bending metal, mostly commercial buildings (handrails etc), but I was recommended them right at the beginning for the rear hoop and some uprights and they were brilliant. Today I took my crappy swingarm brace mockup and some 1" x 2mm round stock to get them to wrangle it into something sturdier and neater looking... should be ready next week.
For anyone loooking for custom tube bending work, I highly recommend these chaps:
Carrington Products
22-26 Melbourne Street
Riverstone NSW Australia 2765
Here is a link to the first lot of work they did for me (http://www.dotheton.com/forum/index.php?topic=31541.msg348269#msg348269), they even did the inserts for no charge!!!
yes and yes and yes ;D................. Top hat, stepped, bolt up.
One caveat - I always like to ensure that the mounts can pivot freely [ cars or bikes ]. The mounting bolts [ which should NOT have thread on the bearing surface ] are there not only to hold the shock in place but ideally should ensure there is no "stiction" at the mount point.
In this application it is a moot point due to the angle of attachment, but stiction does effect the characteristics of the unit. In your example, this is being pedantic.
In a race or competition application these metalasic bushes are always replaced with poly or heim ball type mounts.
Metalsitic joints are in fact meant to operate in that fashion - ie to rotate the bush and the rubber as Crazy states - however take a look at replacement poly bushes which are designed to simply be a bearing, and thus removing any possibility of stiction. Your choice entirely, both methods are acceptable. That is why [ rotation of rubber within bush ] Metalastic bushes will wear out eventually - take a look at a real old shock bush where the rubber has torn or the bush become detached.
On the TR1 units pictured, the spacers are just that - spacers - they don't [ and don't need to ] perform any other purpose than that.
neevo
Over 1,000 Posts
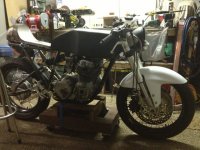
Been finalising the wiring and I need to fill a hole in the headlight (with a parking light) as the hedlight is only activated when the running switch is active.
Here is the headlight with the hole for the bulb (16mm):

Is this what I need its the only one I've been able to find on ebay?
http://bit.ly/WLmyF9
Here is the headlight with the hole for the bulb (16mm):
Is this what I need its the only one I've been able to find on ebay?
http://bit.ly/WLmyF9
neevo said:Whoa! Just blew my mind beachcomber!
I will endeavor to put a spacer in the limits the friction, top hat with a raised surface to contact the metal insert and not the rubber might be the way to go.
Like I said Neevo - pedentic to the point of being picky. Or as I was taught by my engineering professor - doing it right !!!!
In this case "right" is only a meagre % from being "almost right". But remember the old addage - there's no such thing as being almost pregnant.
In my view - if you have to design or create a part, there is no point in NOT doing it right - your bike to date proves that !!!
neevo
Over 1,000 Posts
beachcomber said:In my view - if you have to design or create a part, there is no point in NOT doing it right
Agreed! Half arsed is not in my nature, I've tried it but it eats away at me and I have to redo it again anyway to maintain my sanity.
neevo
Over 1,000 Posts
Slowly picking away at this wiring each evening and have it almost finished tonight. A few more shrink wraps and some extra splices into the indicator live wires (for the Acewell gauge) and it should be finished
All working fine, even put the subframe tray back on tonight, all the rear stuff is on connector blocks so I can easily detach stuff but it means its quite tight in there, not overly so though. On the rear one connector is a bit tight so it will be getting redone to stop any issues later on down the track. Waiting on a replacement RFID, mount the aerial for the key fob and that's it!
Here's a little walk through, hopefully the audios ok, I couldn't stand to listen to it:
http://youtu.be/ZYZJXASmWbI
neevo
Over 1,000 Posts
Got the front indicators mounted up yesterday. Didn't over think it too much and I'm very happy with the placement:


The indicators have 2 wires, I've gone with black/red as the red feed is lower brightness (green was blinding), hopefully that's the right decision:

A quick test of the system and the relay seems to click quite slowly, not sure if that's normal. I will grab a video, hopefully those in the know can comment. Also using the red wire seems to have a faint yellow glow from the indicator when running but clicked off. Not sure what's going on there!
The indicators have 2 wires, I've gone with black/red as the red feed is lower brightness (green was blinding), hopefully that's the right decision:
A quick test of the system and the relay seems to click quite slowly, not sure if that's normal. I will grab a video, hopefully those in the know can comment. Also using the red wire seems to have a faint yellow glow from the indicator when running but clicked off. Not sure what's going on there!
neevo
Over 1,000 Posts
crazypj said:I have same indicators.
I wired mine with 'dim' as running lights and 'bright' for indicators (correct way)
Should I swap them out PJ? Would only take 5 mins as I need to replace the connectors anyway (as the current 4mm ones don't fit through the mounting bolt!!!).
I'm worries about the high setting as my rear light is fucking bright as is the high setting on these indicators. Is there such a thing as too bright?
neevo
Over 1,000 Posts
SONICJK said:Hey Neevo those are the same indicators I'm going to be using on my 400f for rear tail lights/brake lights. Glad to hear they are blinding 8)
Here's a video, hopefully it demonstrates the brightness. Ignore the placement of the signals that's getting changed.
http://youtu.be/x-DsvZNfclo
Just lifted the garage door and the brightness on low gets a bit drowned in sunlight so I'll be using the turns on the high powered green wires.


