
We noticed you are blocking ads. DO THE TON only works with community supporters. Most are active members of the site with small businesses. Please consider disabling your ad blocking tool and checking out the businesses that help keep our site up and free.
You are using an out of date browser. It may not display this or other websites correctly.
You should upgrade or use an alternative browser.
You should upgrade or use an alternative browser.
1982 Virago 920 engine up build
- Thread starter Knifemaker87
- Start date
okay here is what i found...
my wires:

05 CBR600rr diagram

I have already taken the switch apart and eliminated the horn and high beam wires, and i removed the clutch switch, so whats left looks like:
light blue: right turn signal
light blue/white: hazard? signal return?
orange: left turn signal
orange/white: hazard? signal return?
black: hot
gray: ?
I dont remember if the control has a hazard switch or not. either way, the orange/white and blue/white both go straight to the turn signal and nowhere else. is it safe to splice them in with their respective sold colors? i only have two wires on my turn signals...
thoughts?
~Chris
my wires:

05 CBR600rr diagram
I have already taken the switch apart and eliminated the horn and high beam wires, and i removed the clutch switch, so whats left looks like:
light blue: right turn signal
light blue/white: hazard? signal return?
orange: left turn signal
orange/white: hazard? signal return?
black: hot
gray: ?
I dont remember if the control has a hazard switch or not. either way, the orange/white and blue/white both go straight to the turn signal and nowhere else. is it safe to splice them in with their respective sold colors? i only have two wires on my turn signals...
thoughts?
~Chris
two-smoker
I reject your reality, and substitute my own!
Look like your turn signal switch supplies both power and ground to both signal lights. Light blue- pos right, light blue/chwhite- ground right, orange- pos left, orange/white- ground left. Appears the bulbs don't have a chassis ground. Grey is labelled win out, don't know what that means. (Edit- I'm wrong. The white striped wires are running lights, solid colors are turn. The bulbs are dual filament.)
two-smoker said:Look like your turn signal switch supplies both power and ground to both signal lights. Light blue- pos right, light blue/white- ground right, orange- pos left, orange/white- ground left. Appears the bulbs don't have a chassis ground. Grey is hi beam pos. (Edit- I'm wrong. The white striped wires are running lights, solid colors are turn. The bulbs are dual filament.)
And you should be able to eliminate the light blue, gray and orange wires, using the blue/white, black and orange/white to tie in to the three wires you have sketched out on the wiring diagram in the same order.
There is a step by step wiring diagram on the viragotechforum that TRV put together if you get stuck.
Worst cb650 ever said:Not to derail the thread, and I have nothing constructive to add, but isn't anyone else wondering how the snapping turtle took out his phone?!?!?!?
HAHA! i wondered if anyone would catch that. I was fishing in my friends pond when a huge snapping turtle took my bait. I fought it for a couple minutes to come in (using ultralight tackle) and the turtle weight close to 75 lbs. I got him up on the bank to take a picture (so my friend would believe me that i caught it), had my phone up for the photo, and was about to take the picture when all hell broke loose and the monster decided to return to the primordial depths from which he came, breaking the rod, and catapulting my phone out of my hand on into a pile of boulders. it bounced off three or four before settling down.
hance the need for repairs. the phone has been repaired, but my pictures are lost forever. =( i had about 1000 pictures on there all the way back to when i bought the bike. plus pictures of my Wife, family and dog.
well after much ado the phone is working again, but the pictures on it are lost forever. alas.
anyway... here are the pictures i promised.
some better all around pictures of the bike.. complete with crazy wiring (i'm waiting on my open barrel crimping tool)


The exhaust in place, complete with hanger
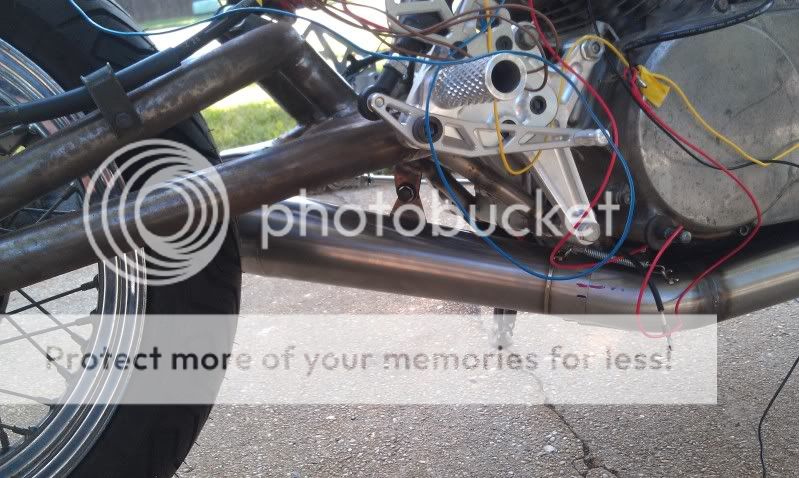
Koso Gauge

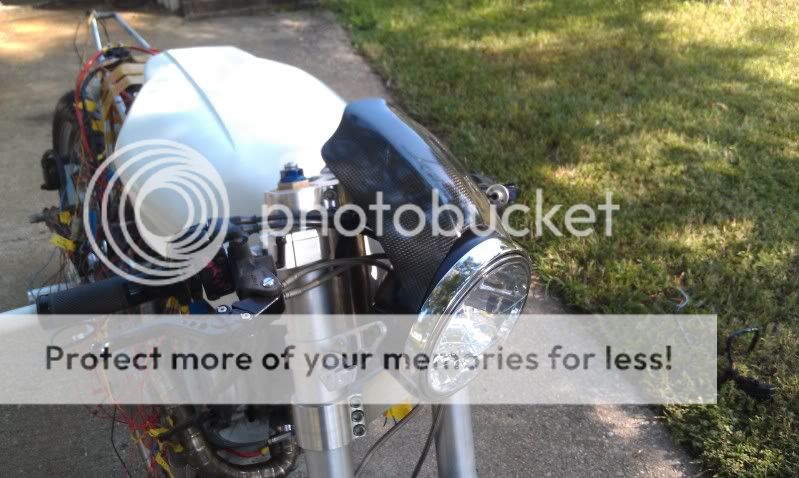
Roughed out Headlight fairing (any guesses what this is from?)
Pocketed Tank
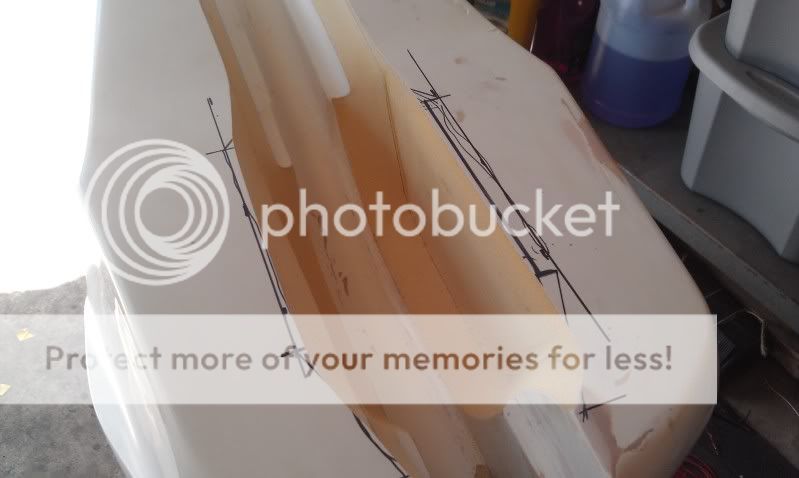
All bondo'ed up to fill the foam's porosity

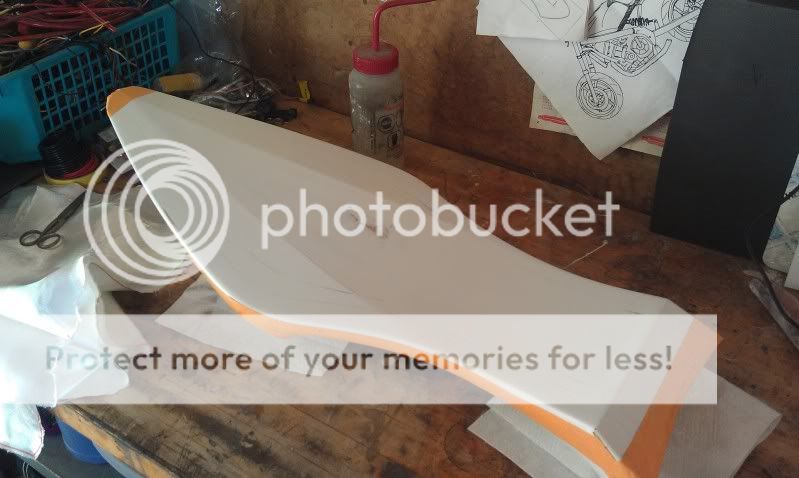
Prepped the tail for the bottom mold
All laid up, (5 layers, multi-orientation fiberglass)

popped off, clean as a whistle.

Now i have the tank sanded and primed, ready for the last sanding before release and molding. then i will have all my molds done and will actually start making the body-work for real. also my crimping tool should be here tomorrow, and as i am taking the day off should get the tank mold done and a good bit of the connectors wired.
still waiting on my fuse box to finish roughing in the wiring. i wont finish the wiring till after everything is together and i can make sure everything is the right length and it all works correctly.
more soon!
thanks
~chris
anyway... here are the pictures i promised.
some better all around pictures of the bike.. complete with crazy wiring (i'm waiting on my open barrel crimping tool)


The exhaust in place, complete with hanger

Koso Gauge

Roughed out Headlight fairing (any guesses what this is from?)

Pocketed Tank

All bondo'ed up to fill the foam's porosity

Prepped the tail for the bottom mold

All laid up, (5 layers, multi-orientation fiberglass)

popped off, clean as a whistle.

Now i have the tank sanded and primed, ready for the last sanding before release and molding. then i will have all my molds done and will actually start making the body-work for real. also my crimping tool should be here tomorrow, and as i am taking the day off should get the tank mold done and a good bit of the connectors wired.
still waiting on my fuse box to finish roughing in the wiring. i wont finish the wiring till after everything is together and i can make sure everything is the right length and it all works correctly.
more soon!
thanks
~chris
1969Honda said:Bike is looking real mean, how did you get such nice looking curves in side the backbone cutout for your electrics? It looks like a fairly tight space to me and they look really symmetrical. As always great looking craftsmanship IMHO.
hey,
glad you like it! the tank plug is foam, so i just used a chisel and some rasps to rough out the space, and then finished it up with decreasingly course sandpaper. BTW... it looks better in the pictures. there were some seams from where i glued the three pieces of foam together.
the sides are actually not symmetrical.. the left side is shallower but longer in order to incorporate room for the loom and wiring connectors for the controls, gauge, and lights.
hope that helps!
Chris
two-smoker
I reject your reality, and substitute my own!
Bad ass....
620dark
You can always get it running with time or money.
Knifemaker87 said:HAHA! i wondered if anyone would catch that. I was fishing in my friends pond when a huge snapping turtle took my bait. I fought it for a couple minutes to come in (using ultralight tackle) and the turtle weight close to 75 lbs. I got him up on the bank to take a picture (so my friend would believe me that i caught it), had my phone up for the photo, and was about to take the picture when all hell broke loose and the monster decided to return to the primordial depths from which he came, breaking the rod, and catapulting my phone out of my hand on into a pile of boulders. it bounced off three or four before settling down.
hance the need for repairs. the phone has been repaired, but my pictures are lost forever. =( i had about 1000 pictures on there all the way back to when i bought the bike. plus pictures of my Wife, family and dog.
Wow, that's crazy! I don't know if you're running an iPhone or an Android, but if you have an Android look into FolderSync - it can automatically back up folders (like your photos folder) to cloud storage like Google Drive. It works well for me - everytime I connect to WiFi it checks to see if there's any new pictures on the phone to upload.
Anyway, the bike looks great - can't wait to see the finished product!
Greg-NWO said:Looking goodMy guess on the windscreen would be it was originally a rear hugger?
and the winner is Greg! it was originally a ducati 748 rear hugger that got damaged in the chain guard area... so i chopped it up.
okay everybody,
Here's whats been done in the last week.
I got my open barrel crimping tool in... so i started on the control wiring connectors.
here's the type of crimp... makes me feel like a professional!

Then i did all the wires, lined them up and put the wires in the housing..

and another...

then i got to work on the tank. all sanded, smoothed, primed and polished. I didnt go too crazy on this part of the plug as most of the smoothing work will be easier on the mold than in the plug cavity.

layed up the glass...

and popped the mold off. it turned out nice and stiff

now, it was too much work to try and get around the throat at the same time so i trimmed the mold back, and re-released the area i needed.

and as i had to fill the odd spot that cloth wouldnt want to go into, i made some very fine fiberglass chop and mixed it straight into the resin and applied it like very fiberous putty

the chop filled the lows spots, and then a couple layers of cloth... then i trimmed it before it had fully cured so it would come off the plug better

While the mold was curing i made my speedo mount.

It bolts into the triple via two of the mounting hols i used to hold the part while i was machining it.

then, i popped my mold off, and Viola! All the molds are made. They just need a little prep before i start making the carbon fiber parts!


more soon! i am going to be taking a break this week to get some painting for a freind done, but i will try and still chip away at it. My fuse box should be coming this week, so i can get that wired in, but i wont do the final wiring till i mount the tail and battery to see how long all the wires should be.
thanks!
~Chris
Cale Young
Been Around the Block
OUTSTANDING!!
DV2000NJ said:Just read through this entire thread, and it is nothing short of inspirational. Simply fantastic work!
thanks for the time investment, an di am glad that it was enjoyable. (or i hope it was)
Also, i know i said that i was going to take a break from the bike to work on the painting... but i just couldn't help myself.
Made an aluminum flange and pressed it onto my carb so the air filter wouldn't flop around.

also made this beauty to bolt the filter pipe to the carb. ID of the part is the OD of the pipe, so i will slip the pipe into the adapter and weld it on the inside face.

and after fitting, checking, fitting again, and welding here is the final result


okay... NOW i am going to focus on getting everything ready to paint.
thanks for looking!
~Chris
ChocolateLab
New Member
Wow...unreal craftsmanship. Really like what you did with the single carb conversion. Keep up the good work, can't wait to see the end result.


