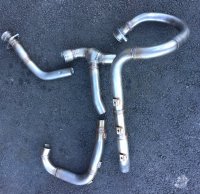
Finished mocking up the exhaust, all tacked up. Front and rear are equal length should flow nicely. I added a couple of heat guards made from Yamaha YZ-F's. Just need to Tig everything up.
We noticed you are blocking ads. DO THE TON only works with community supporters. Most are active members of the site with small businesses. Please consider disabling your ad blocking tool and checking out the businesses that help keep our site up and free.
You are using an out of date browser. It may not display this or other websites correctly.
You should upgrade or use an alternative browser.
You should upgrade or use an alternative browser.
Cafe XV920R Mega-Build
- Thread starter JAGspeed
- Start date


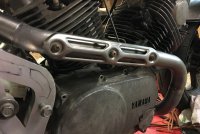
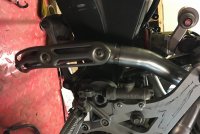

The exhaust does slightly taper out from the begining of the header to the main pipe. it is roughly 39mm OD and tapers to 42mm OD for the majority of the pipe. The muffler opening diameter is larger, can't remember the exact measurement though.der_nanno said:Interesting exhaust - and from personal experience with XVs - yes they respond nicely to equal length headers. Talking of which, I couldn find any remark from you what the ID and OD of the tubing is?
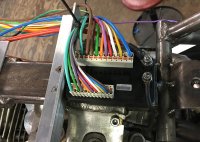
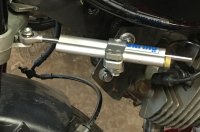
Had this steering dampener in my collection of used parts so I made some brackets and mounted it up. I decided to go with a Motogadget M-unit blue, really makes for a clean install. Started to wire it all up. Much easier than dealing with a 40yr old wiring harness.
Attachments

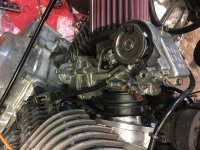
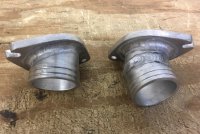
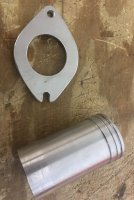
I am using 2 FCR 40mm carburetors so I had to make my own manifolds. I turned down some aluminum tubing and had two flanges made. Clearance was tight but I made it all work. I was going to try and use a single throttle cable to Carb #1 and use the push side of that carb to pull Carb #2.
Attachments
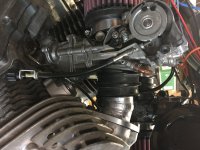
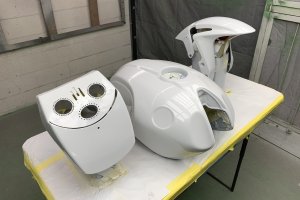
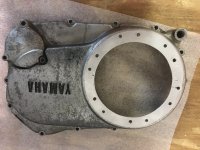
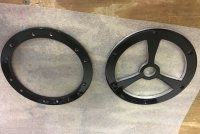
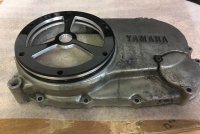
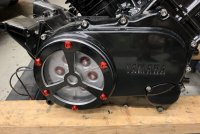
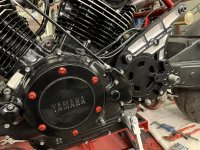
Since my clutch cover already had some damage it inspired me to cut it out and do a plexiglass cover. I had 2 rings plasma cut and then powdercoated. I still need to PC the cover and cut my plexi. Also finished up the exhaust pipes. Getting close to test firing it. I have the wiring about 95% done.
Attachments
corocky said:Really like the equal length exhaust. Im also researching a lot at bigtwins.org. Im curious about your plexiglass clutch window. Any interest in making another one? how much?
I'll be watching your build
I would consider making another plexi-clutch cover, Is it for a Virago or something else? PM me if you really want one and I'll figure out how much.
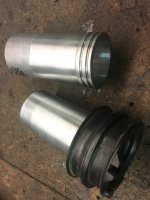
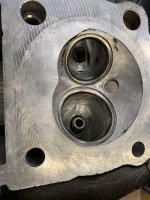
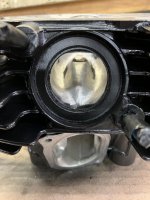
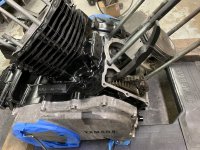
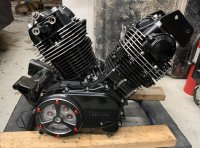
Back to it. The bad news is I had a bent valve so I had to tear the engine down. The good news is that it gave me an opportunity to freshen up the motor. I honed the cylinders and put in a new set of rings. I did some porting on the heads, mainly cleaned them up, smoothed out all the transitions and reshaped around the valve guides. Painted the center cases, cylinders and heads satin black. Going to paint or powder coat the side covers gloss. Just need to finish putting it all back together.
Attachments
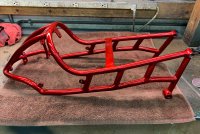
In the home stretch, finally starting to go back together. I had the frame powder coated a cool candy red . I also finished painting the motor and got it back together. Mounted the motor back into the frame. Getting close to the finish just need to take care of some details and paint
Attachments
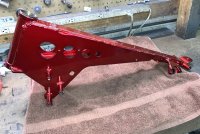
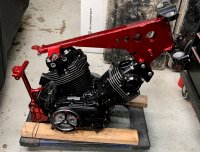
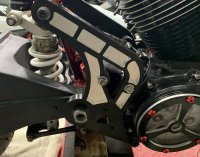
I took the machined frame supports back to my machinist and had them anodized black. Then I had a design cut into the parts to give them more depth. I am finally on my way to getting this bike back together.
Attachments

sandmanred
Been Around the Block
Yowza! Nice work!
Great Job !
To bad for the anodizing poor quality job dought !
The anodizing looks fine now after I cleaned up the parts. I took those picks just after my machinist cut the design, there was still quite a bite of residue on the parts from the CNC cutting oil.
Coxbow
Active Member

I used a couple of sprocket cut down to make my offset sprocket welded them together. I made an extension piece from a XS650 countershaft because it has the same spline as the XV, it slides into the XV countershaft and into the support bearing that fits in my cover.


biker_reject
Over 1,000 Posts
Blown. Away. Wow
Sent from my iPhone using DO THE TON
Sent from my iPhone using DO THE TON