Follow along with the video below to see how to install our site as a web app on your home screen.
Note: This feature currently requires accessing the site using the built-in Safari browser.
We noticed you are blocking ads. DO THE TON only works with community supporters. Most are active members of the site with small businesses. Please consider disabling your ad blocking tool and checking out the businesses that help keep our site up and free.
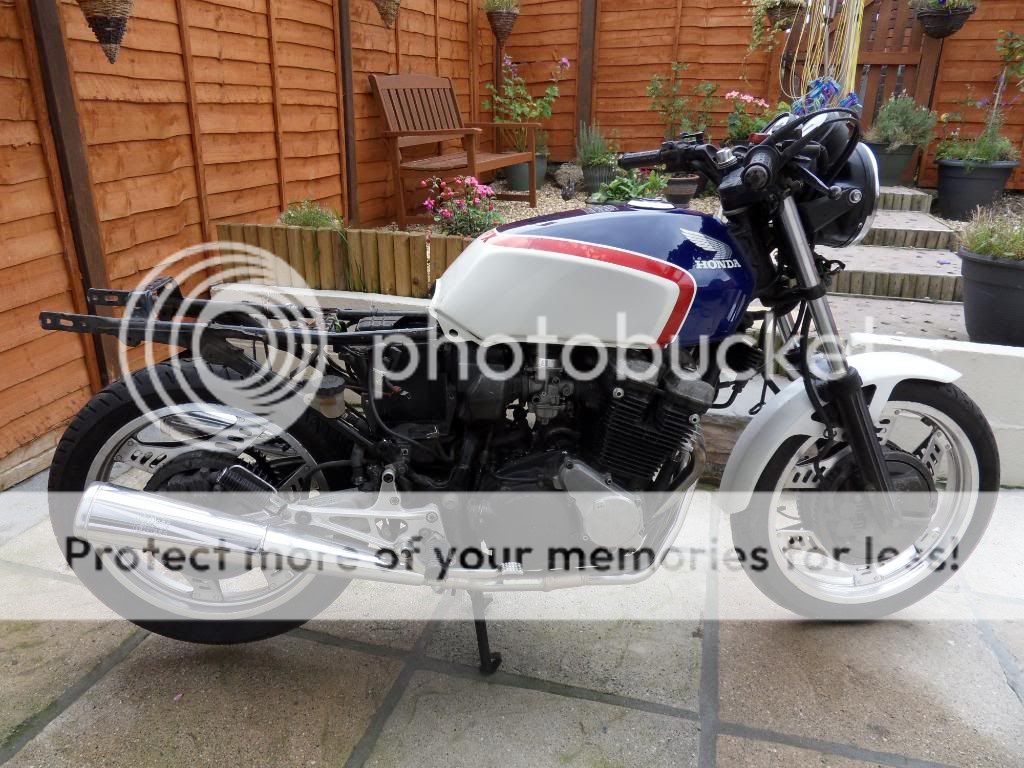
So here is my first attempt at building a cafe racer.
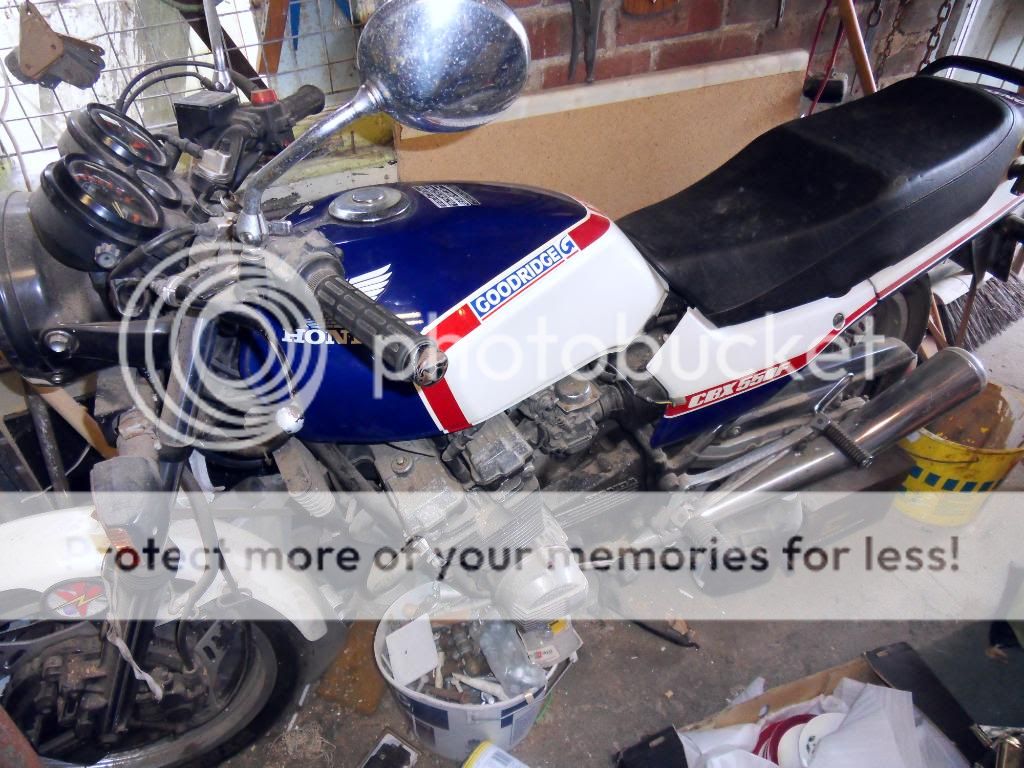
Found this bike in a friends garage after his father parked it there 8 years ago after a fuel leak from the tap.Sadly his father passed away and the bike remained where he left it. I am hoping that after a fiddle, some fuel and a battery it will go. Fingers crossed! Hopefully get around to it at the weekend so stay tuned.
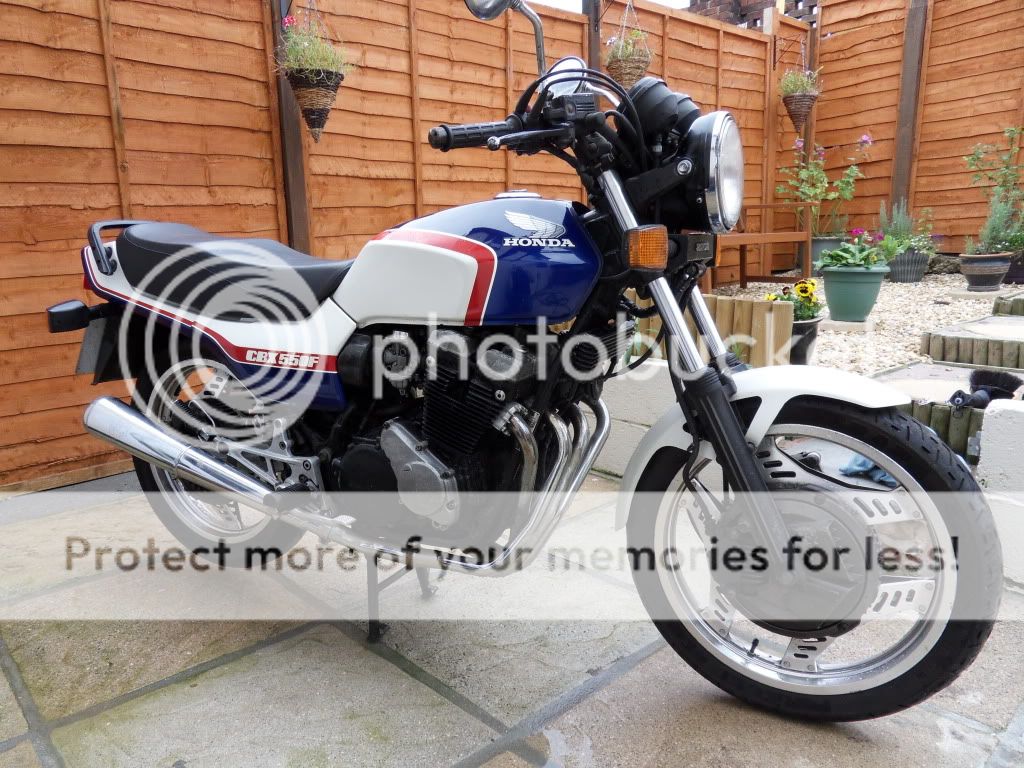
Here is the bike as found:
After a quick clean:
Pretty nice isn't it?!
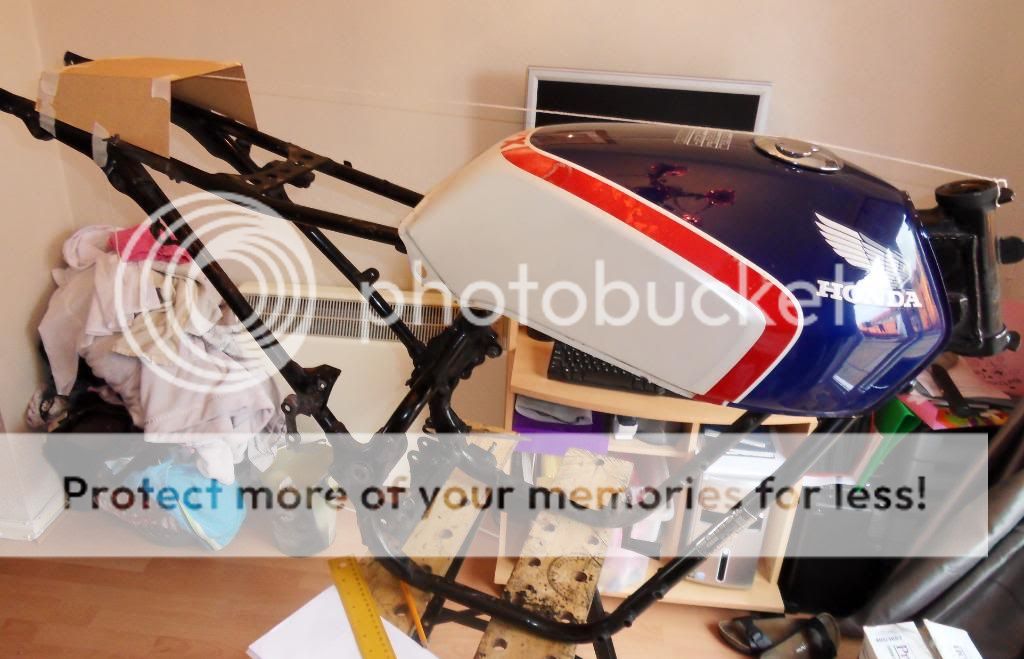
Could'nt help starting to strip it.
So I want to cafe it and I have some questions..on these bikes Honda fitted inboard brakes which in the UK climate are pretty useless.I really would like to get rid of the front end and swap it for some more conventional forks, wheels and disc set up, or some upside down forks from say a RVF400.Has anyone fitted upside down forks to their bike?Or what conventional forks and yokes would fit this bike?Will any Honda forks from around this age just fit or is it a major job? I realise that forks are different diameters but how hard is it to fit the yokes and forks from a similair size bike?
Sorry for all the questions but any help will be much appreciated.
This is a good guide to what tubes can fit in your triple tree, as an alternative to a complete front end swap. Other wise Steering head i/d and steering shaft o/d info can be found somewhere, just can't seem to remember where I've seen it.
Very clean bike, upside down forks would look great too, is the enclosed disk really that bad? Cos it's a shed load of work and money, if it could be cured with some high quality pads, or even a better disk?
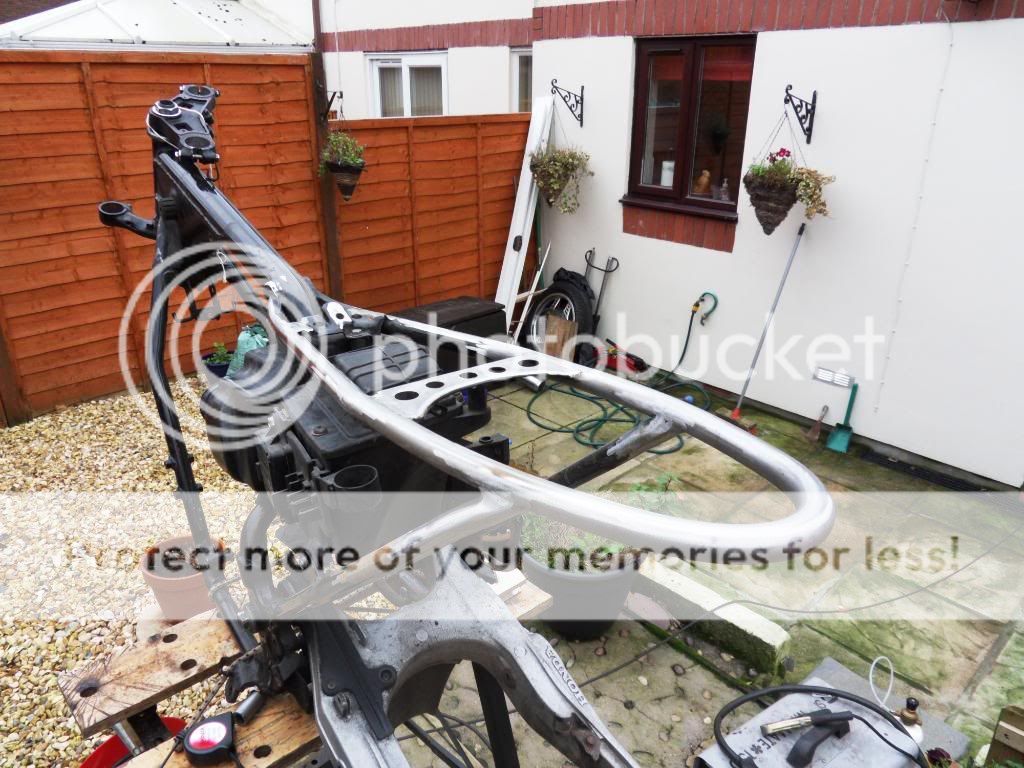
Ok I have got down to business this week and totally stripped the bike down to the frame. Due to financial constraints I am going to go down the route of reusing what I have apart from some nice bits and pieces. That means reusing the forks and original brakes which I was not a fan of initially but they will have to suffice for now. Engine will be left alone apart from paint and servicing etc.
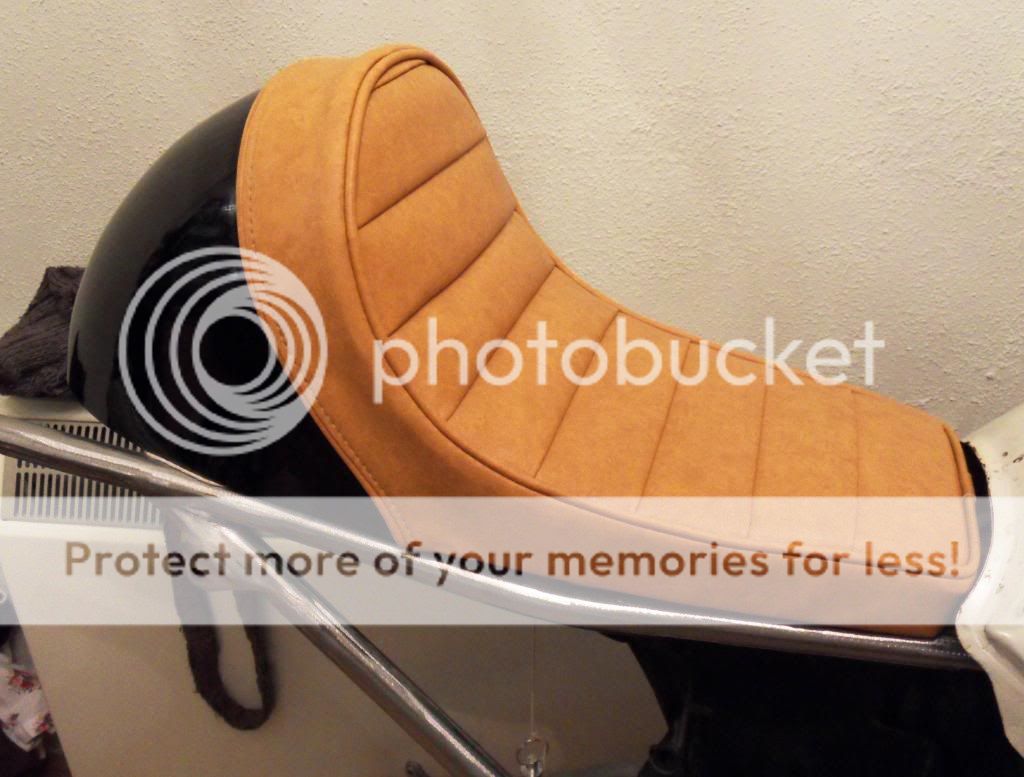
I was going to buy a one piece seat/tail unit but to save some money and flex my artistic muscles I am going to build my own tail unit from steel and weld it to the frame. I saw this done to a cbx on another site and really liked the look of it. This is my initial mock up using card..
On reflection I think maybe the round usual type of tail may not have suited this bike, anyway I'll go with this and see what it looks like when it's on. I will get my local upholsterers to make up a seat pad and trim it with black leather and maybe a bum stop as well later on. Any comments welcome.
Ok so scrub everything I sad previously!
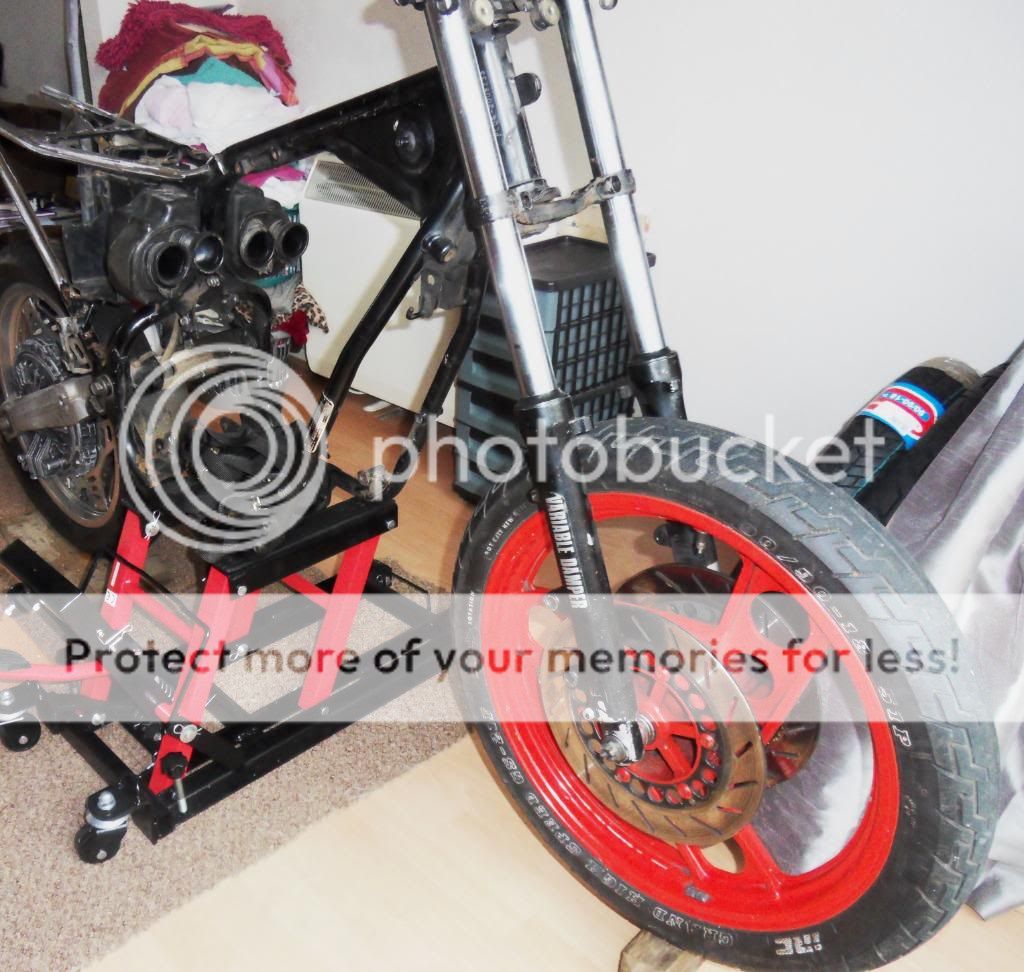
After taking the brakes apart I have decided that I could'nt live with them after all,so many parts for no actual benefit.
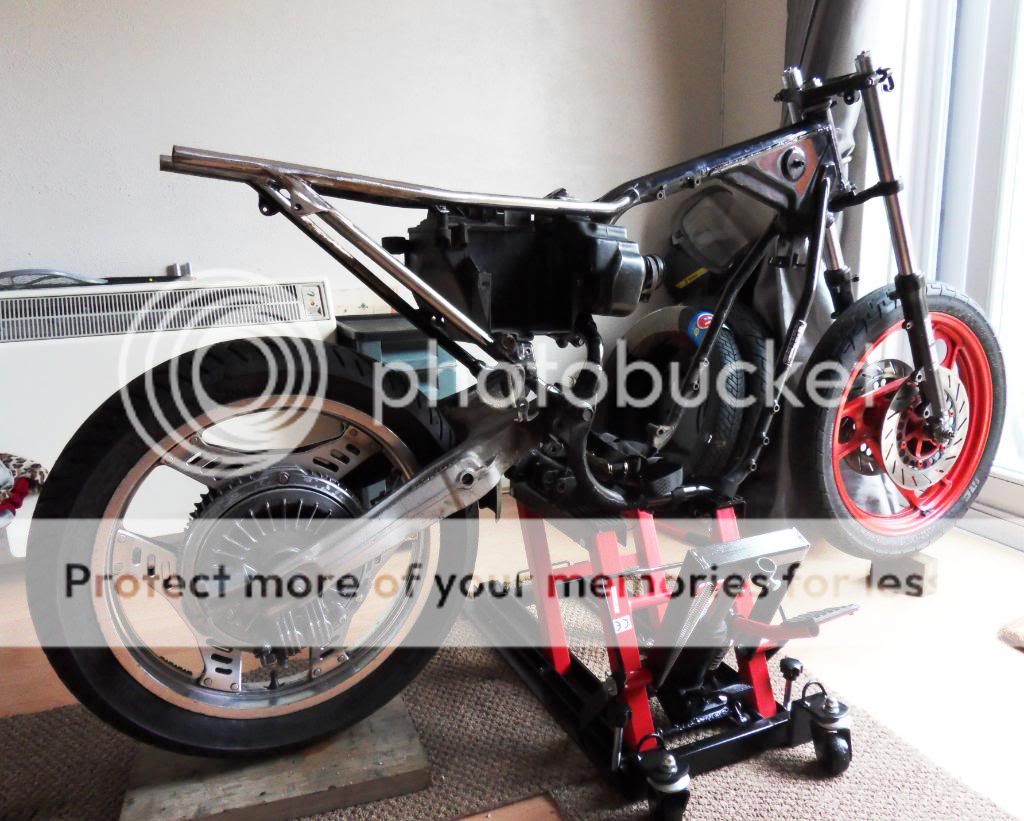
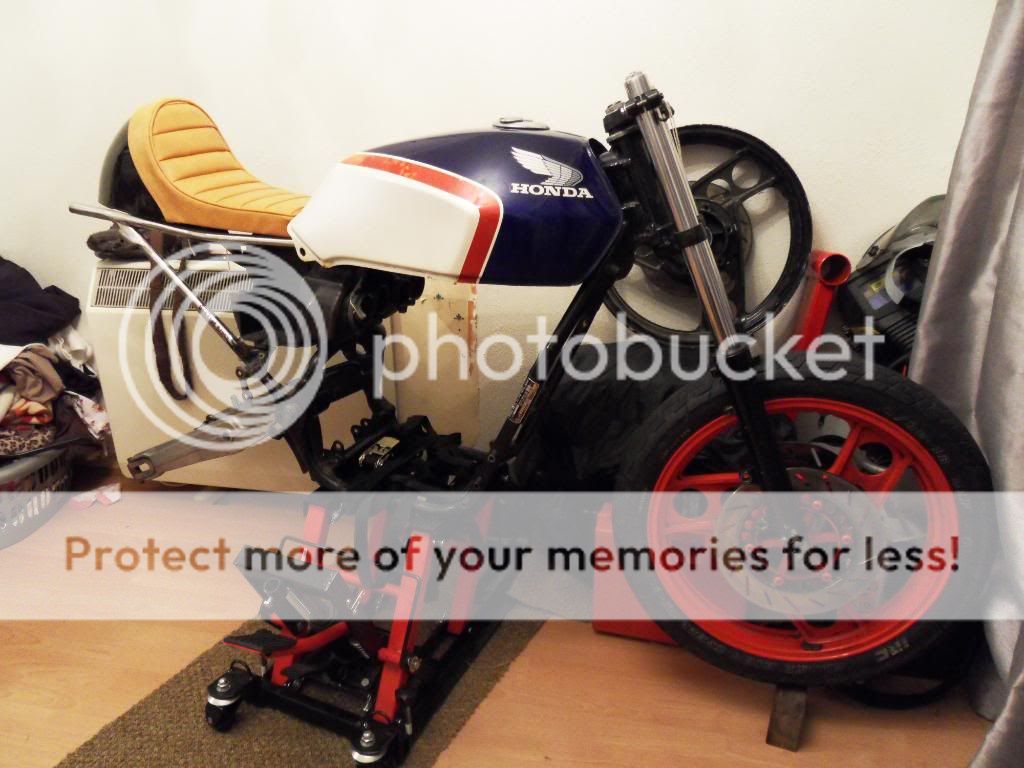
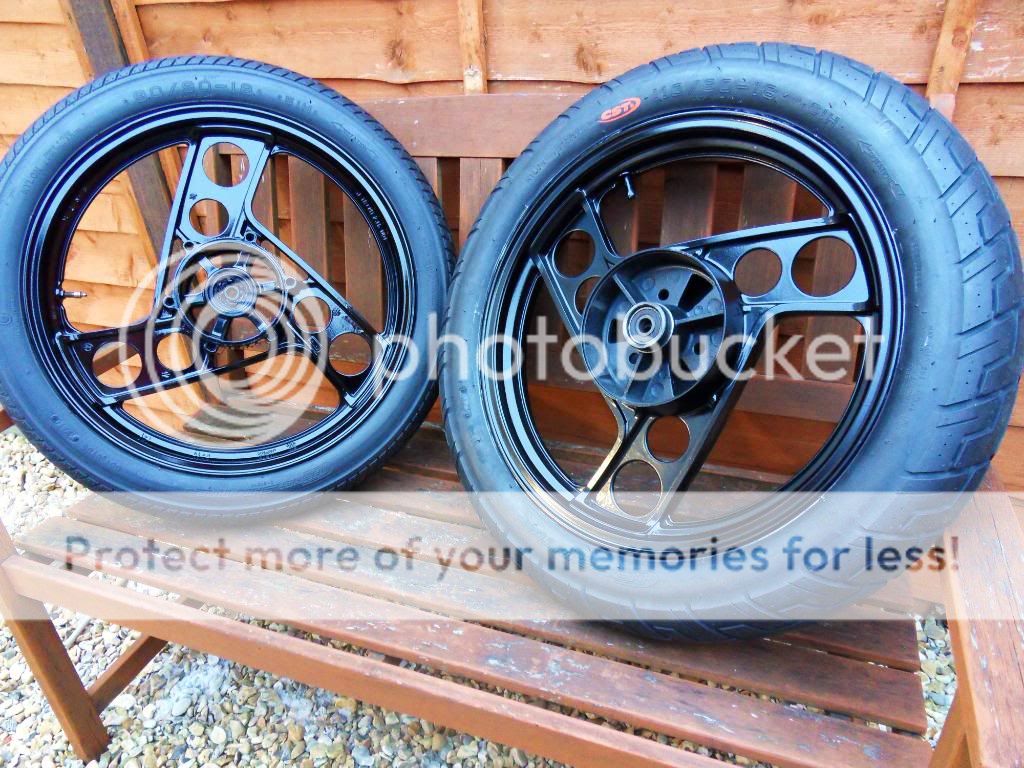
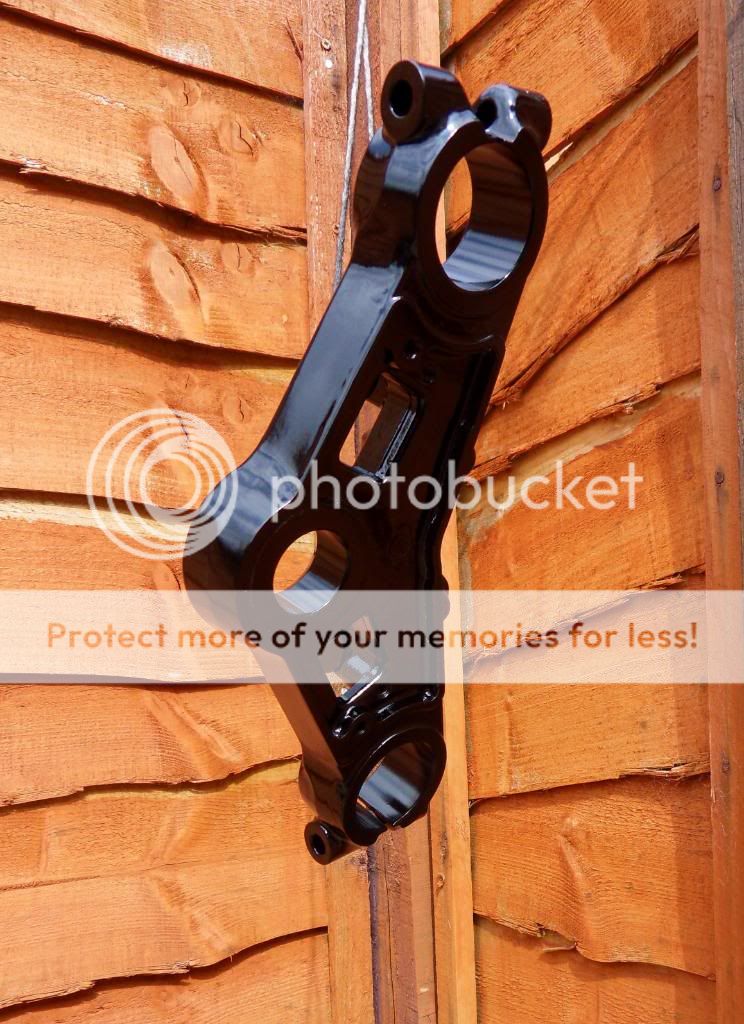
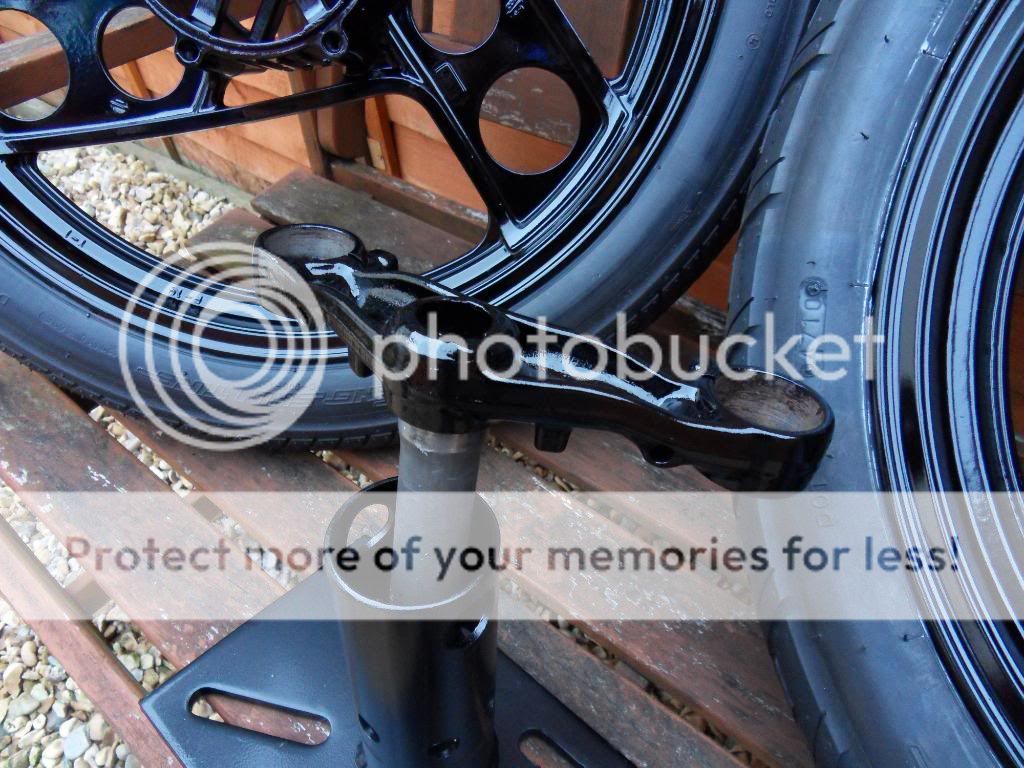
So after some research I have bought a load of parts including a pair of Yamaha RD350 YPVS wheels and forks etc. The rd forks after 10mm narrower than the cbx ones so I mocked the front end up with a couple of 5mm spacers which looks good.Have to make some 5mm spacers for the brake calipers also when I fit them.
Still have to do the back wheel yet, I am going to use the original front sprocket and get a rear sprocket in 530 pitch made up with the right amount of teeth to keep the gearing the same. I am expecting some spacing issues here also.
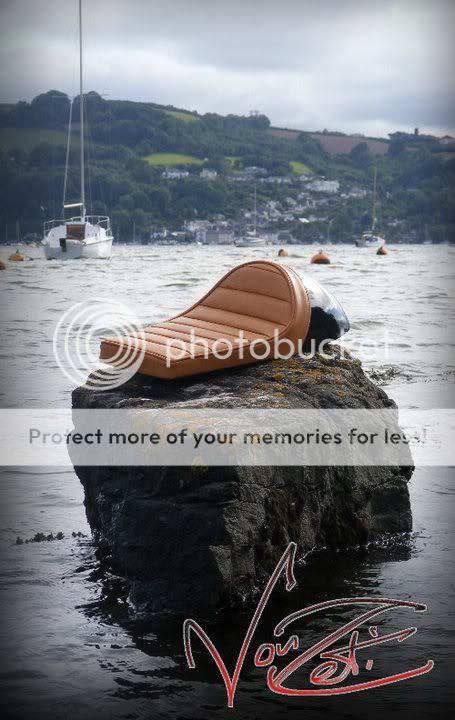
Also on tack welding the rear seat unit to the frame I did'nt like it so I went and purchased this from a company called Vonzetti.
Cost a bit so fingers crossed for when it arrives.
Hopefully get on with the rear wheel this week and then complete the rear end when the new seat unit arrives.
Small update but I am moving on slowly!
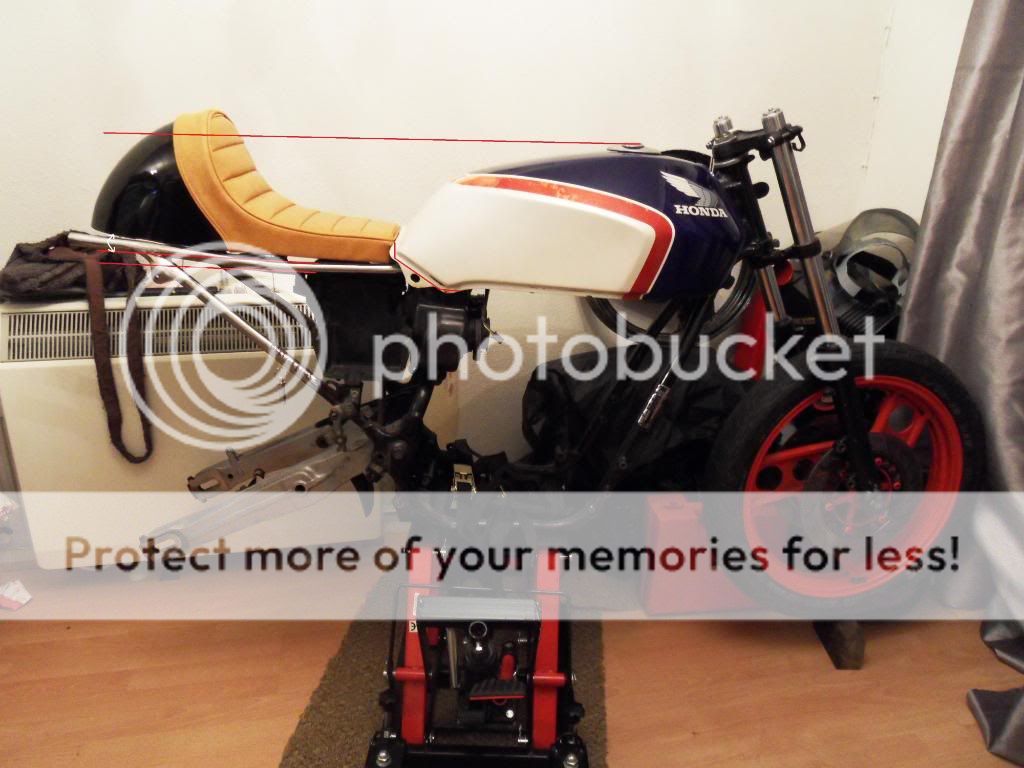
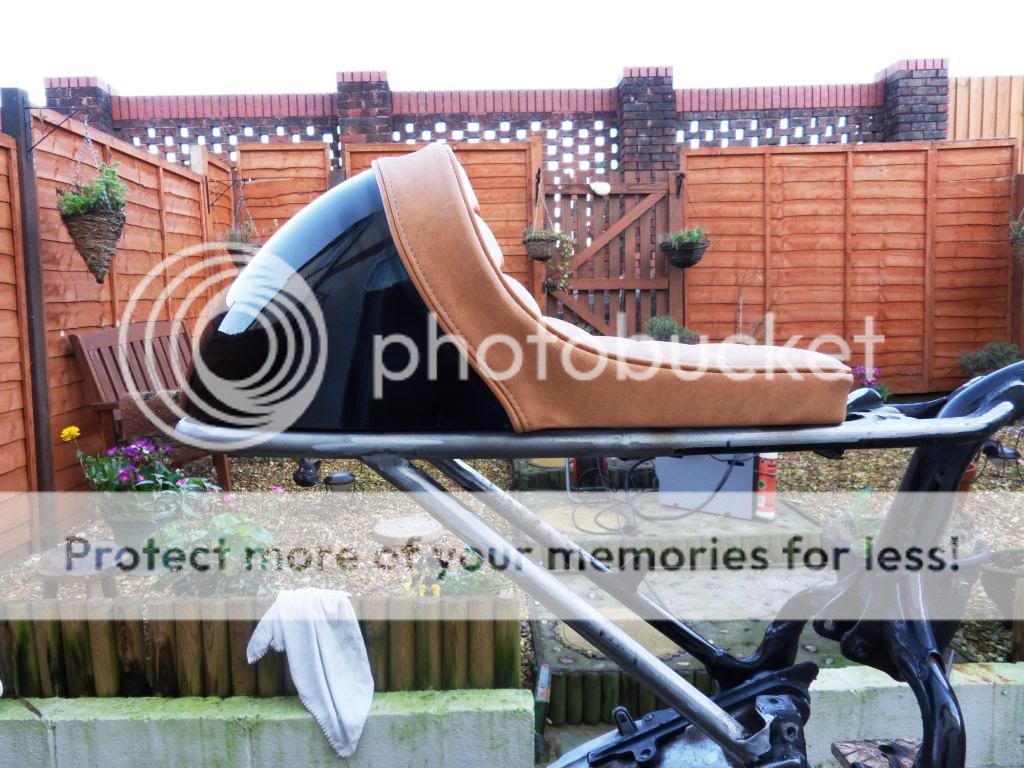
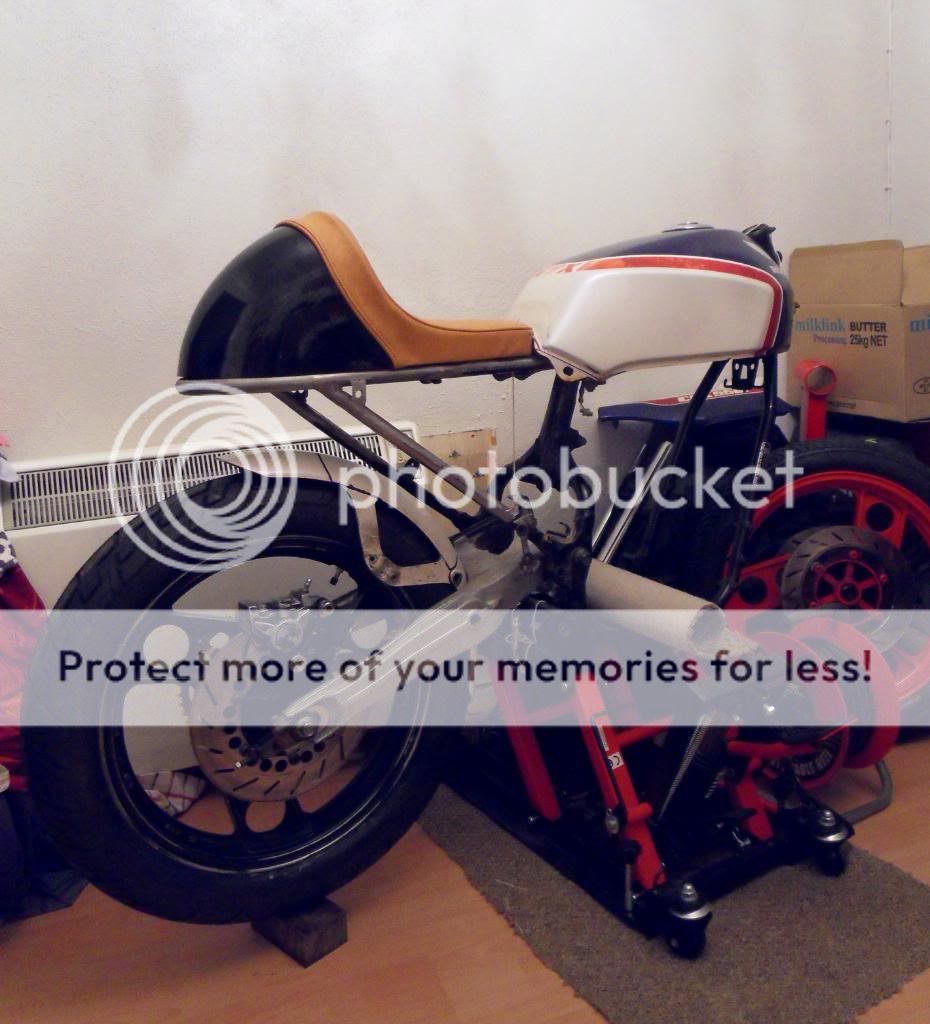
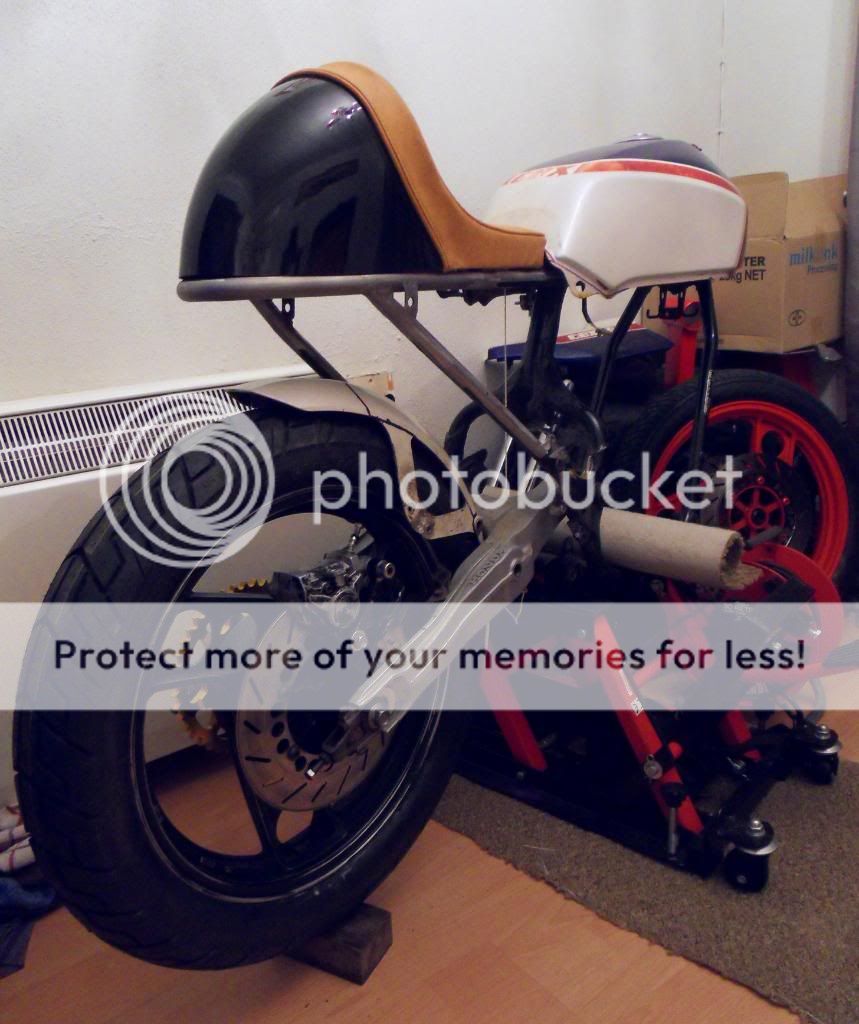
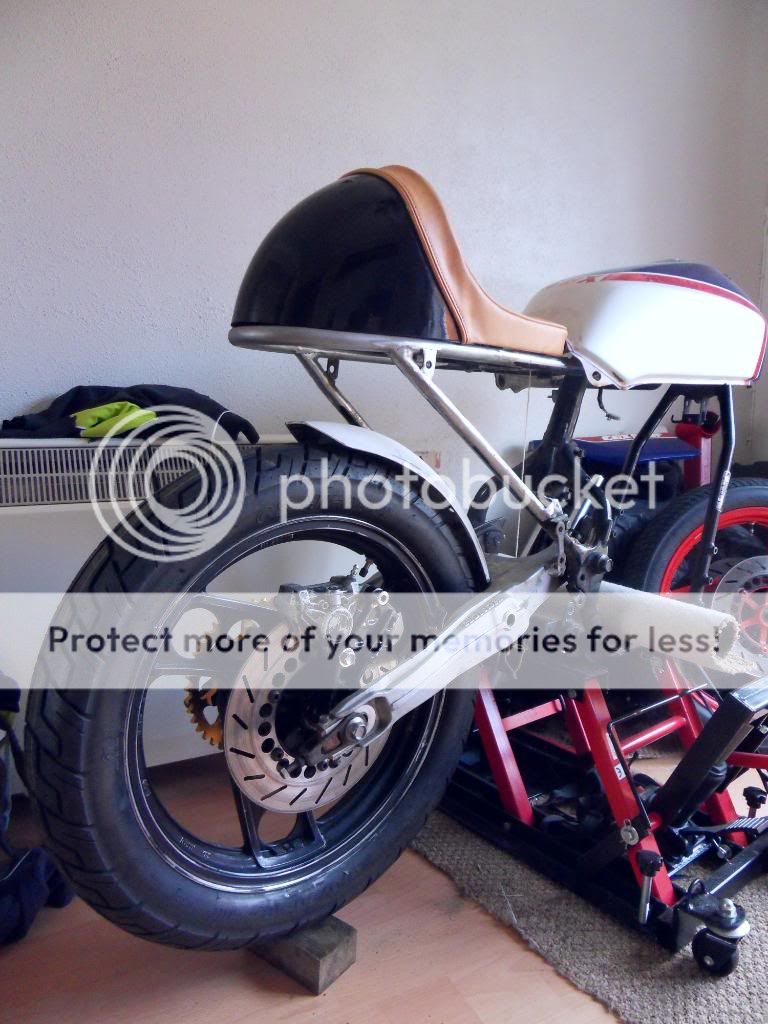
So my new custom built seat unit arrived today. Looks very good quality, the seat colour is a little different to what I thought, but it's okay.
It looks a little big on the bike.... the angle of the rear pod is a bit steep but I think it looks worse because the frame kicks up at the back end. My next job is to cut the frame rails off where it kicks up and make a new section to weld on to support the unit. You can see from the next picture how much it rises, so when it's done it should look better, I hope!!!
I made a template for the new rails so it's off to see a friend to get some tube bent up. Also ordered my new sprocket with a 5mm offset, in gold anodised aluminum.That should look cool on the bike against the black wheels.
Hi Ryanh, I need to make the hoop at the back to match the seat anyway so I thought i would make it all in one, the frame rails need to bend in slightly at the sides as well so it will probably be easier in the long run. Gave a pattern to a friend who has all the equipment to bend the tube, so when it comes back i will get a chopping!
Not sure what I'm going to do with that yet, I will be riding in all weathers so I will need some sort of mudguard. As I am going to run the stock airbox set up for reliability I was thinking of making a couple of covers from stainless for the battery area and the rectifier on the other side instead of using actual side panels. Maybe some go faster holes or slots in them? I could leave some of the frame rails exposed at the back then. Have to make some out of cardboard to get an idea I think.
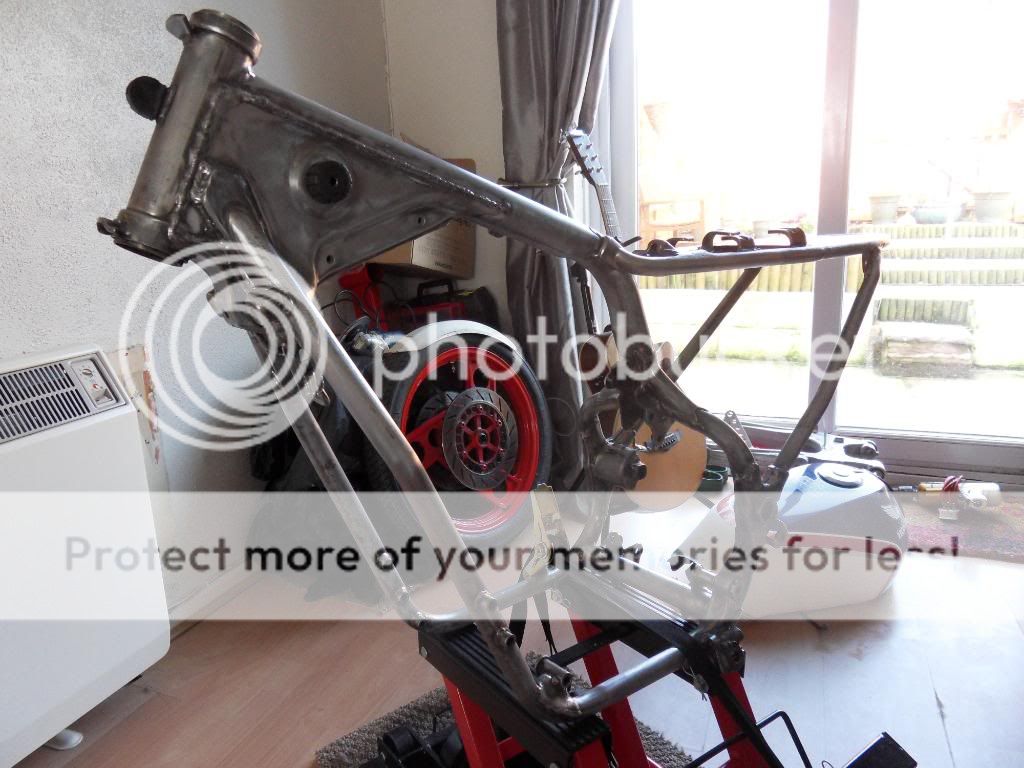
So I have found a little time after stuffing my face with xmas turkey and many other things to do some work! Took the plunge and cut off the old rear end replaced it with my pre formed new one. Fitted great thank god.
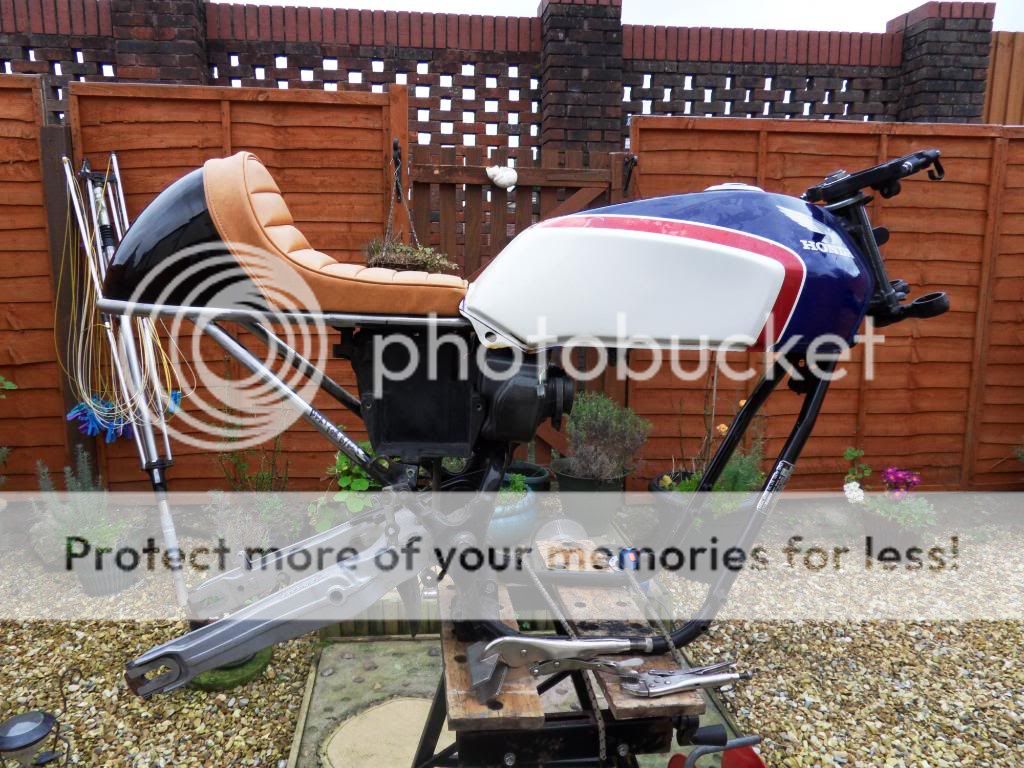
Made up new down tube supports and welded the cross member back in (with holes in) and cleaned it all up, looks quite good if I do say so myself! Here is the result with the tank in place. Looks better now the seat back has been brought down quite a bit, still looks a bit bigger than I would have liked but it's not to bad.
Got a new sprocket in the post which was great apart from being the wrong one. Looked nice in gold anodise though so I am looking forward to it's replacement.
Next job is to make the mounts for the seat unit, get on with it as long as the weather stays dry. Which is not very often here!
Ok another small update, a little bit each day they say don't they? Or in my case a little bit every other week! If you could see our wet weather you would understand why.
Anyway on with the show. Fashioned four mounting brackets to mount the seat unit and got them positioned and welded on. Took a while but when it's bolted up it is very solid. The rear ones are at a slightly off angle due to the contour of the fibreglass underneath. Very pleased with how it turned out.
You can see how wet it has been in the pictures by the green moss stuff that grows on our patio in a matter of weeks. Grrr.
Also in the top pic you can see I took a template of the rear end and made a plate to sit inside the frame. I intend to mount my rectifier and various other electrical items on it at a later date.
So apart from ordering some goodies that's about it for now. Next problem is what to do about side panels...thinking maybe some old fashioned number boards? Anyone know where to buy some of the oval shaped number boards? Think I will make another template to see what it looks like.
Another very small update,not been up to much as I have been waiting for the spacers for my rear wheel and sprocket set up which a friend of mine has been making very slowly! Anyway the set up works great and everything looks pretty good.
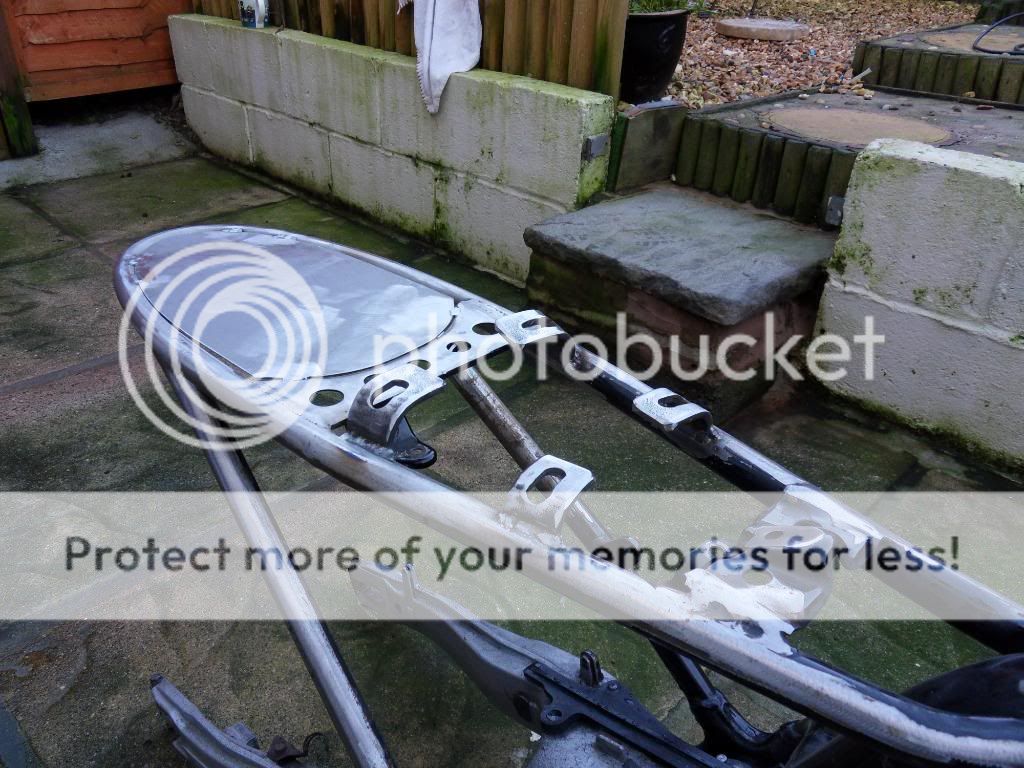
Had my tyres fitted so I could do a dry run and work on the rear mudguard. I am trying to use the front mudguard from the cbx, with a little trimming I think it will look great. Going to weld a upright/bracket on the swingarm to mount it to. Here is a pic for you to look at, any input welcomed.
Obviously I will trim off the original mounting pieces and the piece you can see below the swingarm to be left with just a normal looking guard.What do you think?
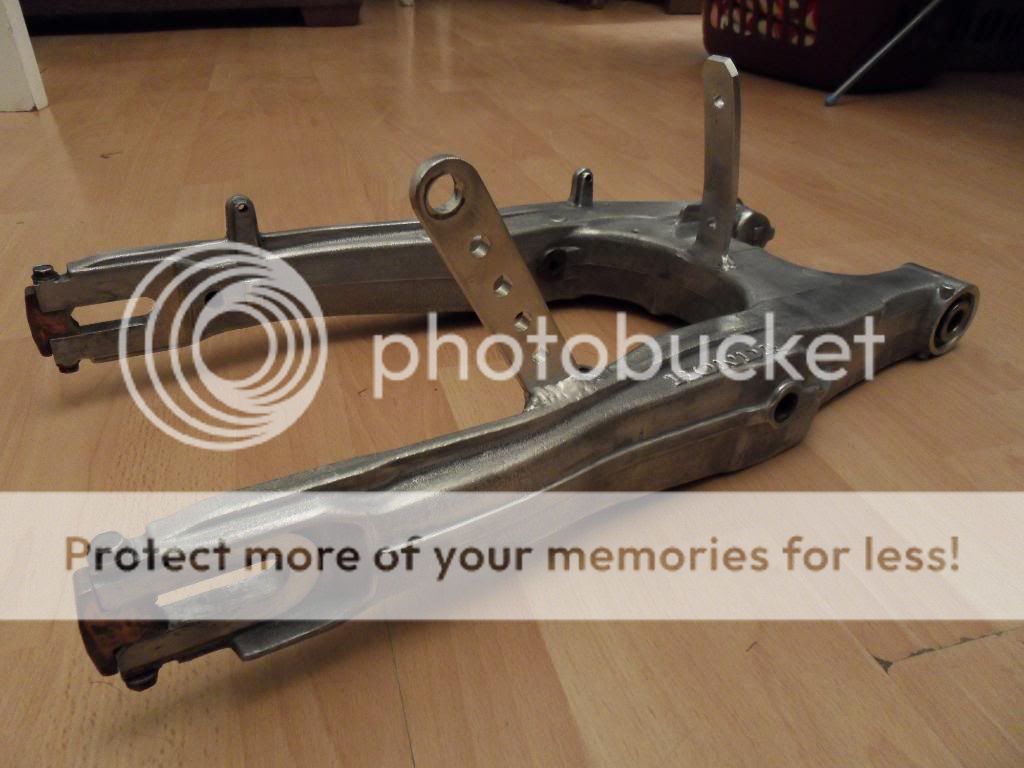
Ok, I have been busy removing paint, grease and 30 years worth of grime from the frame and swingarm.
I used a grinder with a wire wheel attachment which was very successful after removing all the grease first.
It is in surprisingly good condition for it's age with very little corrosion.
Not very interesting but necessary before sending off for painting.Going for satin black on the frame and gunmetal silver on the swingarm.
Feel like I am starting to get somewhere now these bits are ready for paint as I can start reassembly shortly.
You can see from the above picture I have welded on a new brake stay and the mounting bracket for the mudguard.
The next picture shows a mock up of he rear end apart from the brake stay which I forgot to take a picture of!
So in the next update we should have some shiny bits to look at.Fingers crossed.!
Shiny bits!!
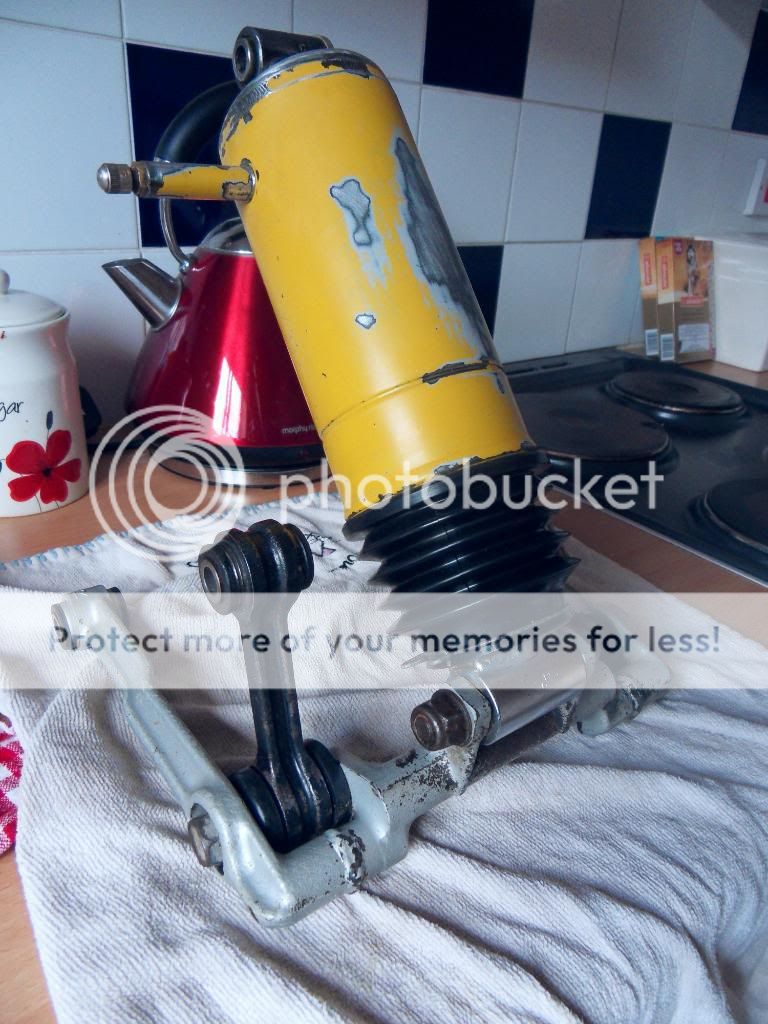
Ok, with the frame away hopefully to be painted soon I took the chance to clean up and paint some bits.First up was the shock absorber which appears to be in good condition under the filth!
So after a rub down and clean I sprayed it with primer and then some silver paint from my local hardware shop which is a very nice colour.Very pleased with it.
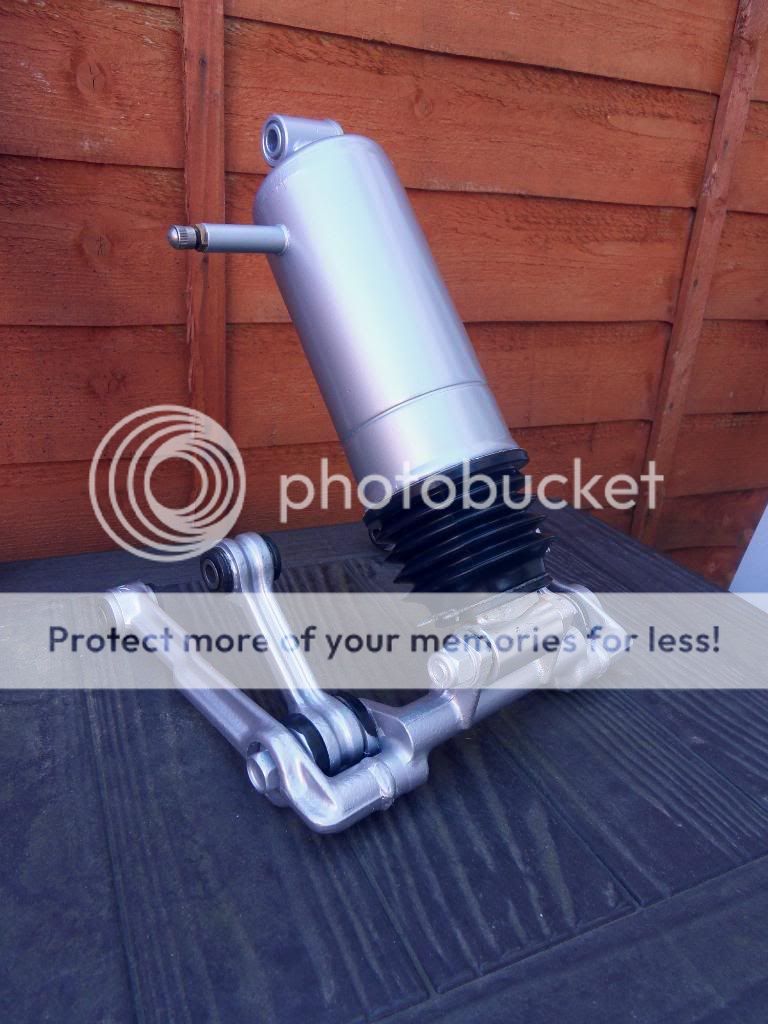
Next up the swing arm which is in brilliant condition so other than a clean up it was on with the same paint.
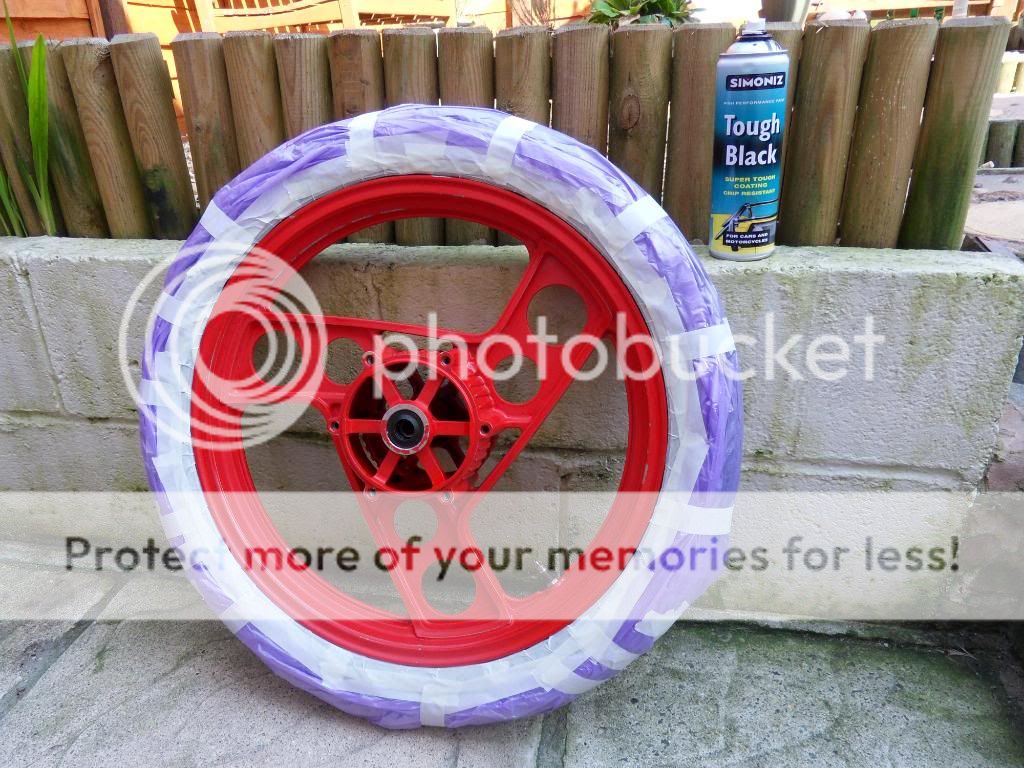
For the wheels I went for a paint by Simoniz called "Tough Paint", I have used it before on a previous bike and it gives a lovely smooth finish. If it's tough enough remains to be seen. Let's hope so.
This paint is very easy to apply.I used a 500ml tin per wheel.
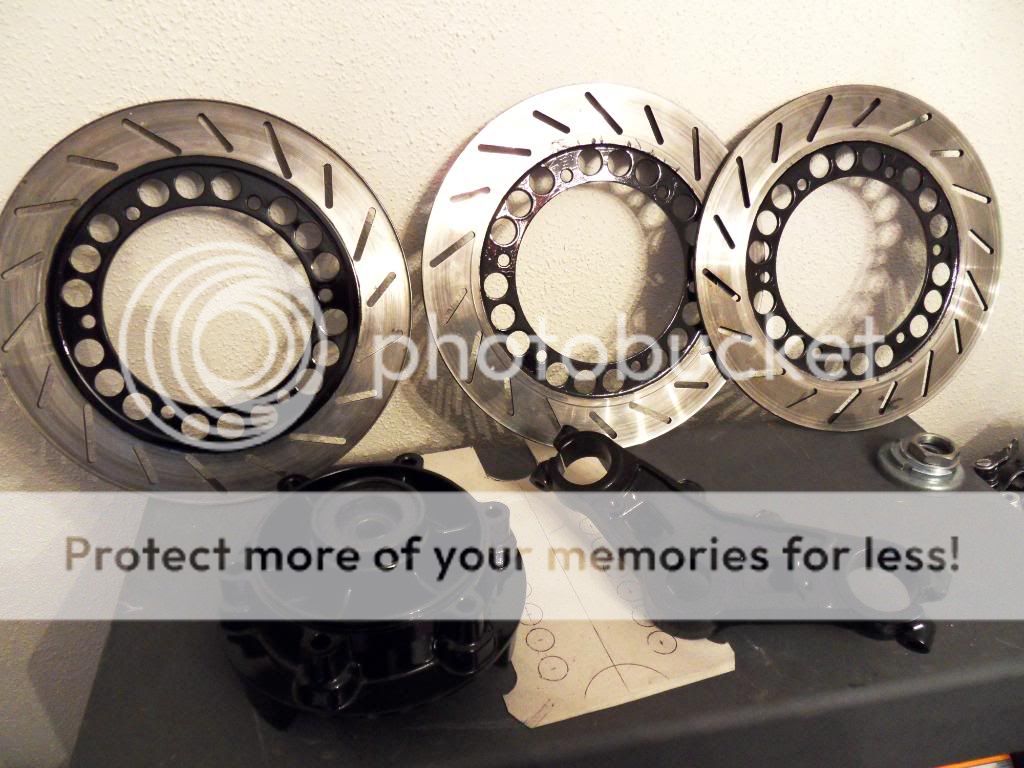
Some other bits I painted with the same paint include the yokes, brake disc centres and cush drive carrier.
Bottom yoke.
Brake discs where a real chore to mask, should look nice on the bike though.
Loads more to paint and rebuild, looking forward to getting the frame back to start putting it all back together.
Have a great Easter.
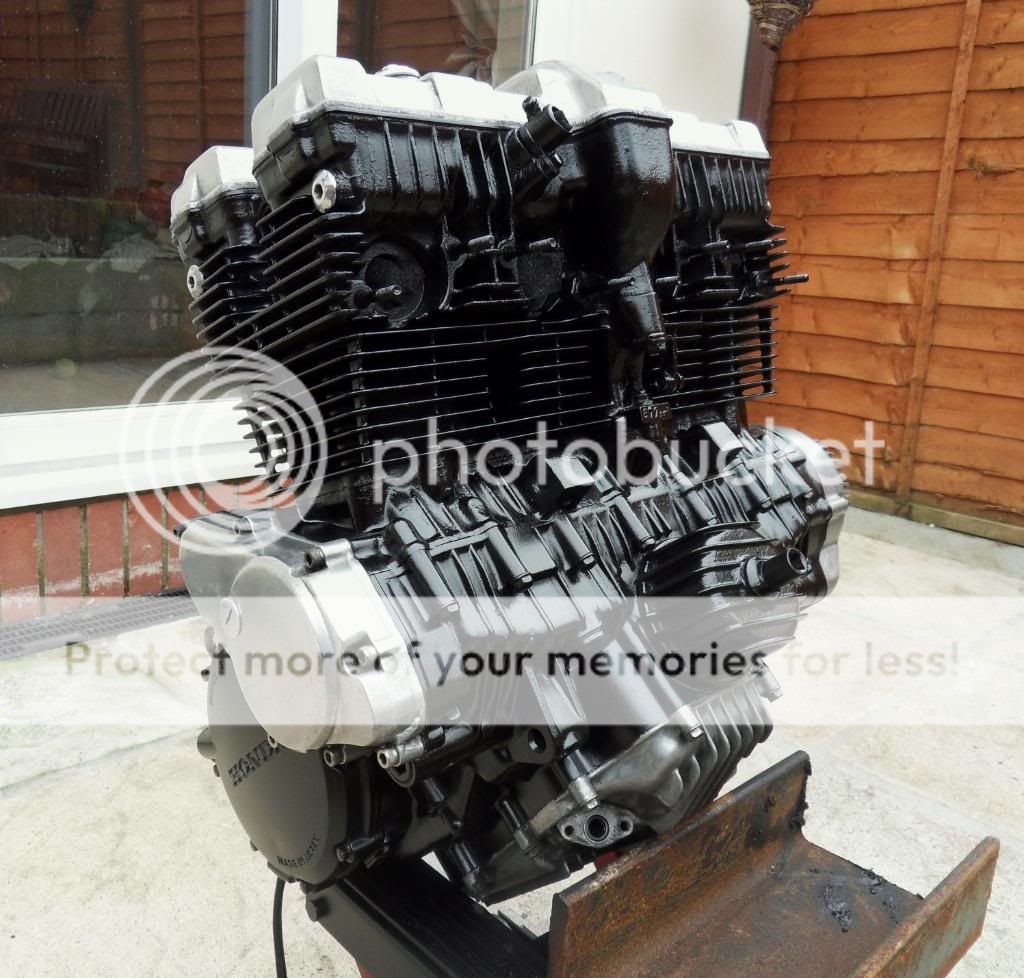
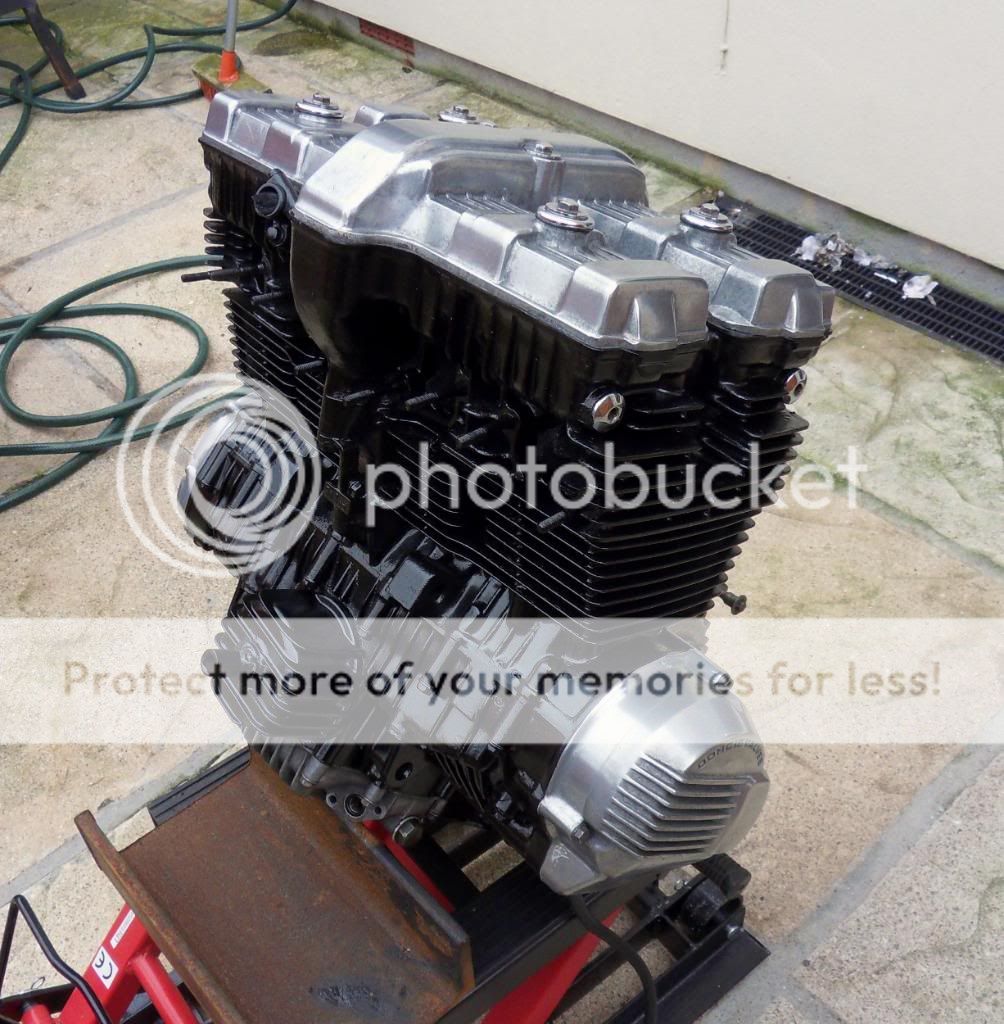
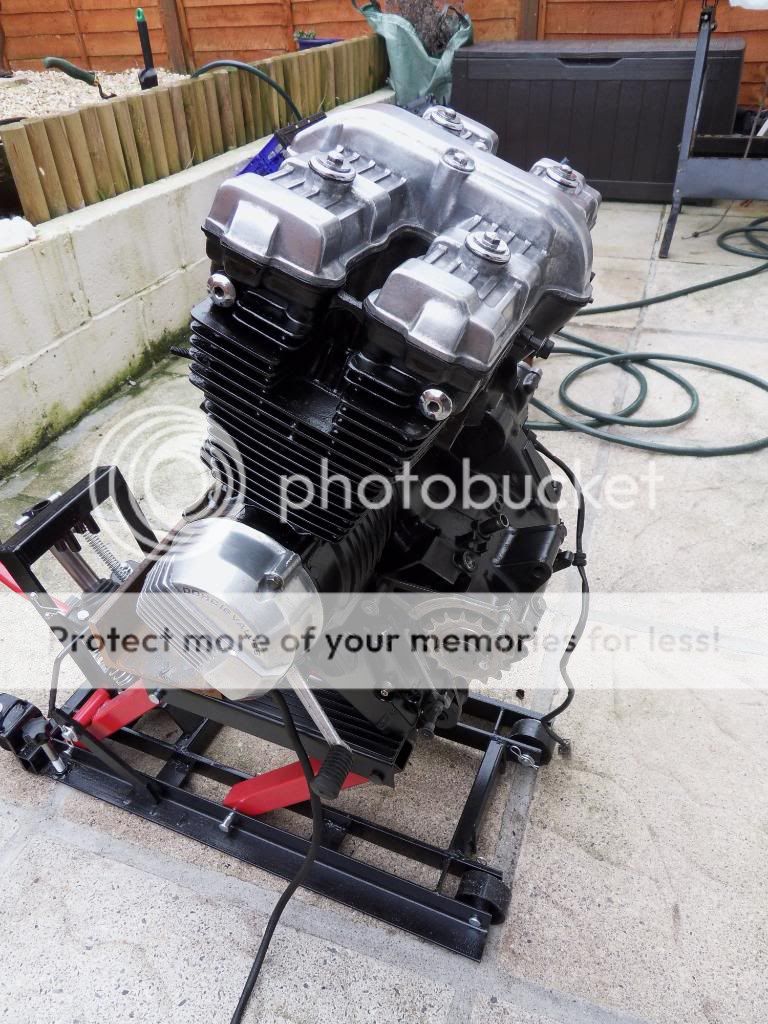
When I had it running for a brief time, the engine on this bike sounded pretty good and ran well with no strange noises or excessive smoke so I am going to run it as is apart from servicing.However it was in need of a spruce up cosmetically.
So I used some wire wool with Autosol to remove the corrosion and discolouration to the alloy. It's not 100% but it has a nice aged alloy look about it.
I got sore fingers trying to get in all the grooves with the wire wool!On the engine block itself I used high temperature satin black spray paint bought again from my trusty hardware store. I used four tins of it but they where only 300ml cans.It went on really easily in between gusts of wind.
Really pleased with how it looks considering I did'nt spend huge amounts of time and money on it.
So the painter says I might get my frame by the end of this week which would be great.The rebuild can then begin. Wahoo!
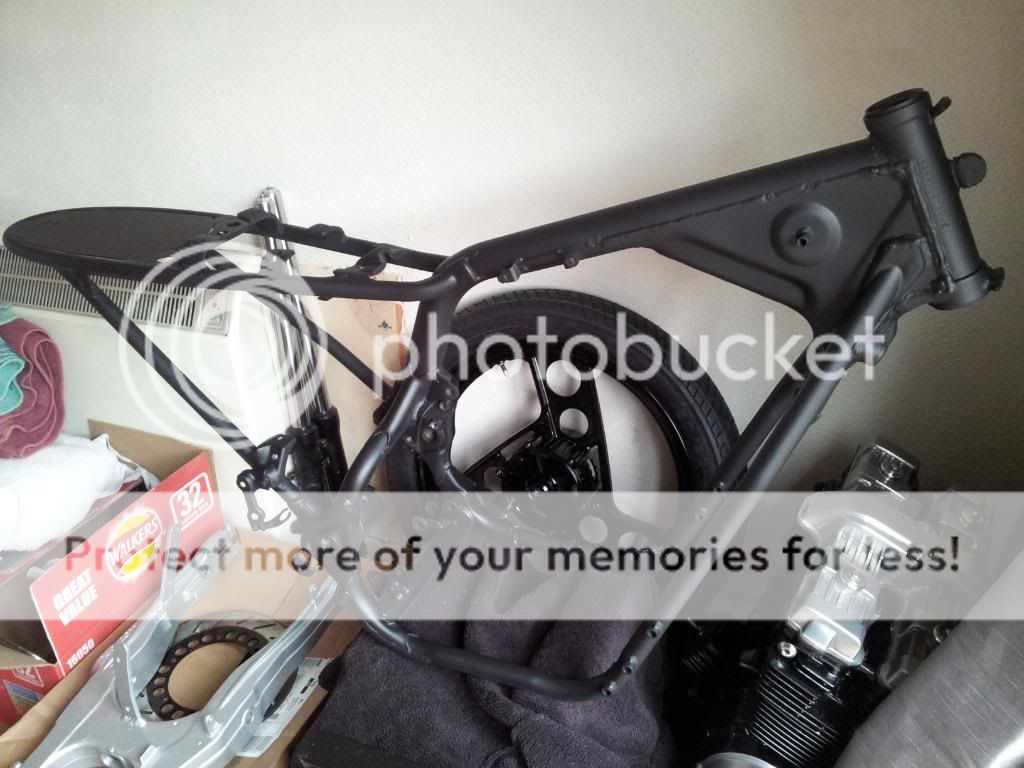
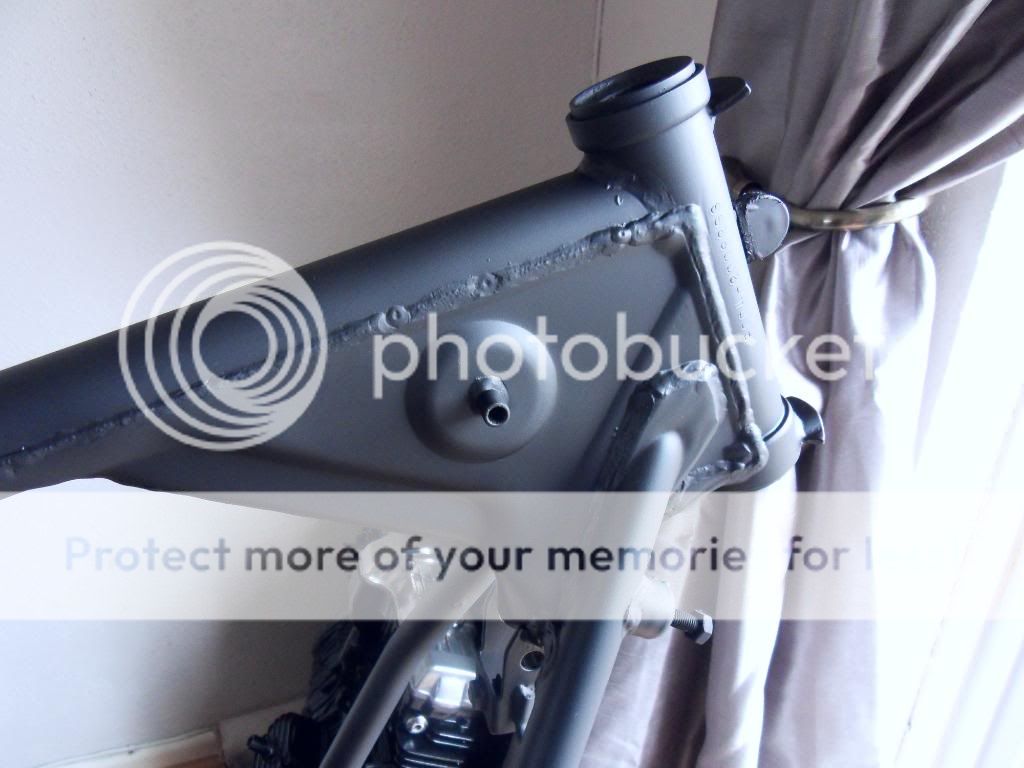
Yeah!...the day has finally arrived. My frame is back from the painter.
Really pleased with the finish. It is satin black but in certain lights it has shades of graphite grey in it which is a good contrast to the gloss black wheels and yokes etc.
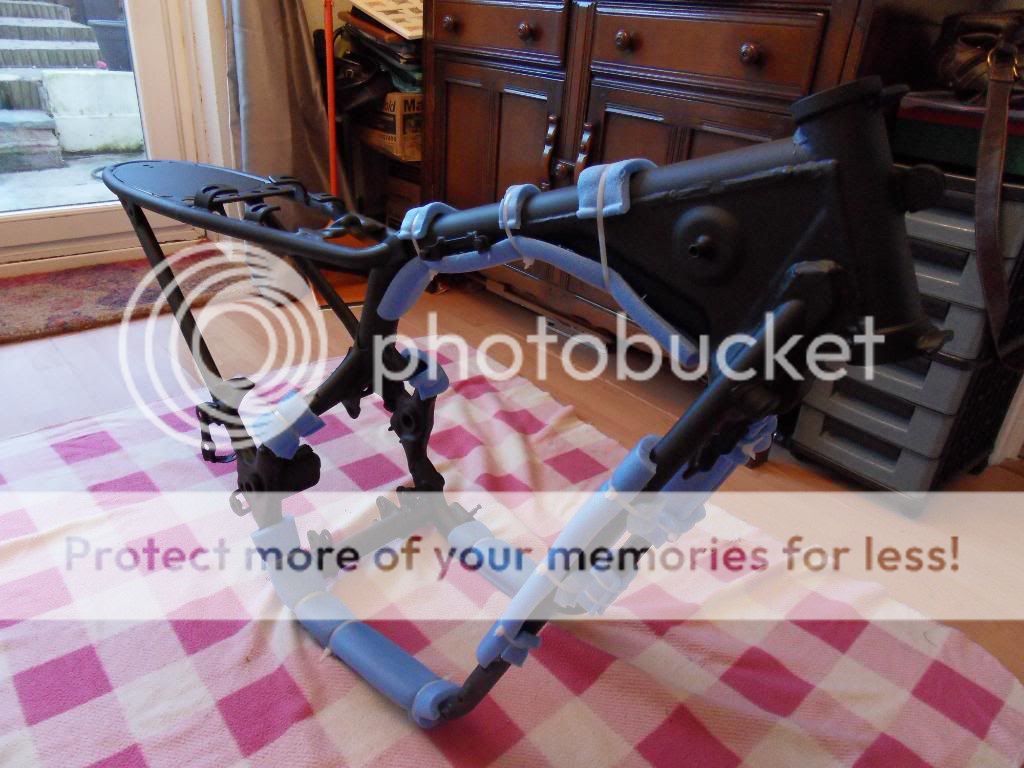
So the first job is to get the engine back in the frame. I have used some pipe insulation to protect the paint when I put it the engine back in.
That's as far as I got as I just remembered I need to paint the engine mounting brackets!Duh.
Tantalisingly close to rebuild now,stay tuned folks.Although I am beginning to think no else is interested due to the lack of comments!! ;D
It is a tight fit. After installing the engine in my CBX way too many times. I find it much easier and with less likelyhood of paint damage to put the frame onto the engine when you have a bare frame.
Lay the right engine on it's side and place the frame over the engine.
It is a tight fit. After installing the engine in my CBX way too many times. I find it much easier and with less likelyhood of paint damage to put the frame onto the engine when you have a bare frame.
Lay the right engine on it's side and place the frame over the engine.
This site uses cookies to help personalise content, tailor your experience and to keep you logged in if you register.
By continuing to use this site, you are consenting to our use of cookies.

")