Down under, an idiot and a 400F

More updates! It's fair to say this project is back up and running :)

Mrs postman had visited me again this morning. In her delivery bag was this package from 4into1. They were brilliant to deal with and they were very helpful and responsive in getting me in to the right package for my needs (was originally looking at the Dyna 5ohm coils but was warned against them as I have clearance issue):


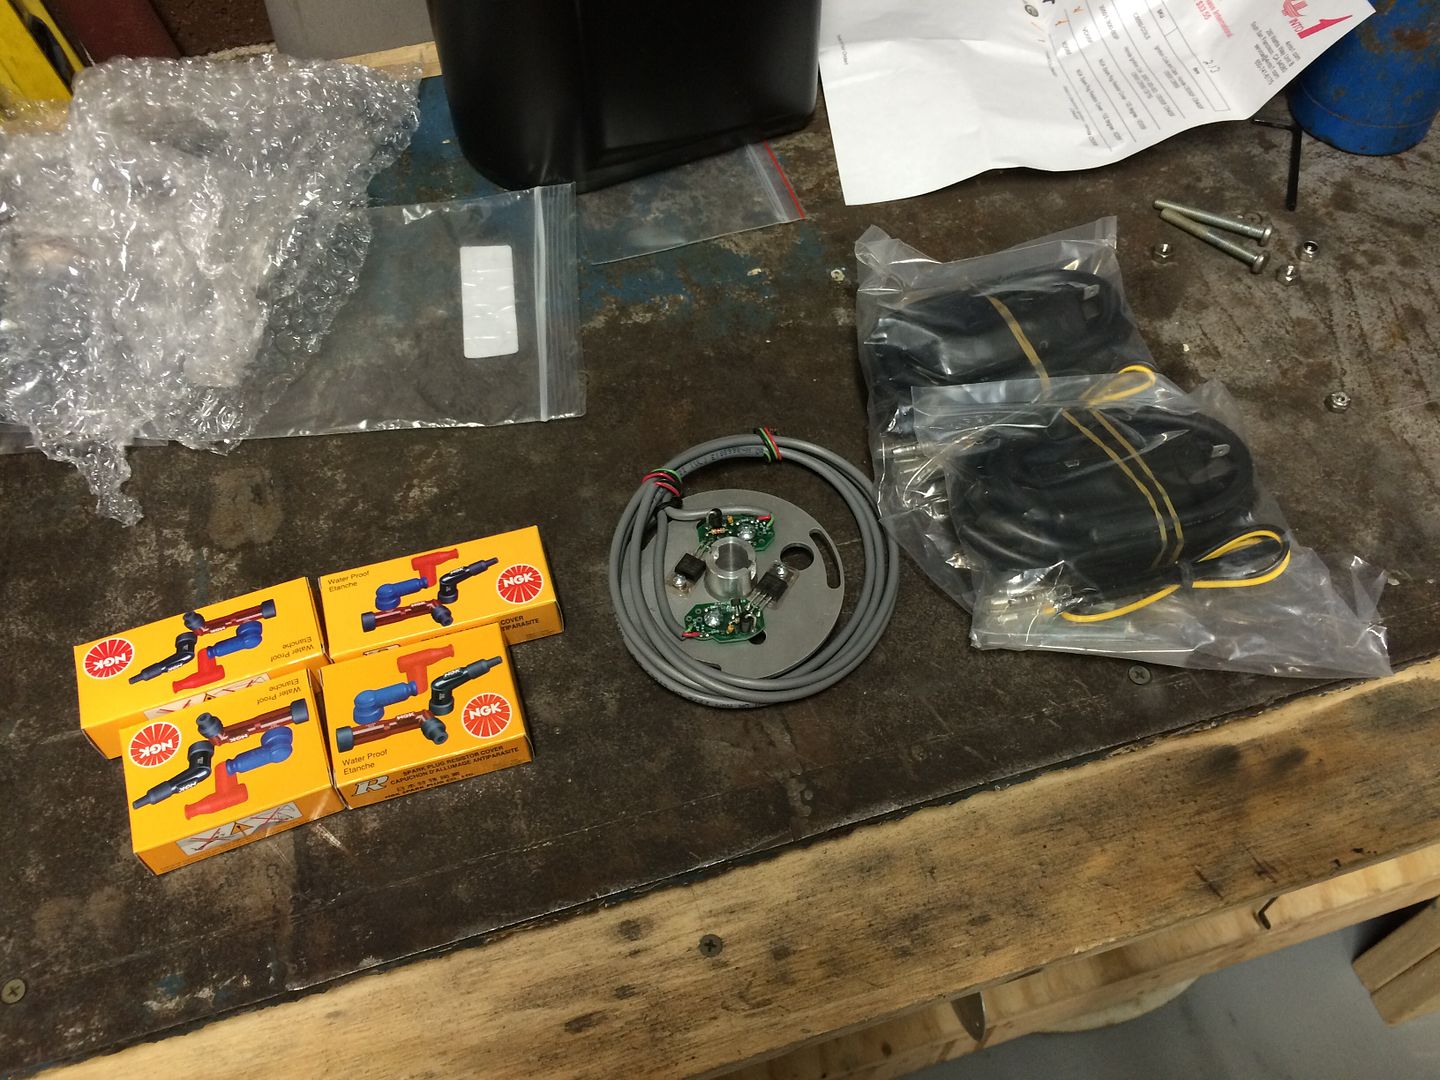
Replacement coils, 5k caps and a Pamco electronic ignition. I'd been in contact with Pete at Pamco and was impressed with his support, which seems to be backed up by those with them already. Very pleased to get the ignition parts crossed off the list. My original coils were so rough looking that I decided to replace them vs trying to get them to work.

Next up I thought I would try to finish off the subframe tray. I'd dropped in to my local fastener supply place on the way home to grab some more stainless hardware for the rec/reg and the RFID receiver. However the RFID receiver needed to be spaced away from the tray slightly.

I'd been having issues for ages now with the lathe and getting a good finish on the parts I'd been making. Today jogged me into remembering the importance of quality stock to turn. Poor finishes were gone as I dropped some Alu into the chuck and drilled and reduced it. It came out smooth and shiny and I was very impressed with how my 1946 lathe was making parts!


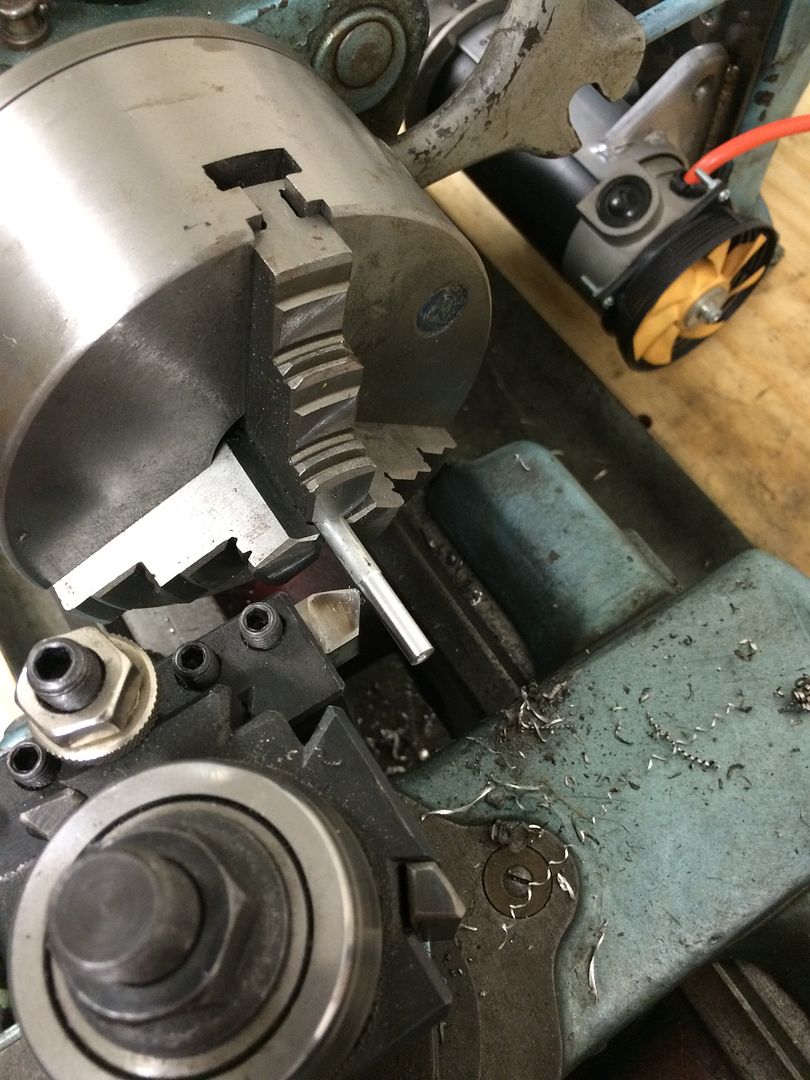
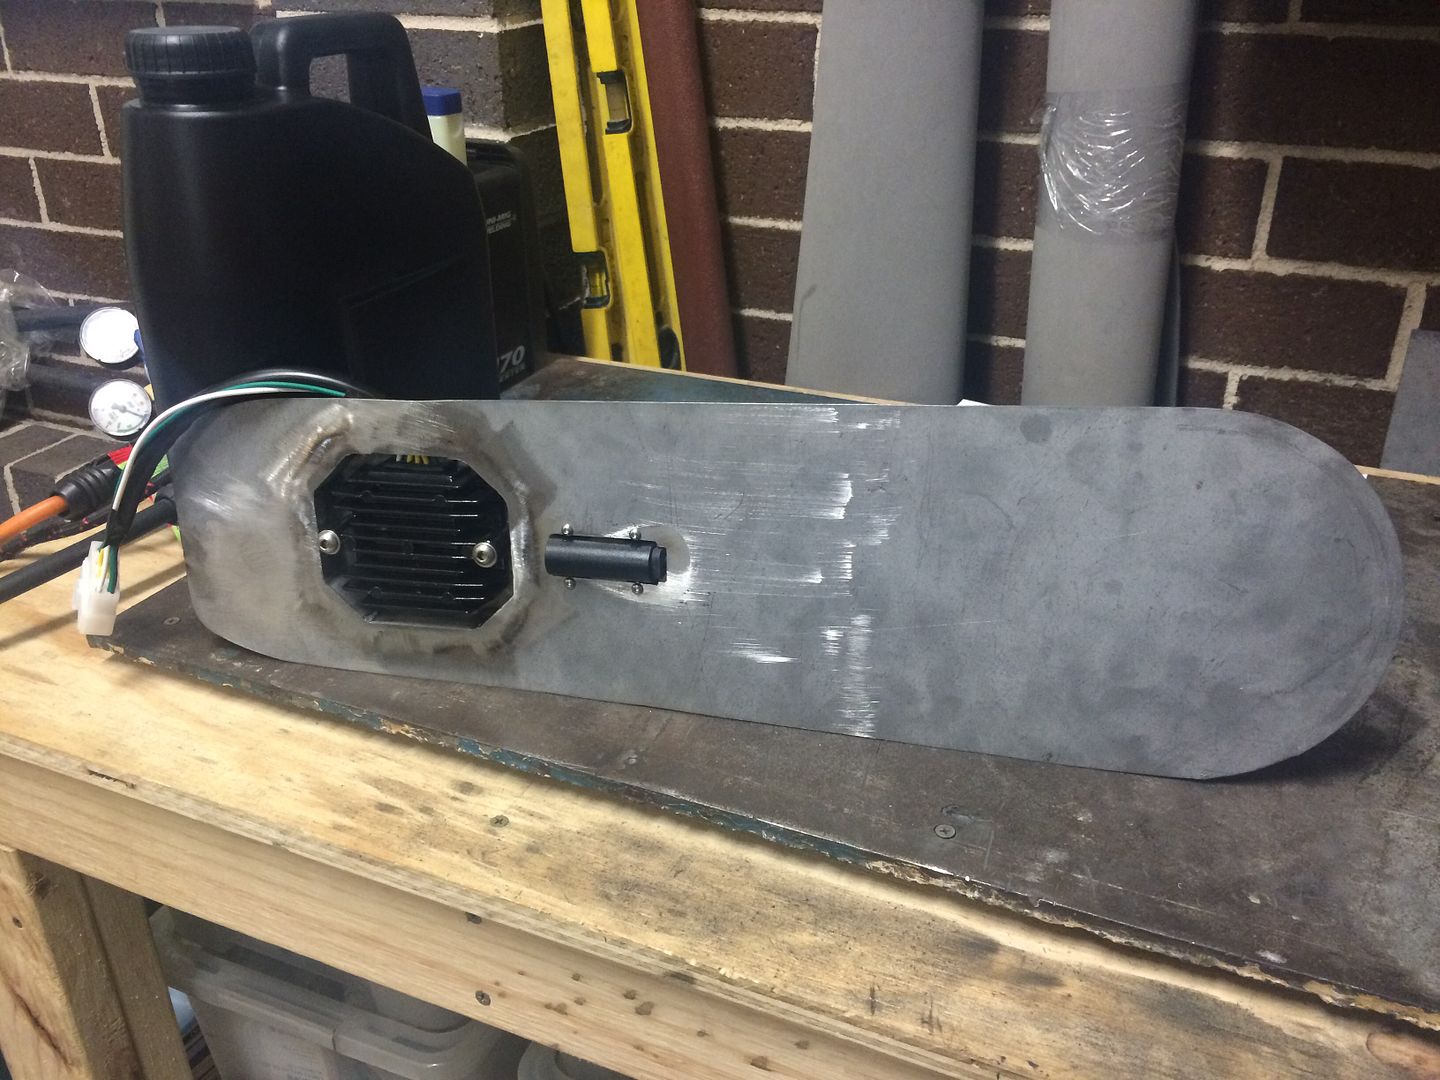
The plan was to make some 6mm spacers to place the RFID receiver in the right place and ensure the cable cleared the tray.

Parted off and ready to install:


Installed:


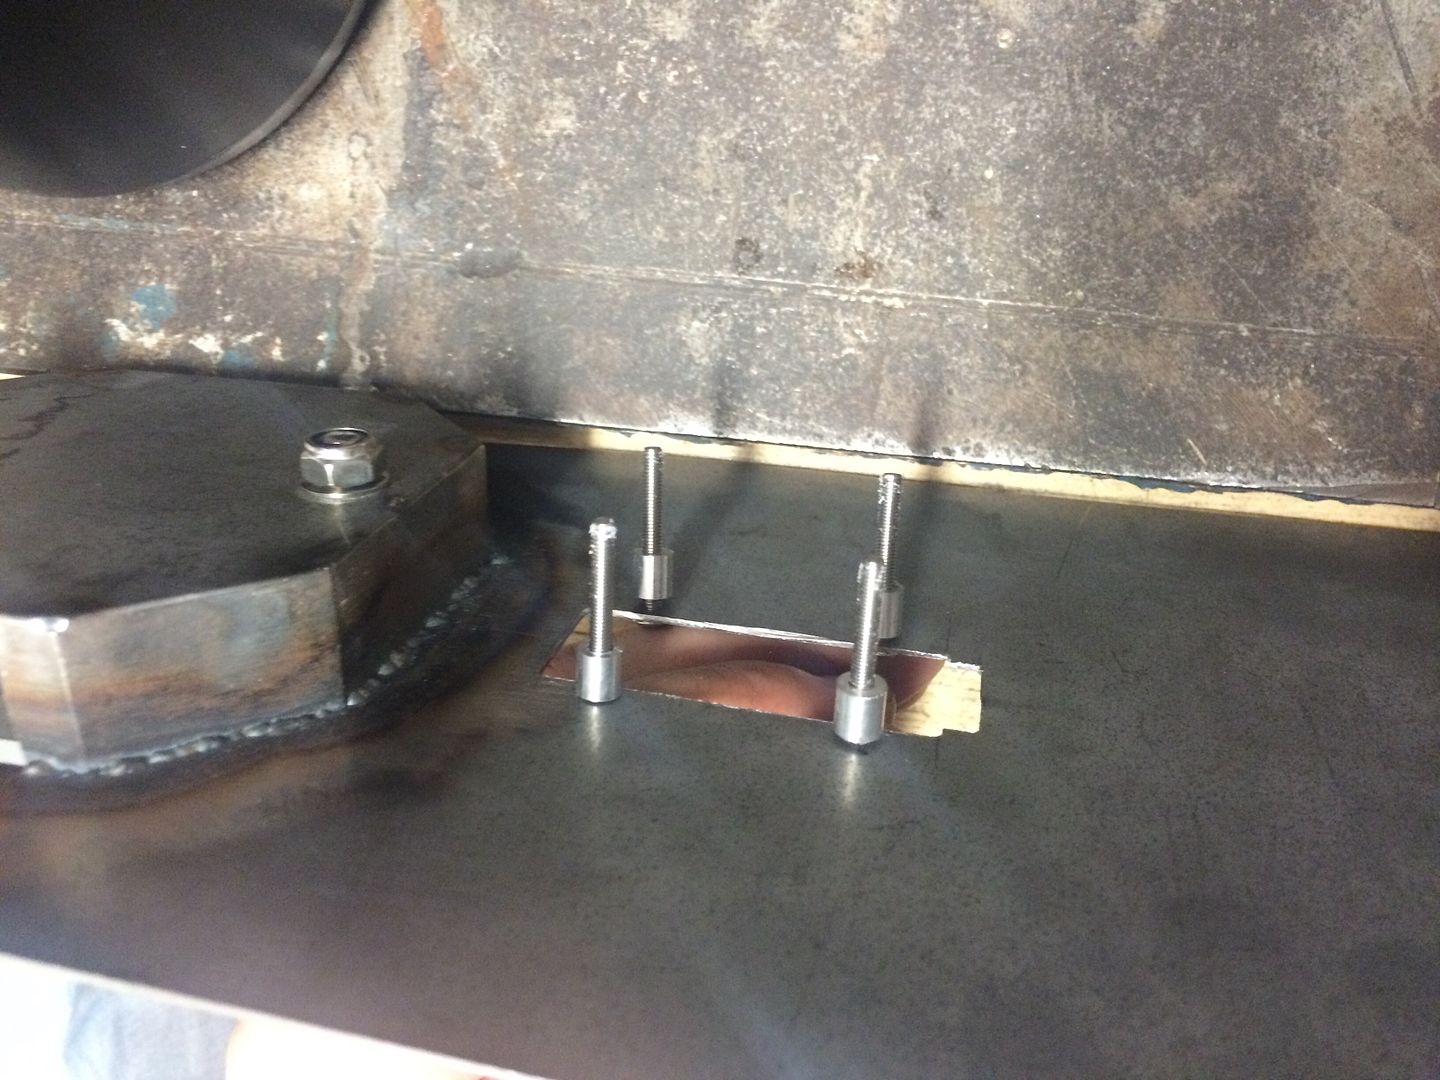
Unfortunately they didn't have any smaller M3 bolts so I will need to trim these down:


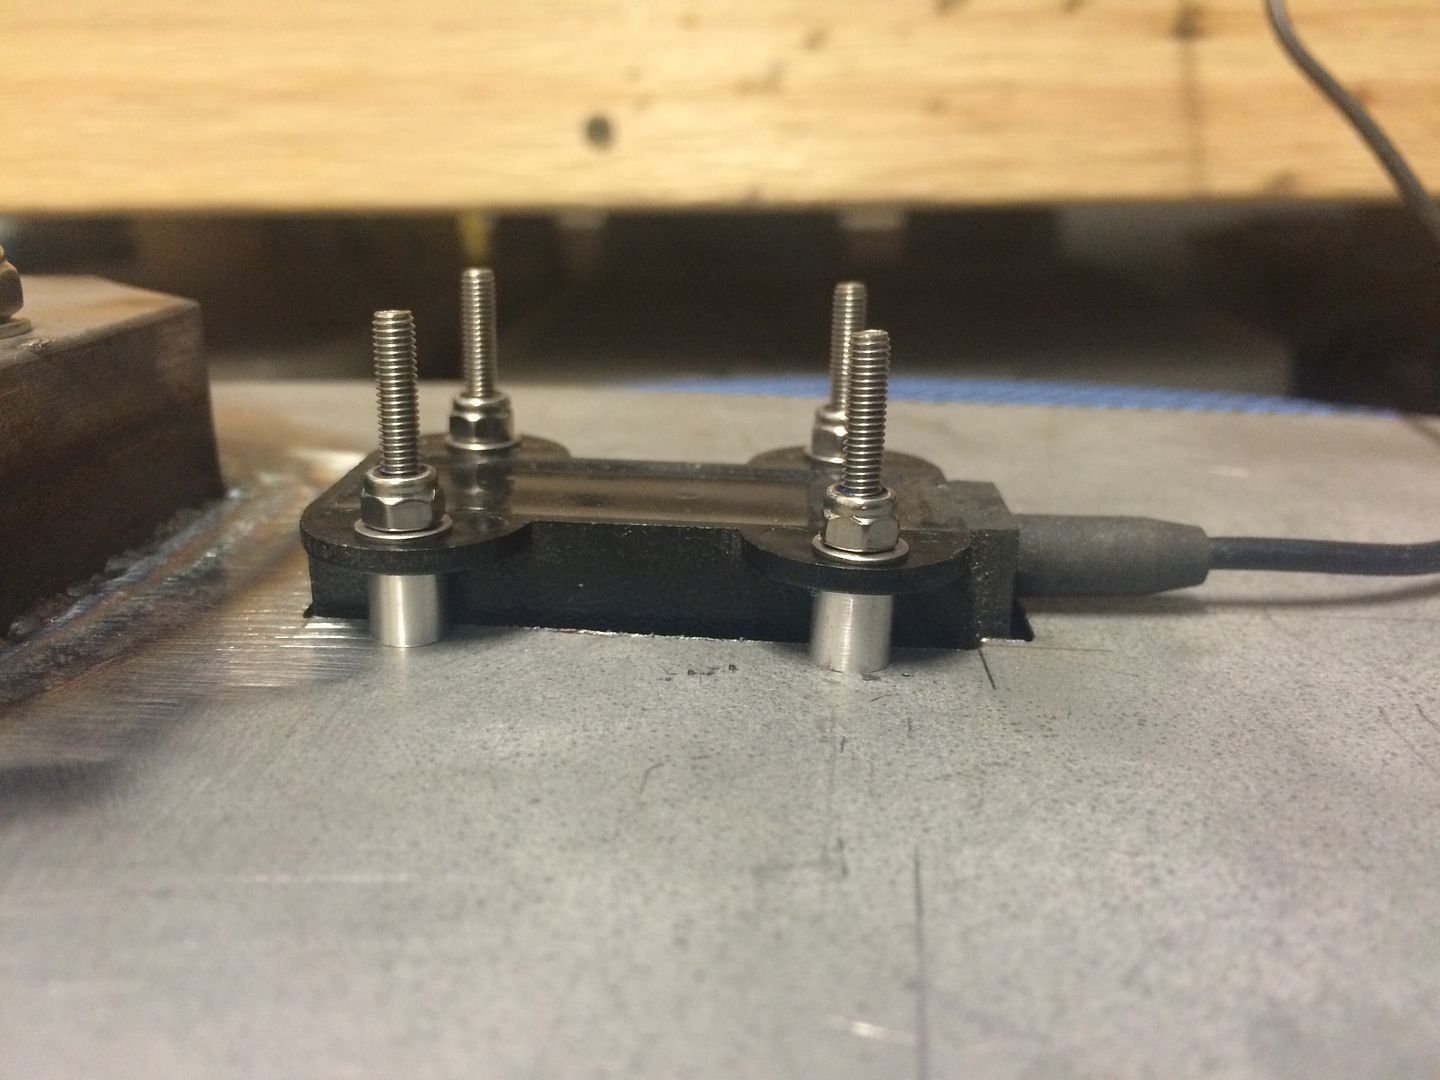
Liking the way it sits below the tray:


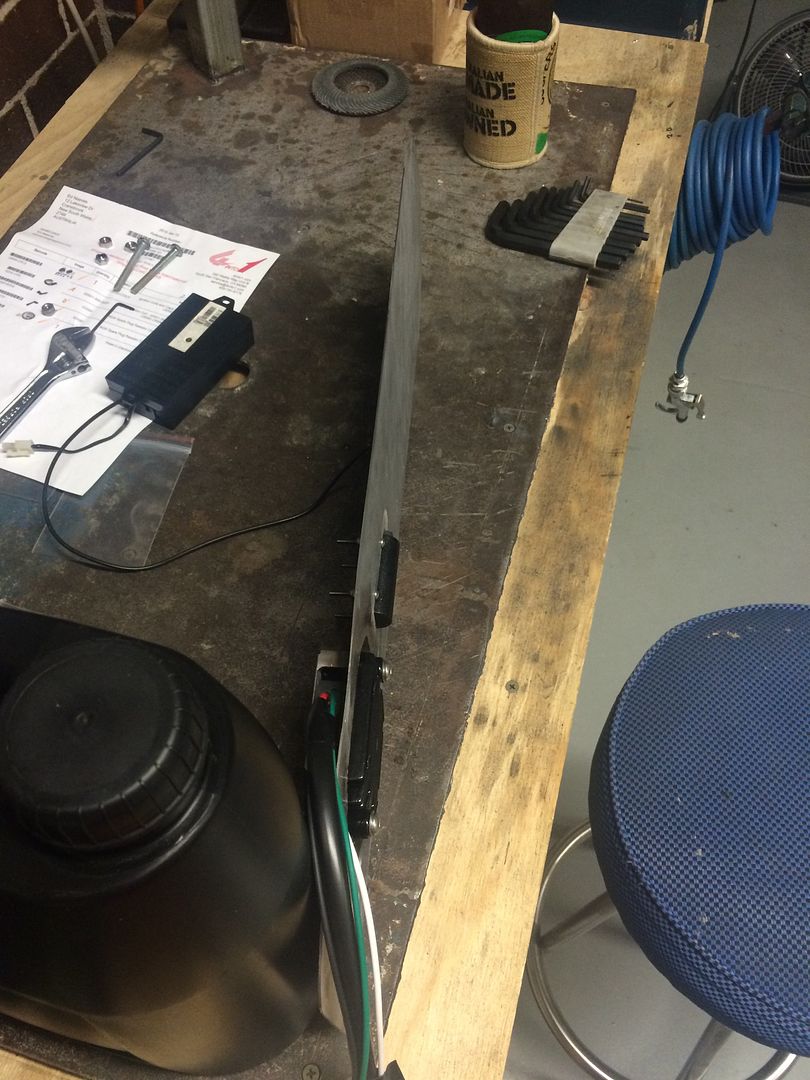
Done with new stainless hardware on the rec/reg too:

 
If only it would levitate, then I would be super impressed with it. Unfortunately it's just a slab of sheet steel with some poorly welded and cut out sections.

Hopefully a bit of paint/powder covers it up a bit as I'm not 100% happy with the hole I cut out (it's not perfectly cut around the RFID receiver) or the edges on the box I welded in.

However it will be underneath the subframe, so probably not the most visible part in the world.
 
Check this build out it's done by waylongway on AdventureRider wlw is an awesome builder you may a few ideas from his work. As always your build is looking great!
 
I've been thinking about how to get the fuel out of the tank and in to the carbs. Pretty essential part of the build as I'm sure you'll all agree.

I was playing around with using copper tube and soldering it in place but moved away from this as 1) it's pretty permanent 2) I was worried the vibrations may not be good for the system.

Add in the fact that the petcock I have was designed for in tank use and I needed a clever fix.

So I bought a couple of specific sized threaded barbed fittings:


The petcock has a 7mm wide throat to each main/reserve entry which narrows down to around 6mm. The plan was to thread the wider portion to 8mm and bolt in the barbs:


There was an issue with this, as the clearance between the barbed fittings was not enough to wind them in:


I was thinking of some ways to fix this and came up with a simple solution by popping the fittings in the lathe and turning the hex section down on opposite ends:


I know it's not going to take as much torque but I was thinking I wouldn't wind them in too hard anyway.

This lead me to a concern. Is the ID of the barb fitting enough to flow enough fuel to maintain the supply to 4 CB400F carbs:


I think I can bore the fittings out a bit to 4mm but will struggle with too much more than that. I would have loved 6mm ID to match the output on the petcock but that's going to take some additional ideas (like making custom brass barbs).
 
Anyone with some knowledge about the ID of the barbs? Is 3.7mm enough diameter to flow enough fuel to the bank of 4 carbs?
 
I would expect that even though the outlet is that large, there is very likely a few points of constriction within the petcock valves.


One way to test is to hook up some plastic tube and put a set amount of water in a vessel above it, and time how long it takes that volume of water to drain through it.
Then do the same test through your brass fitting and time that.
If the volume of water is the same, that will serve as a basis for flow rate.
Although this isn't terribly precise, it should show you in rough terms if if petcock flows more than the barbs do at this point.


Cheers!
 
d1e5edcf27210d1e3370b7a47b2cc465.jpg


I adapted my own guzzler petcock to the stock Honda tank. The stock petcock seemed anemic.
 
Feeling a bit panicked about the barb diameter I took some proactive action to minimise the risk:


Drilled them out to 4.5mm which I assume is going to be fine as I'm pretty sure the stock fuel line for the 400F is 5mm or 1/4" to be more precise. I assume the ID of 5mm fuel line is going to be pretty damn close to 4.5m or a little smaller which makes me feel a little more at ease.

Modified one on left:


Next I committed to the plan by threading the petcock:


Trying to bolt the barbs in, I realised that whilst my barbs would work, my funky plan to wind them in would not, as they kept fouling. Back to my original plan with the barbs which was to reduce the diameter of the hex part down on the lathe, then put a flat on opposite sides. I would love a mill for precision work, but had to make do with a flat file:


All done:


I've been thinking about the cam chain tensioner. My cases wear the damage of a poorly adjusted tensioner and so I've settled on a different solution.

1) a manual tensioner made from a couple of SS bolts and some copper washers (a la TTR400 and 4into1):


Or I've been thinking is there another option that removes the manual part and always ensures the tensioner is properly adjusted but also self adjusts:


Obviously the cases would need some modification but I was wondering if it had even a chance of working?
 
dannywrx88 said:
I want a lathe

I lucked out with mine. It was on the wish list but could never afford it (even entry level). However I found mine as a random eBay auction, was only $350 but had to be gone immediately.

It's a 1946 Hercus (if you're in Oz keep an eye out for them). My lathe was in great nick for its age, however I had to spend another $500 odd getting OEM parts back on it and getting it refurbed for another 70 years of service.

Now has a variable motor (99c eBay treadmill) and RPM live read out.

Along with my TIG welder and pillar drill I reckon it's one of the most valuable items in the shed (other than a grinder).

Setup an eBay notification for cheap lathes and you'll be surprised what you can land. Bear in mind many cheap ones are junk, I was just lucky with mine.
 
Yeah in Sydney so I'll def keep an eye out..
Just goes to show they don't make them like they used to


Sent from my iPhone using Tapatalk
 
eg This:

http://www.ebay.com.au/ulk/itm/111885512168

Could be a bargain as there is a bit of risk with the auction and the fact the seller probably doesn't know how to assess lathe.

Doesn't look like any of those extra parts for that lathe either unfortunately.
Does look like the lathe is largely complete though except for threading gears.
 
dannywrx88 said:
Yeah in Sydney so I'll def keep an eye out..
Just goes to show they don't make them like they used to

You're welcome to use mine if you need. Or happy to come and check out a Hercus if you find one.
 
Back
Top Bottom