
We noticed you are blocking ads. DO THE TON only works with community supporters. Most are active members of the site with small businesses. Please consider disabling your ad blocking tool and checking out the businesses that help keep our site up and free.
You are using an out of date browser. It may not display this or other websites correctly.
You should upgrade or use an alternative browser.
You should upgrade or use an alternative browser.
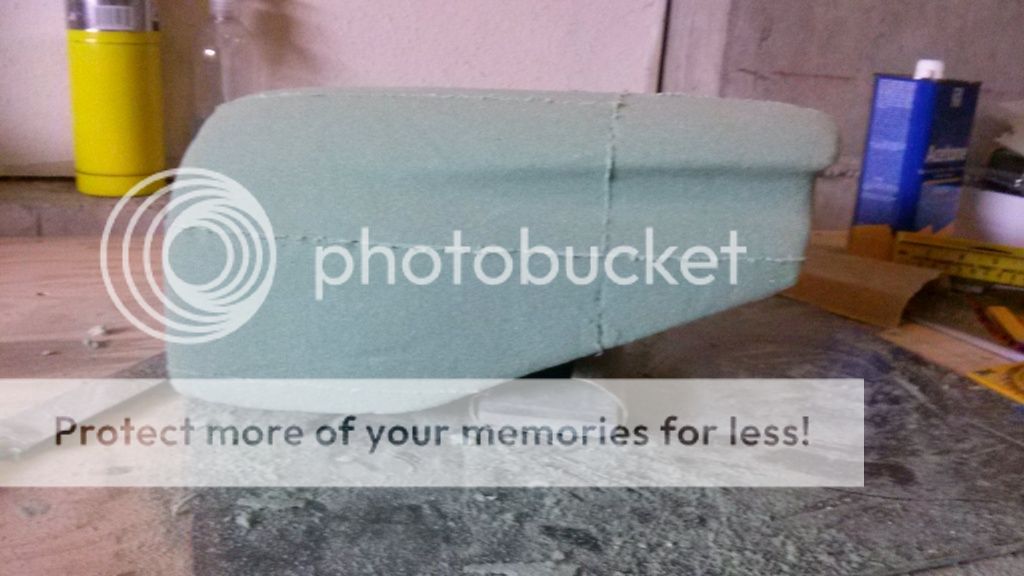
I'm making a tail section
- Thread starter billyp
- Start date
Tune-A-Fish
BOTM LOSER Proudly Deplorable
Re: I'm building a tail section
Is this not going to be a mold for the actual tail section? what would be wrong in mixing up some body filler and coating the whole shebang sand it sumooooth and shoot it with acrylic cure it shoot it with release gel coat and shoot the glass on at the boat shop lol
Yeah I'm not adding anything to this, but I am interested in this stuff
billyp
Been Around the Block
Re: I'm building a tail section
Don't want this to turn into a pissing contest. I'm taking in what EVERYONE is saying and ALL of the advice. I'm going to take it all and with the supplies I have do the best I can. This is a learning process for me, if it doesn't work I'll start over, won't be the first time. It's only foam, resin and fiberglass, I can get more. Everyone does it different because everyone is different, if you go different routes to get the same result how can it be wrong? Sometimes you have to fail in order to succeed. Most of what I love about building is the process, the planning, the learning, the failing, the doing is all part of the process.
Don't want this to turn into a pissing contest. I'm taking in what EVERYONE is saying and ALL of the advice. I'm going to take it all and with the supplies I have do the best I can. This is a learning process for me, if it doesn't work I'll start over, won't be the first time. It's only foam, resin and fiberglass, I can get more. Everyone does it different because everyone is different, if you go different routes to get the same result how can it be wrong? Sometimes you have to fail in order to succeed. Most of what I love about building is the process, the planning, the learning, the failing, the doing is all part of the process.
Tune-A-Fish
BOTM LOSER Proudly Deplorable
Re: I'm building a tail section
Then I would scrap the whole fabric idea and use a known release (I used PB Blaster 8) and foil tape on my tail section) and get a can of cat hair body filler and some thick gloves and give it a massage.
J-Rod10 said:You'll definitely want to put a layer of filler on the foam prior to laying glass on it.
Then I would scrap the whole fabric idea and use a known release (I used PB Blaster 8) and foil tape on my tail section) and get a can of cat hair body filler and some thick gloves and give it a massage.
billyp
Been Around the Block
Re: I'm building a tail section
Even on a one use mold that's going to be detroyed? Seems a little labor intensive, I can understand doing filler if I was going to gel coat it and pull a mold off of it, but not in my case. Couldn't I just lay it up right on the foam?
J-Rod10 said:You'll definitely want to put a layer of filler on the foam prior to laying glass on it.
Even on a one use mold that's going to be detroyed? Seems a little labor intensive, I can understand doing filler if I was going to gel coat it and pull a mold off of it, but not in my case. Couldn't I just lay it up right on the foam?
Tune-A-Fish
BOTM LOSER Proudly Deplorable
Re: I'm building a tail section
That makes perfect sense if you do it for $$ if you do it for the hobby or to kill time meh why not, you can see what the final might look like??
I really should not be here I just think this is something I would like to try.
billyp said:Even on a one use mold that's going to be detroyed? Seems a little labor intensive, I can understand doing filler if I was going to gel coat it and pull a mold off of it, but not in my case. Couldn't I just lay it up right on the foam?
That makes perfect sense if you do it for $$ if you do it for the hobby or to kill time meh why not, you can see what the final might look like??
I really should not be here I just think this is something I would like to try.
billyp
Been Around the Block
Re: I'm building a tail section
I have some surfacing veil (think that's what it's called) would that work in that area as the first layer?
J-Rod10 said:I would go over those areas first with a fine mesh. Then lay it the way I posted. It'll give you multiple pieces through your recessed area. It's tough to get one piece in an area like that. The material wants to pop up around the edges.
I have some surfacing veil (think that's what it's called) would that work in that area as the first layer?
billyp
Been Around the Block
Re: I'm building a tail section
Ha! Fish, you're fine, if you want to try it, do it!
Tune-A-Fish said:That makes perfect sense if you do it for $$ if you do it for the hobby or to kill time meh why not, you can see what the final might look like??
I really should not be here I just think this is something I would like to try.
Ha! Fish, you're fine, if you want to try it, do it!
Re: I'm building a tail section
I haven't used the type of foam you are using, however, how heat resistant is it? The filler gives you a layer between the glass and foam that can be waxed to make it easier to get out, as well as acting as a heat shield.
Epoxy can get hot enough while curing to catch fire/melt foam.
Yes on the veil.
Re: I'm building a tail section
Lots of good advice here but some of the dissenting opinions seem curious to me. Perhaps it will be helpful to consider a couple of things. First, the mold-less composite construction you are intending is in some very important ways very different from classic fiberglass component construction done in molds. Sometimes the materials are the same, and sometimes the techniques can be the same. But to gloss over the fundamental differences and pretend that good advice for one is good for the other would be some very poor help. The construction you plan to do actually is something in between the two schemes. Mold-less composites are just that: composites. You will be starting out that way, but if you are removing the foam, then there is no composite structure. However, the doing of it will involve much the same process. From a practical view, the most important aspect you will face is the fact that the final surface you create will be just that; created. This is comprehensively different that building parts in molds, because with molds, the mold creates the finish surface. This may seem like splitting hairs, but you will see that it is far from it. With mold-less construction, every aspect of your work will take with it the notion that you, at the end, will be sculpting that final surface from scratch despite being based on the form you have made from foam (or anything else for that matter). This causes you to make your foam form slightly smaller than what you intend as a finished product, and while this may not be especially critical with your bodywork, it will nevertheless be the case.
Creating the laminates may be much the same on simple or plain forms, but it looks like your shapes are fairly severe. Keep in mind that at the end, you will be grinding, cutting and sanding these shapes and surfaces into their final form. Were you using a mold, you would have some marked advantages in that you likely would have started with sprayed in gelcoat which flawlessly (hopefully!) follows the mold exactly. This also helps round out all the edges and corners making it substantially easier to form the comparatively stiff and springy glass fibers over them. You also, with a mold, usually working in a concave shape which tends to be less aggravating in keeping the laminates holding the shape of the mold. Working on the "outside" of the form as you will be means that you generally have your work cut out for you. Don't let this sound discouraging, hopefully thinking about the task from this perspective will make it a bit easier when you actually do it.
Your idea of making paper patterns for your laminates is excellent. The totally not stretchy paper will help you see where you will have the most trouble with the much stretchier cloth and mat.
It is very true that epoxy (just like polyester) is an exothermic chemical reaction which generates heat related to the rate of the reaction. What this means to us is that the hotter the activated resin gets, the faster the chemical reaction will take place, which will generate more heat, which will speed up the reaction which - well you get the idea. In practice, this phenomenon usually only becomes important when you have mixed large quantities of reactants - and then only when they are contained in a volume where the heat generated goes more into warming up the mix rather than leaving the surface. In other words, the thin, high surface areas of the parts you make don't (generally) get hot enough to make a runaway reaction. This WILL happen in your mixing cup, so make small batches. The green florists foam (at least what I have used) will not melt from heat or solvents from the epoxy.
Another bit of advice: Mix your epoxy accurately!!!! Most mix by volume, some by weight. Be accurate. The difference here between epoxies and polyester resin in this regard is substantial. Epoxies are vastly more sensitive to the correct proportions. You can not increase or decrease the working time like you can with polyester without doing very bad things to the end result. Also be very meticulous with the actual mixing. Scrape the sides and bottom of your mixing cup like you won't miss a single molecule. What you do not physically yourself blend will not get mixed, and you will have bits of part A and part B that will remain liquids forever - not what you want in your finished parts.
Regarding the rather severe corners and shapes you look to have, my advice is to consider XB's advice of using sticky not-very-liquid almost kicked epoxy to glue your laminates over the more severe shapes. Most epoxies are quite a bit more frustrating - especially for the less experienced - when thin for gluing down those springy glass fibers than most polyesters.
Lastly, wear gloves religiously and be clean and careful to not allow un-reacted materiel to contact your skin. While modern epoxies are very safe, there is still a tiny risk of becoming allergic. Back when this was new technology more than a few guys became so allergic they could not even go back into the room they were building their airplane in and had to abandon it forever.
billyp
Been Around the Block
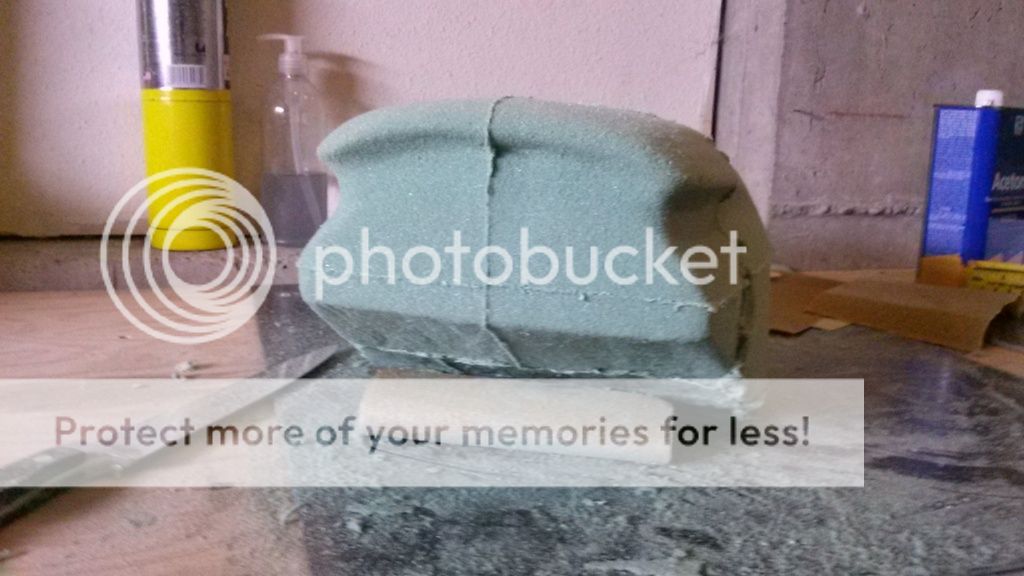
Aaaandddd change 3. Sometimes I think I'm my own worst enemy. I liked the first design but the squareness didn't fit with the tank, maybe on another bike some day. Tried to change it a bit but I just ended up turning it into a turd. Glued up some more foam and shaped another tail but alas, the more I stared at it the more it didn't work.
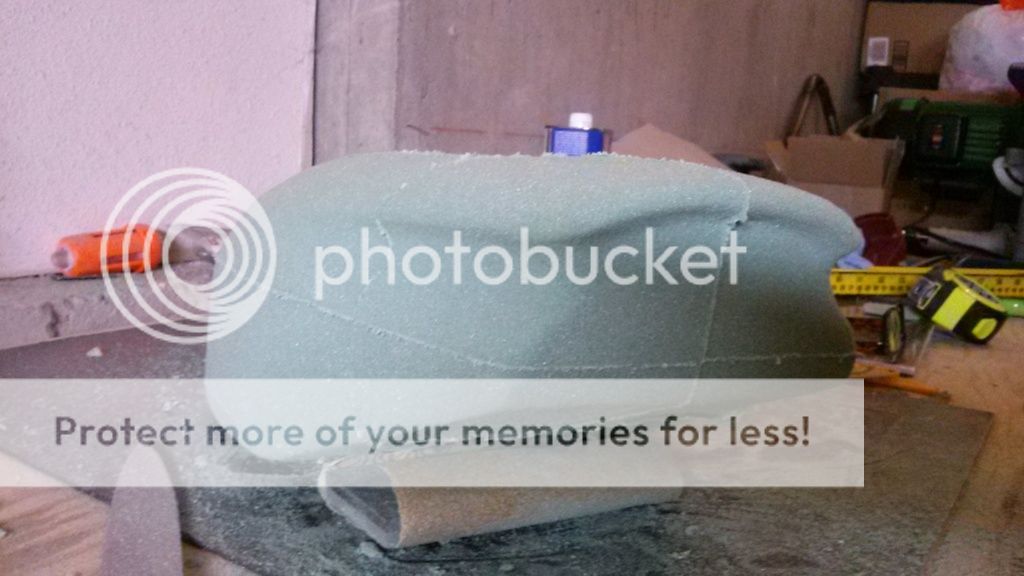
Third times a charm? I like the I initial shape of it, now just need to find tune and hopefully not ruin it ;D
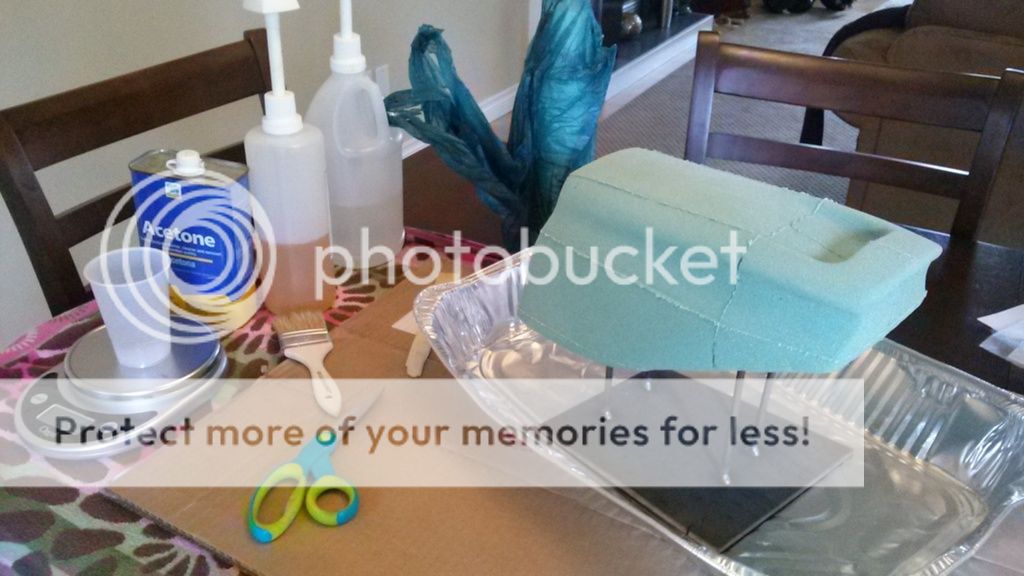
Days off coming so I'll get to laying some fiberglass soon. Pics to follow.
Third times a charm? I like the I initial shape of it, now just need to find tune and hopefully not ruin it ;D
Days off coming so I'll get to laying some fiberglass soon. Pics to follow.

billyp
Been Around the Block
So I learned a valuable lesson yesterday, plain weave cloth sucks when you're trying to lay it on anything that has shape.
Being a novice at fiberglass, when I ordered my supplies, I just went by weight of the cloth with the understanding that the lighter the cloth the more it will conform
to complex shapes. Turns out it's also the weave that has a lot to do with it, plain vs twill in my case. I was able to get a single layer on the whole tail but it was a challenege to say the least. The cloth laid down great on the flat areas but when it came to going around a corner or over the back of the tail it needed tons of help. I finally just cut it into multiple pieces just to get it covered. I have some 6 oz twill left over from a project that I'll try when I get home from work tonight, otherwise I'm off to the fiberglass store on Monday.
Even though it was very frustrating and I didn't get nearly as far as I wanted, I feel I've learned a valuable lesson that will help me in the future. I think that's what building these on your own is all about, the end result is very rewarding, but the journey to get there is sometimes just as much if not more rewarding.
billyp
Been Around the Block
J-Rod10 said:Sand it before you lay the twill on it.
That's what I thought, thanks


