Making something new, old again. '96 Nighthawk 750 hacked and fork swapped

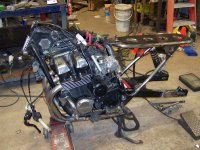
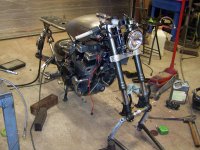
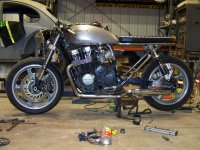
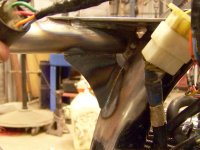
Tonight it felt like I started out by going backwards. I remembered that I still hadn't made a steering stop, which is just a simple tab underneath the head tube, but required taking the forks off repeatedly to get everything right. I think they went on and off about 6 times.

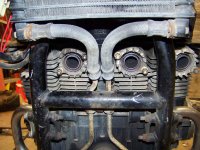
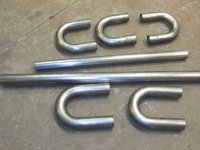
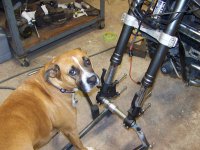
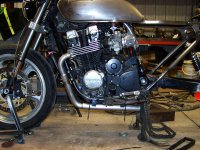
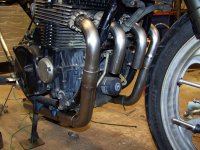
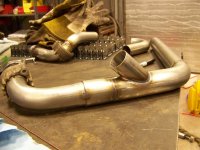
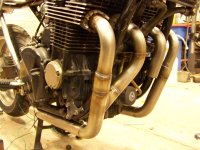
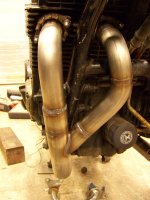
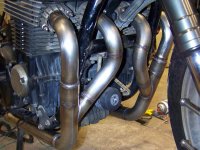
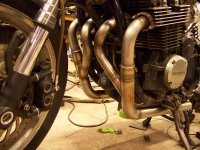
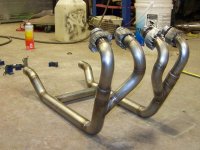
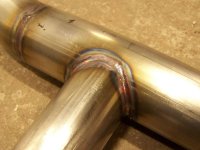
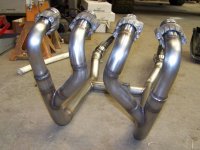
Once that was done I got to work on cutting the flanges off the stock exhaust in order to start on the new stainless pipes. I was a little surprised to find that the stockers were double walled. Guess the new stuff is really gonna flow a lot better! Right about the time I got them all cleaned up and ready to start measuring, my shop dog decided it was time to go inside and started getting in the way, nudging me away from the bike.
 

Attachments

  • 117_3705-R.jpg
    117_3705-R.jpg
    146.5 KB · Views: 286
  • 117_3709-R.jpg
    117_3709-R.jpg
    132.9 KB · Views: 288
  • 117_3713-R.jpg
    117_3713-R.jpg
    84.5 KB · Views: 261
  • 117_3711-R.jpg
    117_3711-R.jpg
    123.4 KB · Views: 269
So here is how she sits for the night. Tomorrow I'll be getting started on the exhaust after I get some actual paying work done. Hopefully there will be something exciting to see.
 

Attachments

  • 117_3717-R.jpg
    117_3717-R.jpg
    133.4 KB · Views: 292
Well I finally got through all the real work (the stuff that pays) and got to spend a little time working on the new exhaust for this thing. It's all 304 Stainless, and so far it's coming together pretty well. The upper pipes are all 1.5" and the 2 outside ones step up to 1.75 just after the first bend. The plan is to have the 2 inner pipes merge into the outers and run down both sides to the mufflers with a cross pipe under the belly somewhere.
 

Attachments

  • 117_3752-R.jpg
    117_3752-R.jpg
    144.9 KB · Views: 275
  • 117_3753-R.jpg
    117_3753-R.jpg
    129.9 KB · Views: 276
  • 117_3759-R.jpg
    117_3759-R.jpg
    62.3 KB · Views: 290
Haven't had a lot of time lately, but I've been trying to sneak in an hour or 2 here and there. Tonight I got to spend a little more quality time with the exhaust. Got the right side merge finished up, which was quite the tedious process. Getting everything to fit perfect takes a lot of fitting, grinding, sanding, fitting, marking, sanding, fitting, tacking, checking, welding... I'm pretty happy with how it's coming together though. Just need to make the other side match now!
 

Attachments

  • 117_3769-R.jpg
    117_3769-R.jpg
    102.1 KB · Views: 286
  • 117_3770-R.jpg
    117_3770-R.jpg
    113.6 KB · Views: 271
  • 117_3771-R.jpg
    117_3771-R.jpg
    92.3 KB · Views: 760
  • 117_3772-R.jpg
    117_3772-R.jpg
    155.8 KB · Views: 283
Got back in the shop for a bunch of hours tonight. This exhaust stuff is time consuming. I finally got it all done though. All that's missing is the hanger bracket that'll attach the H pipe to the bottom of the motor to support the weight.
 

Attachments

  • 117_3779-R.jpg
    117_3779-R.jpg
    136 KB · Views: 270
  • 117_3778-R.jpg
    117_3778-R.jpg
    123 KB · Views: 276
  • 117_3776-R.jpg
    117_3776-R.jpg
    126.5 KB · Views: 258
  • 117_3775-R.jpg
    117_3775-R.jpg
    119.6 KB · Views: 308
Being that this is the first time I've attempted to build a complete exhaust from stainless I'm really happy with the result, and thankfully most of the ugliest parts happened to be in areas that aren't visible.
 

Attachments

  • 117_3784-R.jpg
    117_3784-R.jpg
    97.3 KB · Views: 718
  • 117_3787-R.jpg
    117_3787-R.jpg
    101.3 KB · Views: 282
  • 117_3788-R.jpg
    117_3788-R.jpg
    74.5 KB · Views: 269
Really nice work. I know it's a bit late to say this but don't Honda 4s typically work better with 1 and 3 paired and 2 and 4, or was it 1 and 4 and 2 and 3? It relates to crank phasing and more importantly when each cylinder fires.

For the street it's less important, but for the next one you build it's worth checking out. Nice fab.
 
Looks great. I think a light clean up with a soft wheel and some flitz and steel wool. You might just surprise yourself how clean that really is.
 
I was actually planning to ask what the best way to shine up the stainless is. what do you mean by a soft wheel? as far as performance goes on this one it took a backseat to packaging. I needed as much clearance as possible for the front tire.they're simply isn't room to criss cross the pipes
 
WOW NICE! Looks very familiar. Unfortunately I can't weld so I have to give credit to the guy in the pic Logan describes as a hack.

ynyjaqu5.jpg
 
Been struggling to make progress lately, but I have gotten a couple of the little things checked off the list. Finished off wiring all the lights last night, and got everything working. The tail light is exactly what I was looking for. It's nearly invisible when it's off, and when it's on it's blinding bright. I had a really hard time getting a shot of it lit. The built in turn signals are pretty small, but I chose to have a bigger taillight instead of bigger signals. My last bike didn't have them at all, so this is still a big upgrade.
 

Attachments

  • 117_3796-R.jpg
    117_3796-R.jpg
    86.4 KB · Views: 287
  • 117_3794-R.jpg
    117_3794-R.jpg
    89.3 KB · Views: 268
  • 117_3793-R.jpg
    117_3793-R.jpg
    115 KB · Views: 294
Pretty straight forward. It's just 4 wires. The only "different" part is that the brake light only has one wire, and if you want it to dim so you can use it for brake and tail you have to get this little resistor harness that runs inline. Basically you have the 2 wires for brake and tail coming in one side from the bike, and a single wire going to the light on the other side. It's stupid simple. If you can wire any light you can wire this one.
 
So I started going over my to-do list and it's getting seriously short. Hoping to have it up and running in the next few days. I had been meaning to add a couple gussets to the seat frame to reinforce it but kept forgetting or putting it off. Finally got those done last night. Also spend a little time cleaning up the new pipes with a scotchbrite pad. It's hard to tell in pics, but it came out really nice and smooth. Cant wait to get this thing up and running and put some real color in that stainless.
 

Attachments

  • 117_3797-R.jpg
    117_3797-R.jpg
    90.3 KB · Views: 265
  • 117_3803-R.jpg
    117_3803-R.jpg
    96.1 KB · Views: 308
  • 117_3804-R.jpg
    117_3804-R.jpg
    98.5 KB · Views: 302
Back
Top Bottom