Venderbroeck
New Member
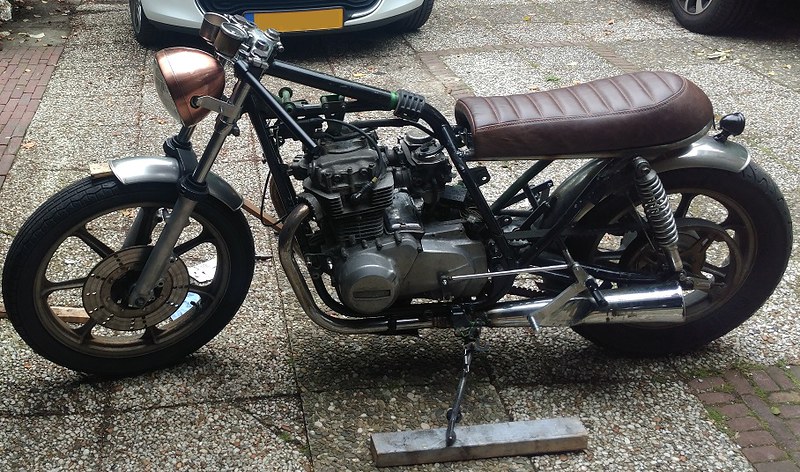
So, more work has been done on the little kz440. It's been a while so I figured it was time for some new updates. The fact that I had lowered the front forks by sliding them throught the triples was starting to bother me more everytime I saw the stubby ends of them poking through the top yoke, so I thought it was high time to do something about that. First I redid the clearance test with the front forks fully collapsed with the engine present as carbsandcilinders wisely suggested earlier. The front forks where still slid through the triples as much as before (+- 1 inch or so).
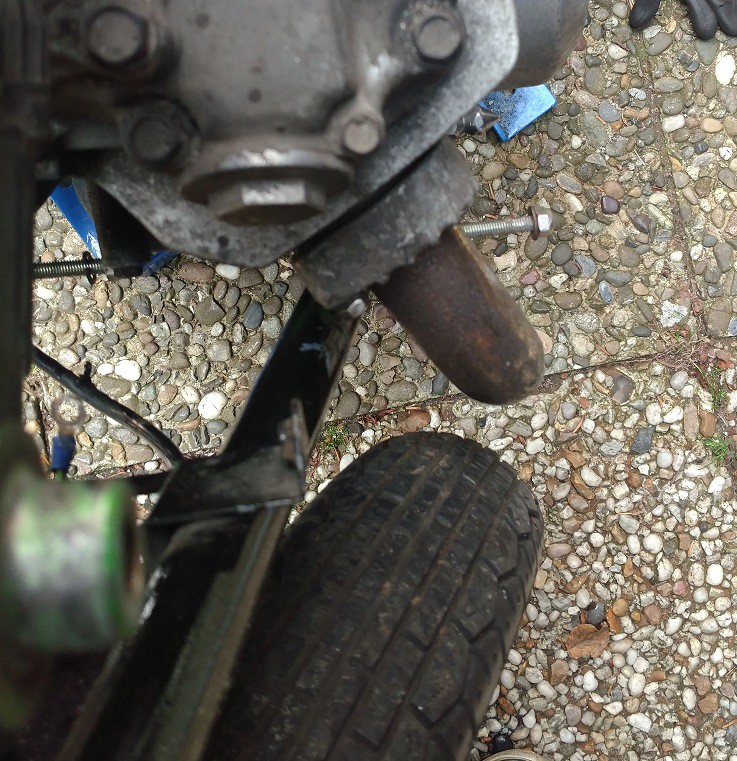
Plenty of clearence with the exhausts, so I decided to disassemble the forks to rebuild them and to shorten them internally. I drained the "oil" (more like slimy sludge) out of them and mentally prepared for a fight with the bottom allen bolts holding the fork tubes together. I was lucky and the allen bolts of both fork tubes came out easily using a quality allen socket on a ratchet and a very sharp tap with a heavy hammer. I didn't smash it like a caveman mind, but the weight of the hammer helps with making the tap "sharper". Hard to describe, but it worked well, they came out without issues. For the lowering I was prepared to make spacers and cut the springs to the required length. However, upon disassembly I discovered it was possible to lower the forks without the need for cutting anything.
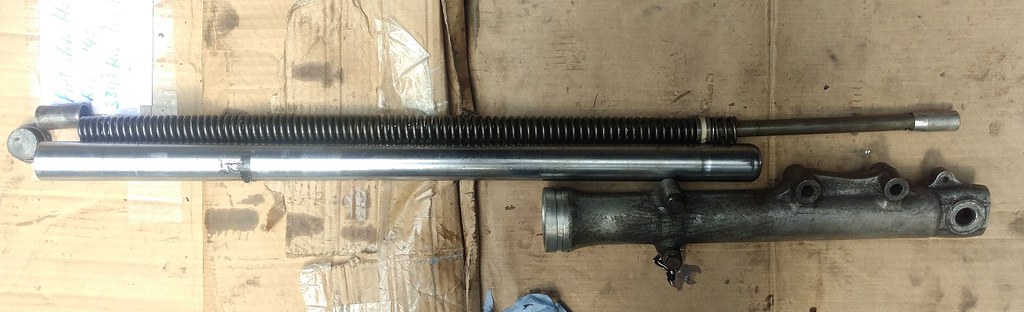
The stock situation is thus:
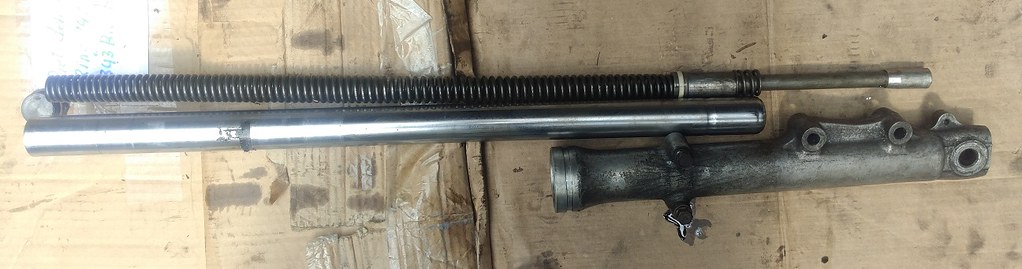
The modification I came up with rearranges the bits slightly like so:
As you can see, the stock setup has a spacer of about 40mm in length up top just under the top caps, to preload the fork spring. By moving the spacer to the bottom of the setup, just above the rebound dampening spring the inner tube is limited from coming out all the way, effectively shortening it by 40mm. As the inner tube does not come out all the way, the spring sticks out of the inner tube by the length of the spacer which provides it with the same preload as stock. The advantage of this is that the effective stroke is unaffected as it is probably limited by the spring binding in both situations, and the clearance will also be stock, making the whole clearance checking exersize unnecessary. As an added bonus, the mod is completely reversible.
I proceeded to change the seals (those put up a bit of a fight, but persistence prevailed), and used my dads blasting cabinet filled with glass bead medium to clean the outer tubes. It really cleaned them up well. If nothing else, this will provide a good base for spray painting.
Here's the stance after reassembly:
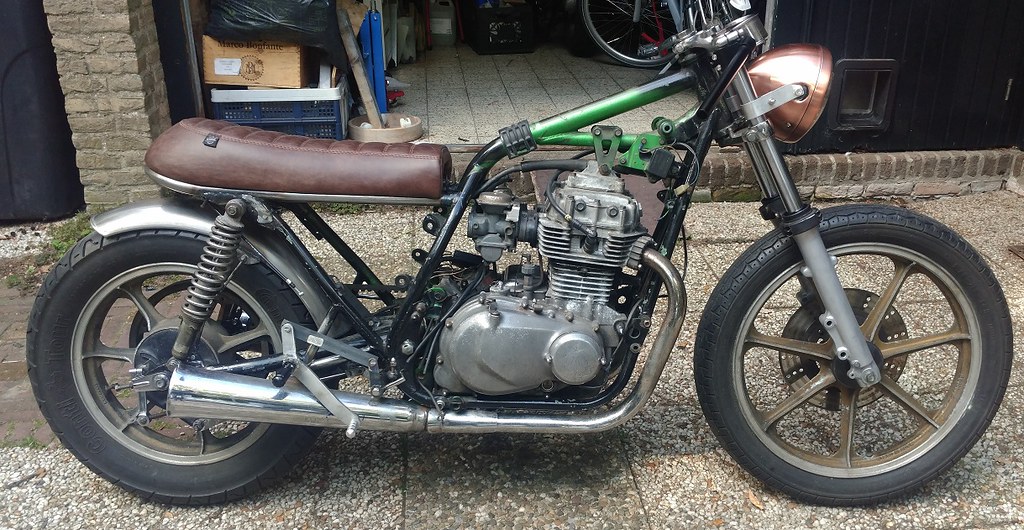
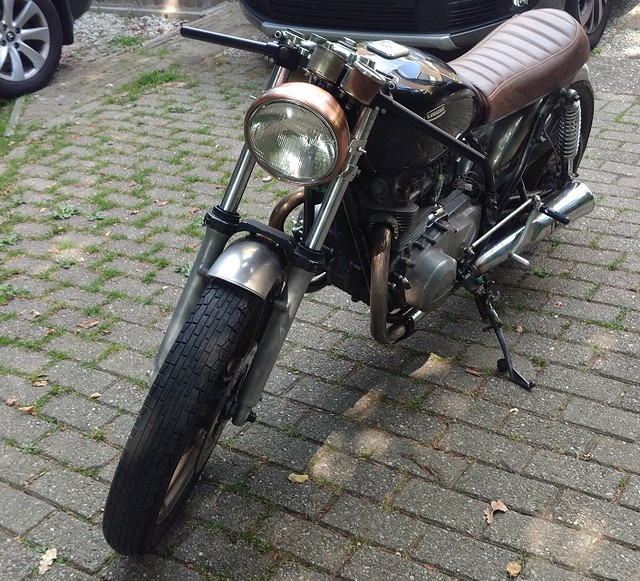
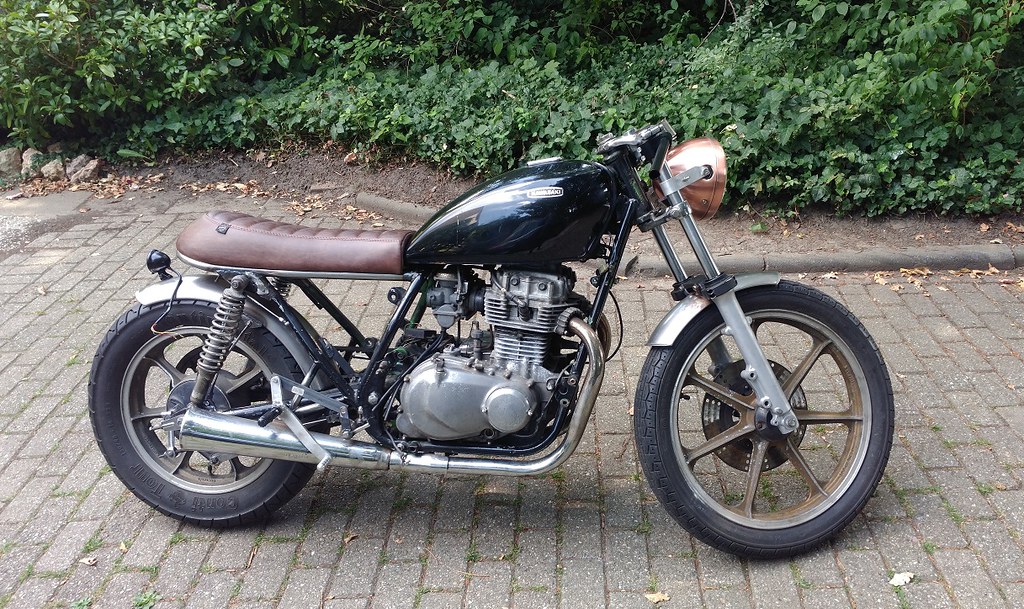
The front has been lowered slightly more than before by about 15mm, but I think it looks pretty good. I will measure the trail once I get the rear setup as well but I figure I have some room to play as it was originally setup as a cruiser.
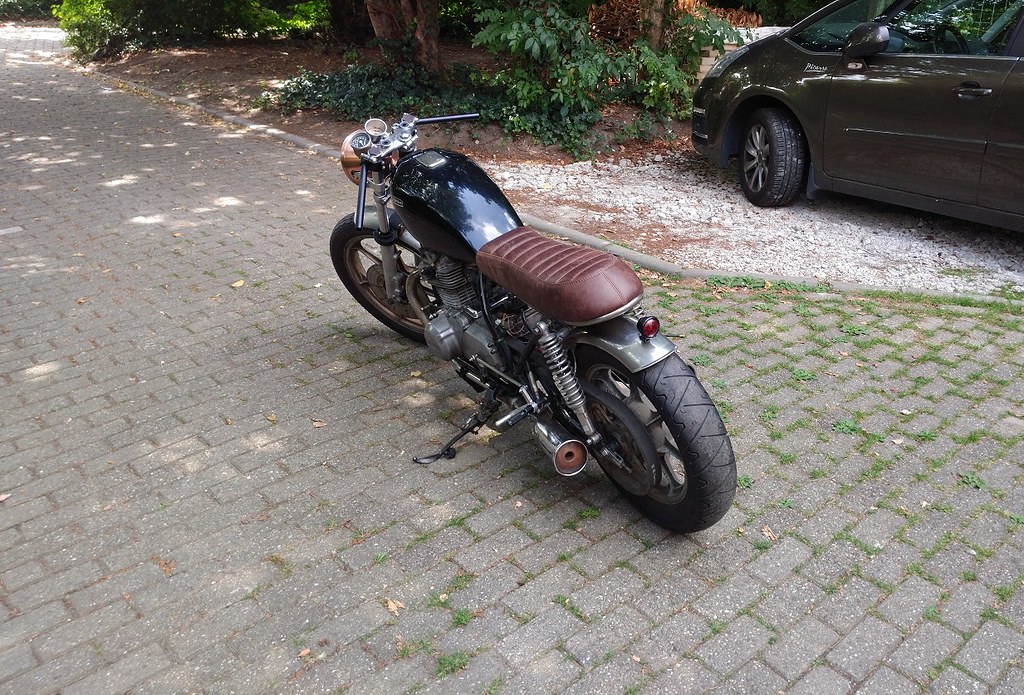
By this time I had also received the front fender and the rear light I ordered, so I mocked them up on the bike.
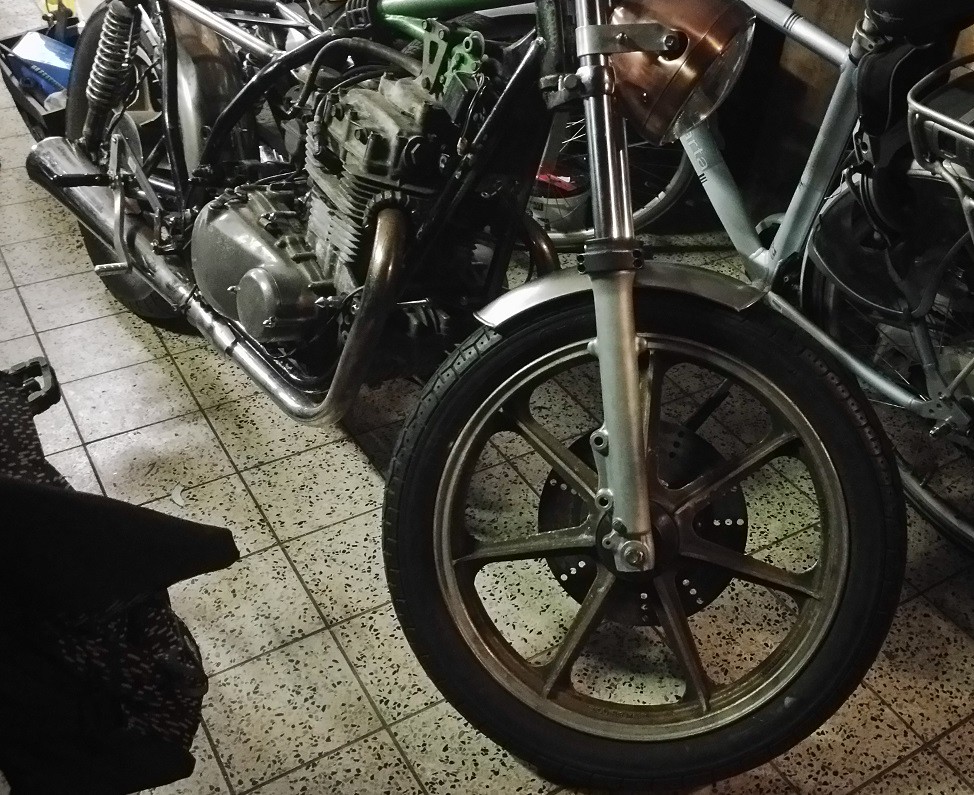
I liked what I saw, so I went ahead to make the attachments permanent. As can be seen in the picture I have this nice fork brace that came with the bike. During the rebuilding of the forks I found out that it came off of a BMW, as it says BMW in big stamped letters on the underside of the brace. That figures as it is german heavy duty looking. It provided me with two convenient mounting points which I could use to attach the front fender to. The brackets I welded to the front fender are positioned under the fork brace, which hides them pretty well. The end result looks like this:
I really like how the fender seems to float above the tire without side brackets.
I rolled the bike out on the driveway a bit more so I could take some better pictures of how it looked.
Really can't wait to ride this thing")
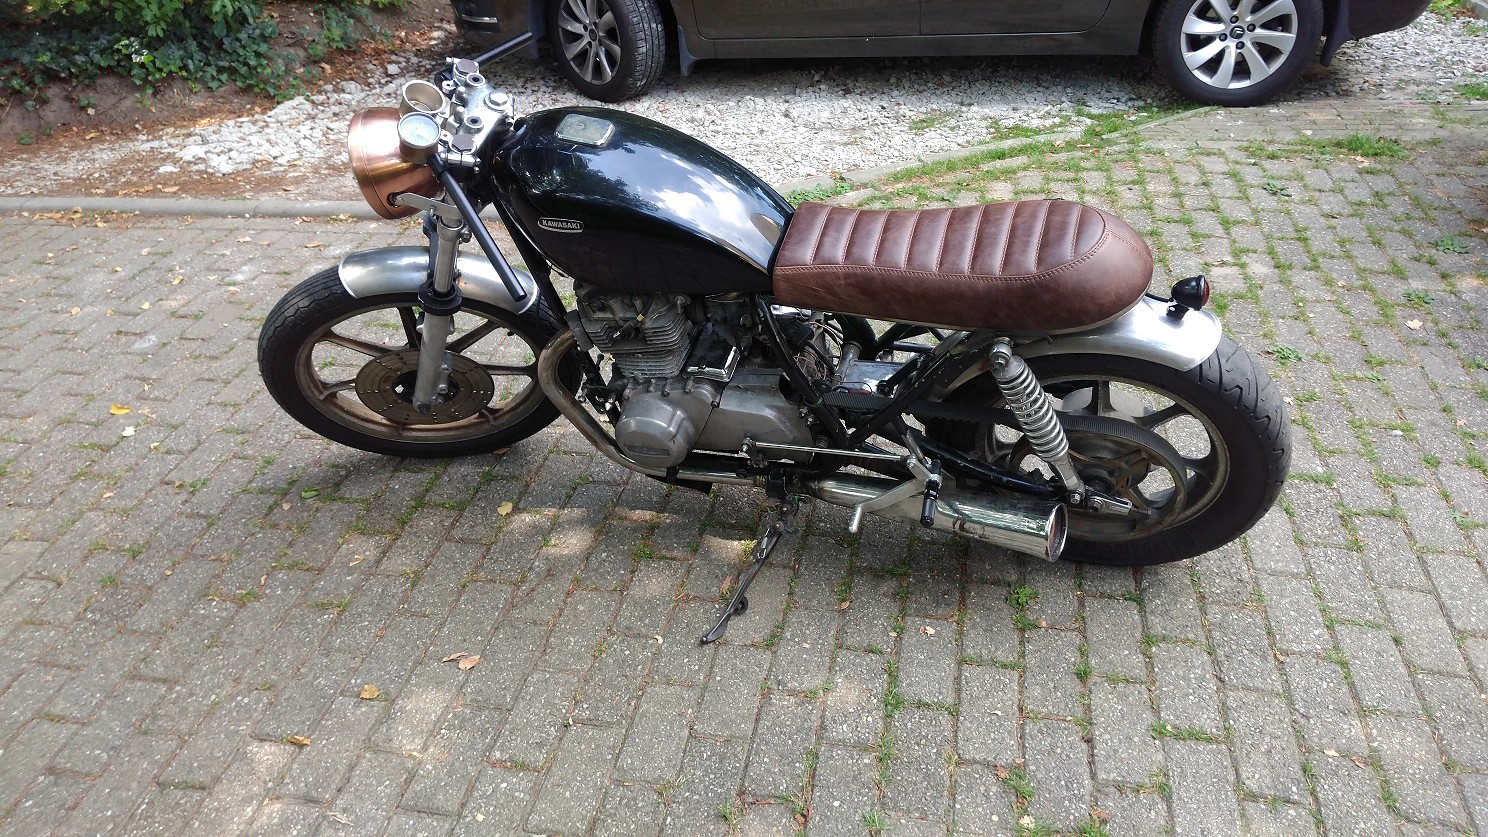
I also bolted the rear light to the rear fender as you can see. I still need to make a (grommeted) hole for the wiring, but that will come later. Still so much to do, but it's coming along.
That's enough for now I think, I don't want to keep posting enormous walls of text all the time ^^.
Plenty of clearence with the exhausts, so I decided to disassemble the forks to rebuild them and to shorten them internally. I drained the "oil" (more like slimy sludge) out of them and mentally prepared for a fight with the bottom allen bolts holding the fork tubes together. I was lucky and the allen bolts of both fork tubes came out easily using a quality allen socket on a ratchet and a very sharp tap with a heavy hammer. I didn't smash it like a caveman mind, but the weight of the hammer helps with making the tap "sharper". Hard to describe, but it worked well, they came out without issues. For the lowering I was prepared to make spacers and cut the springs to the required length. However, upon disassembly I discovered it was possible to lower the forks without the need for cutting anything.
The stock situation is thus:
The modification I came up with rearranges the bits slightly like so:
As you can see, the stock setup has a spacer of about 40mm in length up top just under the top caps, to preload the fork spring. By moving the spacer to the bottom of the setup, just above the rebound dampening spring the inner tube is limited from coming out all the way, effectively shortening it by 40mm. As the inner tube does not come out all the way, the spring sticks out of the inner tube by the length of the spacer which provides it with the same preload as stock. The advantage of this is that the effective stroke is unaffected as it is probably limited by the spring binding in both situations, and the clearance will also be stock, making the whole clearance checking exersize unnecessary. As an added bonus, the mod is completely reversible.
I proceeded to change the seals (those put up a bit of a fight, but persistence prevailed), and used my dads blasting cabinet filled with glass bead medium to clean the outer tubes. It really cleaned them up well. If nothing else, this will provide a good base for spray painting.
Here's the stance after reassembly:
The front has been lowered slightly more than before by about 15mm, but I think it looks pretty good. I will measure the trail once I get the rear setup as well but I figure I have some room to play as it was originally setup as a cruiser.
By this time I had also received the front fender and the rear light I ordered, so I mocked them up on the bike.
I liked what I saw, so I went ahead to make the attachments permanent. As can be seen in the picture I have this nice fork brace that came with the bike. During the rebuilding of the forks I found out that it came off of a BMW, as it says BMW in big stamped letters on the underside of the brace. That figures as it is german heavy duty looking. It provided me with two convenient mounting points which I could use to attach the front fender to. The brackets I welded to the front fender are positioned under the fork brace, which hides them pretty well. The end result looks like this:
I really like how the fender seems to float above the tire without side brackets.
I rolled the bike out on the driveway a bit more so I could take some better pictures of how it looked.
Really can't wait to ride this thing
I also bolted the rear light to the rear fender as you can see. I still need to make a (grommeted) hole for the wiring, but that will come later. Still so much to do, but it's coming along.
That's enough for now I think, I don't want to keep posting enormous walls of text all the time ^^.


