
We noticed you are blocking ads. DO THE TON only works with community supporters. Most are active members of the site with small businesses. Please consider disabling your ad blocking tool and checking out the businesses that help keep our site up and free.
You are using an out of date browser. It may not display this or other websites correctly.
You should upgrade or use an alternative browser.
You should upgrade or use an alternative browser.
My T100R cafe build
- Thread starter motoduck
- Start date
motoduck
Active Member
Thanks man, still not up to the standards of a real shop but i'm working my way there, using an oxy fuel torch def. helps .. and a flap disc ") One day my welds will be purdy enough that I wont want to flush them out.. one day..
One day my welds will be purdy enough that I wont want to flush them out.. one day..
I'm thinking about just having the local plating shop do a nickel coat and call it done just to avoid paint, depends on how much they want to charge me though minus the chrome and the finishing they typically do I'm hoping I can just talk them into doing the required cleaning copper and nickel and save a few bucks we'll see though. Still need to weld up the gap at the top of the collector and the center gap between the two pipe's before I go see them.
One day my welds will be purdy enough that I wont want to flush them out.. one day.. I'm thinking about just having the local plating shop do a nickel coat and call it done just to avoid paint, depends on how much they want to charge me though minus the chrome and the finishing they typically do I'm hoping I can just talk them into doing the required cleaning copper and nickel and save a few bucks we'll see though. Still need to weld up the gap at the top of the collector and the center gap between the two pipe's before I go see them.
motoduck
Active Member
More updates:
Well in an effort to not piss off my neighbors I've been trying to do the loud things during the day and the quiet ones at night plenty of both to fill both spaces. So started removing paint from the Gas tank and addressing the oil tank which has some rust figure I'll try vinegar to remove it so wanted to do a trial run.
Now I've heard Apple cider is the best so I went to the store to pick some up and noticed it was 5% acidity and there was an extra strength 9% acidity white vinegar.. so I figured what the hey ill try both and which ever works the best will go in the oil tank and the gas tank.
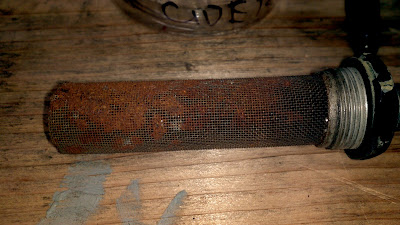
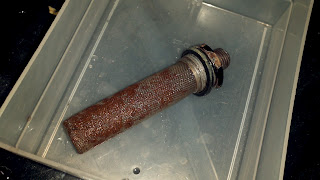
Heres the oil filter screen :
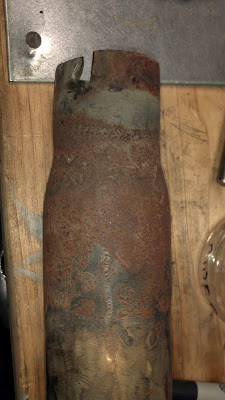
and just to have something awful to test with heres some throwaway slip on i have in the scrap metal bin
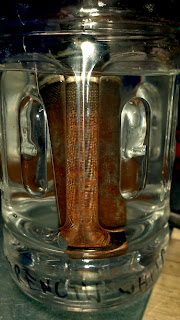
Screen went into the 9% white vin.
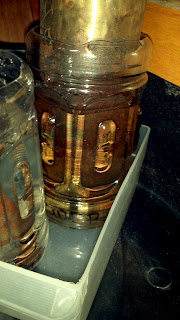
and the scrap went into the apple cider
I'll give it 24 hours or so and check in on it, which ever works better I'll be using on the oil tank.
Well in an effort to not piss off my neighbors I've been trying to do the loud things during the day and the quiet ones at night plenty of both to fill both spaces. So started removing paint from the Gas tank and addressing the oil tank which has some rust figure I'll try vinegar to remove it so wanted to do a trial run.
Now I've heard Apple cider is the best so I went to the store to pick some up and noticed it was 5% acidity and there was an extra strength 9% acidity white vinegar.. so I figured what the hey ill try both and which ever works the best will go in the oil tank and the gas tank.
Heres the oil filter screen :
and just to have something awful to test with heres some throwaway slip on i have in the scrap metal bin
Screen went into the 9% white vin.
and the scrap went into the apple cider
I'll give it 24 hours or so and check in on it, which ever works better I'll be using on the oil tank.
motoduck
Active Member
Well been a bit since ive posted been a bit busy lately. Here are a few updates.
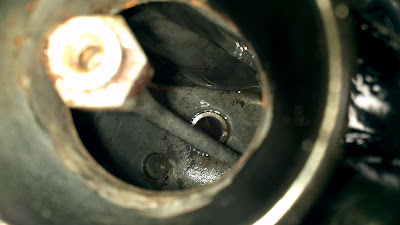
Well in ref to the above vinegar worked great but gotta act fast to avoid flash rust.. i was in a hurry and having to do bits and pieces when I could some of which on my lunch break so i flash rusted, for the sake of time i got some evaporust since it would eat the rust quick and coat the surface for at least a week or two till i was able to get the ducks in a row.
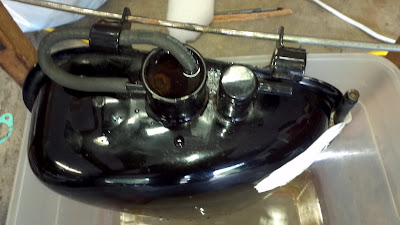
Here's the tank as I got it off of one of the forums
Vinegar
After the vinegar
Flash rust.. bummer
evaporust
And post evaporust been like 5 days still clean as a whistle.
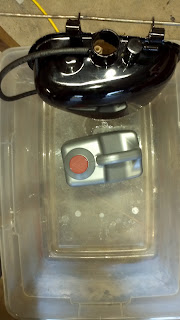
Also picked this up
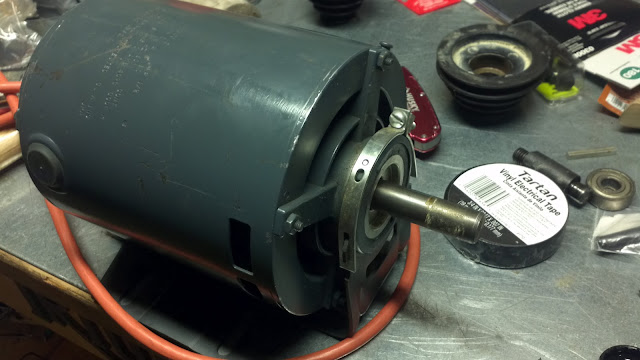
GE 1/2 HP motor
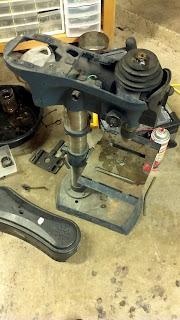
Got this press for free a year or two back
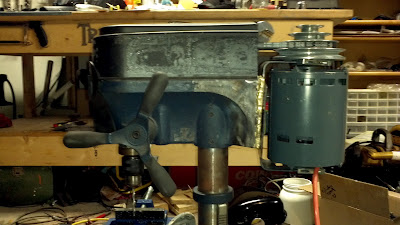
And some hacktastic magic later motor is actually bolted to it , the brazing is a plate i welded on and drilled then bolted the motor to, base metal of the press is awful pot metal tried to mig it and to torch weld it with steel rod brazing was the only thing playing nice, walloped it with a mini sledge though and its solid - works like a champ too, just need to wire up the 3 prong cord into a main switch and an emergency cut off switch.
And.. (long random post its been hectic so they are kinda compounded on each other)
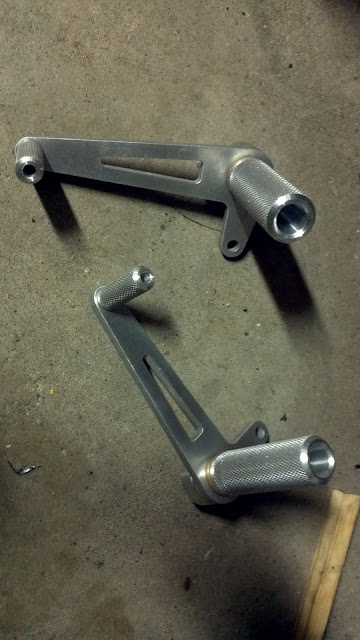
Got these in .
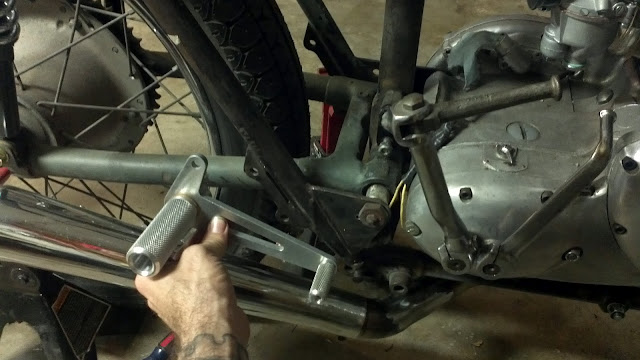
And round about where they will sit. Taking my template to the shop tomorrow to have it CNC'd from aluminum, still need to work out what to do with the gear change lever .. so nice of the factory to jam those two up on each other like a couple of drunk highschool kids...
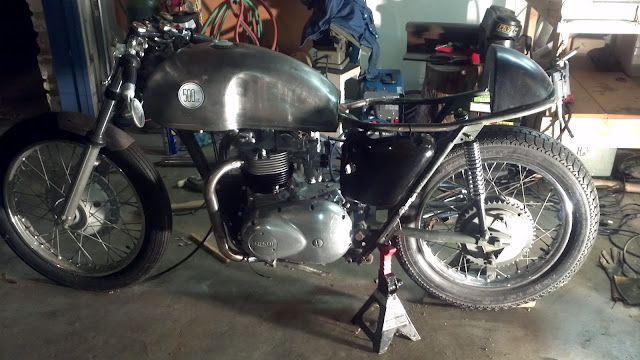
And finally to round it out a bit, a current (ish) mock up
Well in ref to the above vinegar worked great but gotta act fast to avoid flash rust.. i was in a hurry and having to do bits and pieces when I could some of which on my lunch break so i flash rusted, for the sake of time i got some evaporust since it would eat the rust quick and coat the surface for at least a week or two till i was able to get the ducks in a row.
Here's the tank as I got it off of one of the forums
Vinegar
After the vinegar
Flash rust.. bummer
evaporust
And post evaporust been like 5 days still clean as a whistle.
Also picked this up
GE 1/2 HP motor
Got this press for free a year or two back
And some hacktastic magic later motor is actually bolted to it , the brazing is a plate i welded on and drilled then bolted the motor to, base metal of the press is awful pot metal tried to mig it and to torch weld it with steel rod brazing was the only thing playing nice, walloped it with a mini sledge though and its solid - works like a champ too, just need to wire up the 3 prong cord into a main switch and an emergency cut off switch.
And.. (long random post its been hectic so they are kinda compounded on each other)
Got these in .
And round about where they will sit. Taking my template to the shop tomorrow to have it CNC'd from aluminum, still need to work out what to do with the gear change lever .. so nice of the factory to jam those two up on each other like a couple of drunk highschool kids...
And finally to round it out a bit, a current (ish) mock up
Nojokirk 75cl360
DT250 project in the works!
nice lookin trumpet
motoduck
Active Member
Thanks guys, yea that hump still needs to come down, thats actually after shortening it once already, the pan is also split down the middle right now and scored to allow it to bend with the frame, need to get it back in one piece on on the frame and then I'll start to slowly lower the cowl. But yea its Alllllllmost level with the gas cap on the tank now but not quite .. it'll drive me nuts forever if i dont fix it though. Good eye Also dropped off a deposit to hold my place in line with the plater still a few things i need to do to the exhaust and their lead time is 4 weeks so need to wrap that bit up and turn it over, just going to have them nikel plate it to keep from painting or wrapping.
Also dropped off a deposit to hold my place in line with the plater still a few things i need to do to the exhaust and their lead time is 4 weeks so need to wrap that bit up and turn it over, just going to have them nikel plate it to keep from painting or wrapping.motoduck
Active Member
Re: My T100R cafe build
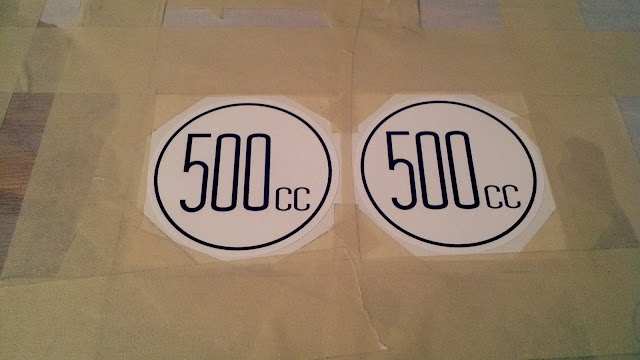
Well no pics this go round yet, got a load of brackets being cut at a local cnc shop should be picking those up on sun at a little vintage shin dig here in town rear set plates scitsu tach mount among the like. In the meantime started the experiments on making tank badges ill have photo updates tomorrow. Basically got vinyl cut from a place that does racing decals and jewlers ice resin that dries crystal clear, ive got 3 test runs going at the moment will use the best method on my "500cc" decals to fit snug in the tank depressions pretty much just a subtle mimic to the benallii tank badges. More to come on that tomorrow when the examples cure.
Well no pics this go round yet, got a load of brackets being cut at a local cnc shop should be picking those up on sun at a little vintage shin dig here in town rear set plates scitsu tach mount among the like. In the meantime started the experiments on making tank badges ill have photo updates tomorrow. Basically got vinyl cut from a place that does racing decals and jewlers ice resin that dries crystal clear, ive got 3 test runs going at the moment will use the best method on my "500cc" decals to fit snug in the tank depressions pretty much just a subtle mimic to the benallii tank badges. More to come on that tomorrow when the examples cure.
motoduck
Active Member
Re: My T100R cafe build
yea ill have round one of pics tonight after I get off work and upload, so far I can handle the test run vinyl its still pliable but its my understanding it goes rigid.. worst case scenario ill back it with something to stiffen it up takes a few days to fully cure and like 6 hours to set up running around 14 hours now I guess.. ill be starting the actual badges when I get off work
Sent from my MB860 using Tapatalk 2
motoduck
Active Member
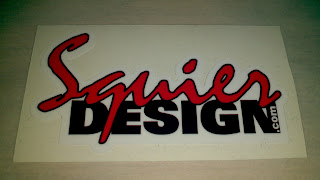
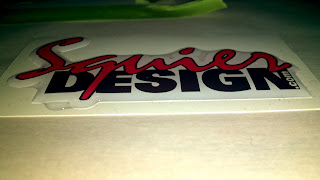
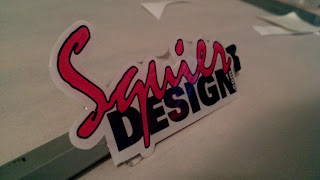
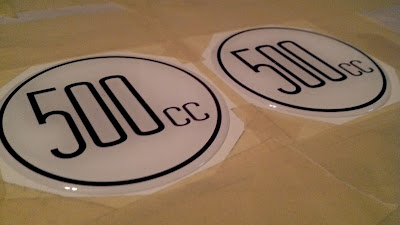
Ok So I have the benalli wards riverside tank with the "360" badges.. well now no self respecting 500cc Triumph Twin can have "360" plastered across the tank so it simply must be remedied. So I contacted the good folks at Squier Design.com http://squierdesign.com/ and worked with them to find the right vinyl design. Can't say enough good things about these folks, they worked with me and even pointed me to the resin that I used to make these. Even sent me some extra vinyl so I could try my hand at using the resin before I committed to pouring it over the final product. Highly recommend these folks - If you need racing numbers etc give em a shout.
 started with just a vinyl decal
 poured on the "Ice Resin"
 here it is after like 15-20 hours
 and one head on - still a bit pliable but getting more and more rigid as time goes on, manf of the resin says you can drill it when cured so im assuming it will keep hardening till then .
I'l have the first few steps of the actual tank badge here in a few, this was my trial test run before i dumped resin all over the final decals.
I'l have the first few steps of the actual tank badge here in a few, this was my trial test run before i dumped resin all over the final decals.
motoduck
Active Member
Ok part 2 - The actual badges
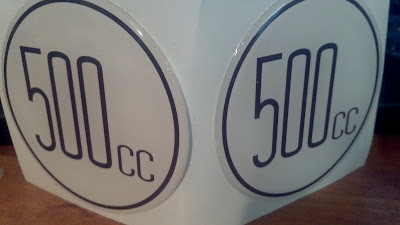
Need to make sure it's level and everything is held down tight its a self doming self leveling resin.
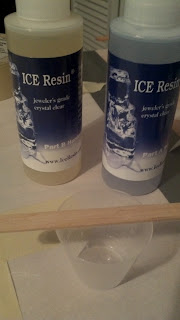
The actual resin used it's a one to one mix
And now the waiting game. After this dries I'll go over it again to create a higher dome on the resin to add some extra depth.
As you can see it pools up at the end just pour it on and let it self level itself out, have to be careful not to pour too much or it can overflow the edge and be a real mess these match the diameter of the stock 360 tank badges.
Need to make sure it's level and everything is held down tight its a self doming self leveling resin.
The actual resin used it's a one to one mix
And now the waiting game. After this dries I'll go over it again to create a higher dome on the resin to add some extra depth.
As you can see it pools up at the end just pour it on and let it self level itself out, have to be careful not to pour too much or it can overflow the edge and be a real mess these match the diameter of the stock 360 tank badges.
motoduck
Active Member
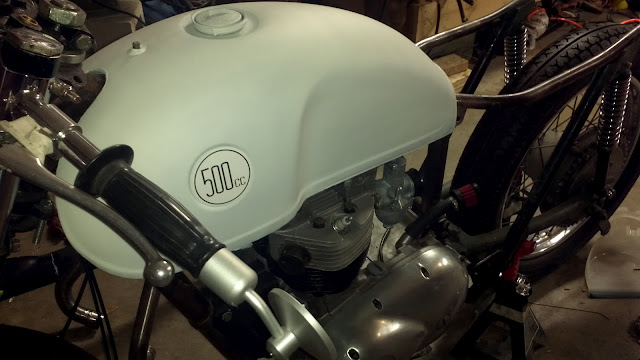
Thanks man I sure hope so, the hardest thing is not touching it while it cures... lol the decals I used for the resin are laminate free (it's what they had used with similar situations with marked success ) I also have a laminate version (the one mocked on the tank above) worst comes to worst i'll slap it on the painted tank and clear over it .. but im hoping the badges pan out would be nice to have the depth and have it look as if it was placed there by a factory... A Factory of SPEED! lol
motoduck
Active Member
Ok here is the 'final' product
After the first layer I added a second to increase the depth on the badges

First layer went on pretty clean, this one .. eh .. i used less resin so as to play it safe and not spill over the edge so it took a while to level out to the edges and I ended up having to help it along started to get pretty close to the tack time so a few spots on the edges aren't the best, dont really notice unless you get up on it, I'll prob do the other set of decals I have as a second run and run the better of the two, but for now this will do.
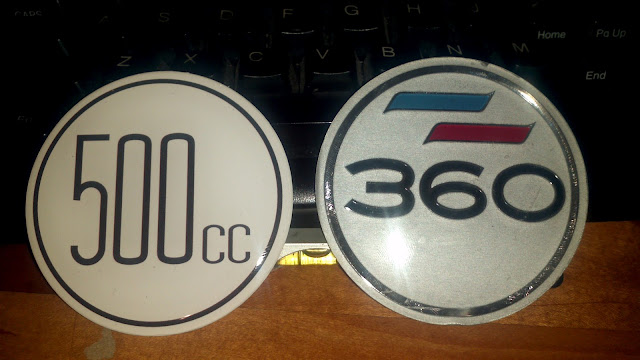
And finally here's the side by side .. i think the stock badge is actually just a tad bigger its less than half a tenth on my caliper but looks like its more in the photo
After the first layer I added a second to increase the depth on the badges
First layer went on pretty clean, this one .. eh .. i used less resin so as to play it safe and not spill over the edge so it took a while to level out to the edges and I ended up having to help it along started to get pretty close to the tack time so a few spots on the edges aren't the best, dont really notice unless you get up on it, I'll prob do the other set of decals I have as a second run and run the better of the two, but for now this will do.
And finally here's the side by side .. i think the stock badge is actually just a tad bigger its less than half a tenth on my caliper but looks like its more in the photo
motoduck
Active Member
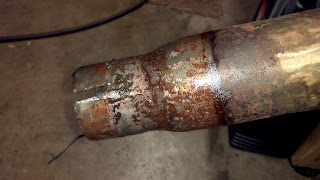
Made a bit of progress. Finished up the muffler, goes to the plater tomorrow for nickel plate.
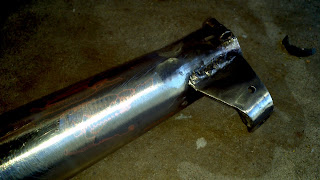
got the bracket welded on and a gusset added, I've had mufflers rocket off at 70mph before also drilled a hole for a safety cable.
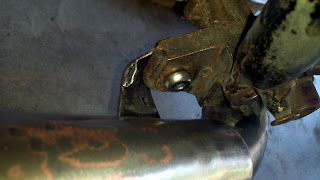
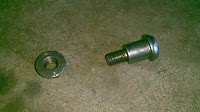
Managed to stumble across the perfect hardware in the box O' bit's and pieces happens to fit the frame perfectly was planning on shaving the center stand mounts off but it just fit.

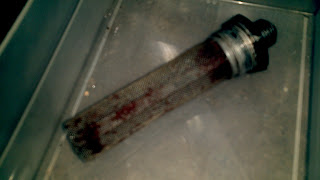
And I cleaned up the underside of the baffle cover that went to the old cocktail shaker. It will be plated with the muffler and attached with magic... Not sure if ill run it just making sure its plated to match if i need it, mostly to keep the inspectors at bay for issues with "open pipes" but we'll see, good to have the option.

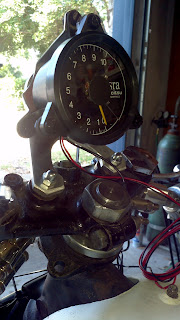
Got the tach mount bracket drilled and mounted
got the bracket welded on and a gusset added, I've had mufflers rocket off at 70mph before
also drilled a hole for a safety cable.Managed to stumble across the perfect hardware in the box O' bit's and pieces happens to fit the frame perfectly was planning on shaving the center stand mounts off but it just fit.
And I cleaned up the underside of the baffle cover that went to the old cocktail shaker. It will be plated with the muffler and attached with magic... Not sure if ill run it just making sure its plated to match if i need it, mostly to keep the inspectors at bay for issues with "open pipes" but we'll see, good to have the option.
Got the tach mount bracket drilled and mounted


