Follow along with the video below to see how to install our site as a web app on your home screen.
Note: This feature currently requires accessing the site using the built-in Safari browser.
We noticed you are blocking ads. DO THE TON only works with community supporters. Most are active members of the site with small businesses. Please consider disabling your ad blocking tool and checking out the businesses that help keep our site up and free.
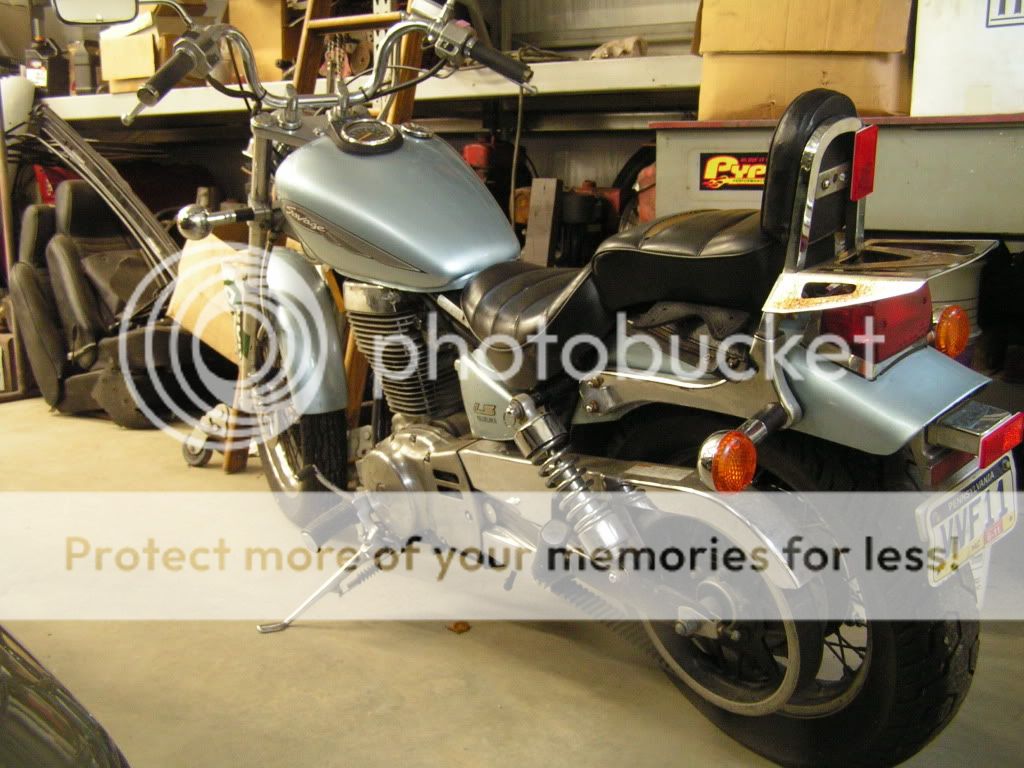
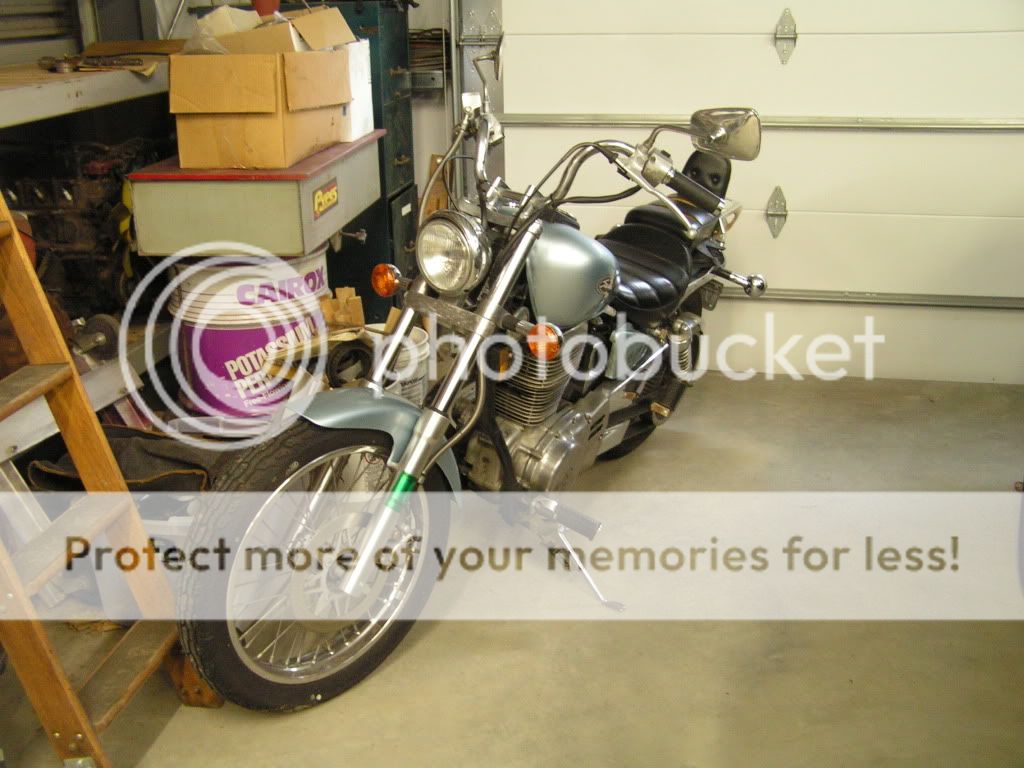
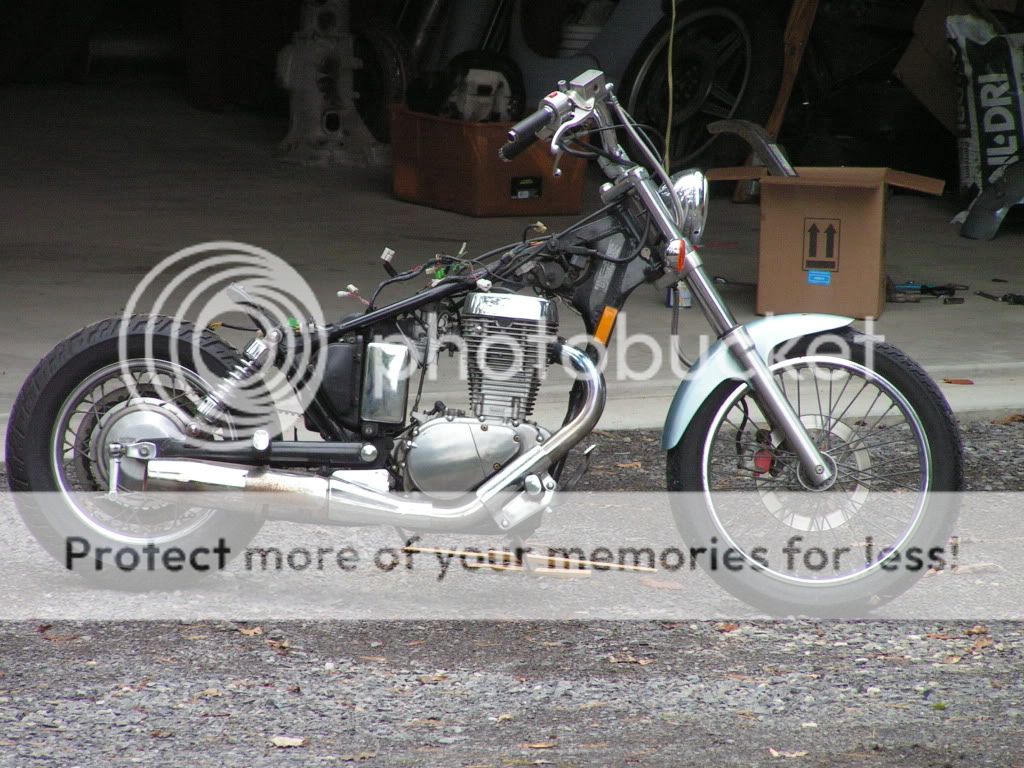
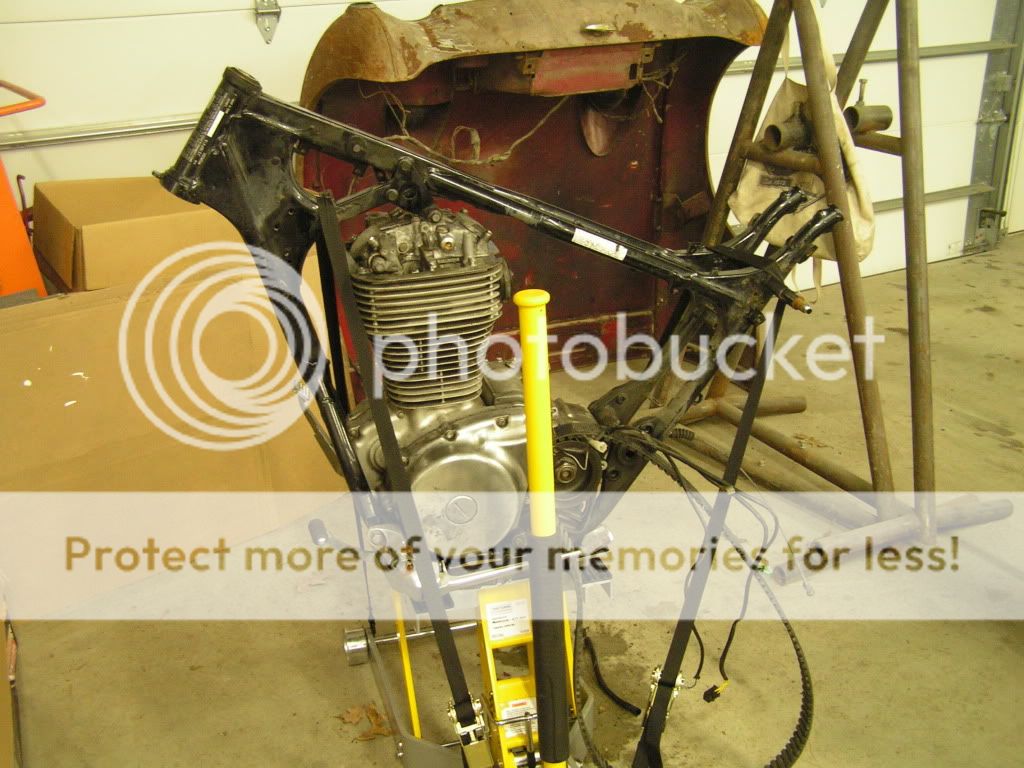
Well, the 550 has been gone a few months now :'( . Its high time I get off my ass and start something new. A buddy of mine called me and asked if I wanted his bike. Of course I couldn't turn it down ;D . It's a 2001 Suzuki Savage. I knew right away that this would make an awesome Cafe bike based on what I have seen done from Ryca. So now it's my turn to make this bike live up to it's name. It's probably going to take me into spring to finish, but in the meantime I will be updating this thread regularly. Here is the bike as it sits awaiting its dismemberment.
oh, don't get me wrong. It's not going to be straight up cafe racer when completed, but it will sit like one. I won't be buying any of the body parts. Everything on this bike will be one-off hand made. It's going to be quite the learning experience!
DBC - there is a Savage on my future shopping list - as soon as one comes up for the right money - it's mine !
The reason I will go with this? Firstly I am missing a 500cc + single in my stable. Second that motor / exhaust looks VERY Goldie 'ish and I can no longer afford / justify the expense of a real one [ Gold Star ]. Sure it will take some frame surgery to get the seat etc. right and the wheel sizes will have to be sorted - but the basis is there. Keep us posted.
Ha I just saw one of these cafe'd on kneeslider and now I want one. they make a good looking cafe you can jack the rearend up and they sit pretty nice. how is the power on that thing? I'd like to know.
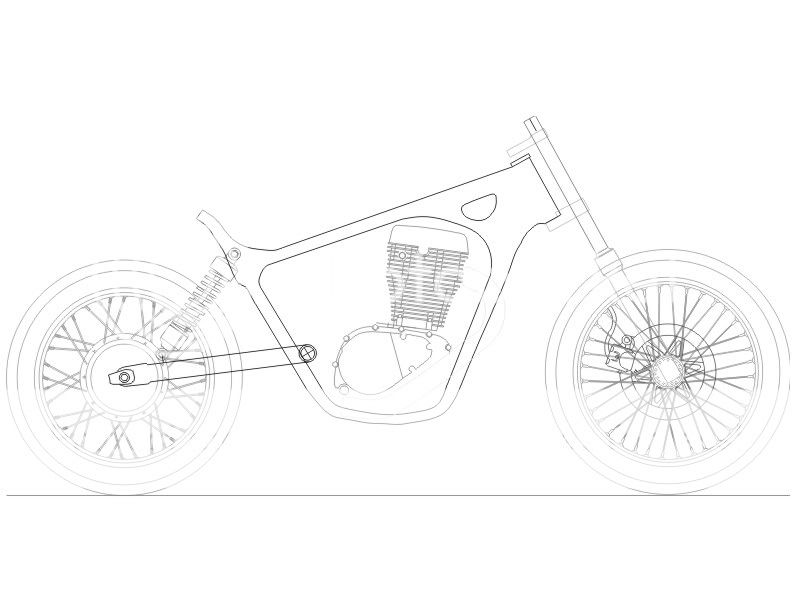
so I started dismantling the bike and I took a picture of it to use as a reference in AutoCAD. I'm now in the process of drawing up the frame and suspension so I can get an Idea of how high To put the rear end, and how low to drop the front. just by making those adjustments, the rake come out to be a little more cafe-friendly. I'll post some pics of the drawings when I finish them.
thompsonmx100 said:
Ha I just saw one of these cafe'd on kneeslider and now I want one. they make a good looking cafe you can jack the rearend up and they sit pretty nice. how is the power on that thing? I'd like to know.
Power is pretty good on the low end, not so much on the high end though. The one on kneeslider is actually a kit you can by to convert a s40/savage to a cafe racer.
Lots of interest in bobbing and cafe conversions, as well as good tech info on the mechanicals / electricals / carb tuning / parts sourcing / routine maintenance, etc.
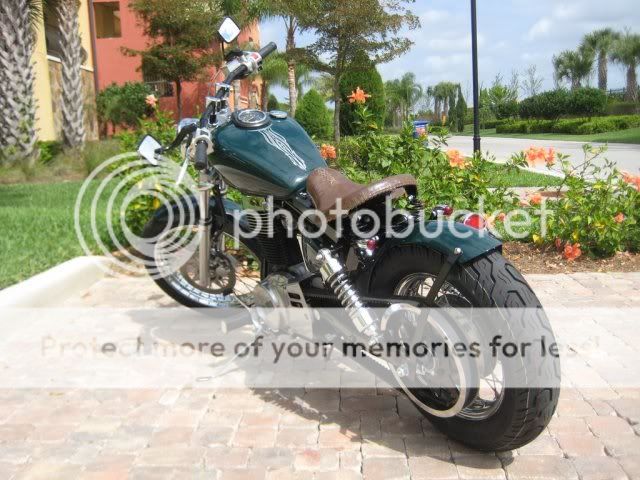
I did a bob-job earlier this spring on an '05 LS40 (pics below). It's sitting quietly in the shop while I finally begin assembly of my '75 CB500T cafe ('under construction' pics below).
The Suzi 650 single is a torque-y little bugger, once you strip off pounds of ugly fat (stock seat, rear fender, gigantic muffler, blinkers, etc.)
Have fun with the Savage; it's an excellent 'canvas' for your best creative thinking!
thanks for the info stevene! nice work by the way on the ls40, looks killer. And it looks like you've got some really nice stuff happening with the 500 as well. keep it up!
well, not much has happened with this bike (yet). but i did manage to find some free time today to play around with autoCAD and figure out the suspension geometry. I lowered the front end 1 1/2" and I am going to swap out the rear shocks for 13" ones (I believe the stockers are around 10 1/2"). This will put the rake at 29° down from 34° stock. I will also be going with a 18" rear wheel. I had a hell of a time finding a 36 spoke 18" rear rim, but I finally did (old xs650's used them). so with all that in order I will start to do some layout sketches of the design I want and then I can start fabricating
the Ryca is not bad, but its also a little too mild for me. I have to admit though, I did get some inspiration from it before I started this project. Instead of simply modifying a savage tank, I will be fabricating a totally new one of my own design from aluminum, along with every other body part ;D. but the real beauty of this bike will lie in the paint. I've got something rather insane planned but you guys will just have to wait and see...you will be waiting a while though as I can see this project is going to be extremely time consuming. I will, however, tell you that I will be using tail lights from a 59' Caddy.
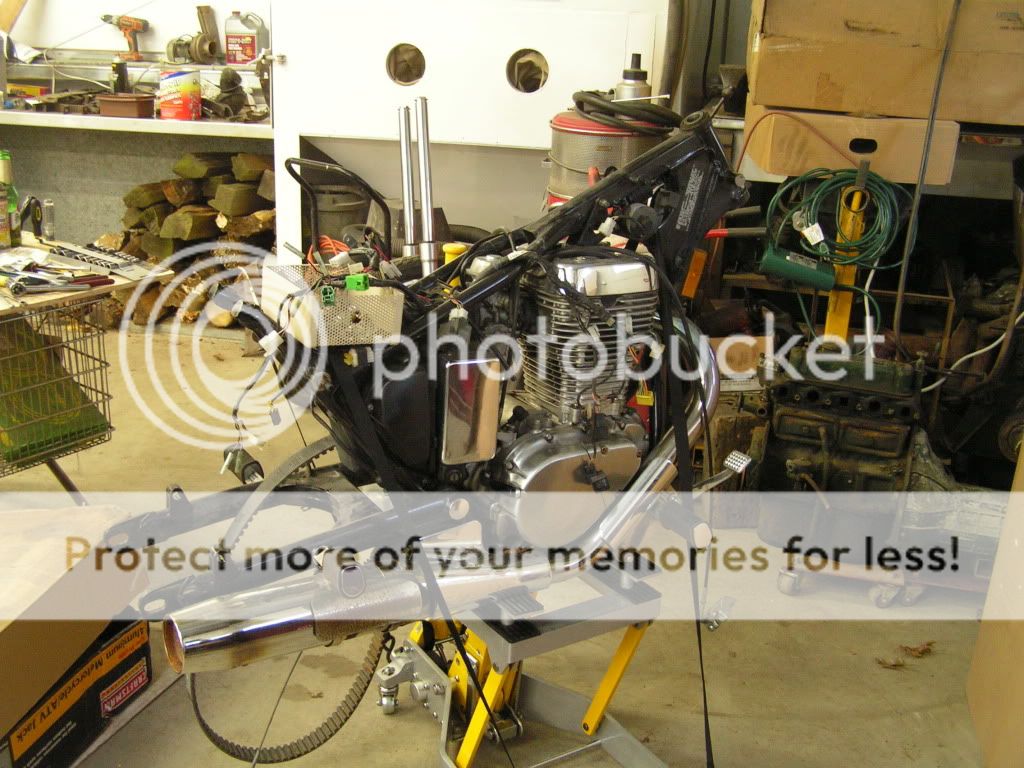
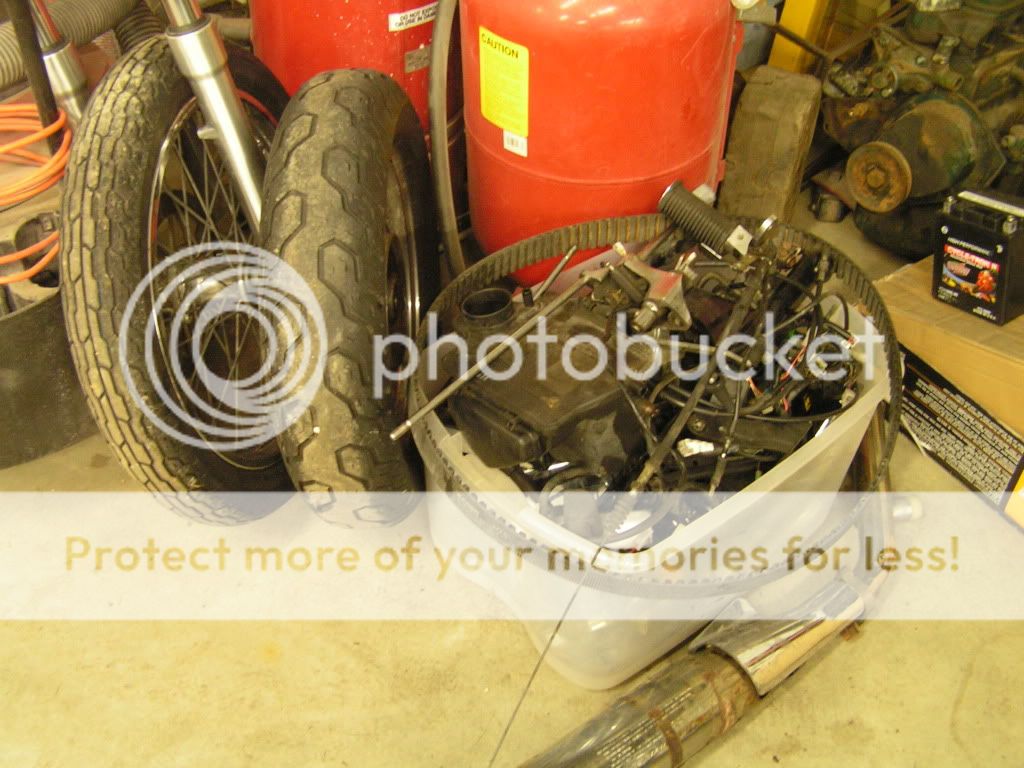
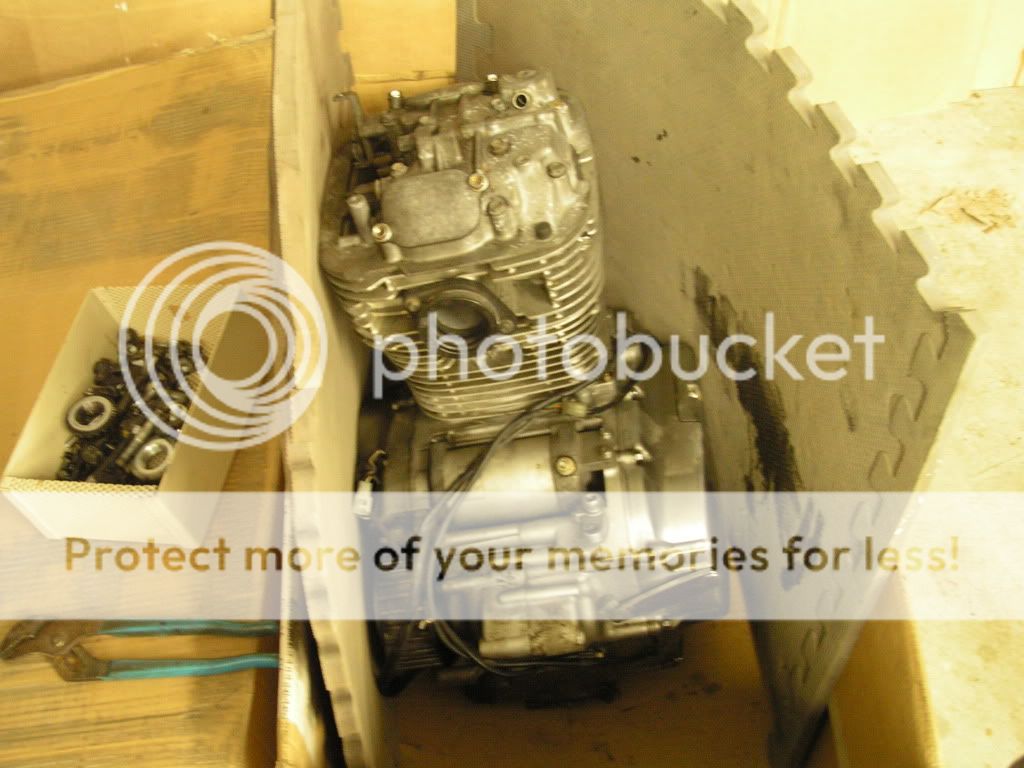
As far as actual progress is concerned, I tore the bike down to nothing yesterday and am putting together a parts list. I just need to find the $ to buy them :-\
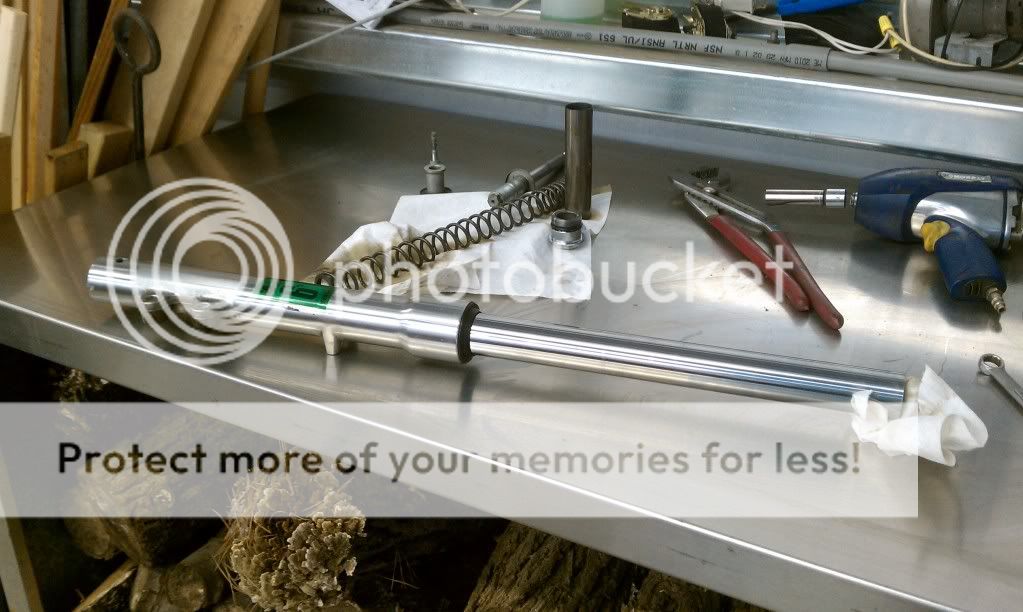
So today I lowered the forks 1 1/2" and it was much easier than I anticipated
first thing was to disassemble of the forks. now in order to do this I had to get creative and make a special tool for removing the dampener rod. I used a 5/8" bolt, 2 nuts, and a 15/16" socket and a very long extension to get the darn thing out, but hey, It sure beats paying $75 for the Suzuki tool equivalent!
dampener rod out
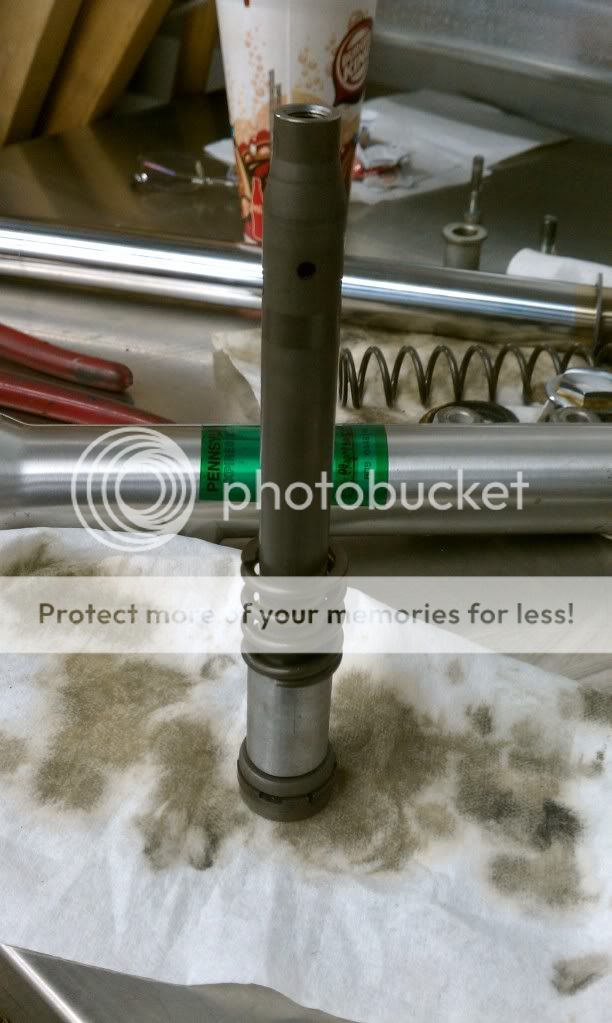
The next step was to make a 1 1/2" spacer to be placed over the dampener rod. I use a piece of 3/4" steel pipe for this. Here you can see the spacer in place
with that done, I went about reassembling the fork with the exception of the top spacer. I had to cut off 1 1/2" from it in order to maintain proper spring tension
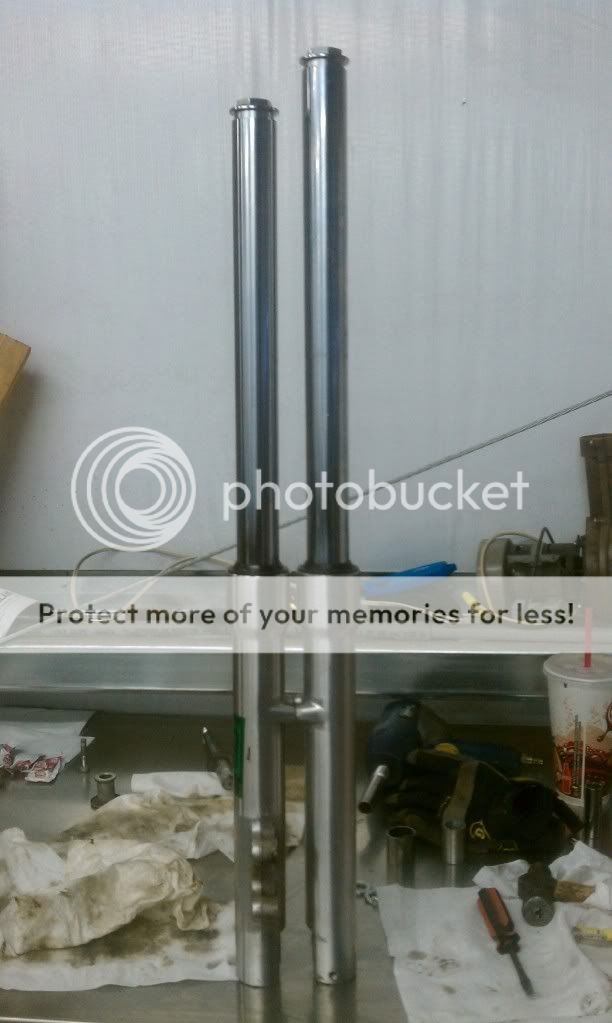
now with the fork all put together.....SUCCESS!!!
when I made the first spacer, I made one for the other fork as well so I knew they would be identical, thus ensuring the same drop in both forks. I will have to take these apart again when I paint the lowers, but I will need them assembled while doing my mock up.
Thanks Joe, Yeah that crossed my mind as well. they are dry right now and will be until i do my final assembly because I 'm going to have them apart again when I paint.
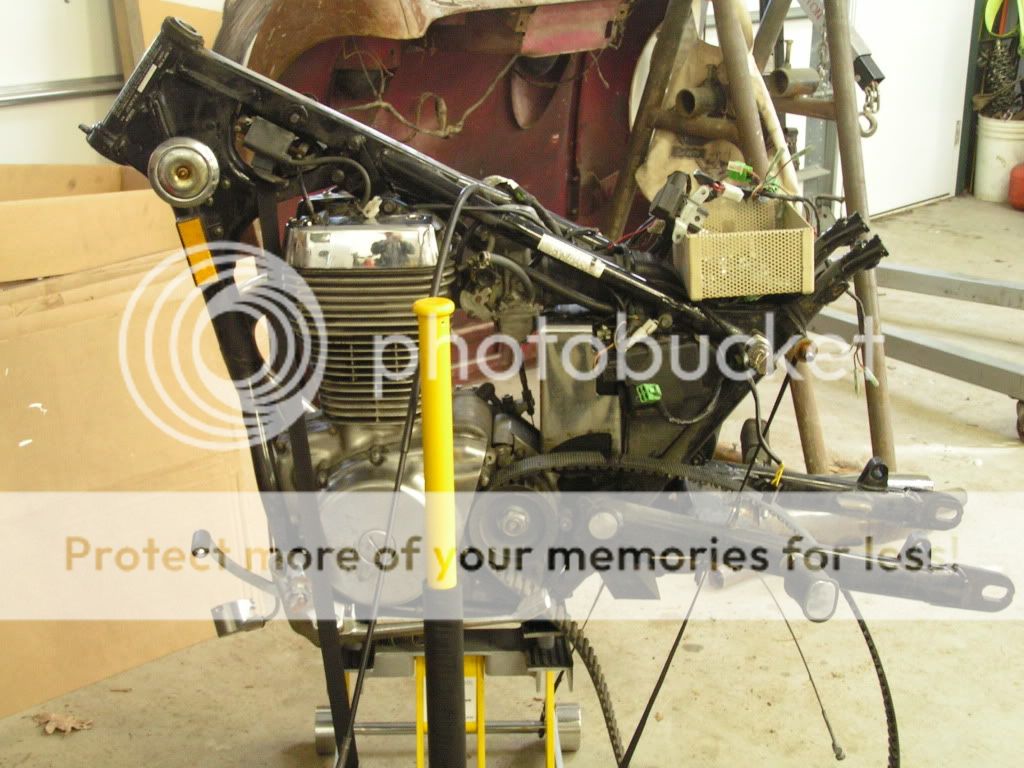
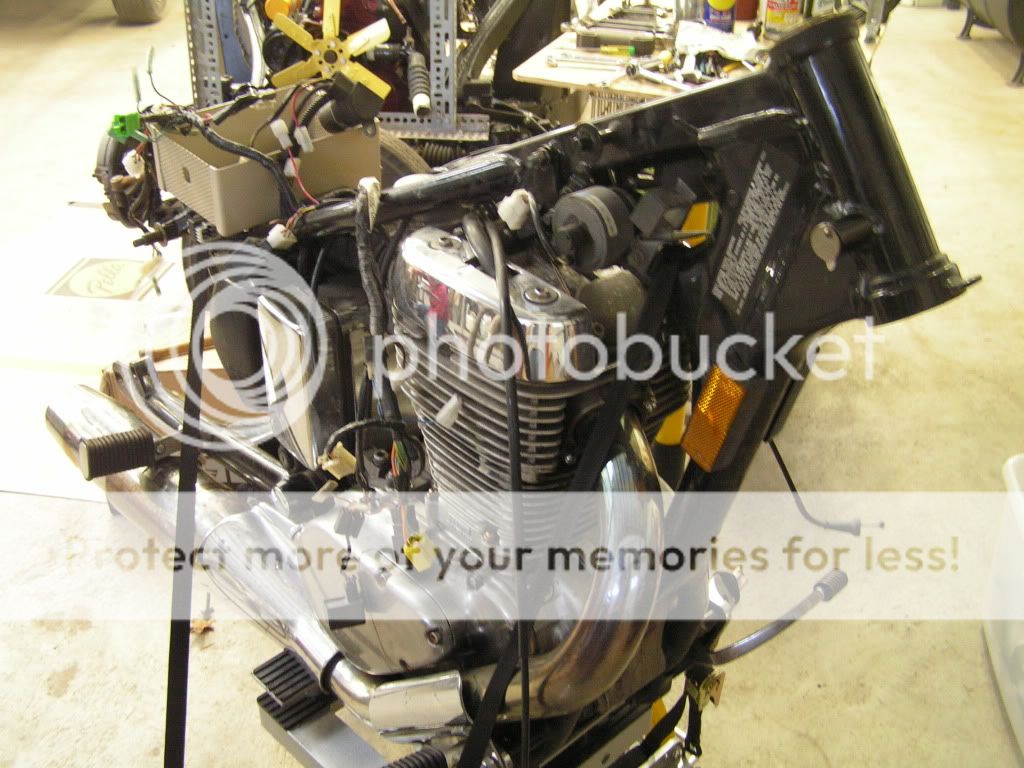
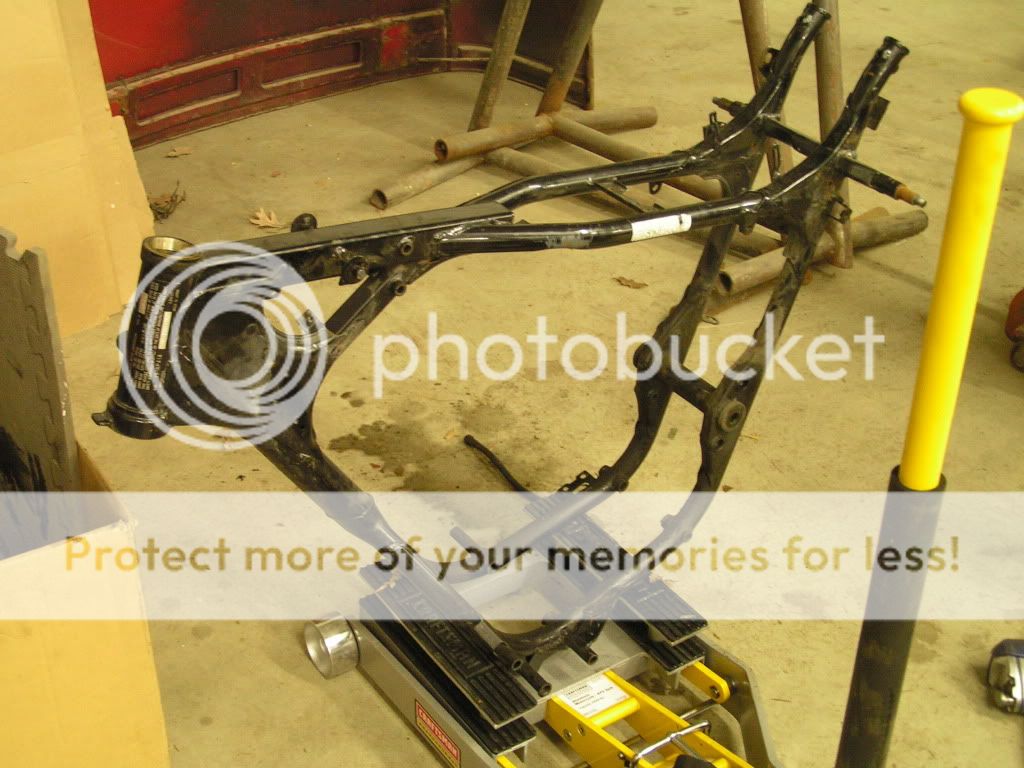
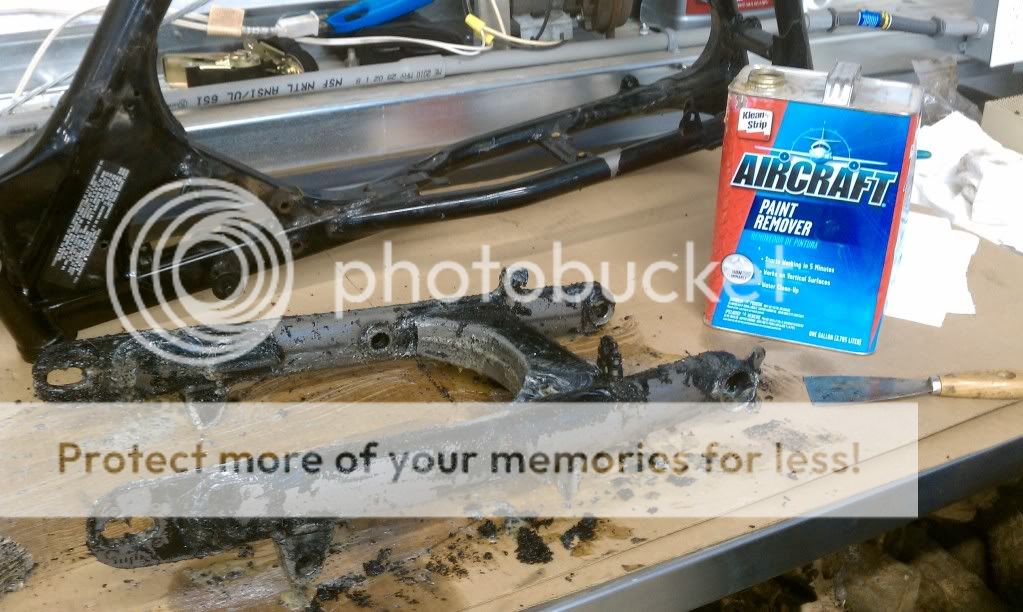
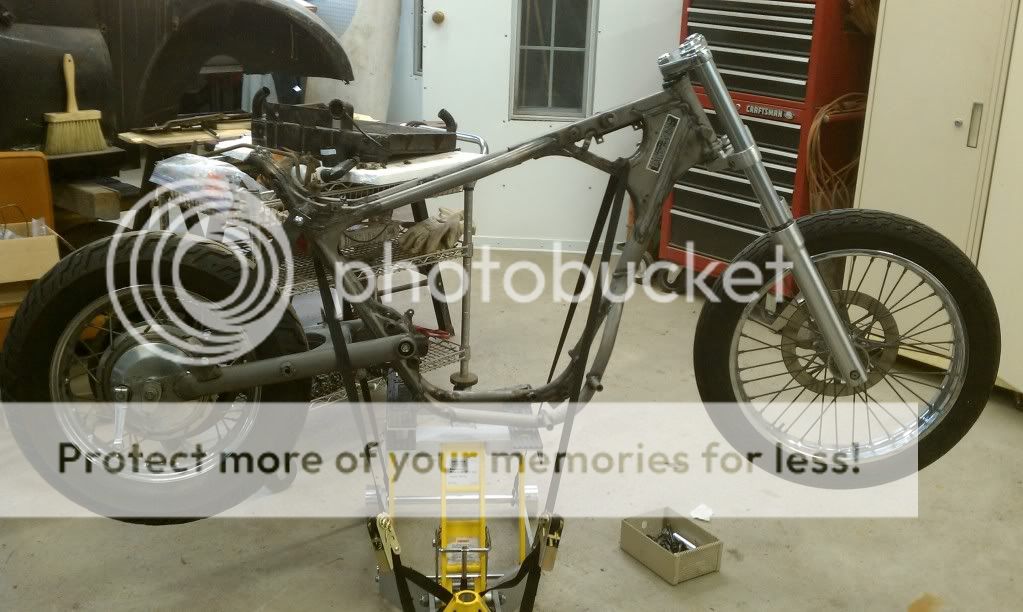
as for today's progress, I got the frame and swing arm stripped down and started setting up my mock-up. I am probably going to sculpt the body out of foam to get an idea of how it will all look together before the actual metal work takes place, so that will be the next step...then I can figure out where to place the rear sets, dash, etc.
I used paint stripper because there are bearings for the swing arm pressed in there that I didn't want to remove or get sand in via sandblasting, otherwise I would have just sandblasted everything.
This site uses cookies to help personalise content, tailor your experience and to keep you logged in if you register.
By continuing to use this site, you are consenting to our use of cookies.