
Re: 1976 Honda CB360T - Build Thread (Update 6/10 Custom Decals!!!!)
Well, I was going to be painting all of this week, but my clutch cable snapped right before I was going to leave for Cars and Coffee on Saturday morning, so that became priority #1 to repair. I finished that repair up last night and then wanted to get to work on wiring up the dash. Im still waiting on my replacement starter solenoid to arrive before I can wire up the engine start button. I went and bought a heat-shrink kit so I could make all nice connections and a nice mini-harness for the dash. I snipped all the OEM wires off the idiot lights at the base and splices them to the LED wires so I could use the OEM connectors.

There wasn't shrink wrap big enough to fit around the stalk for the starter button, so I picked up some Loctite self-locking wrap. It's weather proof apparently, and sticks to itself without being sticky to anything else. Looks like shrink wrap a bit in the final product. Time will tell how it holds up.
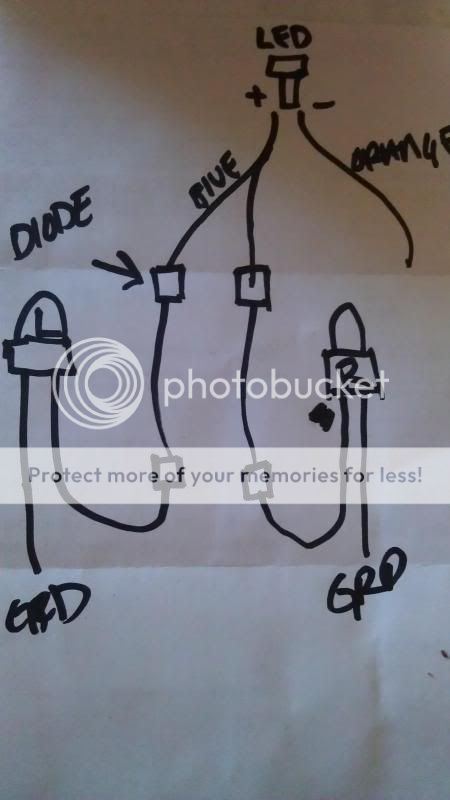
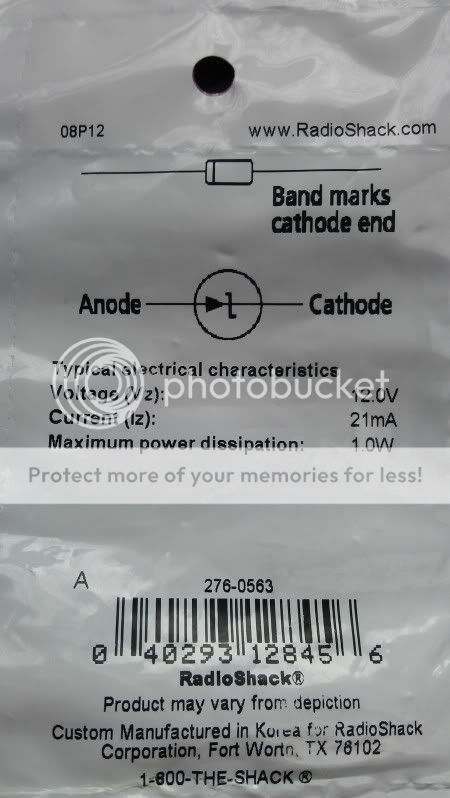
The neutral/brights lights were easy to wire up, but the turn signal was another story. Since my new indicator light is LED and the turn signals are filament bulbs, I had to splice the + wire to have a second connection and wire in inline diodes. Prior to the diodes, the indicator would only work for one side signal.
Here's my crude diagram:
Double check which side goes where:
And here it is!

For some reason, the brights indicator is A LOT brighter, but it'll rarely be on, so it's not a huge issue. Ill start stripping my tank down tomorrow to get it ready for paint. Weeee!
-Matt
Well, I was going to be painting all of this week, but my clutch cable snapped right before I was going to leave for Cars and Coffee on Saturday morning, so that became priority #1 to repair. I finished that repair up last night and then wanted to get to work on wiring up the dash. Im still waiting on my replacement starter solenoid to arrive before I can wire up the engine start button. I went and bought a heat-shrink kit so I could make all nice connections and a nice mini-harness for the dash. I snipped all the OEM wires off the idiot lights at the base and splices them to the LED wires so I could use the OEM connectors.

There wasn't shrink wrap big enough to fit around the stalk for the starter button, so I picked up some Loctite self-locking wrap. It's weather proof apparently, and sticks to itself without being sticky to anything else. Looks like shrink wrap a bit in the final product. Time will tell how it holds up.
The neutral/brights lights were easy to wire up, but the turn signal was another story. Since my new indicator light is LED and the turn signals are filament bulbs, I had to splice the + wire to have a second connection and wire in inline diodes. Prior to the diodes, the indicator would only work for one side signal.
Here's my crude diagram:

Double check which side goes where:

And here it is!

For some reason, the brights indicator is A LOT brighter, but it'll rarely be on, so it's not a huge issue. Ill start stripping my tank down tomorrow to get it ready for paint. Weeee!
-Matt


")


