Follow along with the video below to see how to install our site as a web app on your home screen.
Note: This feature currently requires accessing the site using the built-in Safari browser.
We noticed you are blocking ads. DO THE TON only works with community supporters. Most are active members of the site with small businesses. Please consider disabling your ad blocking tool and checking out the businesses that help keep our site up and free.
So here is the final faced hole and 6mm x 1cm long(just right) button head screw. The hole depth hits the void around 1cm then around 1 inch you could hit something else if you haven't removed the innards yet.... if you already took em apart then you should have a bit more length 1.5 inches ish. so you won't need a bottoming tap. a regular tap should work fine.
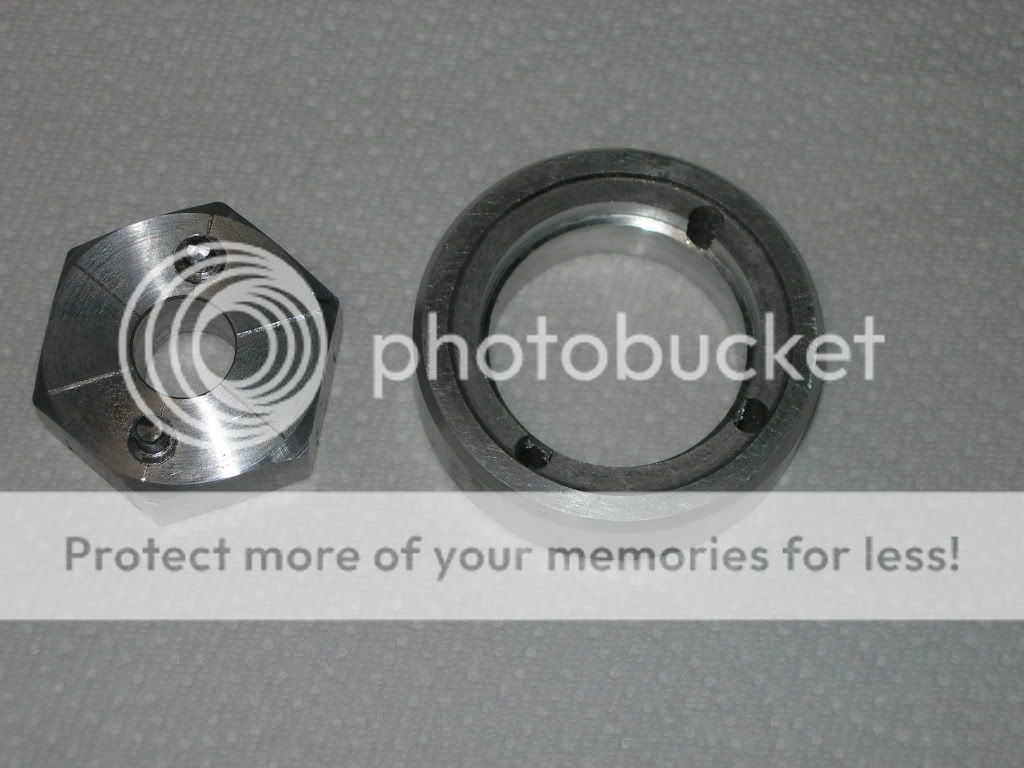
here is the amazing spanner he made for it.
I should post this in the 50000$ mod thread? I mean who has all these amazing cnc machines? THIS GUY!
Here is where I need to give great thanks to Jude and Joe who helped me with this project. Not only did Jude donate his sweet machine shop to the task but they both put in a solid afternoon of tinkering and talking. Mighty fine company as well. Jude did most of the machineing as these tools were above my normal pay grade. Drill Press 5000 was actually a cnc machine too... sorry I didn't get a wide shot of him. We chatted a bit about what motorcycle bits we could machine in a small business setting and his shop is capable of most anything........... got my mind thinking at least.
Anyway got my liquid gasket as well.
after shock rebuild comes the engine paint and rebuild. phew! things are starting to get fun.
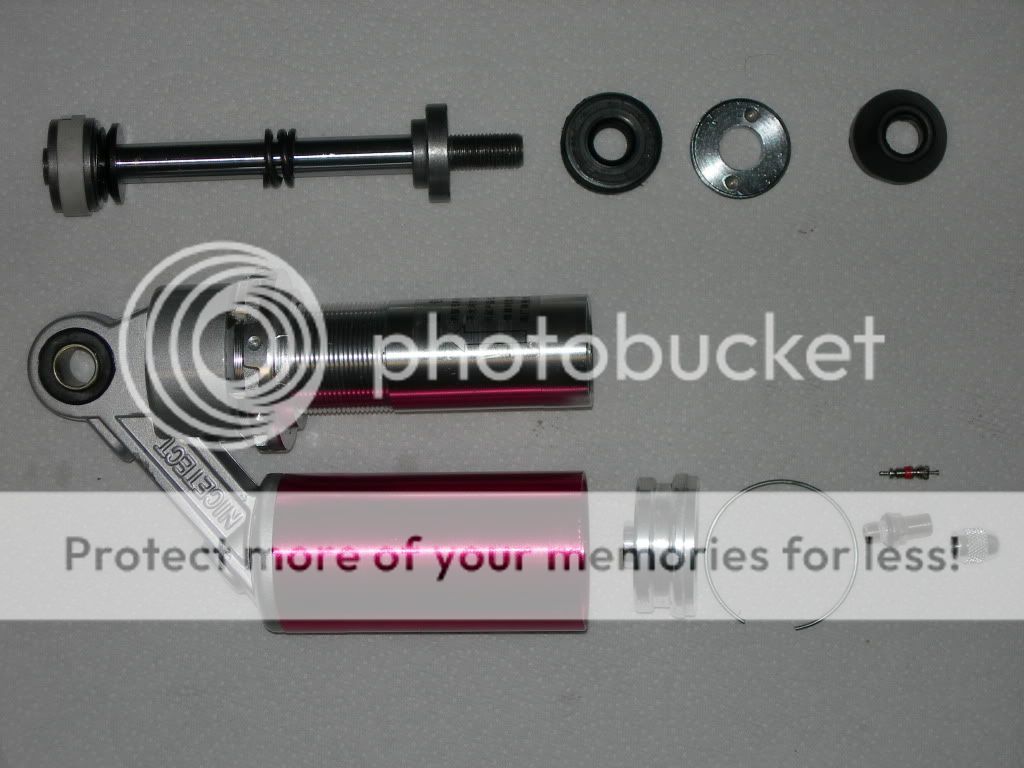
I used 5mm and counter bored a bit deeper to use 'O' ring seal.
It has nowhere to go so should withstand several thousand psi (stronger than the shock body 8) )
You'll be surprised how much more oil fits in there compared to what came out ;D
I was going to go buy a copper crush washer to do the job but an o-ring looks good as long as you have the good deep/close counterbore, ours was mainly for surfacing for the crush washer like on the front forks . our counterbore edge was low and wider than the screw head as so not able to contain a rubber o-ring. i think i'll use loctight on my screws as well so i'll post my findings on the crush washer. Still so jealous of your shock lower solid clevises crazypj !!!
@crazypj - Were you able to find a sleeve bushing for the top rubber of your shocks that fit around the mounting studs? i was going to go sleeveless, is that bad?
I was going to use ordinary copper washers but didn't have right size counter-bore so I made hole deeper and used 'O' ring.
I wouldn't Loctite screws in, copper will compress slightly and provide a lock, just keep eye open for leaks (it would weep way before there was a problem)
Sleeveless is OK, the mounting has a shoulder for washer.
As long as shock is 'free to rotate' it's a happy camper.
I used a Dremel to make rubber a tight sliding fit and also greased mounting stud.
Pics of shock bottoms in my 360 thread, I made them from 2" bar
So I was working on my motor today, and decided to tear apart my second motor to see the condition and end up with the best possible parts for the main engine. the second motor is a newer motor and wasn't stuck when I got it. However I found out the kick start on the second motor was broken. the guy I got it from said it was because it wasn't "hooked up". bah! The gear on the kick start shaft looks like it engaged at a hight rpm and exploded 2 teeth and cracked the cog on the kickstarter shaft. i'll get a pic up tomorrow. luckily the shifting gears are all intact and looking brand new. no damage that I could see. The second motors pistons were much better as well.
the second motors case seemed to leak oil everywhere though.... so I will check the tolerances make sure nothing is warped or funky.
the shift rod was bent at the end. this motor was definitely a product of a crash at some point but most of it's parts are in great shape.
I assembled my rear shocks and they are now one with the bike 8)
Issues I am running into are:
- I don't have a tool to pull either side of the crankshaft (oil filter and magnet thingy) :-\
I had to separate the lower case from the upper an inch to get enough wiggle room to pull the clutch housing off then i could pull the shift rod. assembly will not go smoothly if the centrifugal oil filter is still attached to the crankshaft...
- need to get some kerosene or gas to soak the parts in to make cleaning a bit faster as purple power isn't getting the grease cut quickly.
Just a little piston before and after shot for ya.
Am still in the process of getting the best of the engine parts cleaned and sorted out. I will soon have all the bits pristine for assembly but cleaning all the nooks n crannies is taking longer than expected...
Bow chica bow wow.... it was time to mate the upper and lower case. so I invaded the kitchen and spread the booty over a table and got it on!
dry fitting
getting closer
threebond 1207b in action
the amount of squeege i got
and another
torqued to spec, and the case is together.
So to get things situated properly was difficult, as I had to sneak the shit rod linkage and oil pump housing into play with the clutch basket and centrifugal filter in place... wasn't too bad in the end. i was just careful of not shmearing 1207b all over the place while mating. followed the manual to make sure i didn't miss anything. Next is painting this bad boy before the top and sides go on.
again you are correct pj ;D I will definitely get one for other projects. i wish it didn't require a special tool. I have infinite regular tools, if only it were just a nut or something.
You can grind a suitable socket to do teh job if you have a spare one, but at the small price for a real tool, it's hardly worth the effort - unless you were stuck.
no pics but I got a few things done. I masked the engine parts to be ready to paint. the headlight is now in pieces and initial work on the seat has begun.
You can grind a suitable socket to do teh job if you have a spare one, but at the small price for a real tool, it's hardly worth the effort - unless you were stuck.
agreed. The right tool is worth it most of the time. I purchased my oil filter socket from Z1 Industries for about $8. It came yesterday and worked like a charm.
Kick starter brushes my brake toe peg going to bend it out a bit... any tips?
And it is time to start thinking about wiring..... dun dun dunnnnnnn
I am no electrician so going to have to research what all the important bits are and if I need em. rectifiers n stuff
Shorten toe piece on brake.
Bending the kickstart isn't generally a good idea, puts too much leverage in the wrong direction on the kickstart shaft (then they tend to snap off)
Small update. Got the tank and fender coated with white. the paint wasn't thinned enough so it ended up speckled instead of flowing out glassy... I kinda like the look though so it will stay.
So I made my tank side covers out of wood. I belt sanded some mahogany I had laying around and made them kinda teardrop shaped. Finish sanded and oiled or varnished they will be very pretty. I may make em a little lower profile before they are mounted but we shall see.
Planning out the wiring and starting this bugger is on the docket next. The seat in progress will be revealed at the final stage.
This site uses cookies to help personalise content, tailor your experience and to keep you logged in if you register.
By continuing to use this site, you are consenting to our use of cookies.


") but an o-ring looks good as long as you have the good deep/close counterbore, ours was mainly for surfacing for the crush washer like on the front forks
but an o-ring looks good as long as you have the good deep/close counterbore, ours was mainly for surfacing for the crush washer like on the front forks 


