We noticed you are blocking ads. DO THE TON only works with community supporters. Most are active members of the site with small businesses. Please consider disabling your ad blocking tool and checking out the businesses that help keep our site up and free.
You are using an out of date browser. It may not display this or other websites correctly.
You should upgrade or use an alternative browser.
You should upgrade or use an alternative browser.
YANX 600 Yamaha XJ(FJ) 600 Goes Cafe
- Thread starter Pattheswede
- Start date
JustinLonghorn
No Purple Hearts, No Blue Ribbons
Righteous.
danejurrous
Been Around the Block
Amazing work Pat I wish I had your metal works skills!
Slightly off topic but the tail section on your bike reminded me of a movie I watched when I was a little kid: Flight of the navigator. Can't wait to see this build finished.

Slightly off topic but the tail section on your bike reminded me of a movie I watched when I was a little kid: Flight of the navigator. Can't wait to see this build finished.
danejurrous said:Slightly off topic but the tail section on your bike reminded me of a movie I watched when I was a little kid: Flight of the navigator. Can't wait to see this build finished.
I was thinking the exact same thing...
Pattheswede
First Timer in Cafe Racer Build
Thanks a lot guys!
Kepp you warm up here in the North")
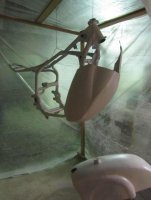
That "thing" in the picture has a realy nice shape! Hope to someday gain knowledge to be able create metalparts with shapes and finnish simular to that piece!
Next project (an XS 500 waiting in the basement) will probably be bobbed, get hardtail and hopefully ware a lot of handmade shiny alloy parts as tank, seat, rearfender ... Hmmm, will need moore practise
Tnx again!
Kepp you warm up here in the North
That "thing" in the picture has a realy nice shape! Hope to someday gain knowledge to be able create metalparts with shapes and finnish simular to that piece!
Next project (an XS 500 waiting in the basement) will probably be bobbed, get hardtail and hopefully ware a lot of handmade shiny alloy parts as tank, seat, rearfender ... Hmmm, will need moore practise
Tnx again!
Pattheswede
First Timer in Cafe Racer Build
DreadRock said:Yes yes man very nice !
Just read through the first 12 page in your build, the XS 500, amazing work, as it looked like *** at the start!
Will definitely read it all. Really liked the "metal-detail" with the Yamaha logo behind the footpegs in the frame, and also think you got a nice look at the wheels.
Pattheswede
First Timer in Cafe Racer Build


Pattheswede
First Timer in Cafe Racer Build
Sometime since last update, alot of other stuff comes between
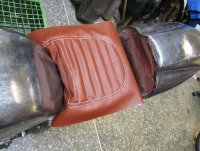
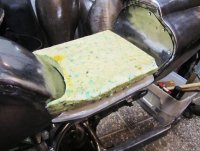
Anyhow, have painted the seat and startet make a seatcover in fakeleather... that's a tool I need some more practice on...
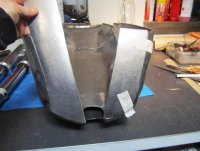
Gastank have the tunnelsection and is soon finnsihed ... hrmmm, well, there is some welding to do first.. but most of the metalpieces are made or in place
Also got two new (old) engines waiting for frames and so, can't wait to start with thosse. One of them is an Honda CB 450 -72 wich I consider as a realy beutyful piece of metal. The other is a XJ 400 (I think) wich I would like to put in a tiny frame, with tiny wheels, clip-ons and pherhaps an old racefairing ... Old style classic Racer, yeah!
Anyhow, have painted the seat and startet make a seatcover in fakeleather... that's a tool I need some more practice on...
Gastank have the tunnelsection and is soon finnsihed ... hrmmm, well, there is some welding to do first.. but most of the metalpieces are made or in place
Also got two new (old) engines waiting for frames and so
, can't wait to start with thosse. One of them is an Honda CB 450 -72 wich I consider as a realy beutyful piece of metal. The other is a XJ 400 (I think) wich I would like to put in a tiny frame, with tiny wheels, clip-ons and pherhaps an old racefairing ... Old style classic Racer, yeah!Attachments
Pattheswede
First Timer in Cafe Racer Build
Time for sme updates then...
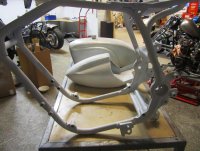
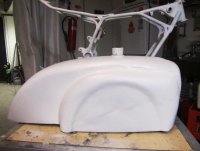
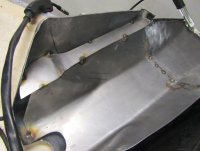
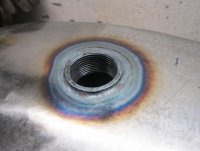
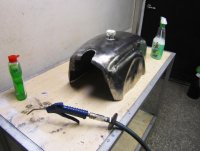
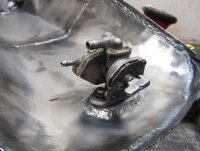
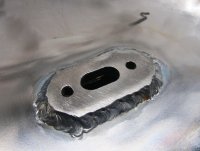
Gastank is finaly done. All wlede and tested, with just a couple of tiny holes to redo.
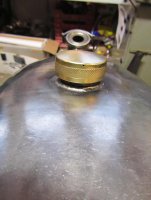
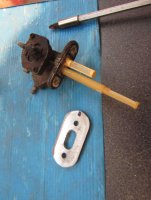
Gascap made by a friend in the garage and at last desided to reuse the old pecock. Just needed to do an adapter.
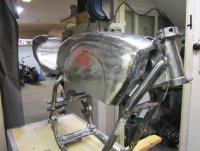
Just one thing left to decide... either let the seat keep the gastank in rearend (frontend is done) or weld a mount and fit it in the old framemounting...
Gastank is finaly done. All wlede and tested, with just a couple of tiny holes to redo.
Gascap made by a friend in the garage and at last desided to reuse the old pecock. Just needed to do an adapter.
Just one thing left to decide... either let the seat keep the gastank in rearend (frontend is done) or weld a mount and fit it in the old framemounting...
Attachments
Pattheswede
First Timer in Cafe Racer Build
Pattheswede
First Timer in Cafe Racer Build
Tnx a lot man!
Pattheswede
First Timer in Cafe Racer Build
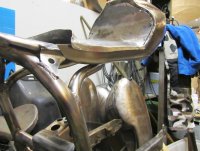
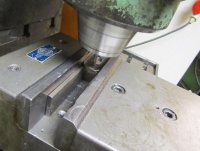
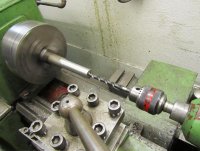
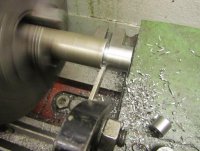
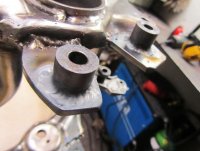
Also made small "***" well, don't know what they are called, but is welded on the plates where the footpegs is mounted..
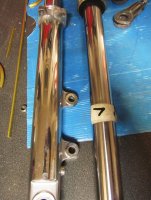
And gave it another shoot with polishing forkleg, must say it gave a great resault with not that much effort (as paint was grinded of earlier)
And gave it another shoot with polishing forkleg, must say it gave a great resault with not that much effort (as paint was grinded of earlier)
Attachments
Bobbed_out
Been Around the Block
Wow that tank looks freakin amazing!
Pattheswede
First Timer in Cafe Racer Build
Hey
Thanks a lot, all of you!
Well, I have failed quite some times before getting this stuff as I want to
So, don't give it up, give it another try, sooner or later, things fall in place!
I also have a couple of friends showing me the right technuiqes, as welding.
Tnx again!
Thanks a lot, all of you!
Well, I have failed quite some times before getting this stuff as I want to
So, don't give it up, give it another try, sooner or later, things fall in place!
I also have a couple of friends showing me the right technuiqes, as welding.
Tnx again!
Pattheswede
First Timer in Cafe Racer Build
Finally start with the paintjob... well, for a newbie, I think it went pretty well, after all.
Had to build a small tent to keep dust away. So frame, gastank and tail got it first layer epoxi-coating. Will try to do the frame one more time tonight together with swingarm. Gastank and tail will dry for some more day and will start working with bondo before topcoat.
Had to build a small tent to keep dust away. So frame, gastank and tail got it first layer epoxi-coating. Will try to do the frame one more time tonight together with swingarm. Gastank and tail will dry for some more day and will start working with bondo before topcoat.