Re: Alex's 72 CB750... Mommy's Little Monster...
Diesel: Yeah dude, without Brandon here helping, pushing, working, etc. this bike might never have gotten done. I can't wait to help build his!
Curb: I don't know about the box/Dunstall style of seat myself, but when I saw that outboard cowl in a pile of debris I knew it would work. It's kind of boxy while still following the lines of the bike.
With only 11 days until my self imposed deadline, the pressure is on. We made a list of stuff that needs to be done and it's like 26 items long! Anyway we knocked a bunch of items off last night. tWistedWheelz brought the seat over yesterday padded, covered and all! He also sent me some progress pics to post here.
Here's the padding during cutdown:
Here's the padding finished with batting over it:
And here she is with the pleather pulled on and stapled. We got the pleather for 5 bucks. The padding itself came from an old jet ski seat I had tucked away for just such a purpose.
Big thanks go out not only to Brandon who went above and beyond yet again, but also to his future mother-in-law who has experience with such things and was there to help.
So the first thing we did was to throw everything on the bike to get a look! Here's the look.
As you can see, I decided on the black sidecovers with no badges.
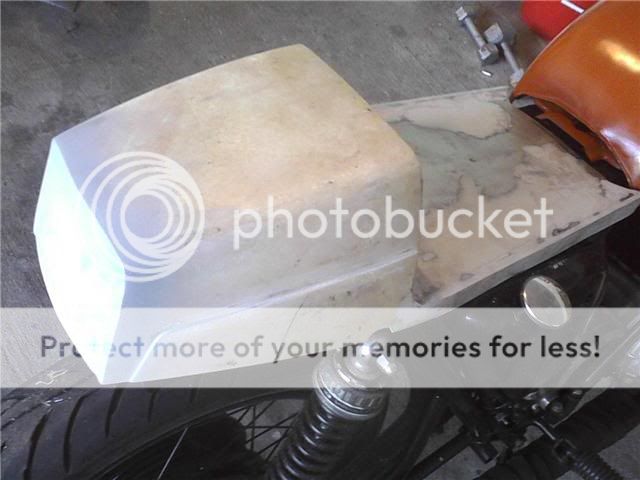
here's another pic of the seat on the tail
The seat has gone from looking Dunstallish to looking more like a duc 900ss seat. Especially once the orange goes on it.
We devised a way to mount the seat to the frame. We drilled three holes in the seat pan and put machine screws through them with a nut tightened down on them. The screws correspond to three holes on the frame (one that we drilled, two that already existed). To secure the seat you tighten down nuts with washers on them. This gets the seat low and secures it very nicely. To go back to the stock seat, I just take off the nuts and put the factory seat back on the factory hinges. It'll work out nicely for those two-up rides with the old lady. Here's the bottom of the pan.
That big chunk of aluminum riveted to the bottom is to keep the seat from flexing.
We cut the hole out of the back for the taillight. It'll be mounted from the inside.
We also cut some notches into the frame in order to mount the blinkers.
This is tWistedWheelz doing what he loves best; Cutting the shit out of 40 year old steel.
")
Here's one of the notches:
And here's how we mounted the blinkers:
That's all for the pictures, but we also installed the rear brake linkage and controlls, put on a new coil and remounted the coil pack, and did lots of other small things. A little more body work, paint, and hooking all of the wires back up are next. If she runs, we'll then see about the front brake. If not, we'll scratch our heads for a while and think real hard...