
We noticed you are blocking ads. DO THE TON only works with community supporters. Most are active members of the site with small businesses. Please consider disabling your ad blocking tool and checking out the businesses that help keep our site up and free.
You are using an out of date browser. It may not display this or other websites correctly.
You should upgrade or use an alternative browser.
You should upgrade or use an alternative browser.
'75 suzuki gt250...Buzzing around the block
- Thread starter joeschuit
- Start date
joeschuit
Been Around the Block
Re: '75 suzuki gt250...Back from the dead
I got some work done tonight. The sprocket cover has been polished and powdercoated. I masked it off in a way to make it blend in with the top of the crankcase and still have the polished surface to blend with the alternator cover. I made up a new clear alternator cover piece. With some fine grit sandpaper and some plastic polish it came out very nice. I also did some measuring for the tach sensor and I should have enough room to have a 1/4" tooth on the flywheel without running into the cover. I'll just need to make up an aluminum riser to fit the sensor and I should be set.


I got some work done tonight. The sprocket cover has been polished and powdercoated. I masked it off in a way to make it blend in with the top of the crankcase and still have the polished surface to blend with the alternator cover. I made up a new clear alternator cover piece. With some fine grit sandpaper and some plastic polish it came out very nice. I also did some measuring for the tach sensor and I should have enough room to have a 1/4" tooth on the flywheel without running into the cover. I'll just need to make up an aluminum riser to fit the sensor and I should be set.
joeschuit
Been Around the Block
Re: '75 suzuki gt250...Back from the dead
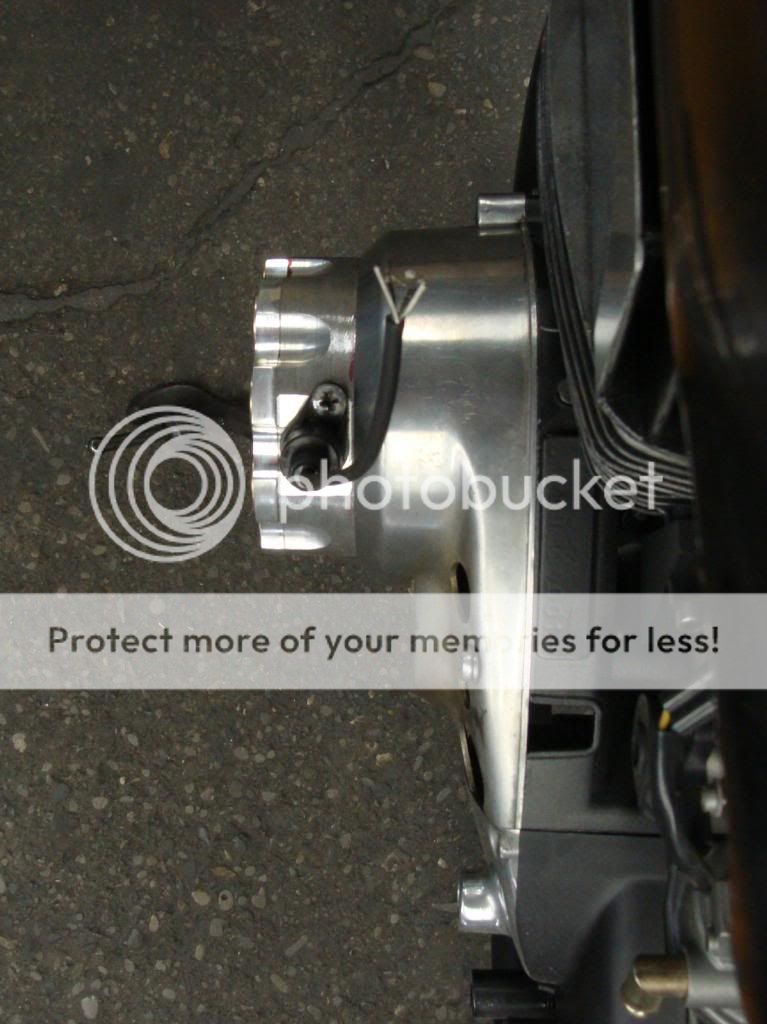
I received the rebuilt crankshaft and have now progressed onto the crank sensor mount. I originally was going to have two teeth mounted on the flywheel, but after some consideration I decided to move the teeth to outside of the cover. I'm using a spare clutch cover before I use the good one, hence the holes.


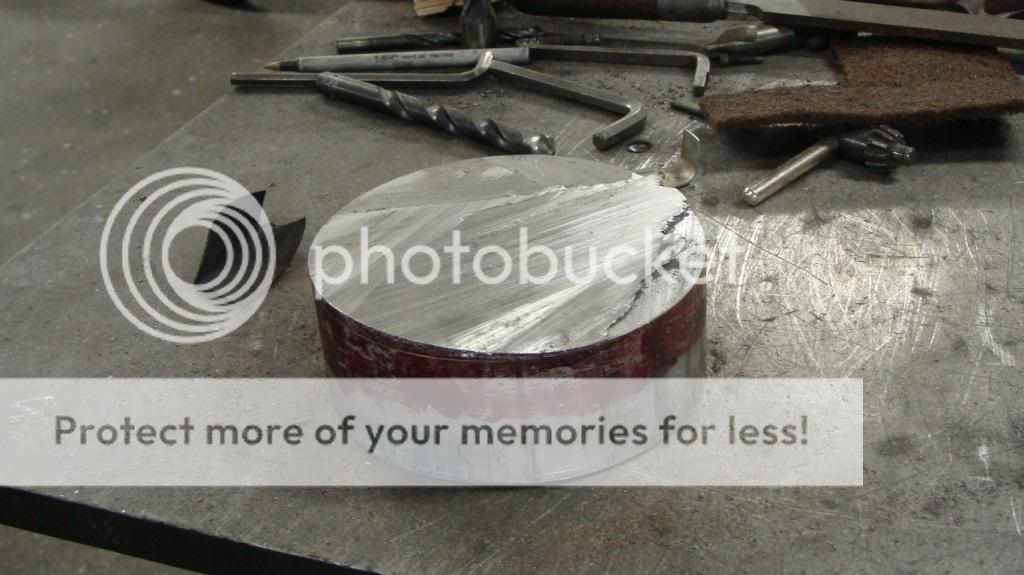
In addition to the new toothed wheel, I need to extend the alternator cover outwards to house the sensor. I started with a big chunk of aluminum:
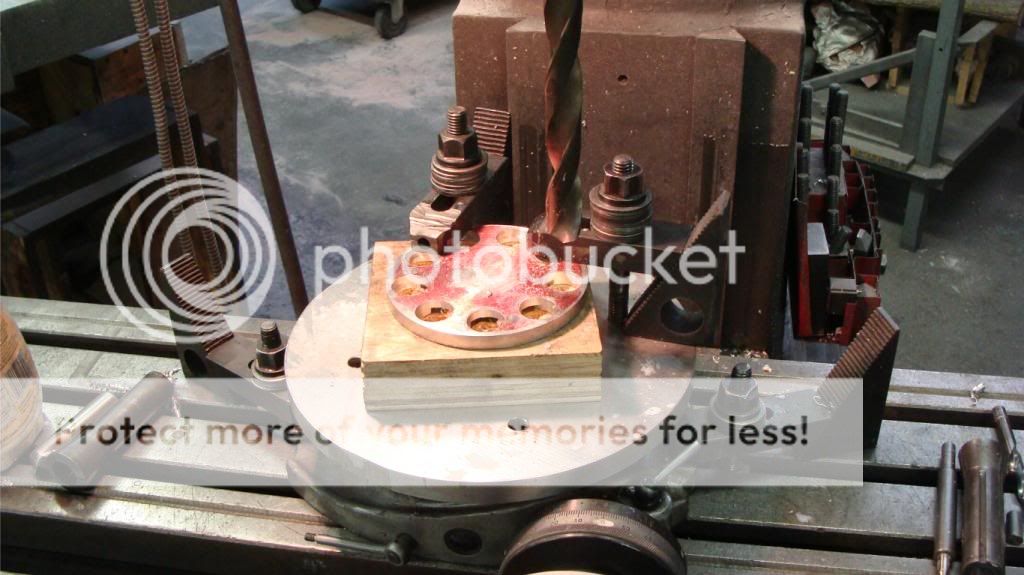
After about 4 hours on the lathe, I ended up with this:


The pieces combined tip the scales at 2.22 lbs. Don't worry though, there will be much more meat cut off once I get to the final product.
I received the rebuilt crankshaft and have now progressed onto the crank sensor mount. I originally was going to have two teeth mounted on the flywheel, but after some consideration I decided to move the teeth to outside of the cover. I'm using a spare clutch cover before I use the good one, hence the holes.
In addition to the new toothed wheel, I need to extend the alternator cover outwards to house the sensor. I started with a big chunk of aluminum:
After about 4 hours on the lathe, I ended up with this:
The pieces combined tip the scales at 2.22 lbs. Don't worry though, there will be much more meat cut off once I get to the final product.


Re: '75 suzuki gt250...Back from the dead
Joe, that's an awesome piece of work but it's so wide! I always try to make my bikes narrow. Is there a way to mount that trigger wheel right up against the rotor and fit the sensor inside a thinner cover plate?
The new cover plate could be slightly thicker than stock and would be relatively easy to mount the trigger in that.
I have exactly the same issue with a GT750 that I'm trying to fit a Ignitech trigger wheel to and there is no simple answer for sure. I want to make mine more narrow that stock and so far it's not working out. It will come to me one day.
joeschuit
Been Around the Block
Re: '75 suzuki gt250...Back from the dead
I machined off quite a bit more width from the last pics. After hogging out the base spacer, I cut the weight, including the sensor, down to 15.85 oz. I'm pretty happy with the overall product considering I haven't modified the powerdynamo flywheel at all.
All of the machine work was done on the lathe and rotary table
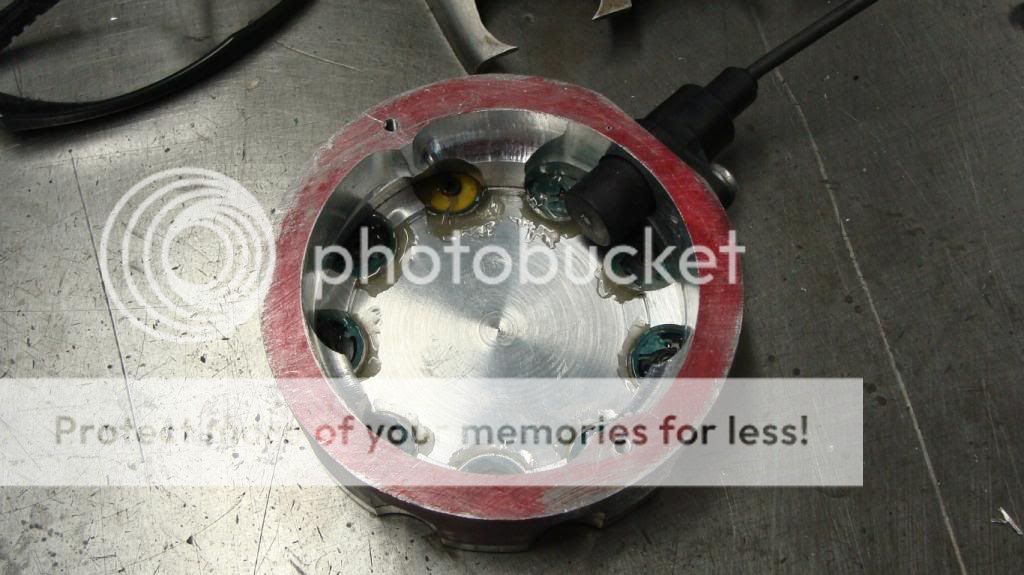
Going with the oil cap theme, I put nine 12 gauge shells in the cover.
I machined off quite a bit more width from the last pics. After hogging out the base spacer, I cut the weight, including the sensor, down to 15.85 oz. I'm pretty happy with the overall product considering I haven't modified the powerdynamo flywheel at all.
All of the machine work was done on the lathe and rotary table
Going with the oil cap theme, I put nine 12 gauge shells in the cover.
two-smoker
I reject your reality, and substitute my own!
Re: '75 suzuki gt250...Back from the dead
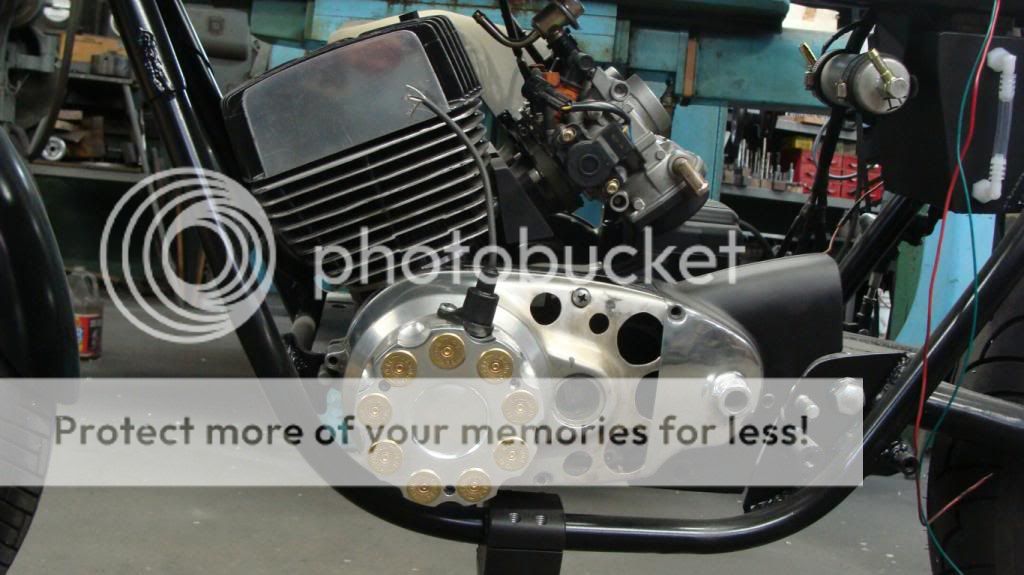
Looking at how far the clutch cover sticks out the other side, I'd say the motor looks more "centered" in the frame now.
Looking at how far the clutch cover sticks out the other side, I'd say the motor looks more "centered" in the frame now.
joeschuit
Been Around the Block
Re: '75 suzuki gt250...Back from the dead
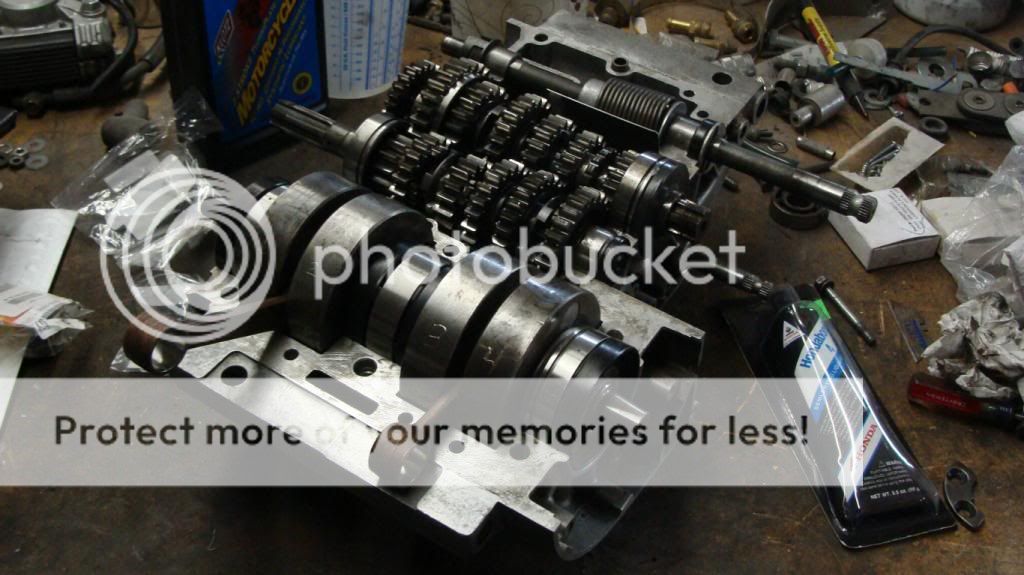
I pulled the cases out of the bike and started on the final reassembly. The transmission is in and shifts smoothly. Hopefully I can get a little done here and there and get it ready for pressure testing by next weekend. I plan on replacing all of the transmission seals so that date will depend on the seal availability.
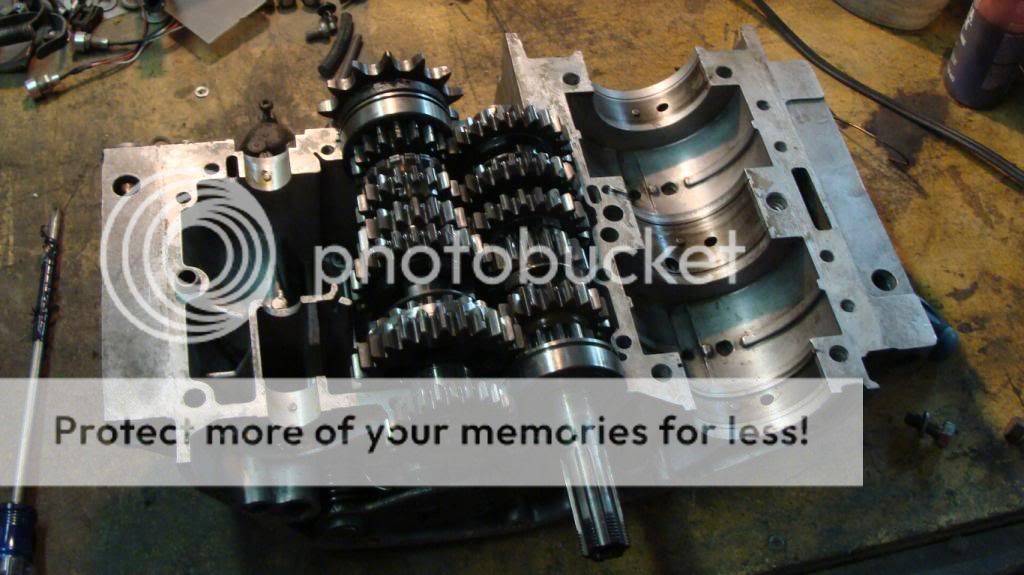
I pulled the cases out of the bike and started on the final reassembly. The transmission is in and shifts smoothly. Hopefully I can get a little done here and there and get it ready for pressure testing by next weekend. I plan on replacing all of the transmission seals so that date will depend on the seal availability.
joeschuit
Been Around the Block
Re: '75 suzuki gt250...Back from the dead
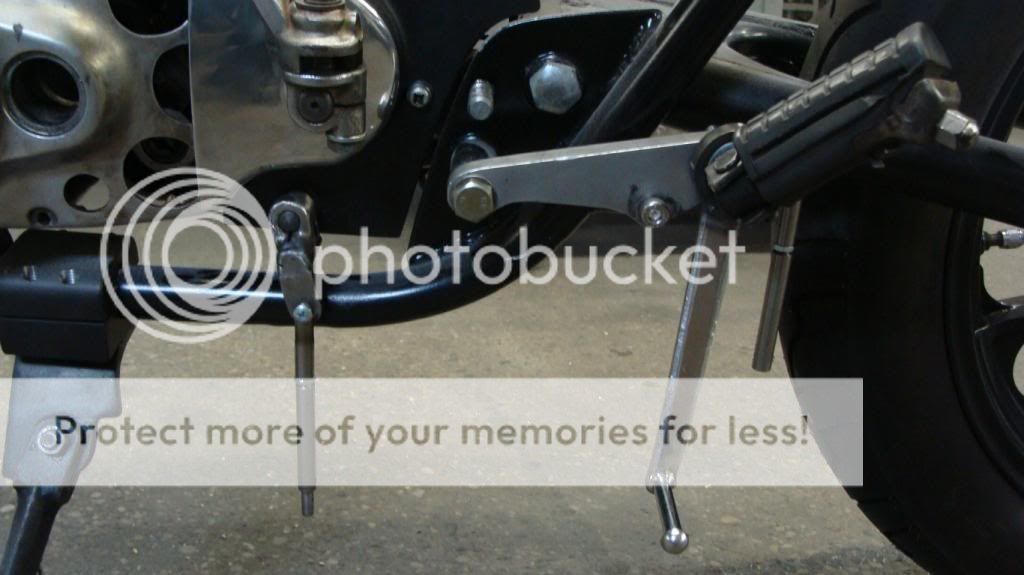
I Got the needed transmission seals ordered and should be here next weekend. This gave me time to work out a new shifting linkage. I originally reversed the shifter and shortened the lever for the right fit. This made it difficult to shift because of the reduced leverage. However, I couldn't do it the normal way with a linkage because of the left side kickstart. I plan to remedy this situation by having a quick disconnect shift linkage that allows me to swing the shift lever out of the way when starting. It isn't the quickest method, but this will allow me to have the correct lever ratio for smooth, stock shifting. Here's what I've gotten done so far:

I've got a full 1 inch of adjustability from this linkage. You can see the center portion that slips inside of itself, enough to give it strength to not flex. I'll put a hole through the center with a clip for quick removal.
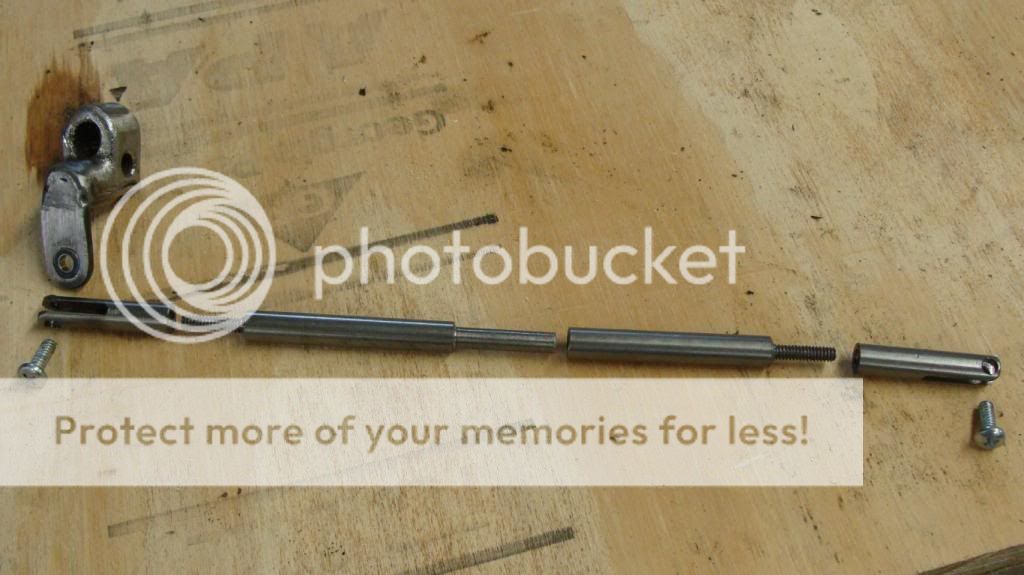
I modified the shifter shaft lever so it moves the rod to outside of the frame.

I Got the needed transmission seals ordered and should be here next weekend. This gave me time to work out a new shifting linkage. I originally reversed the shifter and shortened the lever for the right fit. This made it difficult to shift because of the reduced leverage. However, I couldn't do it the normal way with a linkage because of the left side kickstart. I plan to remedy this situation by having a quick disconnect shift linkage that allows me to swing the shift lever out of the way when starting. It isn't the quickest method, but this will allow me to have the correct lever ratio for smooth, stock shifting. Here's what I've gotten done so far:
I've got a full 1 inch of adjustability from this linkage. You can see the center portion that slips inside of itself, enough to give it strength to not flex. I'll put a hole through the center with a clip for quick removal.
I modified the shifter shaft lever so it moves the rod to outside of the frame.
two-smoker
I reject your reality, and substitute my own!
Re: '75 suzuki gt250...Back from the dead
You could also do what I did, and make a "z" in your kickstarter so it clears the linkage and footpeg....
You could also do what I did, and make a "z" in your kickstarter so it clears the linkage and footpeg....
Re: '75 suzuki gt250...Back from the dead
I did the same on my RD.
two-smoker said:You could also do what I did, and make a "z" in your kickstarter so it clears the linkage and footpeg....
I did the same on my RD.
joeschuit
Been Around the Block
Re: '75 suzuki gt250...Back from the dead
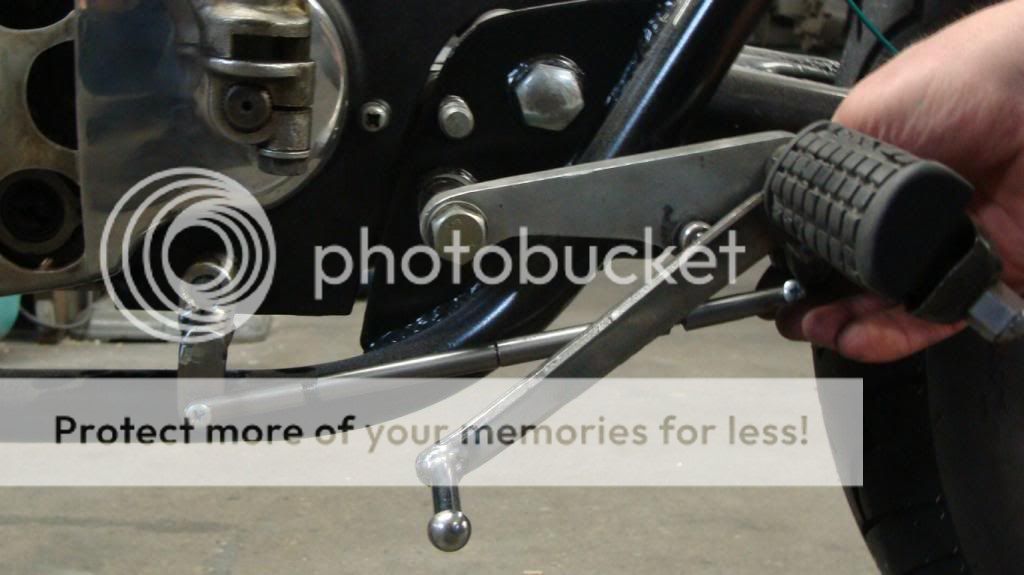
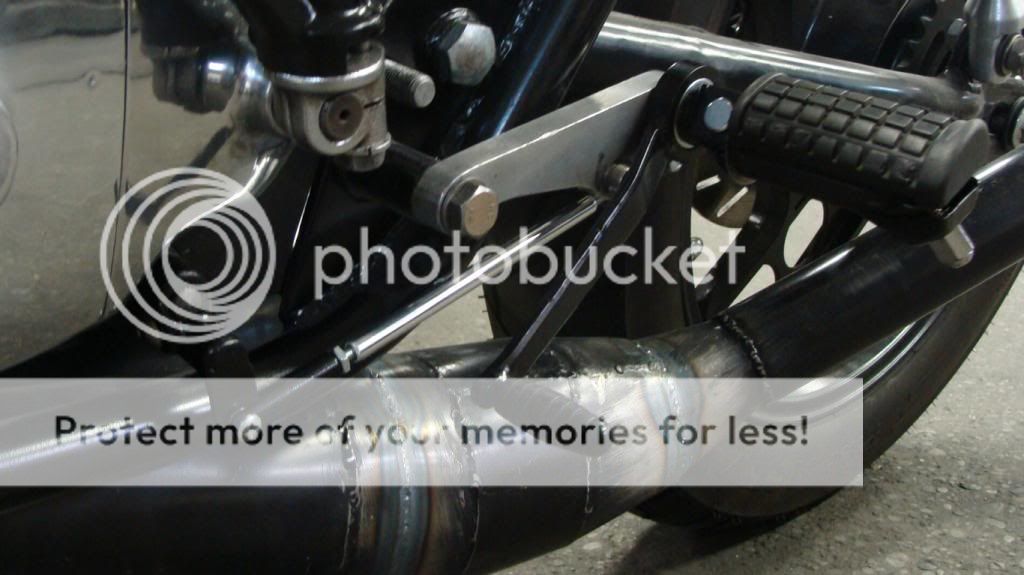
I agree about modifying the kick starter. However, my peg and shifter assembly sticks out quite a bit farther than the one pictured. The kickstarter would have to be bent out quite a ways, not something I want to be kicking over and putting extra stress on the crankcase. I can revisit this later if I come up with something. I finished up the linkage. Overall I'm very happy. It shifts just like stock and is very smooth. I'll powdercoat the shifter lever and the shifter arm, along with polishing and putting a clear coat on the rod.
I agree about modifying the kick starter. However, my peg and shifter assembly sticks out quite a bit farther than the one pictured. The kickstarter would have to be bent out quite a ways, not something I want to be kicking over and putting extra stress on the crankcase. I can revisit this later if I come up with something. I finished up the linkage. Overall I'm very happy. It shifts just like stock and is very smooth. I'll powdercoat the shifter lever and the shifter arm, along with polishing and putting a clear coat on the rod.
joeschuit
Been Around the Block
Re: '75 suzuki gt250...Back from the dead
I got a bit of work done. I polished the final alternator cover and decided on a rear fender. Its going to hug the rear tire just like the front.


I also went ahead and bent the kickstarter. After attempting to work out a usable method for the quick disconnect, it was much more of a hassle than I was anticipating. I'll pull the swingarm and weld on some mounts for the fender and make up a solid rod for the shifter.
I got a bit of work done. I polished the final alternator cover and decided on a rear fender. Its going to hug the rear tire just like the front.
I also went ahead and bent the kickstarter. After attempting to work out a usable method for the quick disconnect, it was much more of a hassle than I was anticipating. I'll pull the swingarm and weld on some mounts for the fender and make up a solid rod for the shifter.
Re: '75 suzuki gt250...Back from the dead
+1. Nothing worse than going down due to a peg.
bradj said:You outta make those pegs fold it just cheap insurance
+1. Nothing worse than going down due to a peg.
joeschuit
Been Around the Block
Re: '75 suzuki gt250...Back from the dead
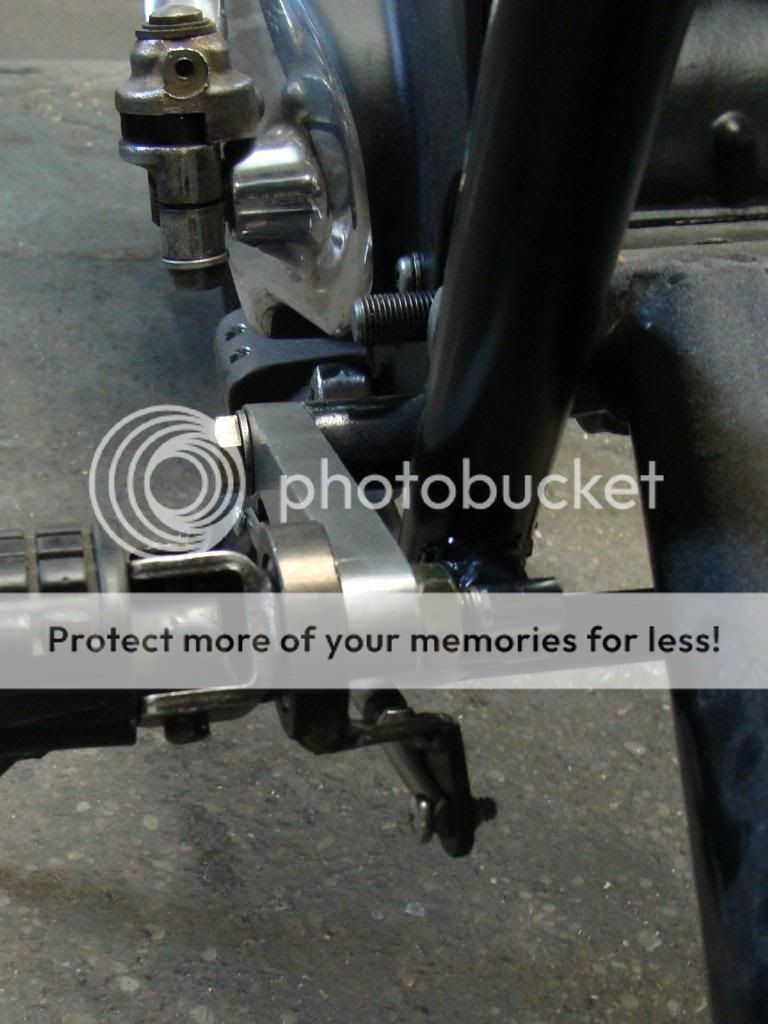
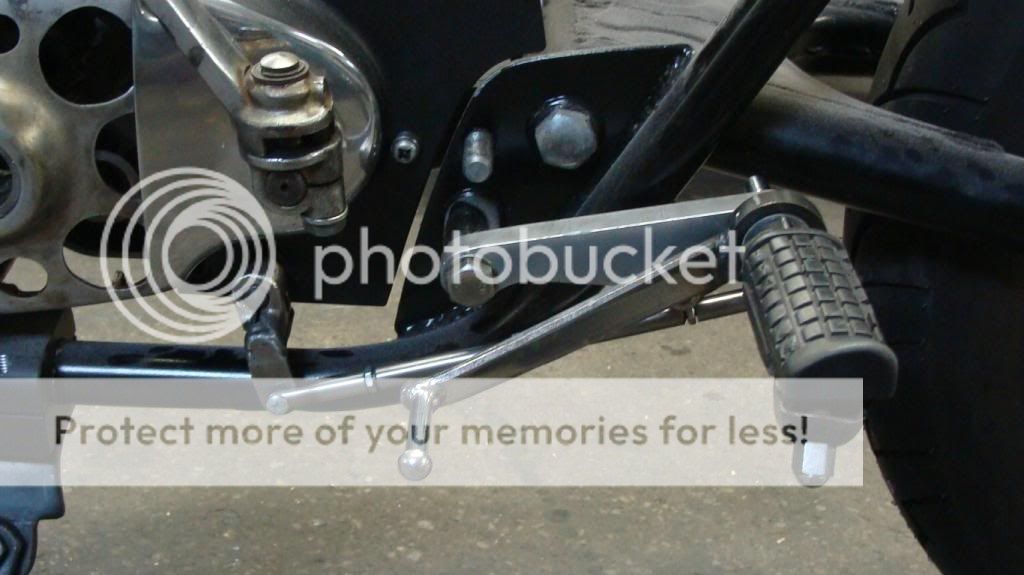
I ended up modifying the shift lever and the kickstarter so they don't interfere. I eventually figured out that it would be too much of a hassle disconnecting the shifter every time. I made up a new rod out of aluminum with threaded steel rod on either end. Here's what it looks like now:

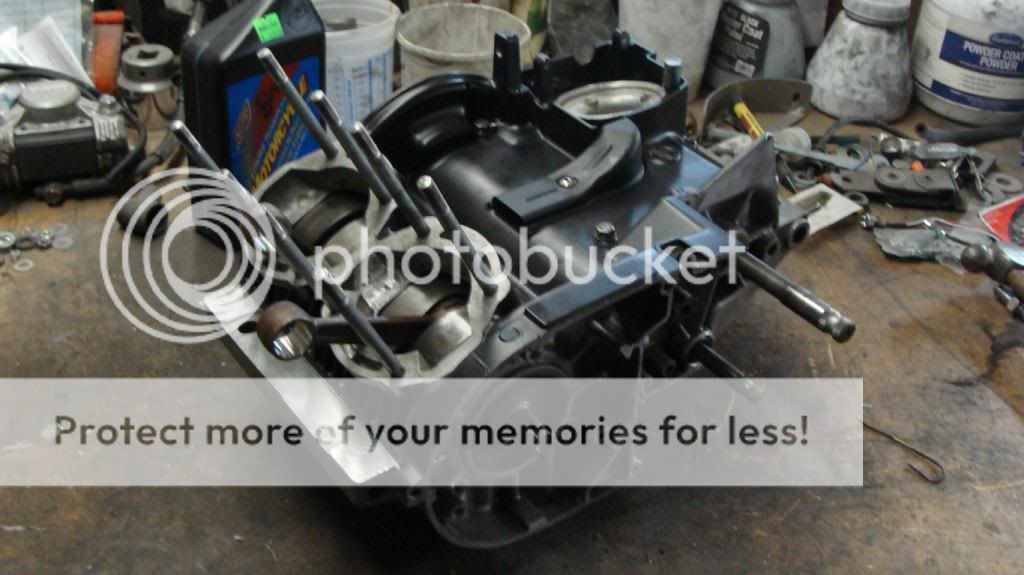
I got the final little things done before closing the cases for good. I'm surprised on how stiff the new crank bearings are. Definitely no slop.


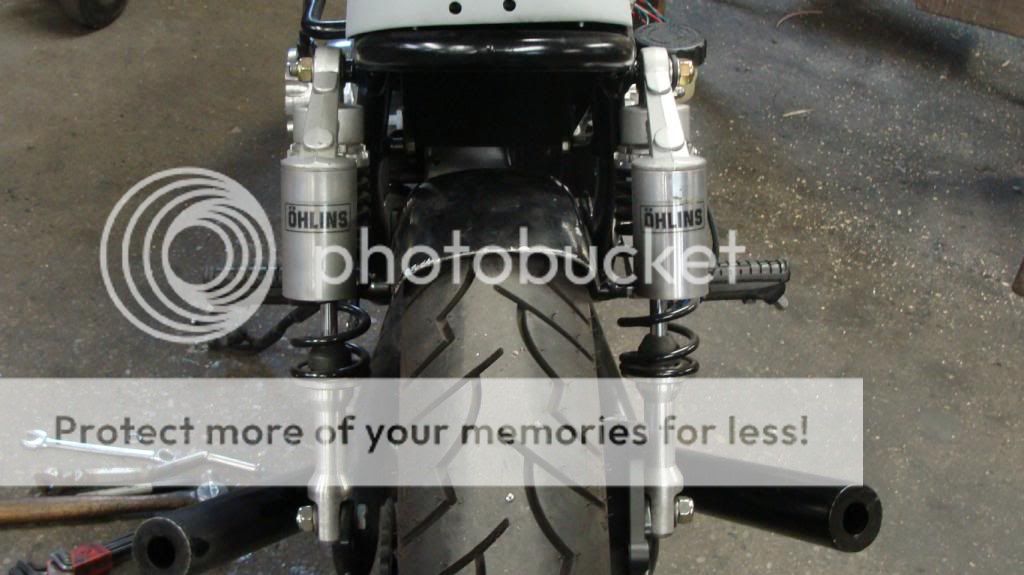
And for the peg, it does fold. As for the shocks, if you go back to page 18 you can see they're the $100 rfy shocks that I machined up new lower mounts. I bought some vinyl decals on ebay to "dress" them up.
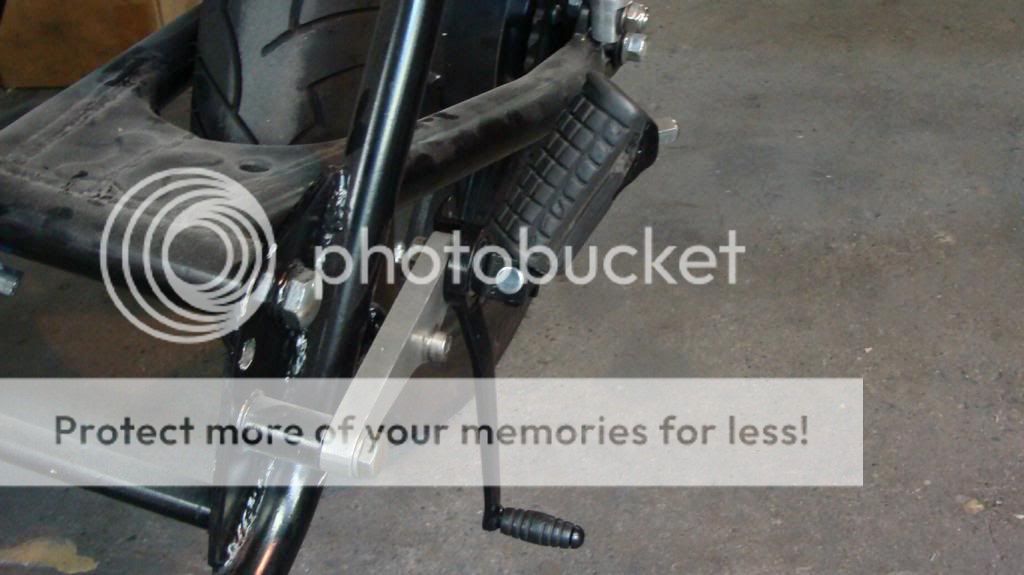
I ended up modifying the shift lever and the kickstarter so they don't interfere. I eventually figured out that it would be too much of a hassle disconnecting the shifter every time. I made up a new rod out of aluminum with threaded steel rod on either end. Here's what it looks like now:
I got the final little things done before closing the cases for good. I'm surprised on how stiff the new crank bearings are. Definitely no slop.
And for the peg, it does fold. As for the shocks, if you go back to page 18 you can see they're the $100 rfy shocks that I machined up new lower mounts. I bought some vinyl decals on ebay to "dress" them up.
joeschuit
Been Around the Block
Re: '75 suzuki gt250...Back from the dead
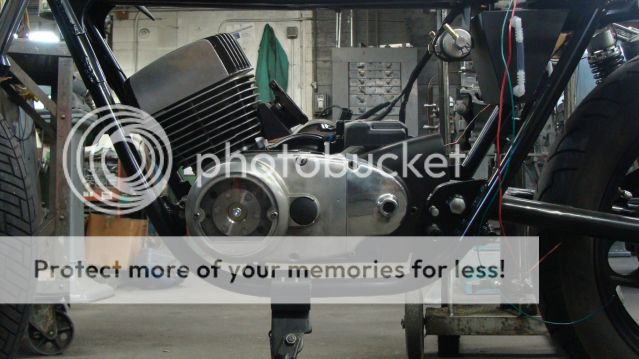
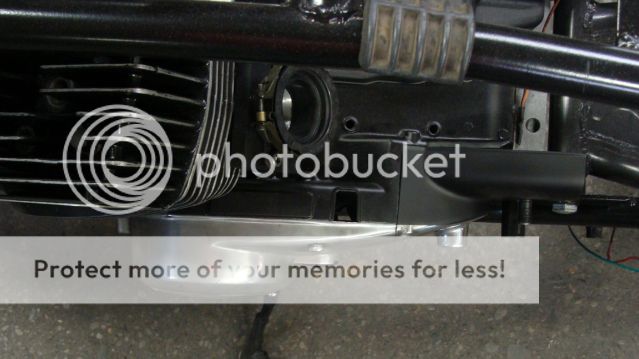
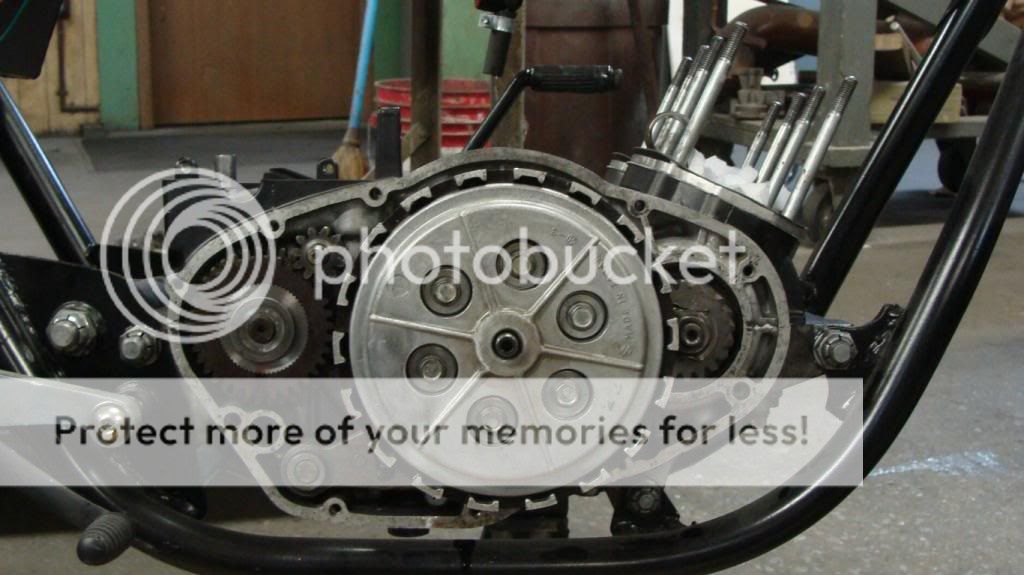
I've pushed farther on the engine. The bottom end is now back on the frame. I started with the clutch side:

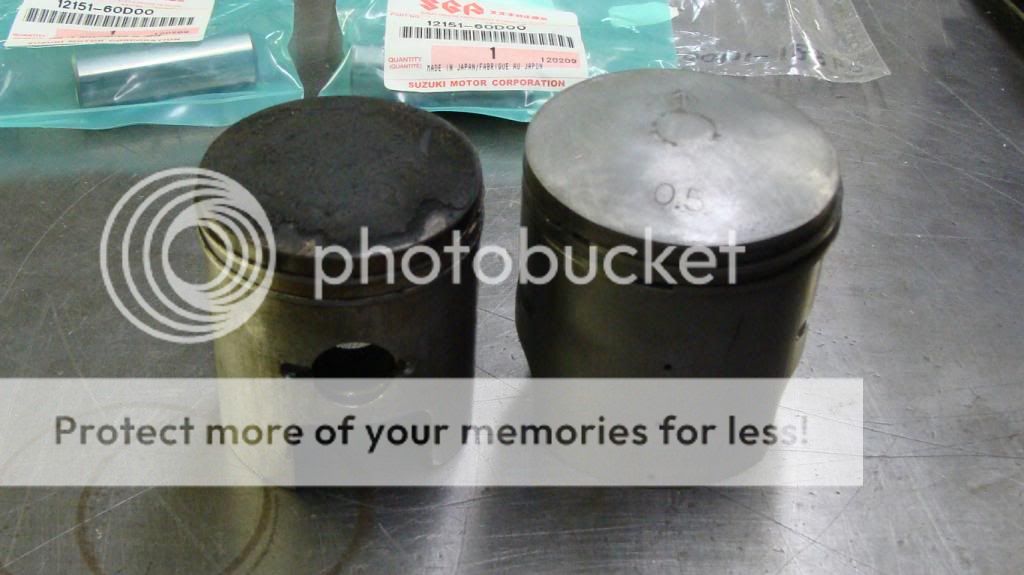
I finally got the correct piston pins. I took a pic of the difference between the gt250 and the t350 piston sizes:

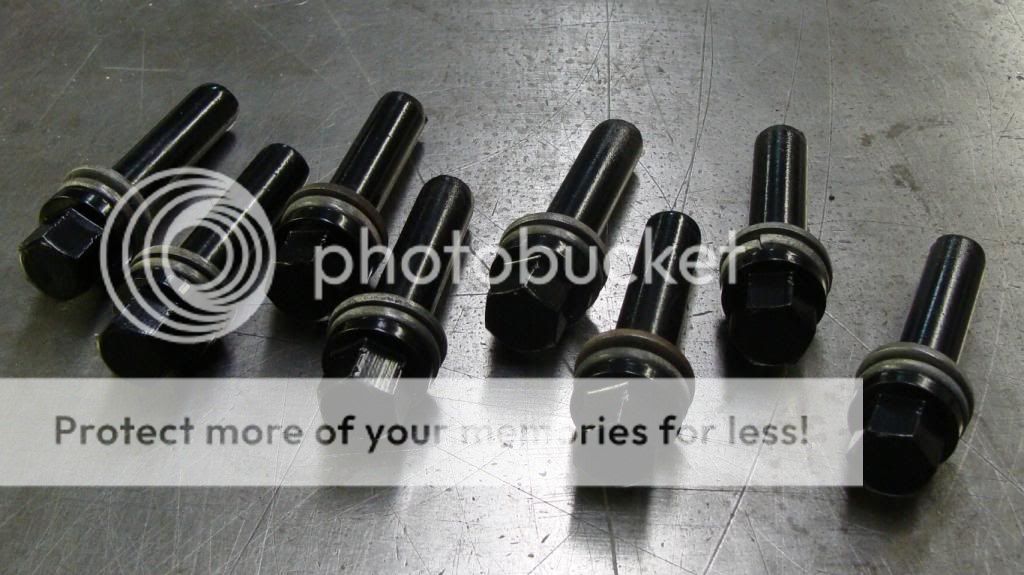
I also blasted and powdercoated the headbolts. They blend in very nicely with the heads now.

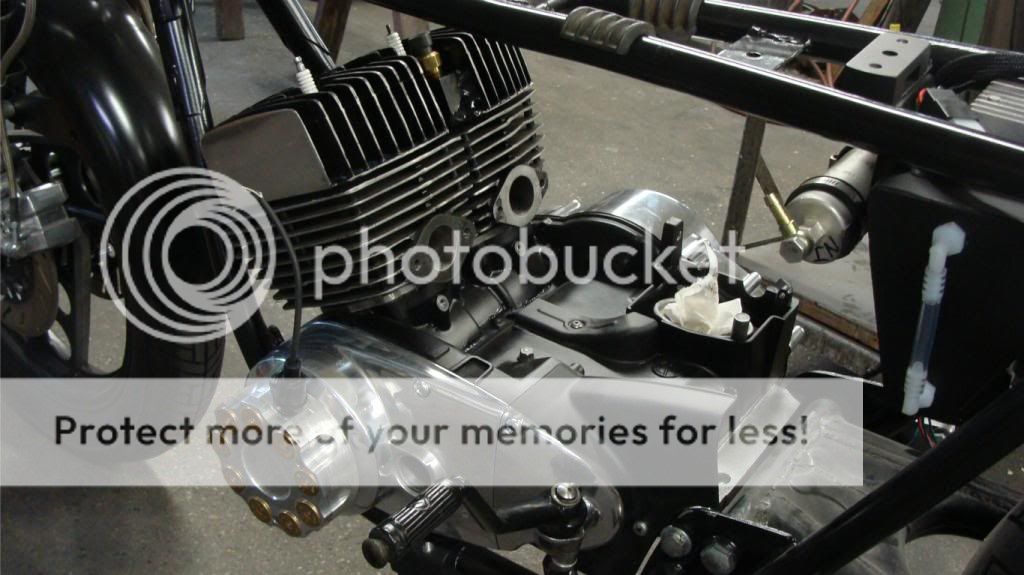
And now where I'm at:
I'll be able to get the throttlebodies on and start wiring in the new alternator along with timing it. Thanks, Joe
I've pushed farther on the engine. The bottom end is now back on the frame. I started with the clutch side:
I finally got the correct piston pins. I took a pic of the difference between the gt250 and the t350 piston sizes:
I also blasted and powdercoated the headbolts. They blend in very nicely with the heads now.
And now where I'm at:
I'll be able to get the throttlebodies on and start wiring in the new alternator along with timing it. Thanks, Joe


