
We noticed you are blocking ads. DO THE TON only works with community supporters. Most are active members of the site with small businesses. Please consider disabling your ad blocking tool and checking out the businesses that help keep our site up and free.
You are using an out of date browser. It may not display this or other websites correctly.
You should upgrade or use an alternative browser.
You should upgrade or use an alternative browser.
CB450 K7 "Espresso Love"
- Thread starter CCRider
- Start date
CCRider
Coast to Coast
ryanglade said:I am loving the clip-ons and headlight ears. I am taking a welding class in the fall and I just found some projects.
Keep up the great work!!!
Thanks. Welding is fun! I've had a little stick and gas welding instruction, but trying to do flux core wire welding (with no instruction) frustrates me a lot. Seems like every time I lay a bead, I get a random 1/2" that looks great and the rest looks like shit. I guess that's what grinders and bondo are for
") .
.CC
CCRider
Coast to Coast
gribbs said:Kudos for tackling all this on your own! And thanks for the coping calculator, I passed on the link to my buddy ho is making a frame from scratch in his garage for Norton twin-powered rigid....he might be able to use it. Thanks!!
That's what it's all about. Making something from nothing, learning a little bit in the process and passing it on.
If you don't have a tube notching tool, the coping calculator is very helpful.
CC
CCRider
Coast to Coast
The wheels were a part of the build that started early and spread out over a long timespan.
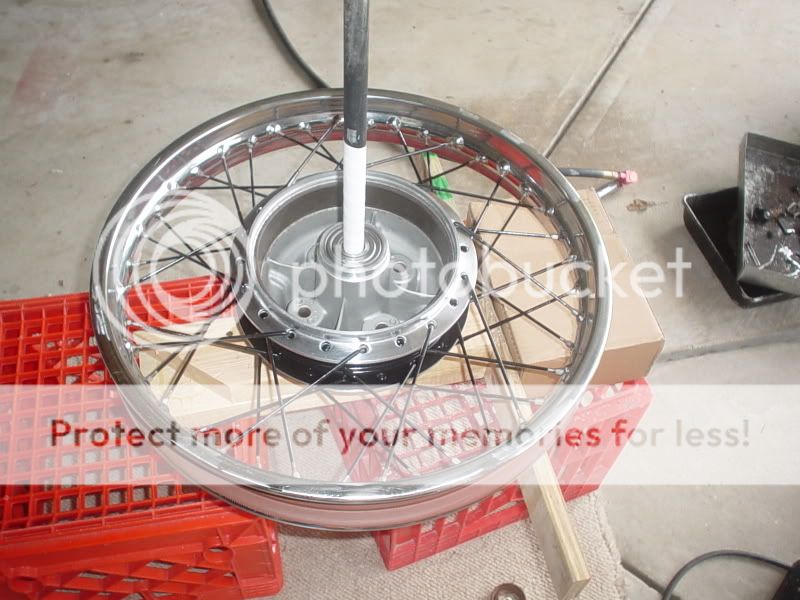
I started with the rear wheel, disassembling it and polishing the hub. The inner part of the hub was painted with Duplicolor engine paint to stand up to heat from the brake drum. Spokes were painted with the same paint for no good reason. I laced the wheels and trued them using a truing stand built from some 2X4's. I've seen several guys on here who have laced their own wheels and then paid someone else to true them, but to me the truing was the easy part.
The inside of my rims were a little rusty, so I cleaned them up and added a few coats of Rustoleum rusty metal primer.
I'm a little short on pictures of the rear wheel, but here's a few of them being laced and in the truing stand:


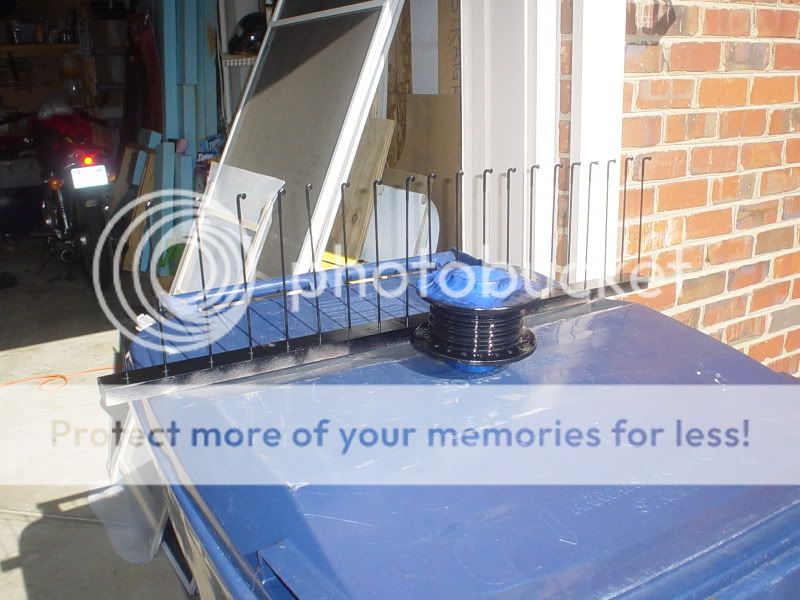
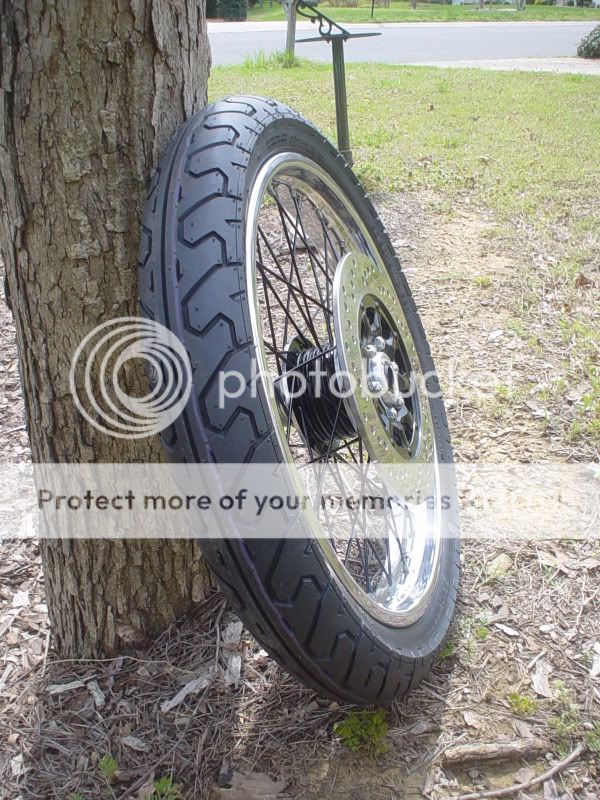
By the time I got to the front wheel I'd been turned on to Rustoleum Appliance Epoxy (thanks JRK). It has a better finish and is a lot tougher than the Duplicolor engine paint (and I didn't need the heat resistance for the front wheel).
Here's the front hub and spokes with fresh paint:
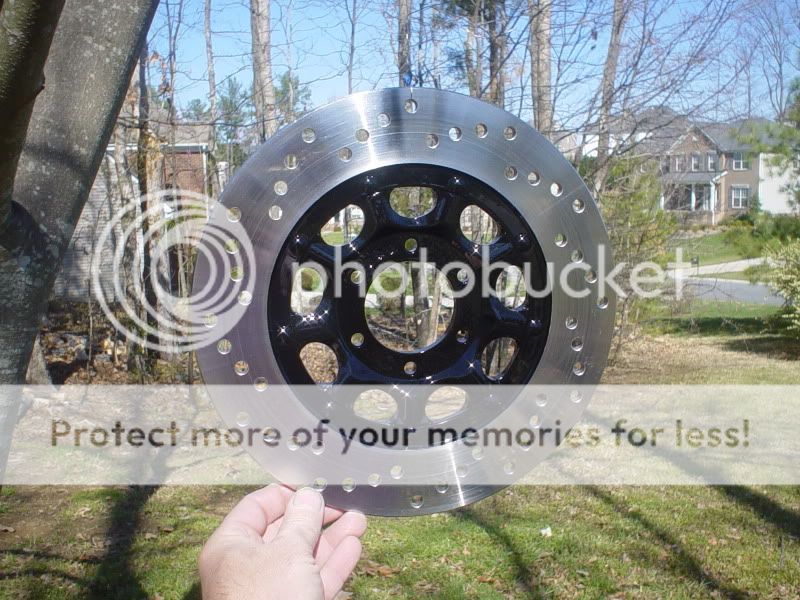
Here's a link to a post I did on drilling my brake rotor: http://dotheton.com/index.php?topic=6711.msg56656#msg56656
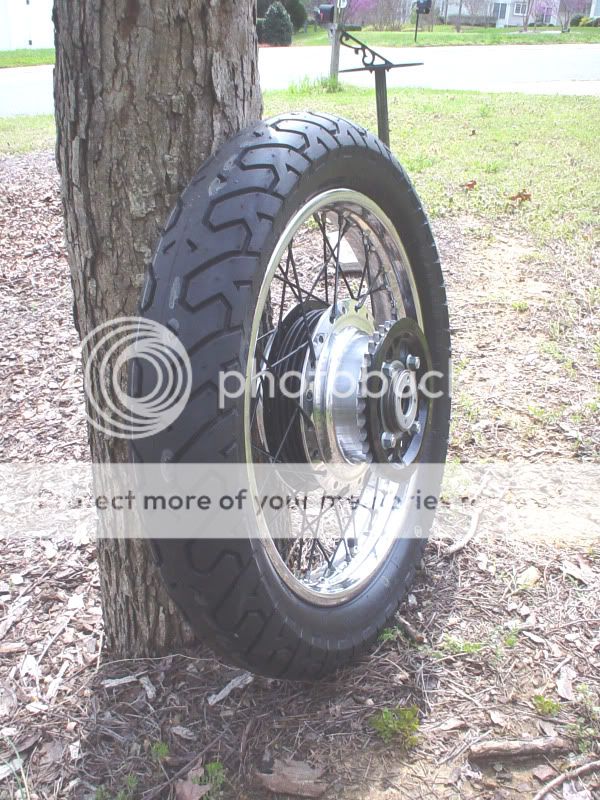
And a shot with fresh appliance epoxy on the center part:
For tires I went with Bridgestone Spitfires 110/90R18's on the rear and 90/90R19's on the front.
Here's the final products, itching hit the road:
Thanks, CC
I started with the rear wheel, disassembling it and polishing the hub. The inner part of the hub was painted with Duplicolor engine paint to stand up to heat from the brake drum. Spokes were painted with the same paint for no good reason. I laced the wheels and trued them using a truing stand built from some 2X4's. I've seen several guys on here who have laced their own wheels and then paid someone else to true them, but to me the truing was the easy part.
The inside of my rims were a little rusty, so I cleaned them up and added a few coats of Rustoleum rusty metal primer.
I'm a little short on pictures of the rear wheel, but here's a few of them being laced and in the truing stand:
By the time I got to the front wheel I'd been turned on to Rustoleum Appliance Epoxy (thanks JRK). It has a better finish and is a lot tougher than the Duplicolor engine paint (and I didn't need the heat resistance for the front wheel).
Here's the front hub and spokes with fresh paint:
Here's a link to a post I did on drilling my brake rotor: http://dotheton.com/index.php?topic=6711.msg56656#msg56656
And a shot with fresh appliance epoxy on the center part:
For tires I went with Bridgestone Spitfires 110/90R18's on the rear and 90/90R19's on the front.
Here's the final products, itching hit the road:
Thanks, CC
CCRider
Coast to Coast
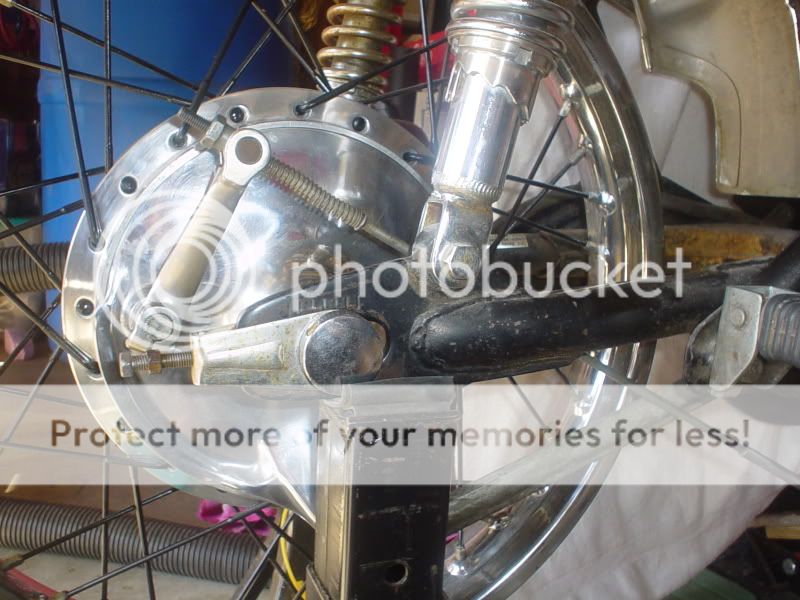
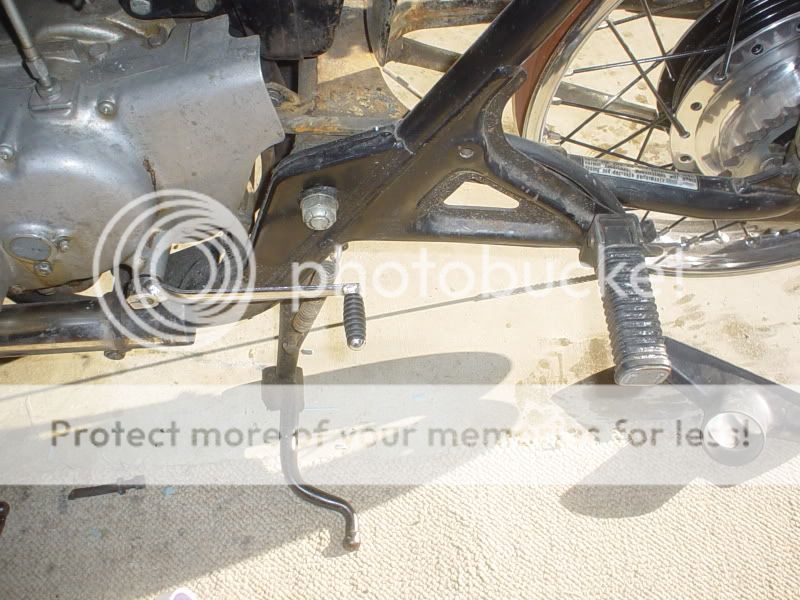
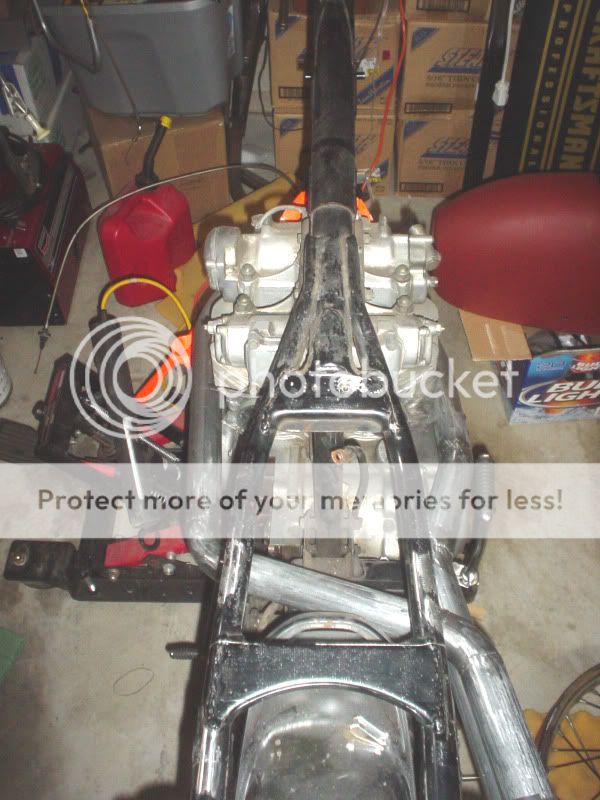
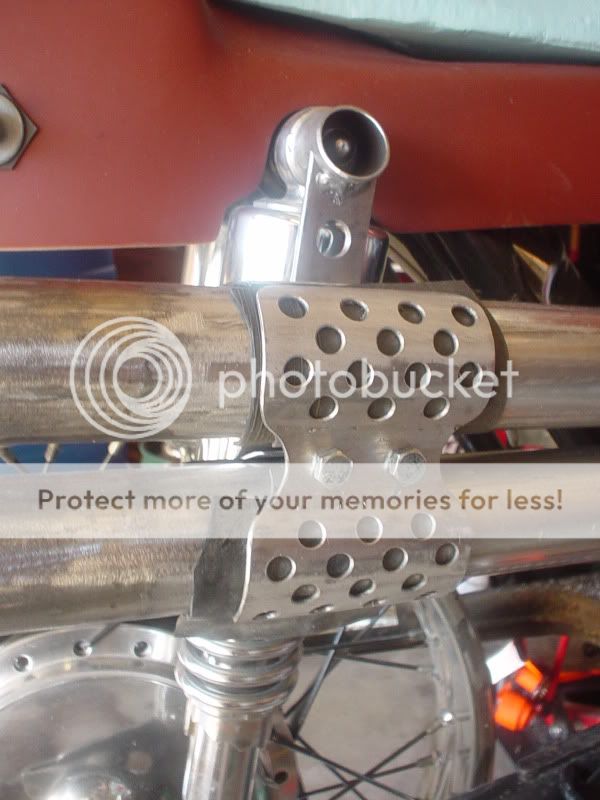
For my rear sets, I'm going simple and using the passenger pegs.
The inspiration for the brake side came from Zonda's brilliant brake set-up, http://dotheton.com/index.php?topic=5846.60 , but I added simplicity by eliminating some linkages.
I cut the foot pad off of the stock brake pedal and welded up a new pedal that will pivot on a rod just inside the frame at the stock footpeg attachment point:
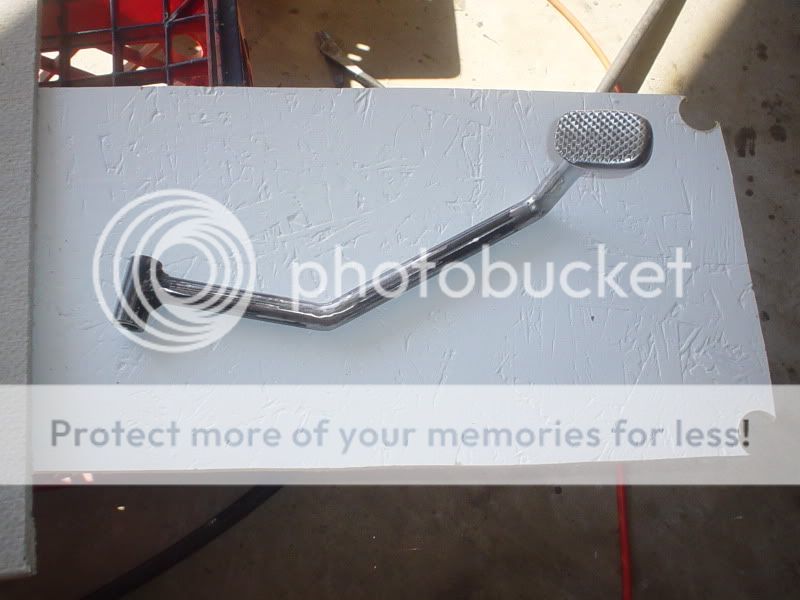
A pedal stop, tabs for the return spring and taillight switch and the brake control arm were added:
The sleeve throught the frame at the stock footpeg mount was reamed out a little to take a 7/16" pivot rod that extends to the opposite side of the frame and plugs into a tube welded to a bolt in the left side footpeg mount.
Here's a shot of the upside down frame with the new pedal in place:

And an earlier shot with the linkage installed:
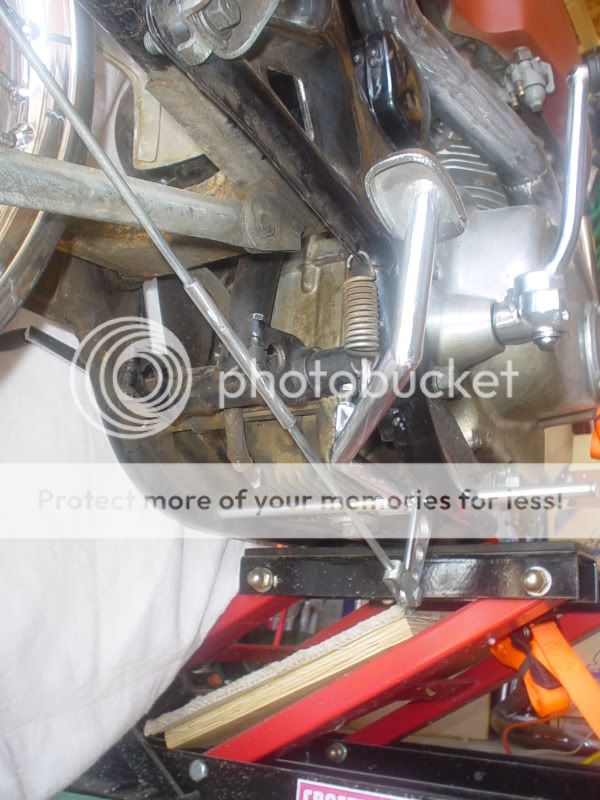
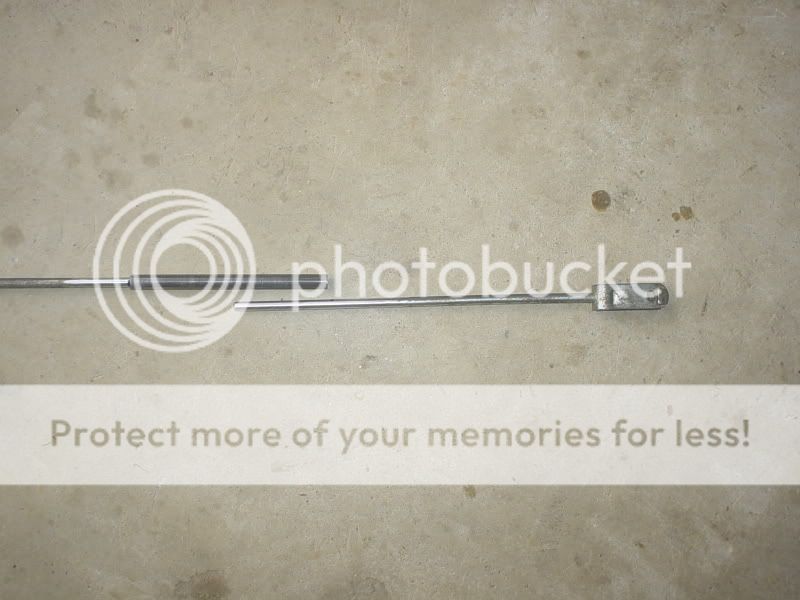
The brake control arm at the rear hub is rotated 180 degrees and the brake rod runs straight from arm to arm:
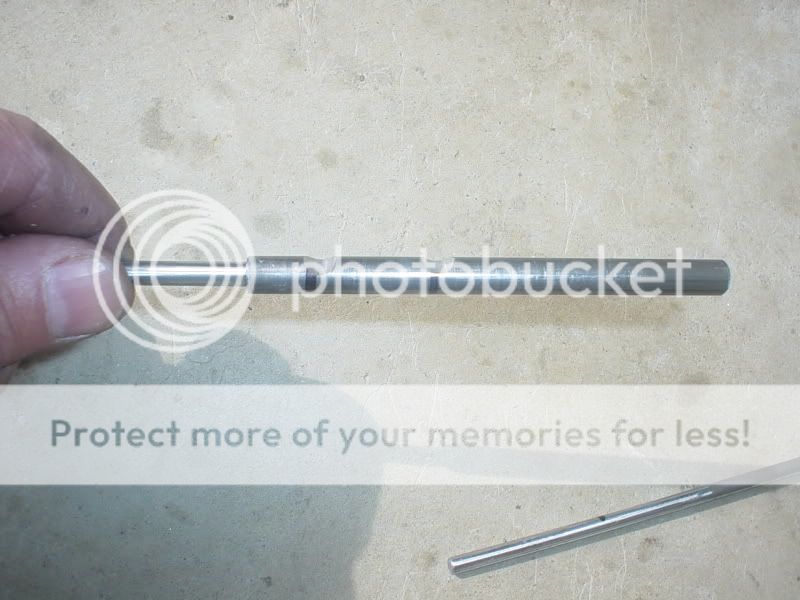
To make a brake rod long enough, I used the front of one rod and the rear of another and spliced them together with a 4" section of tube:
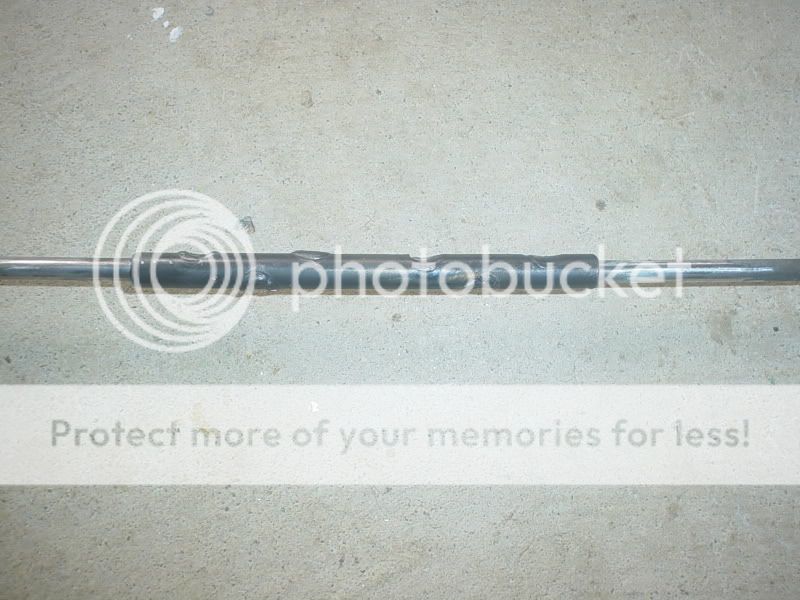
At three places on each side of the splice a groove was filed in the rod and splice sleeve about half way through the rod and the grooves were welded over:
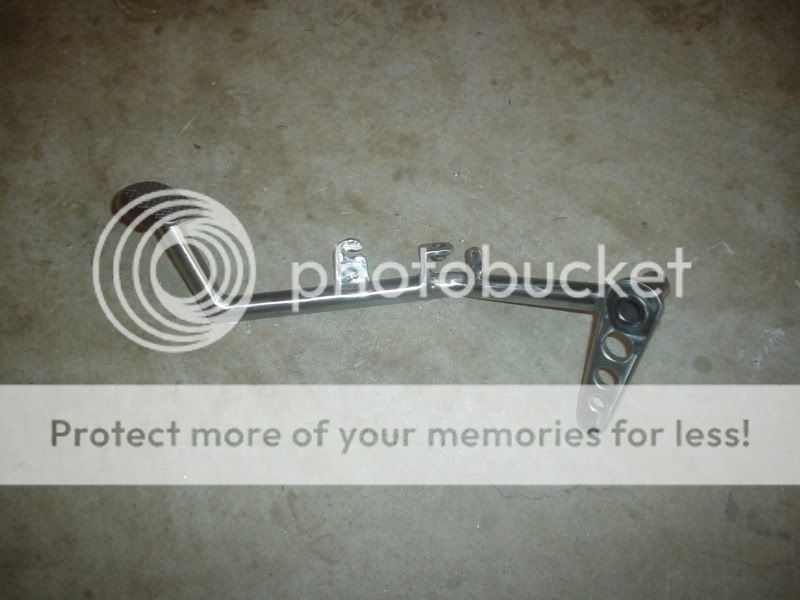
The shifter side is mechanically uber-simple. I'm just going to try my hand (foot?) at GP shifting. With the bends straightened out of the shifter, it's just about the perfect length for use with the passenger pegs (a little short maybe).
If the GP shifting proves to be a problem, I'll fab a set-up like Herm's.
Thanks for looking, CC
The inspiration for the brake side came from Zonda's brilliant brake set-up, http://dotheton.com/index.php?topic=5846.60 , but I added simplicity by eliminating some linkages.
I cut the foot pad off of the stock brake pedal and welded up a new pedal that will pivot on a rod just inside the frame at the stock footpeg attachment point:
A pedal stop, tabs for the return spring and taillight switch and the brake control arm were added:
The sleeve throught the frame at the stock footpeg mount was reamed out a little to take a 7/16" pivot rod that extends to the opposite side of the frame and plugs into a tube welded to a bolt in the left side footpeg mount.
Here's a shot of the upside down frame with the new pedal in place:
And an earlier shot with the linkage installed:
The brake control arm at the rear hub is rotated 180 degrees and the brake rod runs straight from arm to arm:
To make a brake rod long enough, I used the front of one rod and the rear of another and spliced them together with a 4" section of tube:
At three places on each side of the splice a groove was filed in the rod and splice sleeve about half way through the rod and the grooves were welded over:
The shifter side is mechanically uber-simple. I'm just going to try my hand (foot?) at GP shifting. With the bends straightened out of the shifter, it's just about the perfect length for use with the passenger pegs (a little short maybe).
If the GP shifting proves to be a problem, I'll fab a set-up like Herm's.
Thanks for looking, CC
goodfornothing
Spicey!
Sick! I'm replicating the Herm sets for my build.
The brake pedal is steel correct?
The brake pedal is steel correct?
hysteria411
New Member
i love what you did with your foot controls, a little different than what i usually see
tWistedWheelz
BUILT NOT BOUGHT!
WOW! very impressive work! I love your clip-ons and the headlight ears. Great craftsmanship. I lke the headlight ears so much I think I will have to use your idea when I buld one for myself! Cant wait to see more of your progress. Good Luck!
CCRider
Coast to Coast
CCRider
Coast to Coast
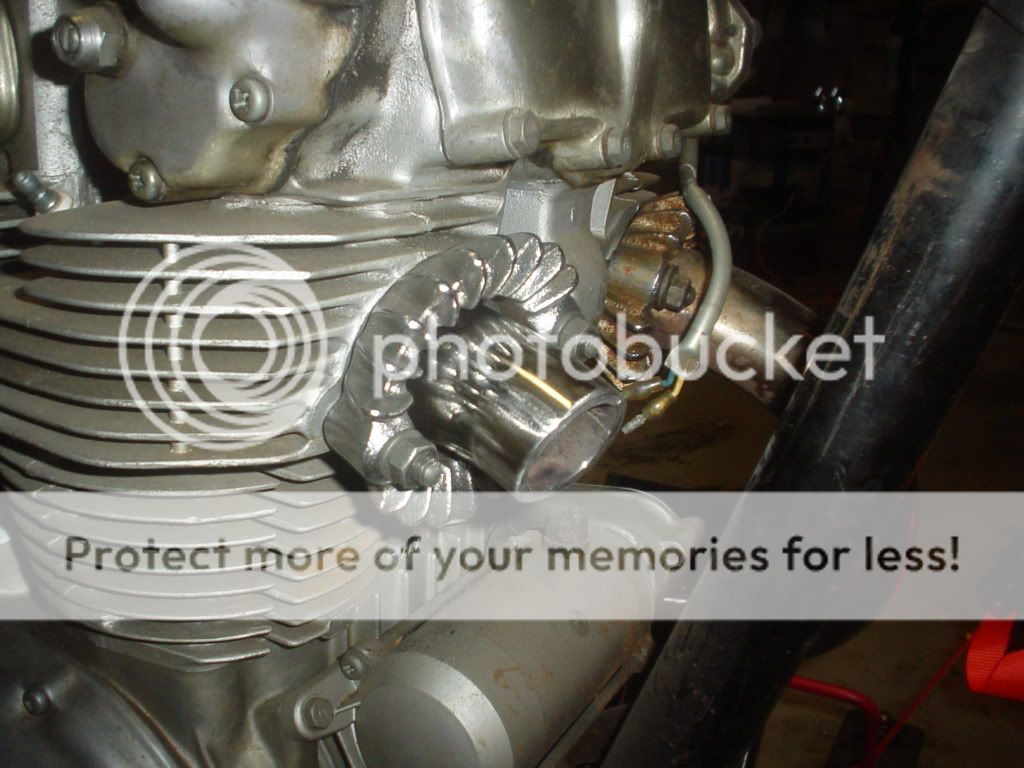
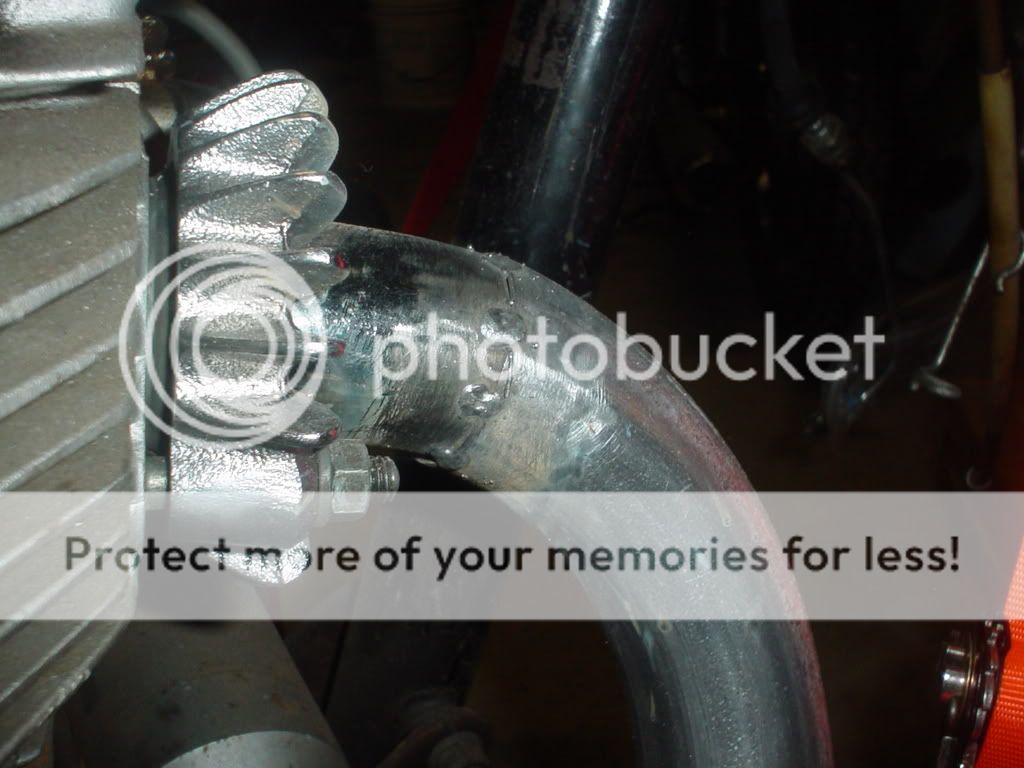
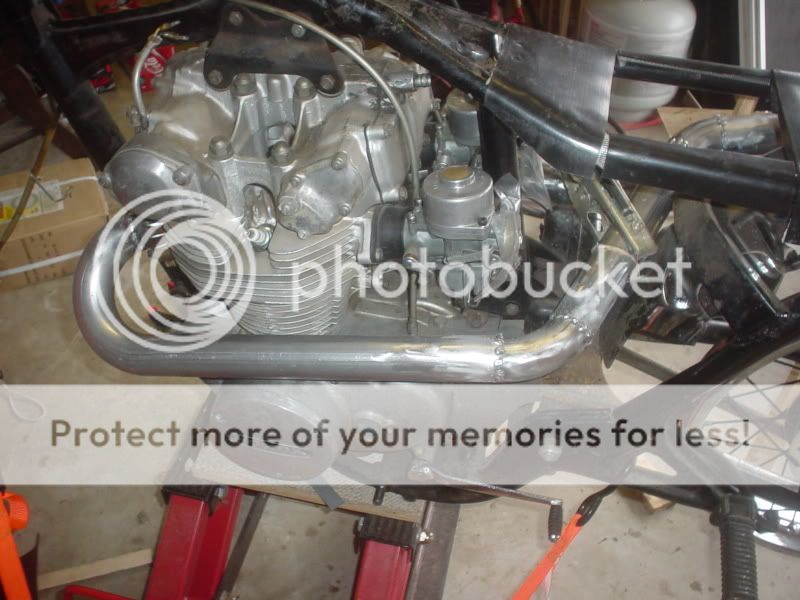
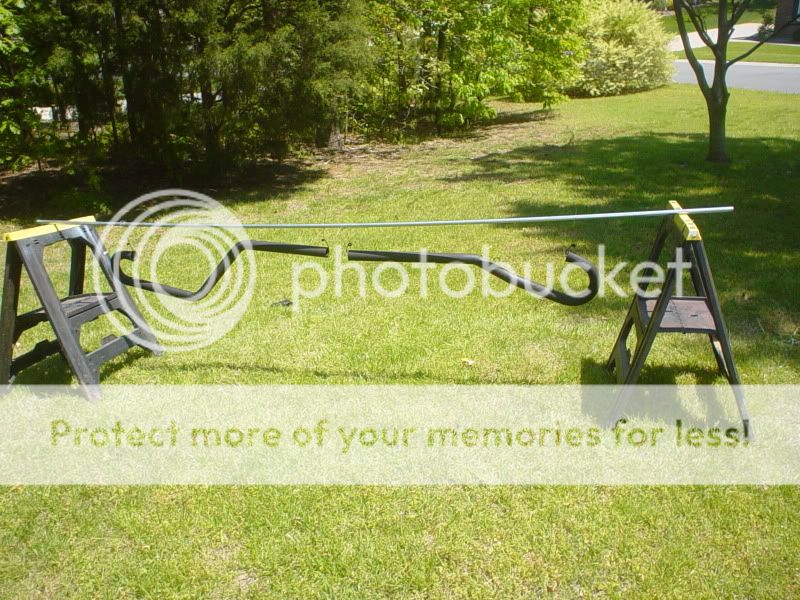
I fabricated my exhaust pipes with some mandrel bends from J.C.Whitney. I believe the tubes are 1-5/8" ID (whatever matched the stock headers)
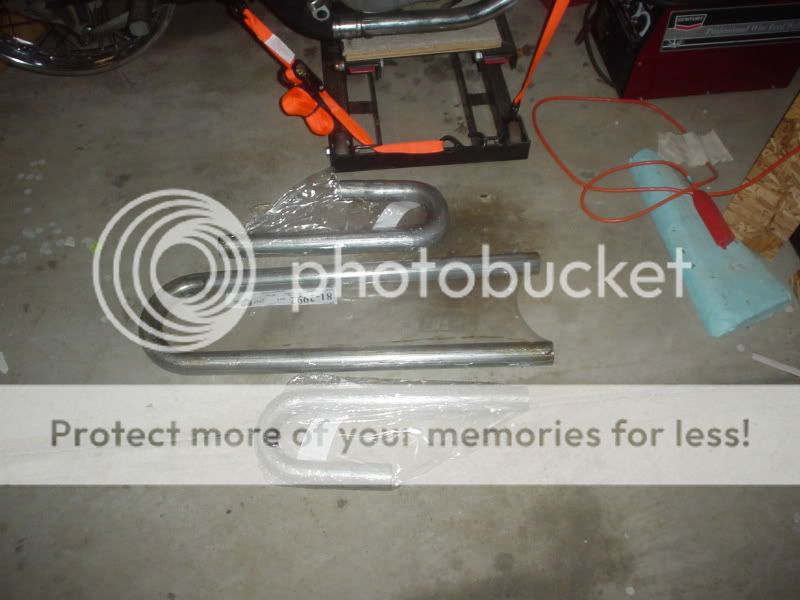
The stock headers were cut back to a couple inches long and the new tubes were tacked on.
Basically the bends were cut into sections and trial fitted into place until I got things about where I wanted them then tacked together.
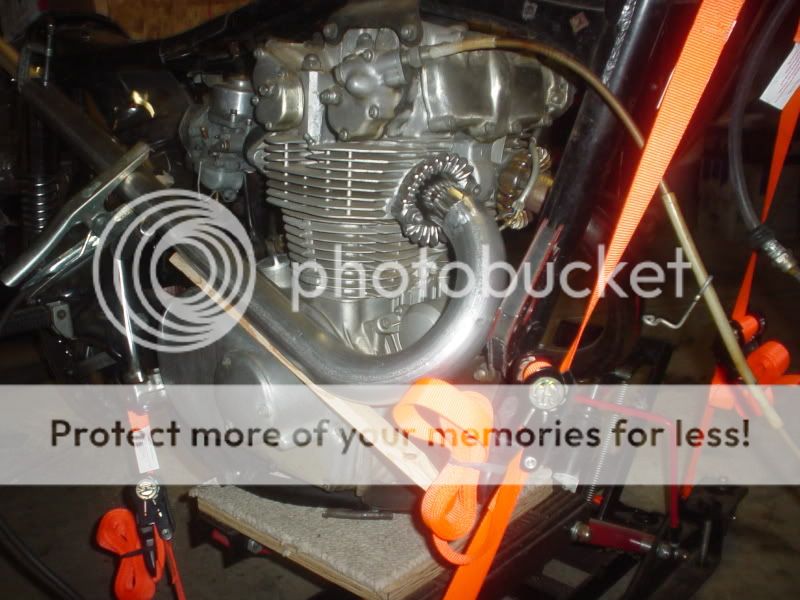
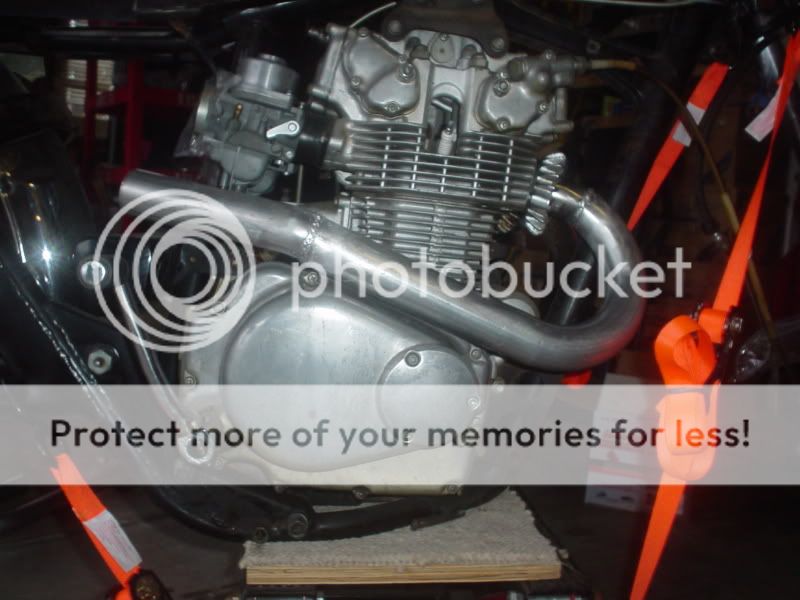
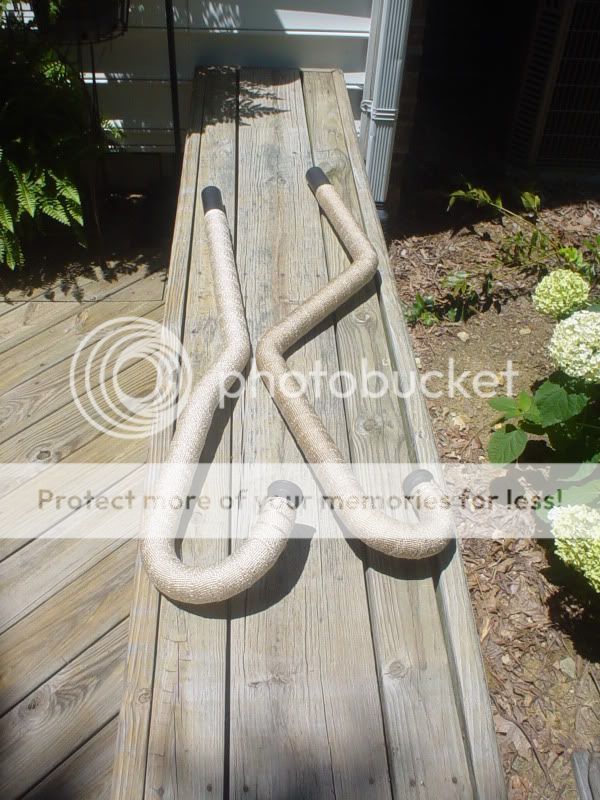
Here's the right side pretty much finished up:
The left side starts on on the left then snakes through the frame and comes out parallel with the other pipe on the right side.
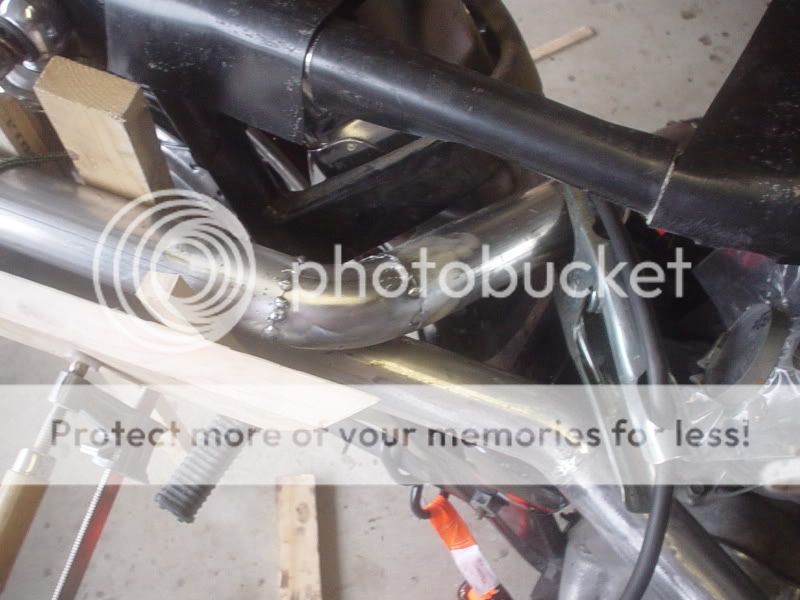
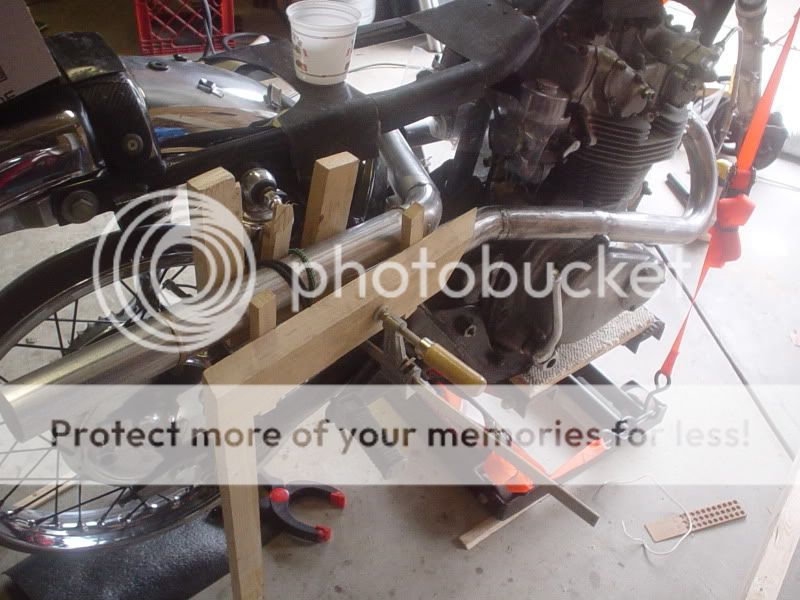
After I got things mocked up on the bike, I decided the pipes were a little short so I added about 5" to the overall length.
I made a rear support bracket from a couple of short lengths of tube split down the middle.
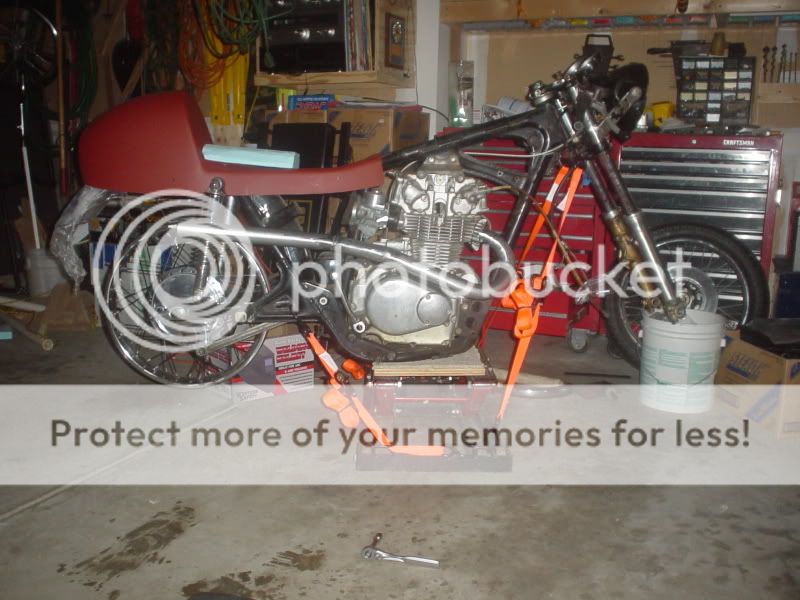
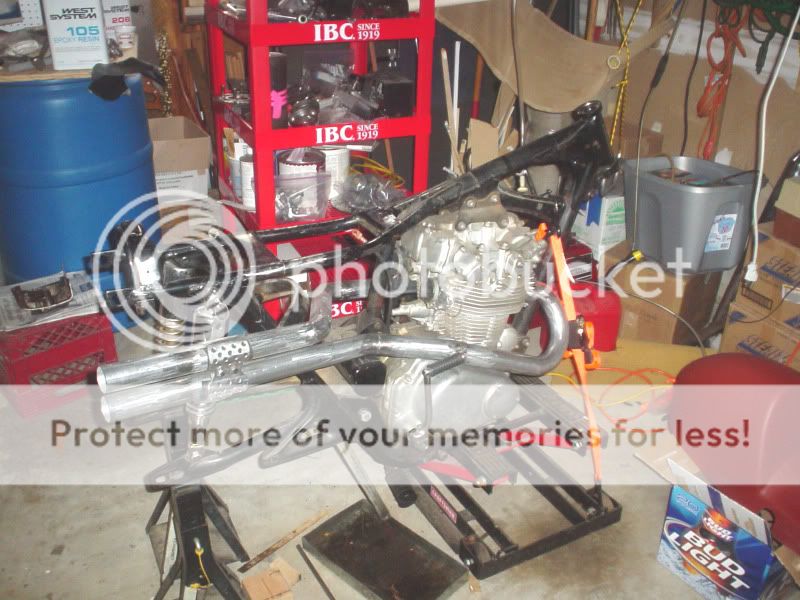
I emptied out a can of flat black VHT paint on the pipes.
Since I make ugly welds my only real choice for final finish was full length header wrap. My wife thinks it ruins the look of the bike, but I think it looks pretty cool.
I would like to spray the wrap with a clear sealer but all I can find are black, aluminum and copper color. I guess the copper would be closest to the color of the wrap. Any suggestions?
Hope you guys don't mind the abundance of photos. Thanks for looking.
CC
The stock headers were cut back to a couple inches long and the new tubes were tacked on.
Basically the bends were cut into sections and trial fitted into place until I got things about where I wanted them then tacked together.
Here's the right side pretty much finished up:
The left side starts on on the left then snakes through the frame and comes out parallel with the other pipe on the right side.
After I got things mocked up on the bike, I decided the pipes were a little short so I added about 5" to the overall length.
I made a rear support bracket from a couple of short lengths of tube split down the middle.
I emptied out a can of flat black VHT paint on the pipes.
Since I make ugly welds my only real choice for final finish was full length header wrap. My wife thinks it ruins the look of the bike, but I think it looks pretty cool.
I would like to spray the wrap with a clear sealer but all I can find are black, aluminum and copper color. I guess the copper would be closest to the color of the wrap. Any suggestions?
Hope you guys don't mind the abundance of photos. Thanks for looking.
CC
monteboy84
Rowdy Rookie
CCRider said:I would like to spray the wrap with a clear sealer but all I can find are black, aluminum and copper color. I guess the copper would be closest to the color of the wrap. Any suggestions?
I would just use a Clear high-temp paint on them, it will be plenty sufficient. I run mine naked, I like the used look
-matt
Flugtechnik
My bike is not transportation, it is a respite
That's awesome! I wish I could weld.
goodfornothing
Spicey!
Wow CC,
You never cease to amaze me. That exhaust set up looks b*tchin'! For the exhaust wrap, I can't see it in the picture but did you have to clamp it down on the exhaust side? Or did you wrap it from the header side, clamp it, go all the way down to the exhaust and back up to the header side and put more clamps on it?
You never cease to amaze me. That exhaust set up looks b*tchin'! For the exhaust wrap, I can't see it in the picture but did you have to clamp it down on the exhaust side? Or did you wrap it from the header side, clamp it, go all the way down to the exhaust and back up to the header side and put more clamps on it?
DBLshotcafe
New Member
i second that! i wish i could weld :
CCRider
Coast to Coast
Flugtechnik said:That's awesome! I wish I could weld.
Me too!
I can stick two pieces of metal together so they won't come apart, but I hate to call it welding. I get alot of practice with my grinder when I "weld".CC
CCRider
Coast to Coast
Here's how I attached the wrap.
Started at the back end. I folded the wrap over about 1/2" to cover the loose end and secured the first inch or so with a couple of wraps of safety wire.
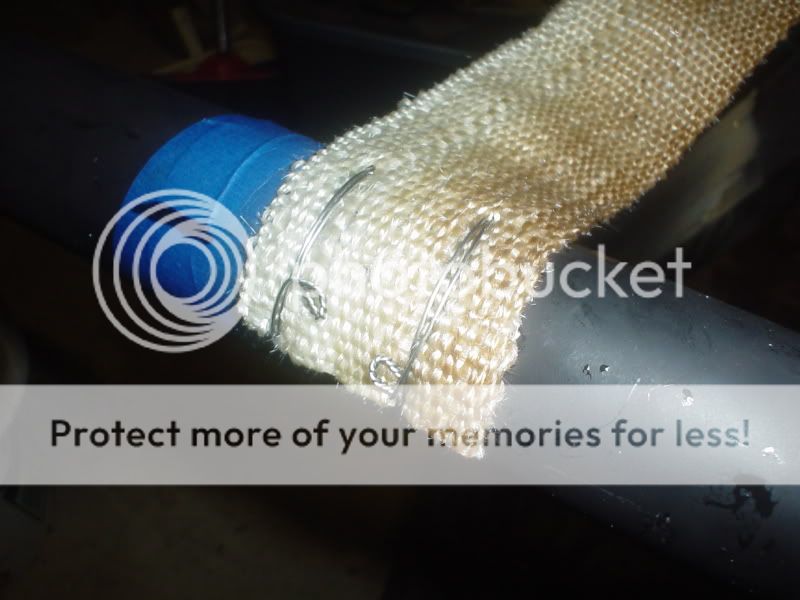
I covered the exposed safety wire with the first turn of the wrap then continued wrapping towards the front.
At the front, again I folded the wrap over, tucked the loose end under and secured with three safety wire ties.
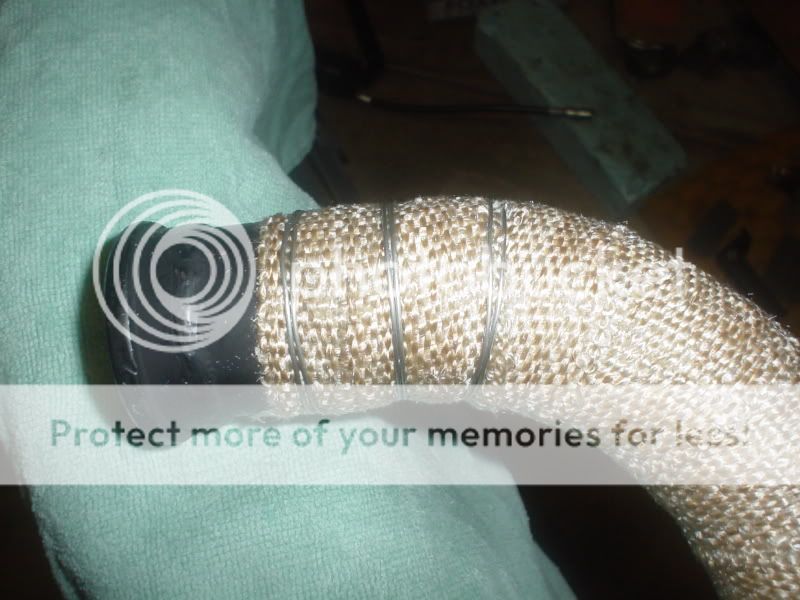
Hope that helps, CC
Started at the back end. I folded the wrap over about 1/2" to cover the loose end and secured the first inch or so with a couple of wraps of safety wire.
I covered the exposed safety wire with the first turn of the wrap then continued wrapping towards the front.
At the front, again I folded the wrap over, tucked the loose end under and secured with three safety wire ties.
Hope that helps, CC


