Down under, an idiot and a 400F

Tried to get the calipers out tonight to measure the side clearance on the rotors but I cannot get accurate enough readings.

I'm getting wild differences which isn't helping ranging from 0.22mm to 0.9mm which leads me to think I need a new method.

The pointer on my calipers is not doing the depth accurately enough. Anyone got any suggestions?
 
Hey question, do you still have the little rubber grommets that were for the side covers? I know you've moved house but maybe? And what are you doing with the original airbox / battery mount? Cheers Andy (mostly after the grommets ;) )
 
Sorry Andy. I didn't get any sidecovers with the bike. Most of what I have in boxes are the metal parts only.
 
neevo said:
Sorry Andy. I didn't get any sidecovers with the bike. Most of what I have in boxes are the metal parts only.

:) I noticed no side covers in your first pic's, but the grommets were there :eek: but it was pre-house move ;)

$(KGrHqZHJEcFD)oSS5-!BQ99njY!-g~~60_12.JPG
 
Ah, let me have a look. I don't think I've seen anything like that though so assume I don't have them. I did sell the battery box, so maybe they went with that.
 
Looking further in to the thread I found your de-tabbing pic, I fear they may have gone the way of the dodo :eek:
 

Attachments

  • sfygi.jpg
    sfygi.jpg
    190.2 KB · Views: 213
Ah, good detective skills Andy. Them would have made their way to western Sydney landfill unfortunately :(
 
neevo said:
Tried to get the calipers out tonight to measure the side clearance on the rotors but I cannot get accurate enough readings.

I'm getting wild differences which isn't helping ranging from 0.22mm to 0.9mm which leads me to think I need a new method.

The pointer on my calipers is not doing the depth accurately enough. Anyone got any suggestions?

If wheel is centered in forks they should be good to go. I don't remember exactly what I made but rotors bolted to wheel and calipers bolted to forks without anything rubbing.
Have you changed anything?

neevo said:
Thanks PJ, you've put my mind at rest knowing the pump should be good. I don't have any precision tools to measure the depth of the housing or width of the rotors. Would my calipers be good enough?

Andy: you'd be surprised how simple motors are really. If I can do it I have no doubts you could have a go. How's that beautiful CB of yours going?

Calipers would have worked fine but I guess you needed another excuse to buy a depth gauge? ;) ;D 8)
 
PJ. Brake calipers are fine. Both comments were about vernier calipers and measuring the oil pump rotors.
 
I'm looking to push the button on the ignition system and looking for some guidance. Given my original coils are so rough, I've decided to replace everything and go for a slightly upgraded system. Can those in the know let me know if I am on the right track?

1. Pamco electronic ignition
2. Dynatec 5 Ohm Black Coils
3. 8mm Suppression Core Wires
4. NGK Plug Caps (2 x 10² degrees and 2 x 120 degrees)

I assume that's all I need.
 
neevo said:
I'm looking to push the button on the ignition system and looking for some guidance. Given my original coils are so rough, I've decided to replace everything and go for a slightly upgraded system. Can those in the know let me know if I am on the right track?

1. Pamco electronic ignition
2. Dynatec 5 Ohm Black Coils
3. 8mm Suppression Core Wires
4. NGK Plug Caps (2 x 10² degrees and 2 x 120 degrees)

I assume that's all I need.

Just wondering...why not stick with Dynatek electronic ignition as well? Also, I'm not sure on the caps, but I don't believe you need any resistance in them anymore when you use this system, unless you are worried about radio problems etc. (Please someone correct me if I'm wrong....but my CB500's that both run JUST the 5ohm coils run fantastic without those caps)

Here's the product I bought from an ebay seller: http://www.ebay.com/itm/Dynatek-Dyna-Coils-5-ohm-Dual-Output-DC8-1-Black-DW-200-Wires-Honda-CB-500-550-/400788435744?hash=item5d50da3320:g:YfMAAOxyJmhSHnU1&vxp=mtr

Here's the dyna ignition plate. Read the description!!! There's something odd that might be on your bike, or might not. "If you have a CB400F check the diameter of the advancer shaft. Some of the later CB400F bikes used larger CB750 size advancers. Check whether the advancer shaft diameter is the early style 13.5mm (.530") or the later style 15mm (.590") This set includes the 13.5mm rotor. If you find you have the larger size you can still get this set and Dynatek will exchange the part for you."
http://4into1.com/dynatek-dyna-s-ignition-system-ds1-1-honda-cb350f-cb400f/

From digging up this info, found a post in another thread over on SOHC forums.


Re: 1975 cb400f what kind of dyna coils do I need?
« Reply #5 on: January 11, 2009, 11:32:31 PM »
thank you very much for the responses, I called dynatech and they told me that I suppose to use 5 ohms coils for my 1975 cb400f otherwise I will drain the battery out?
 
Bruno: I was going with the Pamco over the Dyna as the Dyna is out of stock at the moment, plus Pete at Pamco was great in responding to my questions. Plus it seems like there are many happy people with either ignition it seems and from all reports Pete sticks by his product. So as long as its a robust system that dos the same job, I was happy to go the Pamco, plus its $30 odd cheaper.

Also with the plug caps, Pete at Pamco recommended the 5K caps, which I assume are the ones on the 4into1 site (NGK)? However he did recommend them with stock coils, so not sure if that affects anything (hence why I was asking for guidance here to make sure I got it all right).
 
neevo said:
PJ. Brake calipers are fine. Both comments were about vernier calipers and measuring the oil pump rotors.

:-[
I need to read more carefully ;D

Maybe it's just me but I haven't had much luck with Dyna ignitions. and wouldn't have another one.
Don't seem to cope with heat and vibration very well in my experience (2 for 2 I've had personally failed on one trigger unit)
CB550 will do 80mph on 2 cylinders as long as your not going up hill or hit a headwind 8)
Coils are OK (but I do have a melted one off Brendon's CB360 somewhere 'safe' ;) )
The 'green' double pole coils seem to be almost indestructible (just don't leave ignition on by accident, coils get VERY hot but seem to work OK afterwards) Wasn't me or my bike, brother in law did it on his
I think the Pamco has a shut off circuit to prevent coils heating up if ignition is left on?
As for plug caps, there is a reverse EMF, the amplitude will vary depending on spark voltage.
5K plug caps will spark at lower voltage and have a longer duration spark than using 10K plug caps although using 5K caps you should use 5K resistor plugs.
reverse EMF will need 'clamping' to prevent damage to circuits/chip in ignition modules
Getting 'ordinary' spark plugs is slightly more difficult as 'R' plugs have been in general use since late 70's (about 40yrs) so maybe thats why he recommends 5K caps?
 
Got it. Thanks PJ, very helpful. 4into1 offer stock replacement coils with caps for a great price. Is there any benefit to running the Dyna coils over these? Seems like they are 4.7 ohms vs 5 for Dynas plus do not have replaceable cables, but the whole kits probably $90 cheaper.
 
Realistically the main difference is the 'name' and the insulation.
I doubt your going to be tearing around in monsoon conditions or running at 13,500rpm so either should work fine (rain was the bane of all the Honda 4's - firework display' under tank from the arcing over ;D )
I would go with the cheaper option. Dyna may work OK but they look like crap for the money
 
The missus and kiddlywinks went to their grandparents this morning so I got set on some motor action... Not the sort you might expect in this thread as I was tuning the lawnmower. It's been a bit rough recently so I treated it to a new air filter, new blades, fresh oil and a strip down and clean. First time for many in probably 10 years and with some minor fettling to the throttle it now runs like a champ. Slight miss sometimes so I can get a new plug and hope that fixes it, but it roars at the moment so it's not a huge issue.

Amazing the punishment a home lawnmower takes!

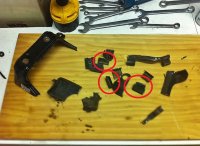
Secondly I took some time to unpack my freshly delivered goodies.

1. Ricks Regulator


2. My cheapie depth gauge


3. Clutch and Throttle Cable Adjusters


4. Rubber edge trim for my subframe tray


Here is the rubber trim on the subframe tray. Should neaten things up a bit and stop any rattles.


Next up I set to getting the depth gauge out and testing the rotor thickness and the gap to the housing walls. I zeroed out the gauge on the rotors in the housing:


And then set to measuring the drop off each side of the other oil pump body:


Wether the gauge is accurate I don't know, but it certainly seemed to deliver the same reading each time; 0.09mm which I think is under the 0.1mm maximum that was recommended, however not sure if that's still useable after a fair few miles/kilometres are put on the bike.

I also took the time this week to pop in to my local Honda dealer and ordered all the oil pump o-rings. They had to order a few in from Japan but they were super helpful so it's nice to know I have a local supplier I can feel comfortable spending my money in. They didn't have the 40mm o-ring from inside the pump so I will need to grab one of those from an engineering place. Some Viton type I assume.

Next up I grabbed my wiring diagram and tried to decipher the wiring for the regulator, to check I had it all set for wiring up. Currently I have 8 wires coming out of the combined rec/reg, but I've only accounted for 7 in my wiring diagram. I need some help to identify all the wires coming out of the rec/reg so I can make sure I've got it all wired correctly.

Here's what's on the rec/reg.


1. On the stock 5 pin plug (rectifier on old bike I think)

Yellow x3: the stator windings
Green x1: Unknown
Red x1: Unknown

2. 3 Separate Wires (regulator on old bike I think). The sheet that came with the bike seems to suggest these are as outlined below.


Black: Switched 12v feed
Green: Green field coil wire
White: White field coil wire

So 8 wires in total.

The 7 I currently have in my loom are:

x3: Stator windings
1: Switched power (as per old wiring, taken off rear brake feed)
1: Main battery power (as per old wiring, taken off the starter solenoid)
x2: Field coil wire

I looks like I haven't bothered with a ground which is an easy fix as I can just run one to the frame or direct to the battery.

So currently it looks like the wiring may be ok, as long as I can work out what the green and red wires in the block are for (assume they are main 12v feed and the ground).

Also the red/green wires in the stator are pretty heavy duty, a lot thicker than what I've been using in my wiring harness. Wondering if this is something to be concerned about, as I've pretty much used 7.5A 24x0.2mm 18AWG wire throughout my harness, excluding the main ground and starter wire.
 
I've been thinking about a couple of issues I've got on the bike.

1. The RFID receiver doesn't work underneath the seat hump, as the steel is too good of an insulator for the key to work through.
2. I'm worried attaching my rec/reg to the battery box, underneath the seat hump is not going to offer up enough air flow to keep it cool.

The solution?

I'm thinking of making a new subframe tray, out of steel so I can weld in a box to house the rec/reg so it's flush with the bottom of the tray and also cut out a small rectangular hole for the RFID key receiver too.

Thinking it should all blend nicely once the tray is painted black, plus will offer up a load of air for the rec/reg and mean firing up the ignition is as simple as waving the RFID key under the seat.

Will also provide some interest to the seat area if you look underneath (the industrial look).

Here is a rough idea of what I'm thinking, I will mount them both on the centreline (need the bike back so I can avoid the shock):


Once I've done this, I need to redo the subframe tray mounts. Moving away from the single ones and will look at small flat bar across the rails on the underside as it will be easier to do, plus if it's overkill, I can simply chop out the middle to leave the edge mounts.
 
Red is always 'permanent' 12v live direct to battery. Green is always ground. Black is always switched live (+12v)
They are wire colours Honda never changes.
You will probably have a spare ground lead now your using a 'one piece' unit instead of separate components
 
Back
Top Bottom