Follow along with the video below to see how to install our site as a web app on your home screen.
Note: This feature currently requires accessing the site using the built-in Safari browser.
We noticed you are blocking ads. DO THE TON only works with community supporters. Most are active members of the site with small businesses. Please consider disabling your ad blocking tool and checking out the businesses that help keep our site up and free.
Yeah keep trying to tempt you two into coming over to see it. lol It is time consuming but in just about everythread I see people asking for more pictures. So try to make sure I cover that. lmao.
Haven't done any real work to the bike over the last couple weekends. Holidays and not feeling well have kind of put a damper on the progress. Getting close to a point where I am going to have to mount up the engine, get the turbo and plumbing, and get some things mocked up so I can insure I have clearance for the parts around the tank and seat. In retrospect I guess I should have broke down each stage of the build and put it in different areas on the forum so just those aspects would have been covered in the different areas and made it easier for people to find that specific information. Then once it was all done did a build thread that combined those aspects in a begining to end picture build. Oh well. I will have alot more coming on here as the weeks and months of this build progress so stay tuned.
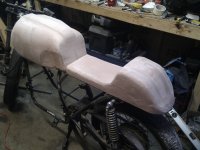
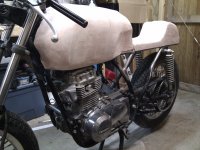
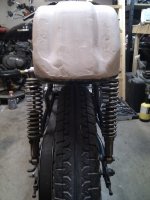
So I finally got out and did some work on the bike today. Decided to take a break from the tank work and start working on the seat/tail section. I wanted to get a little shaping done on it and start to get a better idea of how the bike was going to look. I have it all in my head but it is nice to see that translated into a real form. As it looks now I will most likely get the seat/tail section molded and built before the tank. Mainly because it is very integral in how I am building the bike and I really need it finished for the mock up stages to make sure everything else works in concert with it. But for now I have the seat/tail rough shaped and matched up the tank ridge. In the photos it looks bigger just due to the perspective. That is an optical illusion. I plan to get out and do some more work on it later this evening but for now here is where the project stands. Hope you like.
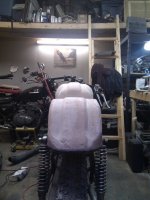
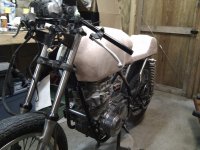
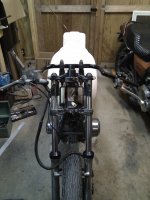
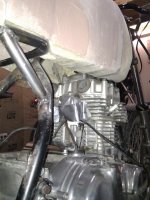
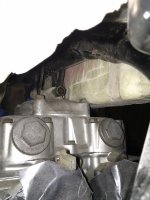
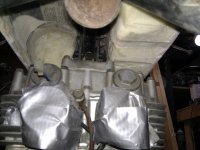
So I started work on my mock up of the bike. In order to get the plugs correct before the mold is done I need to make sure everything will fit. Two issues with the tank plug came up. 1) need a little more clearance for the intercooler intact plumbing and 2) need to make a little more room for the breather/rocker cover. So here are some photos of the mock up in progress. Those daylight fluorescents really do a good job of whiting out a photo. lol.
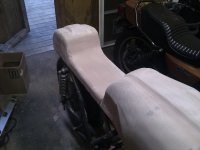
These photos so the belt alignment and the clearance issue with the breather cover. I really only have to do some very minor trimming to clear the breather. My original form took into account where the engine's highest point was however I forgot the engine has an upward angle on the head. So this brought it just touching with the plug. This is why it is a good idea to do mock ups when your going to do specialized work.
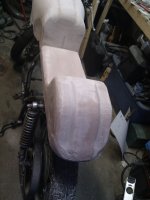
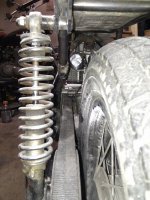
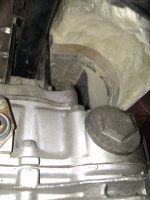
This photo set is to show the area that has been setup to accept the liquid to air inter-cooler. You can see the area where it will set. I have to trim some more of the foam out of the front area to get the clearance I am going to need for the plumbing to get in there but it wasn't that far off from ideal. Of course none of the underside of the tank or the seat/tail will be finalized till I get all the associated sections mounted and make sure they will clear. If I don't and build the mold I will be screwed on the final part. Now is the time to address these issues.
So once I finished the mock up portion I thought it would be a good idea to do a in-process walk around video and describe a little about the bike. So here is the video doing just that.
http://youtu.be/goTyaraTRTY
Great project! I love the idea. I have turboed a few things that were never meant to have turbo's on them. I have always wanted to build a turbo bike. what are your plans for modifying the internals to handle all the extra power and abuse? Keep up the good work.
Millennium,
Thank you. I thought it would be unique and so far so good. This is one of at least two turbo bikes I will have. Kind of cutting my teeth on this one before I get started on my GPZ1500 turbo build. Plans for the bottom end are de-burred, balanced, and shot peened factory rods. They are as big as most small block chevy's so don't foresee any real problems there. Crank will be radius-ed, balanced, nitrided, and all the tricks performed to it. These parts are being done by APE race parts. Pistons are a custom forged 7.5:1 which I am having Arias pistons manufacture. Sleeves will be o-ringed with a custom copper head gasket. I will be contacting ARP for a set of custom made head and main studs. Stainless steel valves and head ported by Cavanaugh racing. Still have to work out some figures on the oil system to look at its capabilities. I have to add not only the flow needed for the turbo but also adding an oil cooler. The turbo is water and oil so I may end up tying the inter-coolers coolant system into the turbo as well just for a little extra protection. All in all it is being designed from the ground up for the turbo and the necessary mods are being done. Keep following I will show all that I do to it.
roman_dog,
Thanks. Trying to make it as complete a build as possible. Can't wait to post some riding, dyno videos. Well that's a bit a way but getting there.
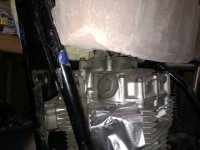
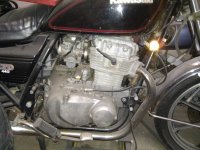
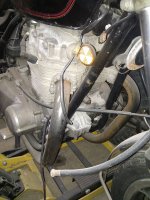
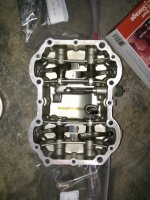
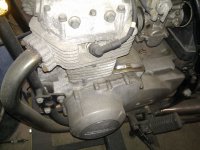
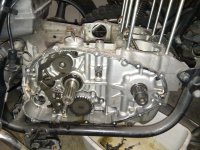
I have been doing various items on the build and thought I should get some updated photos posted. Work is progressing on the tank and seat but needed to take a break and get the engine that will be built torn down and ready to start shipping the parts off to the companies that will be doing the machine work/mods to it. So the beginning here is the photos of the tear down. So the beginning of this sequence is the 1981 KZ440 engine I will be using for the build sitting in the donor bike. The 82 motor that was installed in the Cafe bike is actually a good running motor and I did not want to tear down a good motor for this complete overhaul. Here you can see the shape the exterior of the motor is in.
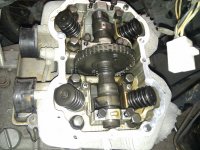
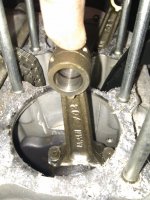
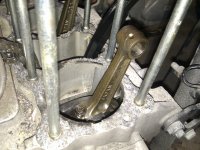
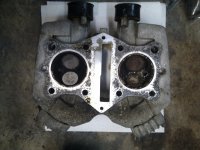
The first photo is the last of the before tear down pictures. Following you can see the internal condition of the motor. It is actually very clean considering the odometer read 26,000 miles.
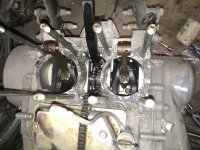
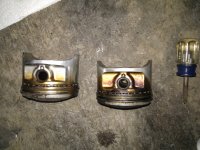
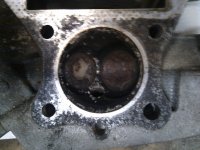
Here I have a little closer view of the rods and pistons. The pistons are not really a big deal for I have Arias making a set of custom forged turbo pistons for the build up. I couldn't get over just how small these pistons are.
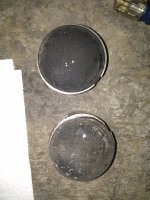
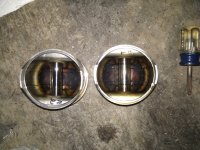
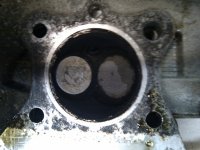
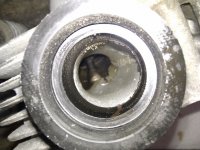
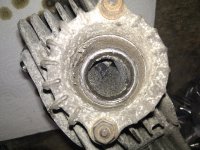
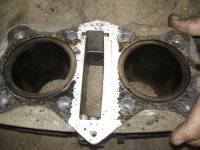
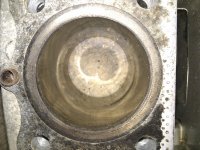
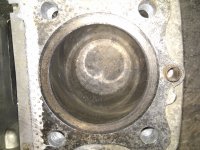
Last photo of the pistons. The main point of this set is the combustion chambers and just how bad the condition is. The PO had the B9HS plugs installed and they were only finger tight. The bike must have been permitted to sit outside because the was evidence of moisture corrosion in the chamber areas. These photos will be really good before pictures. The new chambers/valves will be ceramic coated by Swain Tech. For those interested according to the factory service manual the combustion chambers on these heads are 36-37cc's standard. I will have the new chamber volumes once the porting work is complete.
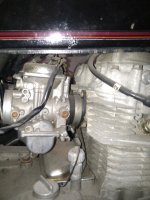
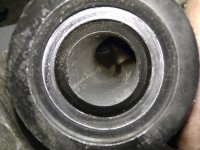
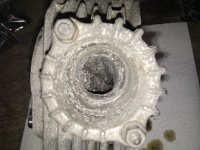
I included these photos to show the current condition of the intake and exhaust ports. Cavanaugh racing will be receiving these heads for porting and rebuilding work. Once they are done I will snap some shots of them prior to sending them to Swain tech for the coating process. The exhaust ports will be receiving coating as well. It is specifically designed to keep the heat in the port and out to the turbo. I can't wait to see how that turns out.
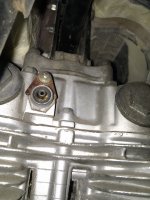
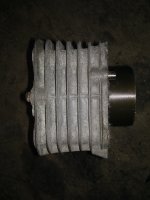
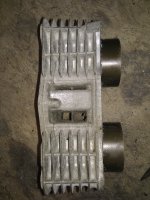
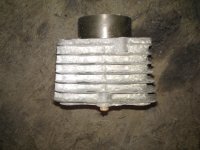
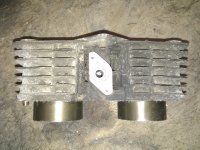
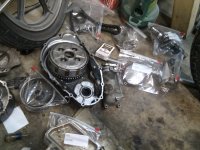
Here is the block assembly. I wanted to get some really good shots before it gets its coating and machine work. Swain will be using a special coating on the exterior of the heads and block that is specifically designed to dissipate heat. Other than the block being bored to 68mm's I am considering modifying the tensioner port to accept an APE mechanical chain adjuster. I have one here at the house on there is only some slight modifications needed to make it work. This would provide a more consistent adjustment on the chain tension and will lesson the likely hood of the chain having any slop.
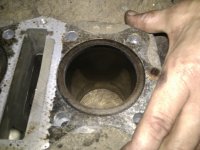
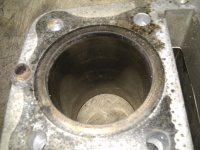
For the mileage reported on the odometer I was surprised to find there was very minimal scuffing in the bores. It does have a pretty good ring groove but not more than expected. You could still see the cross hatch pattern though it doesn't show very well in the photos.
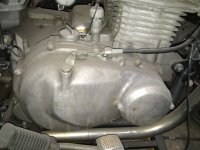
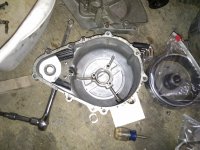
The block will receive a fire ring groove so I can make sure I have a good seal on the boosted chambers. At 12-15lbs of boost it will be necessary to ensure I don't blow a gasket. The clutch side of the motor was actually quite clean and the oil pump design will work quite well with the turbo system. All the splines are in excellent shape and the clutch is pretty beefy. One big concern for this build was the alternator and its low output. Well in doing the tear down I was able to mock up a design idea I was hoping I would be able to use. I have a rotor and stator from a GPZ1100 that is a true 3 phase alternator with a 30 amp output. Well it all bolts in and clears. Plus the rotor is identical to the 440's except the internal diameter is slightly larger allowing the gpz's larger stator to clear. So my concerns about having enough electrical energy are over.
This site uses cookies to help personalise content, tailor your experience and to keep you logged in if you register.
By continuing to use this site, you are consenting to our use of cookies.

")