Follow along with the video below to see how to install our site as a web app on your home screen.
Note: This feature currently requires accessing the site using the built-in Safari browser.
We noticed you are blocking ads. DO THE TON only works with community supporters. Most are active members of the site with small businesses. Please consider disabling your ad blocking tool and checking out the businesses that help keep our site up and free.
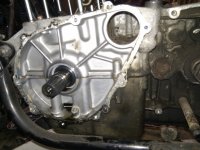
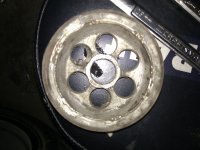
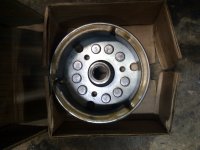
So in the first photo we have the alternator side of the motor. The taper and length were a perfect match to the GPZ's rotor seen in the box. I also included on problem I did discover in the tear down. The PO managed to completely tear out the teeth on the belt pulley. You can see come material in the output shaft splines. Problem was that there wasn't enough material left to account for the size of the splines. I have no idea what happened. Its a steel pulley. I think the teeth were drilled out and the metal in the grooves were actually from slip. Besides that on the clutch side they didn't line up the clutch hub properly and basically the clutch wasn't engaging. The importance of a manual becomes evident when people just try and guess.
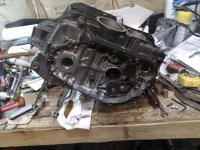
Well the case is almost completely stripped in this photo. Of course other than removing the shift forks I have the case completely stripped down now. I have the lower case soaking in some engine de-greaser right now. Once I get the cases cleaned up I will begin the process of smoothing all the casting parting lines out. I want to minimize any and all stress risers in the motor. Once all my prep work is done the case will be off to Swain for the exterior heat dissipation coating. The other photo is of the 1 1/2 oz chop strand mat and fiberglass rollers I purchased for the mold build up on the seat and tank I am working on.
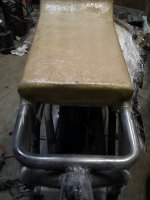
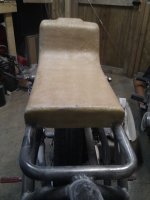
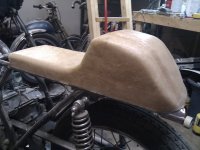
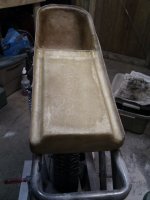
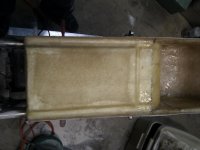
So finally we have the up to date portion of the build. I have finished the rough/medium shaping of the seat/tail section. Here I have a layer of fiberglass applied to the seat/tail plug. This will provide the internal strength I need for the plug to be used to make the mold. Once it is fully covered and sanded I will begin application of the drywall compound to do the final shaping and smoothing. After that will be the primer coating and then buffing. All that will finish out the plug and set me up to start the mold process. Hope everyone has a happy new year.
Roman_dog,
Thanks. It is getting there slowly but surely. Of course we are all familiar with that. lol. The fiberglass isn't bad for the autozone/walmart brand. Didn't want to use the really good stuff seeing how once the plug is done and the mold's are done this will be going in the trash. I won't need it once I have the molds made.
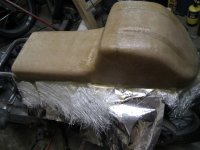
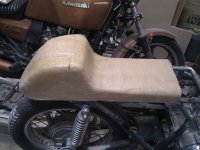
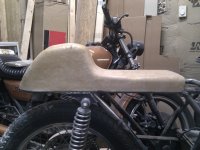
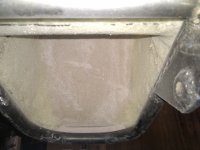
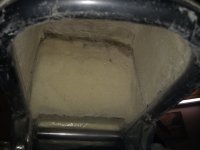
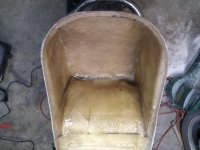
Time for some more updates yay! Well I have trimmed the excess material off the seat plug and started cutting out the area under the tail for the electronics bay. Because this will be a two part mold I had to make sure the underside is an exact match of the final product. I will have to due this in two parts and then join the lower and upper sections in order to form the coolant tank that is being built into the seat. The electronics themselves will sit on a custom pan I will be making out of Carbon/Kevlar composite. Here are some photos of where the seat/tail section is at now.
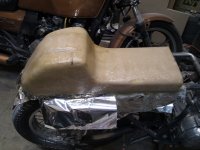
So here are the rest of the photos for the seat/tail plug trim and the cut out for the electronics bay. I will be out in the shop this weekend working some more on this and hope to get it to a point that the final shaping can be done. Then I will only have to prime it and buff it to a class A shine in preparation for the mold construction.
Some additional updates for other items in work. I have sent my cam off to web cams to see about a regrind to better tailor the came to the turbo application. In doing this I requested they let me know if they can build me a new billet cam. They needed mine to verify what process they can use. If they can do a new billet I can completely change the profile to get exactly the usage I am looking for. If they have to do a regrind I will be a little more limited to the design. The cam is scheduled to arrive on the 8th and I will update once I find out what they can do. One other note to those who have KZ400's. They do have 2 different profiles already in their database for those motors so if your looking for a cam you may want to give them a ring.
I emailed Swain tech coatings about their coatings and what they could offer. It was refreshing to find a company that you could tell them what you wanted and have a response tell you which coatings would give you the best results and which they could do but would be a waste of money for the very minimal if any performance benefit. Excellent response from them. That is where the project sits currently. Future updates to come.
w8lifter21,
Thank you. I am super eager to get it built. Most of the parts are custom and take 2-3 weeks turn around time so it will take a bit. I'm looking at around March for the purchase of the turbo. I have a plan and order of what I need and when. So far things have been progressing well. Glad you subscribed.
Yep. I am using a Garrett GT1241 running 12-15lbs of boost. 12lbs will be easily available to use on high octane pump gas and once I go above this it will be necessary to run octane booster/race gas. The GT1241 is designed for engines from 400-1200cc's and will support a total out put airflow wise of 50-130 horsepower. Here are a few items that I will be installing on the bike build.
Hope this helps start to get an idea of the level of this project. I know the traditionalist are probably thinking I am crazy and I have a lot of respect for them. Knowing the old cafe racers were built using as many existing parts as possible and squeezing every ounce of power out of those parts to achieve a goal was the foundation of these builds. I just wanted to build something no one else had seen or done. The expense on this one far exceeds the value of the bike but we all have our hobbies. lol.
w8lifter21 and Millennium Falcon,
That is a couple very true statements. My buddies at work think I'm crazy and they can't wait to see it finished. Oh course they know I'm a little off so it doesn't surprise them. I find building our bikes is so much better than store bought cookie cutters anyway. Its funny when my 81 GPZ1100 gets more attention than the hayabusa's at gatherings. Makes me laugh. Just can't wait to see peoples reactions to this one. hehehe
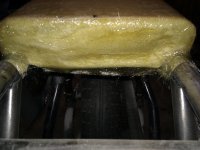
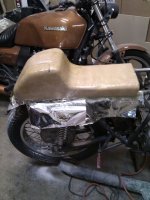
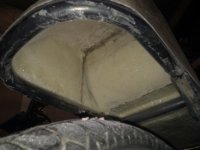
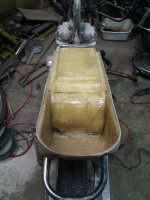
Made a little more progress today on the plug for the seat/tail section. I was able to get the rough shaping done and a layer of fiberglass on. The last few sections I accidentally mixed the resin a little hotter than I wanted so it cured quicker than I had hoped. No big deal seeing how I will still have work to do once this sets up.
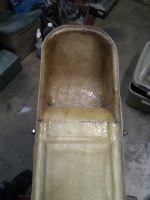
Once last photo of the bottom of the plug work done today. I will have to cover this with the final shaping coating and then primer and wet sand for a super smooth finish. Once that is done then it will be time to buff it to a Class A shine in preparation for the mold build. I will be so happy when I have the seat/tail and tank finished. These are such a long process but I know they will be worth it in the end.
stroker crazy,
Hit the nail on the head. I can't wait for the pieces to start to come together. Things are actually moving pretty smoothly for now and the camshaft has arrived at Web Cams for its rework/redesign. I'm hoping they will be able to build a new billet cam with more specific design specs for the turbo set up. Nice thing about a build of this size is the ability to have other things to work on while parts are out for mod or on order. Keeps me busy. lol.
Just got off the phone a few minutes ago with Lori (hope I spelled her name right) over at Web Camshafts. I am really excited about what I am hearing and think this cam is going to be exactly what the motorcycle gods ordered. Factory had a 228 duration @ .050 lift as measured by them and the lifts were a little funky. .252, .250, .252, .249. She said the cam was actually in excellent shape and the intake and exhaust centerlines were perfect for the turbo application. They are going to play with the numbers a little bit to match up with my goals. Adding 8-10 degrees to the duration, improving the ramp rate (which she said was actually sluggish), and adding around .027" more lift. No real final numbers yet but should here something back very soon. Decided to go with a hard weld/regrind on the cam. They could do a billet as long as I didn't need the tach drive, which I don't, but than can take up to 6 months. I realize this will be a long project but I really had no desire to extend it out that far. Plus they can do the work I want to mine so why go the extra cost/effort if what I have will work. Well need to make some more phone calls. Work, work, work, its all I do. ;D
This site uses cookies to help personalise content, tailor your experience and to keep you logged in if you register.
By continuing to use this site, you are consenting to our use of cookies.