
We noticed you are blocking ads. DO THE TON only works with community supporters. Most are active members of the site with small businesses. Please consider disabling your ad blocking tool and checking out the businesses that help keep our site up and free.
You are using an out of date browser. It may not display this or other websites correctly.
You should upgrade or use an alternative browser.
You should upgrade or use an alternative browser.
Down under, an idiot and a 400F
- Thread starter neevo
- Start date
wayfastwil
New Member
Glad to see you back! Not that I had any doubts! Beginning to feel a part of this build!
A stairway to Heaven & a highway to hell should tell us something!
A stairway to Heaven & a highway to hell should tell us something!
neevo
Over 1,000 Posts
Hoopdy said:Holy crap just spent the entire day reading this from page 1 to 157 Amazing build mate, now I'm gunna be hooked till the end
Very kind. Cheers champ, I hope it's an entertaining read amongst the shit talking
")
I know I try and write the type of thread I like to read, one with plenty of pics too.
I write this often but for anyone who wants to read the condensed (build only version), you can get it on my blogger site:
http://idiotsguidetocustom400f.blogspot.com.au
I started copying all the build threads over there as a document of my build without the comments in between so I could go back and look at it, plus for those who want to read the build only stuff too. It's had over 35,000 visits so far and usually has between 6-300 visits a day.
neevo
Over 1,000 Posts
Now I have my whiteboard I'm motivated to try and cross things off. Today I stole a few moments to try and knock battery box v3.0 out. My second attempt was a bit too low and one of the mount holes for the fusebox was a little too close to the top edge, plus I had an idea how I could get rid of the bolted on battery strap loops.
Step 1: mark up some steel:
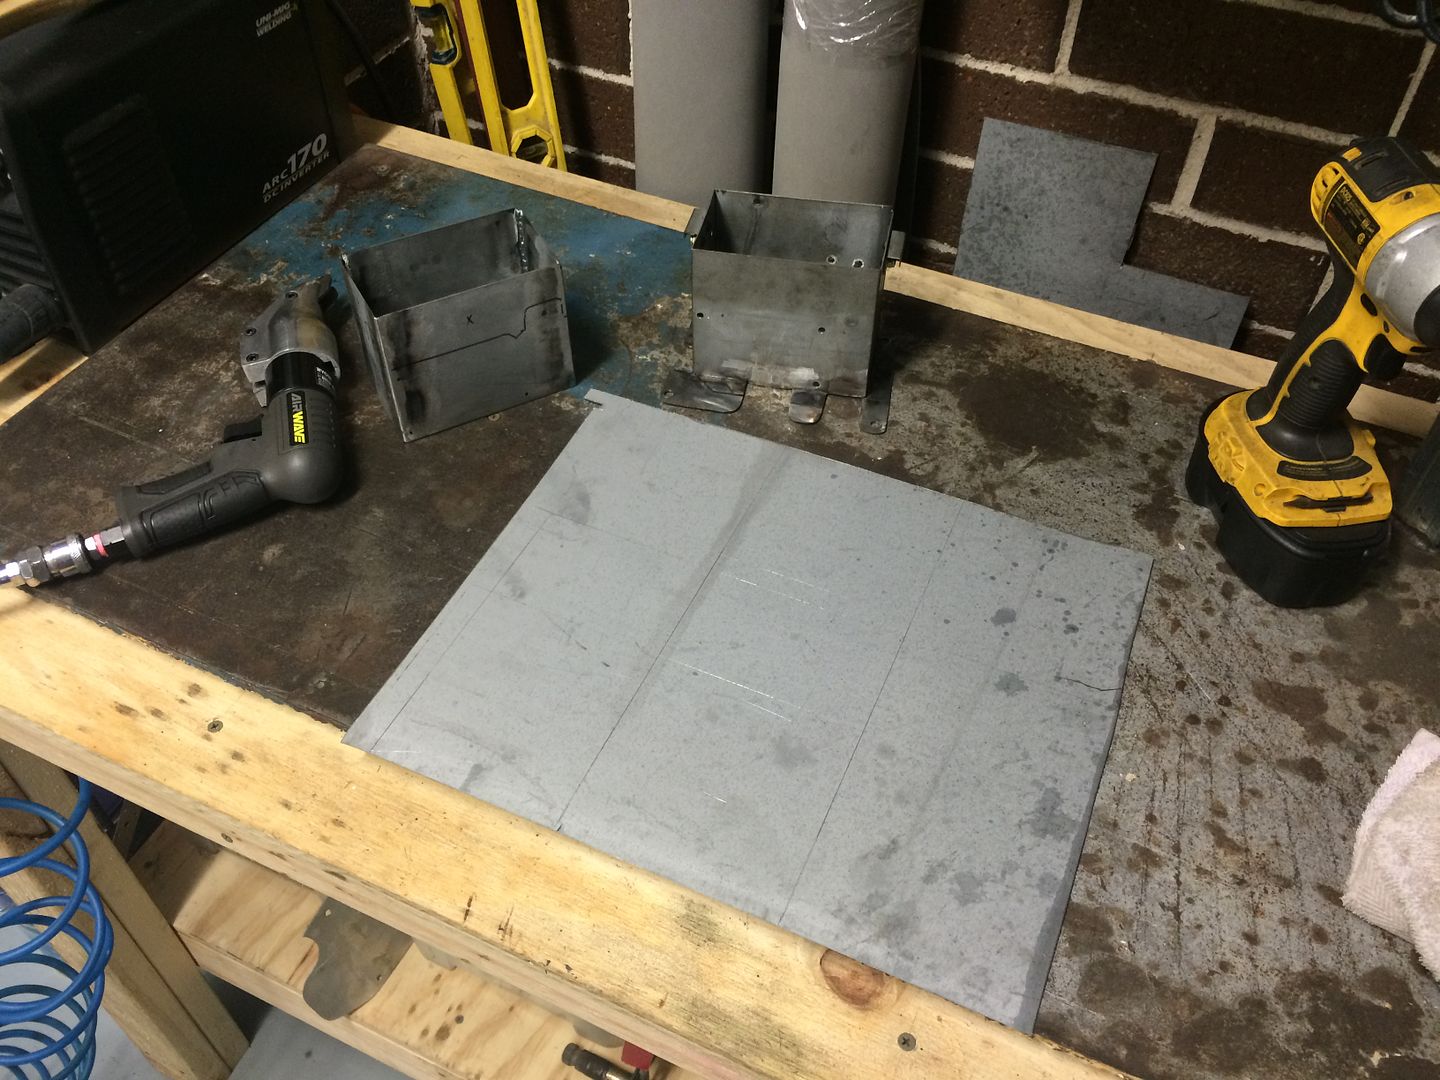
Step 2: trim the shape with the air sheers. Those with good eyes will see I cut one side too short here, so I had to start over.
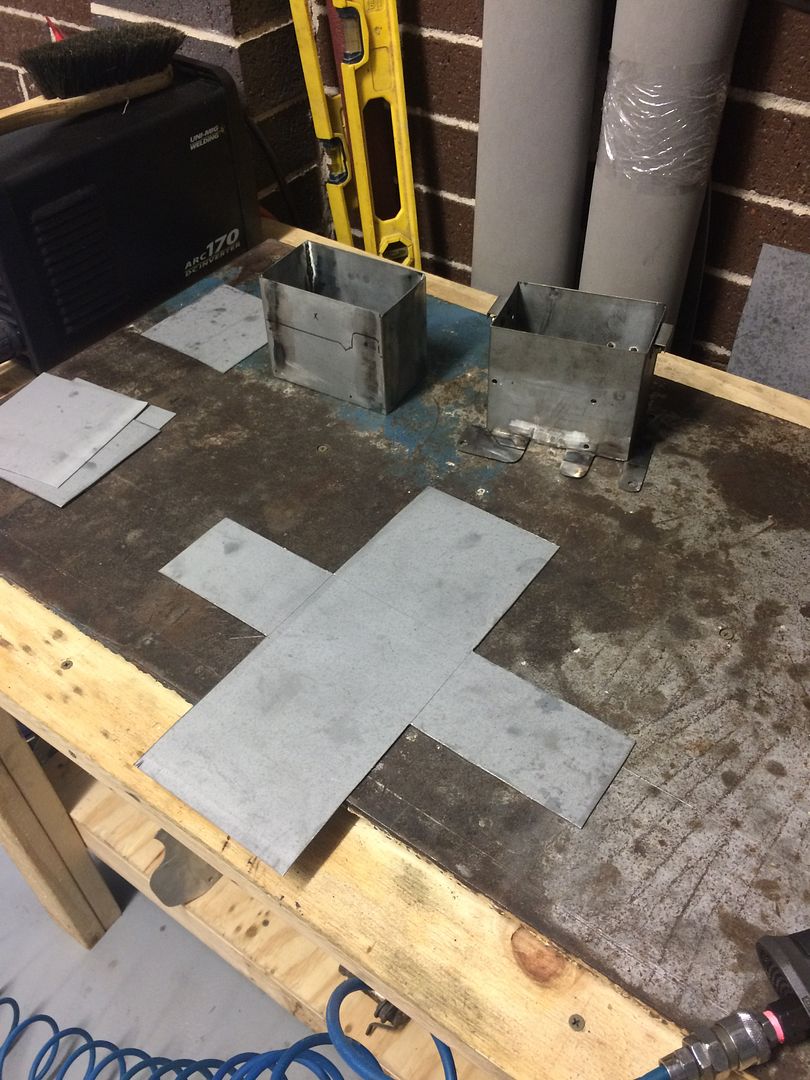
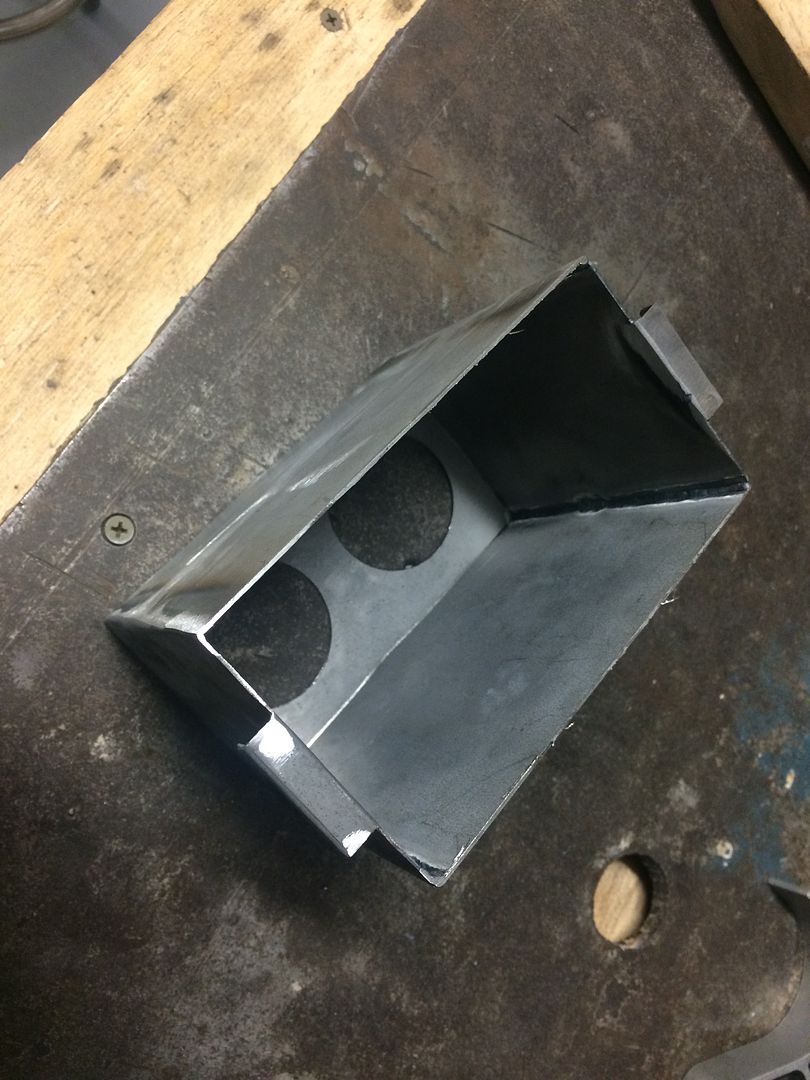
Step 3: drill the bottom holes.
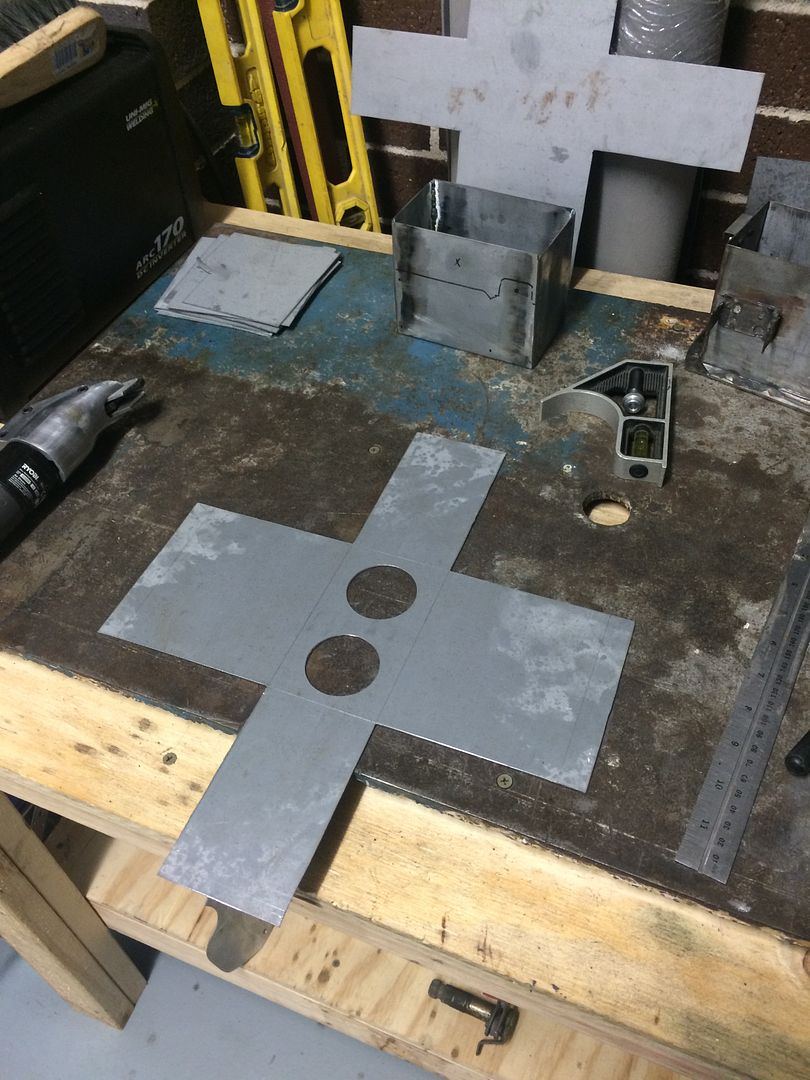
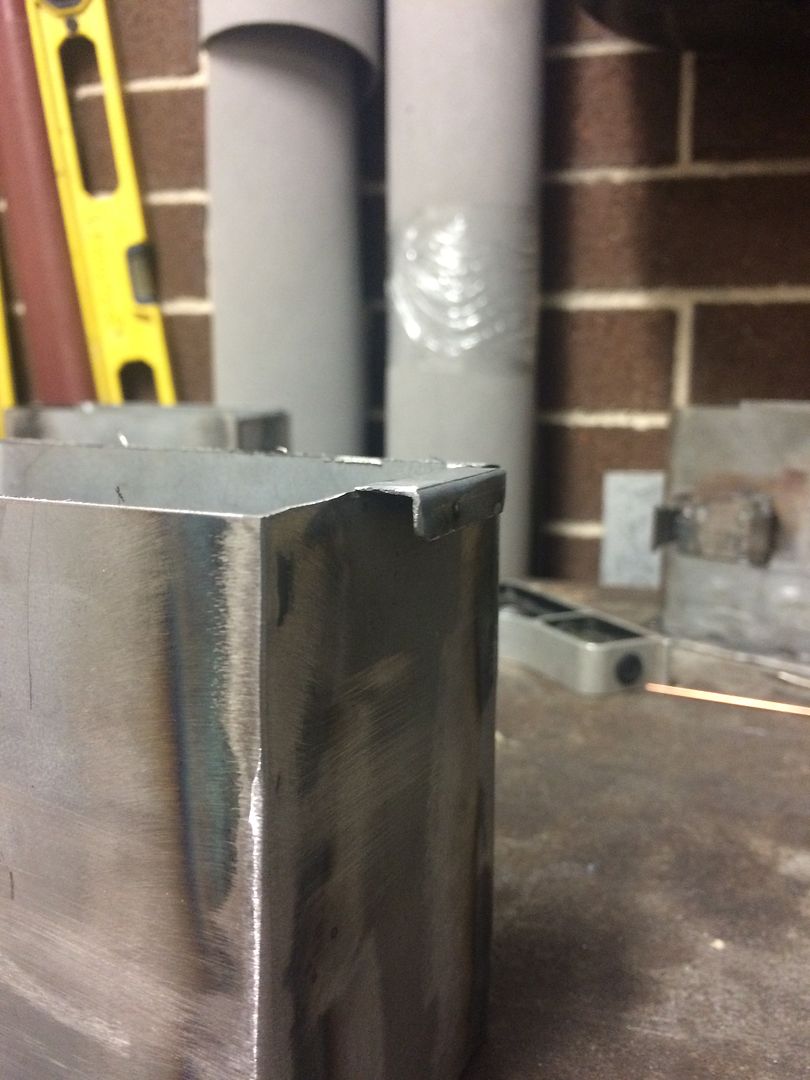
Step 4: trim the ends for the battery strap loops and fold up the sides.
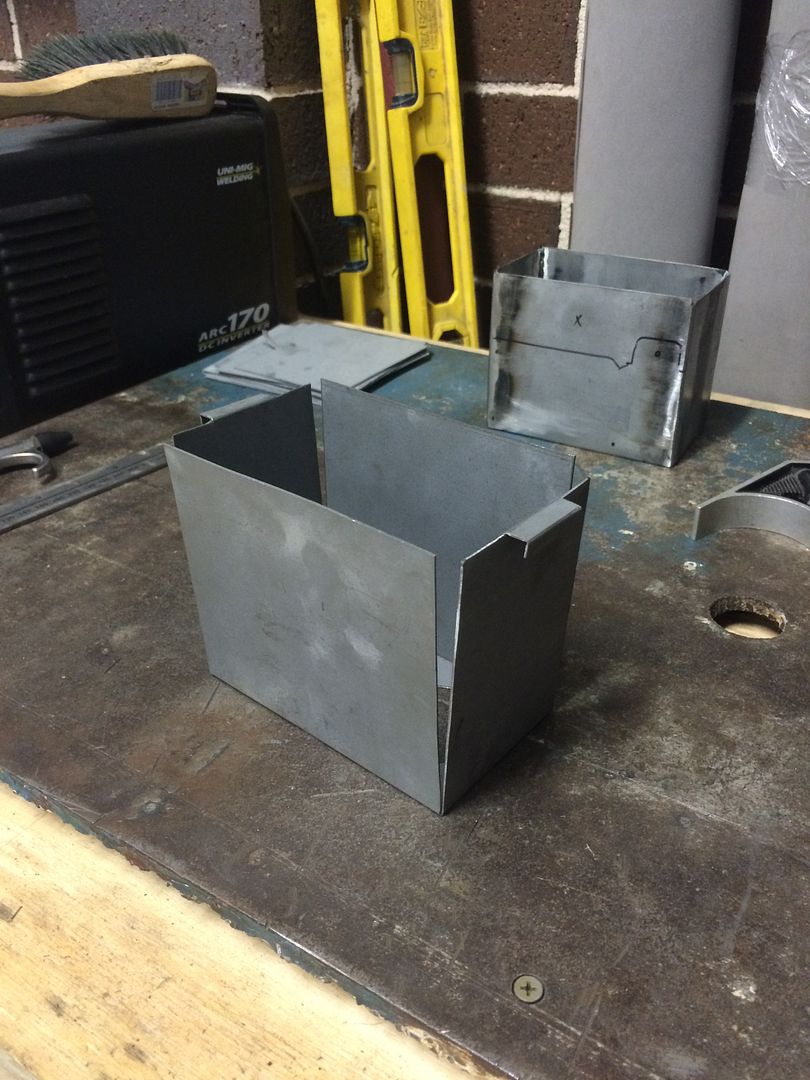
Step 5: weld her up.
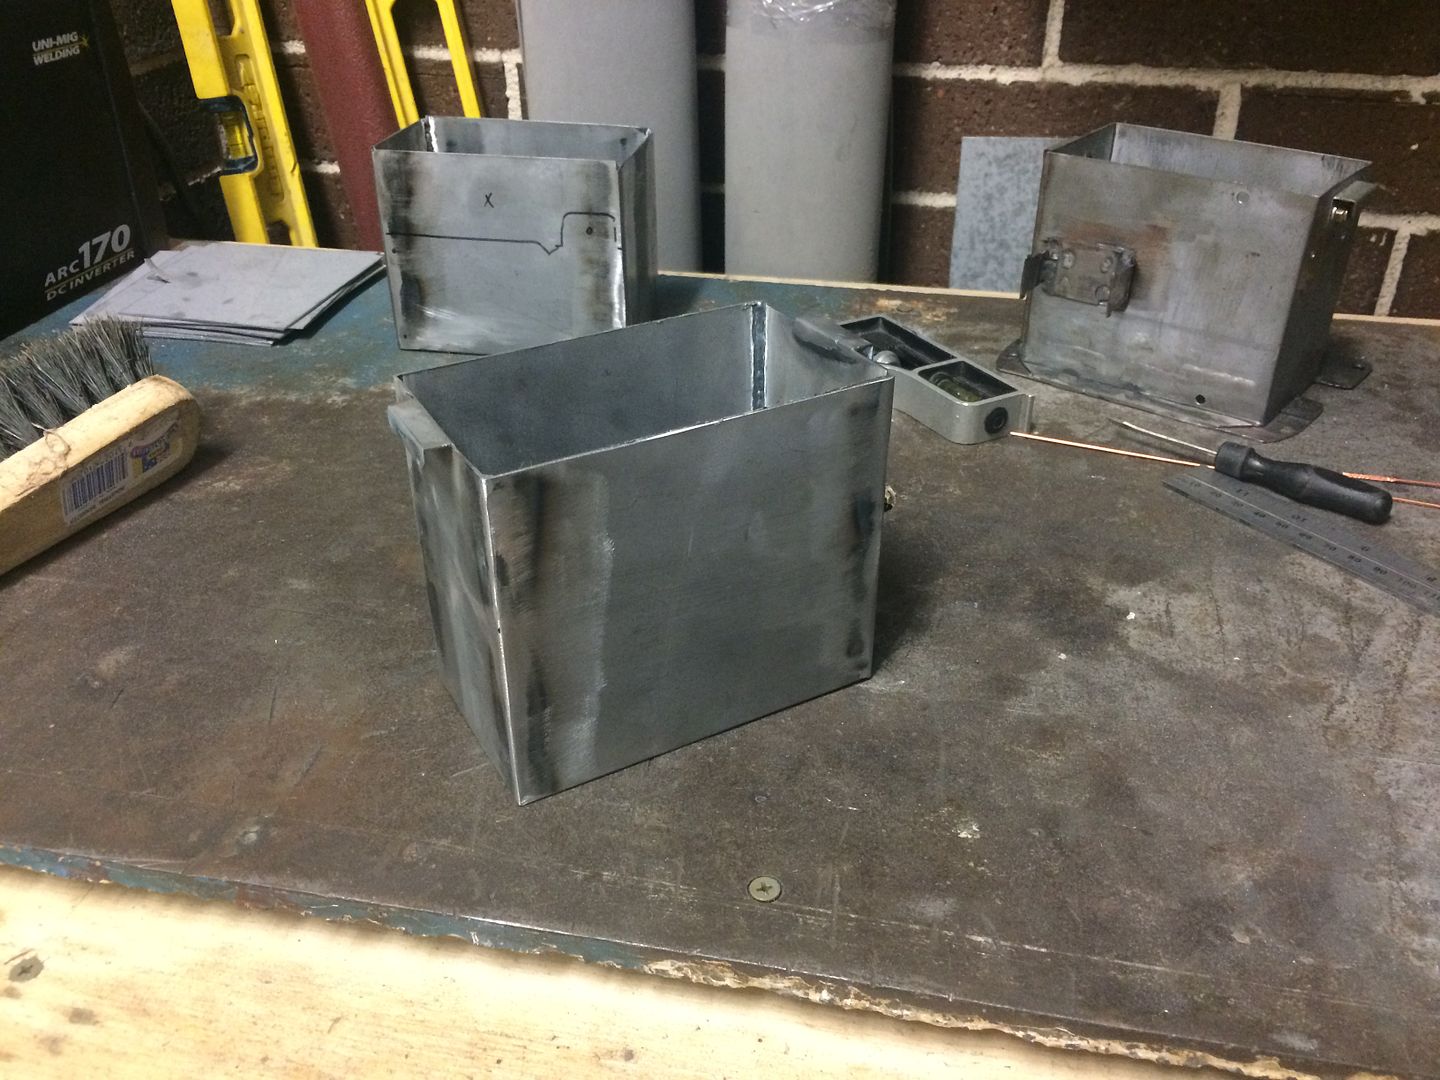
I'm pretty pleased with this latest version. Only issue I had was with 1 battery strap loop which fatigued with bending it, but a quick bead of weld and its rock solid now.
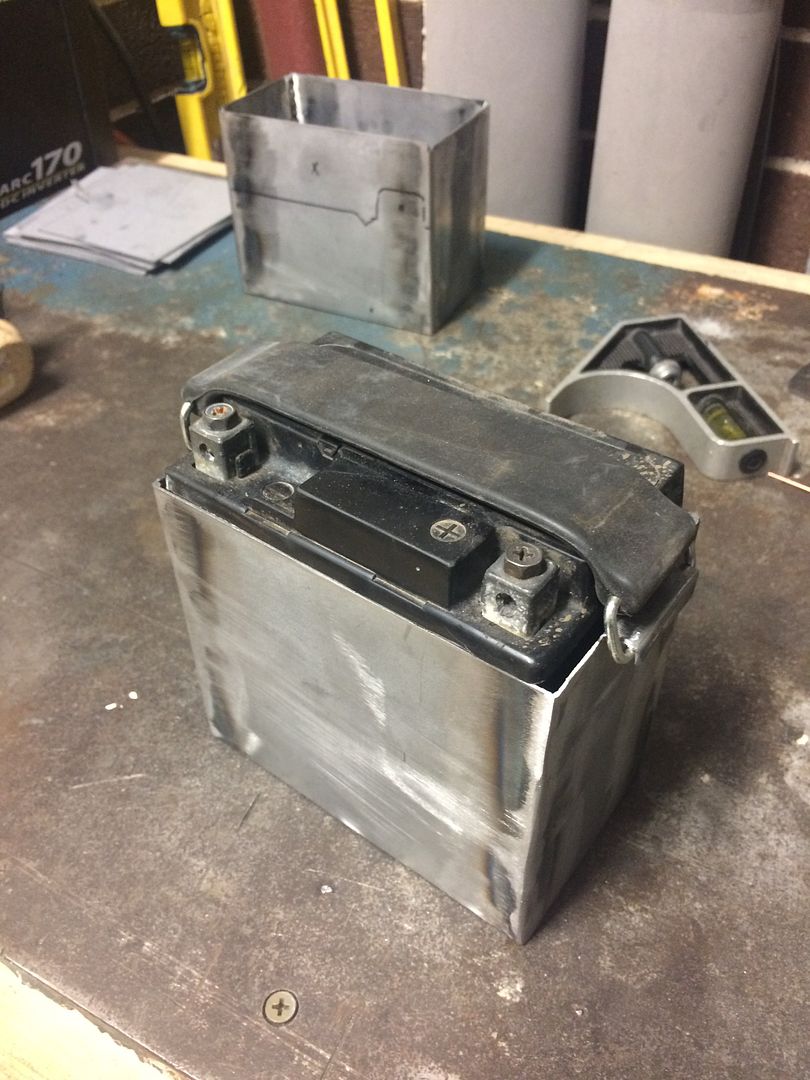
Test fit with the battery and strap:
Step 1: mark up some steel:

Step 2: trim the shape with the air sheers. Those with good eyes will see I cut one side too short here, so I had to start over.

Step 3: drill the bottom holes.

Step 4: trim the ends for the battery strap loops and fold up the sides.

Step 5: weld her up.


I'm pretty pleased with this latest version. Only issue I had was with 1 battery strap loop which fatigued with bending it, but a quick bead of weld and its rock solid now.

Test fit with the battery and strap:

DohcBikes
Fuck You.
All of my builds speed up considerably when a list is in effect. I really do think it has as much to do with seeing things crossed off as it does with finishing the bike. Weird.neevo said:Now I have my whiteboard I'm motivated to try and cross things off.
barnett468
Coast to Coast
DohcBikes said:All of my builds speed up considerably when a list is in effect. I really do think it has as much to do with seeing things crossed off as it does with finishing the bike. Weird.
Which is EXACTLY why I don't make lists.
DohcBikes
Fuck You.
Haha, I got two frames back from the blaster today. Tomorrow, there will be lists!!barnett468 said:Which is EXACTLY why I don't make lists.
barnett468
Coast to Coast
DohcBikes said:Haha, I got two frames back from the blaster today. Tomorrow, there will be lists!!
And i'll be reclining in my lounger drinkin margaritas made with fresh squeezed lemonade while basking in the warm california sun [if thats where i really live]
neevo
Over 1,000 Posts
A few parts have been ordered and I'm also preparing to finish off the wiring. Will update as soon as they land and I get them crossed off the list
I've been thinking about engine parts too, in preparation for trying to get the motor buttoned up around May (I'm heading back to the UK so will put an order I with David Silver Spares). One of the areas of concern for me is the oil pump. I've got 3 and none of them are in perfect condition so it has me thinking.
1. Does anyone have a link to Kevin's (TTR) 750 rotor mod PDF for the 400F
2. Anyone have a decent set of 750 rotors I can buy too?
I would hate to spend all the money on a new motor to have the oil pump let me down.
I assume the mod increases flow and pressure which should protect from oil starvation?
crazypj
Split personality, I fake being smart
I have it downloaded on a flash drive, saw it just a couple of days ago.
I've got about 10~15 drives laying about though, I'll look for it tomorrow (later today : )
You need a CB750 rotor set and do machining on pump body plus grind rotors thinner.
I've got about 10~15 drives laying about though, I'll look for it tomorrow (later today :
)You need a CB750 rotor set and do machining on pump body plus grind rotors thinner.
neevo
Over 1,000 Posts
Oil pump time. As with most of my work on the bike, first up I got a well organised workspace and cracked out the Clymers manual I had. I had 3 complete oil pumps at some point but now cannot find 1 housing, main rotor set and gearbox rotor set (despite still having most of the other bits). I assume it's because 1 was so bad I tossed it in the bin, something I need to do more of as I am hanging on to literally every part at the moment (including 3 valve trains):
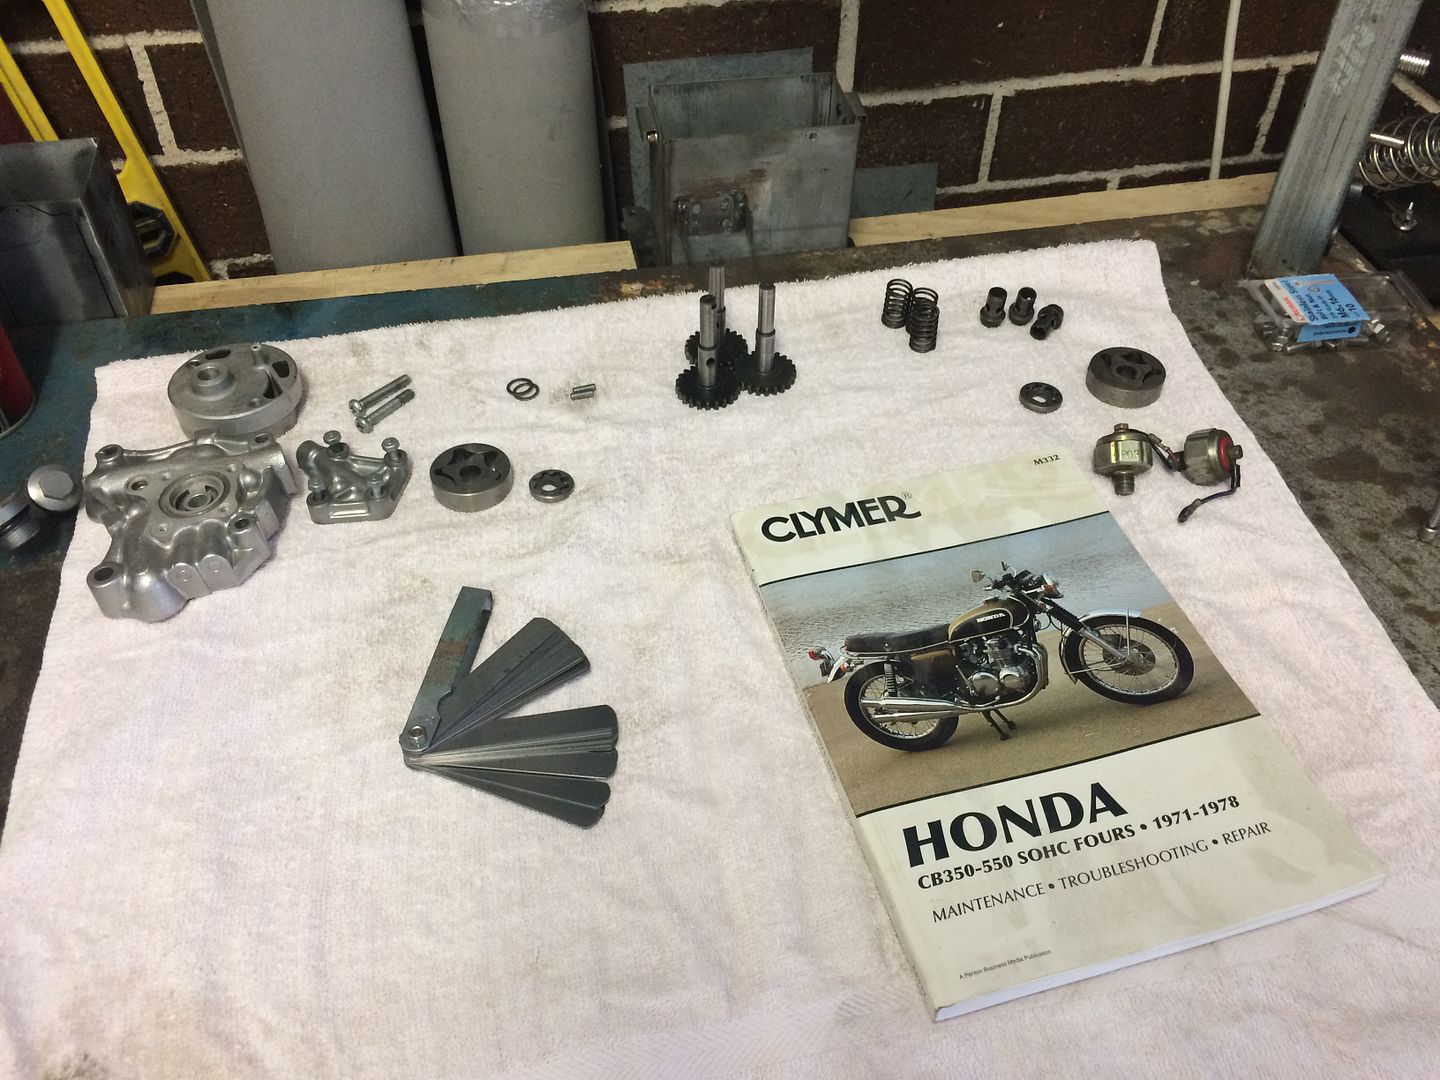
First I set about giving all the bits a clean with some degreaser and a nylon brush to clear the gunk away:
All cleaned and a nice workbench I set about picking the nicest parts to build 1 pump and spec the items as I went. I got the Clymers to guide me (along with a Haynes later on):
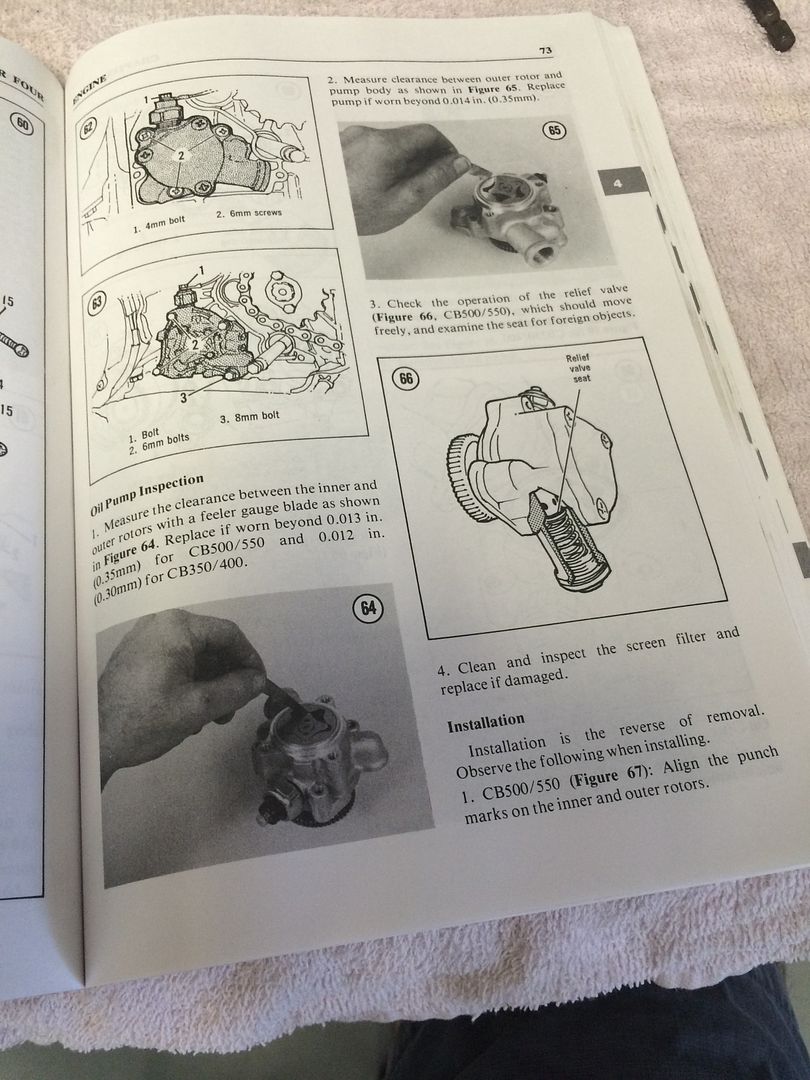
Surprisingly the specs on the oil pump are pretty limited so I checked all those and have taken a load of pics to help guide me with those in the know as to whether this pump will be serviceable.
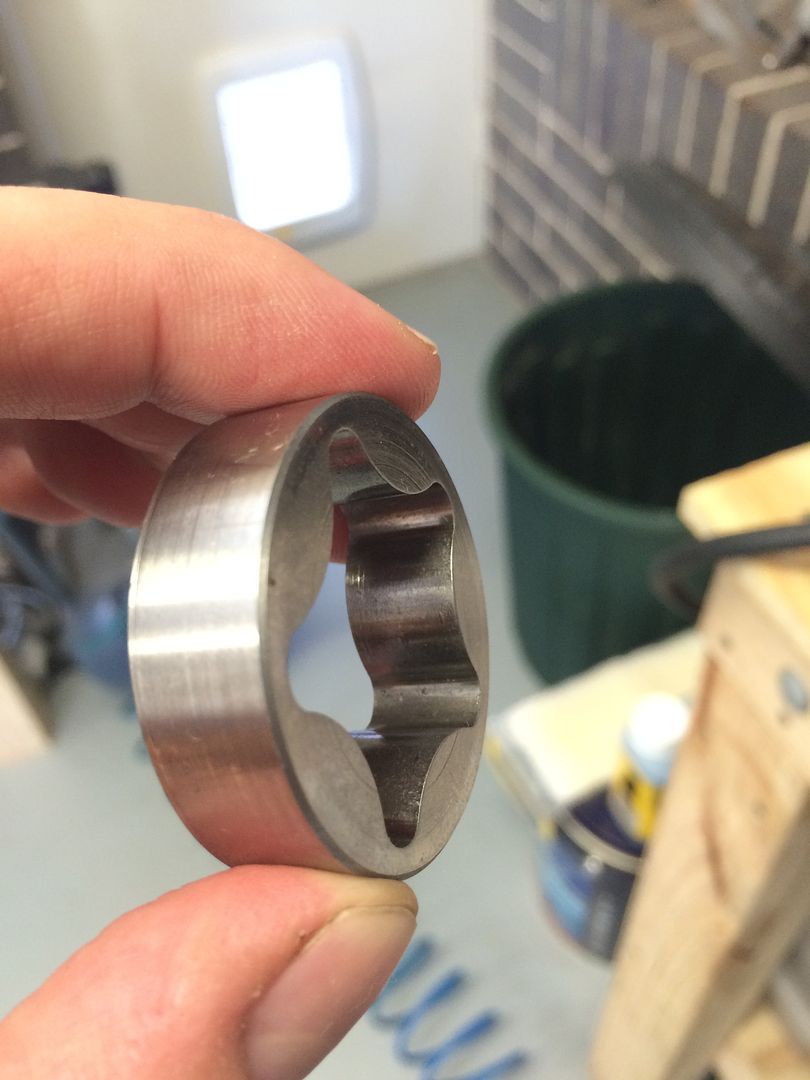
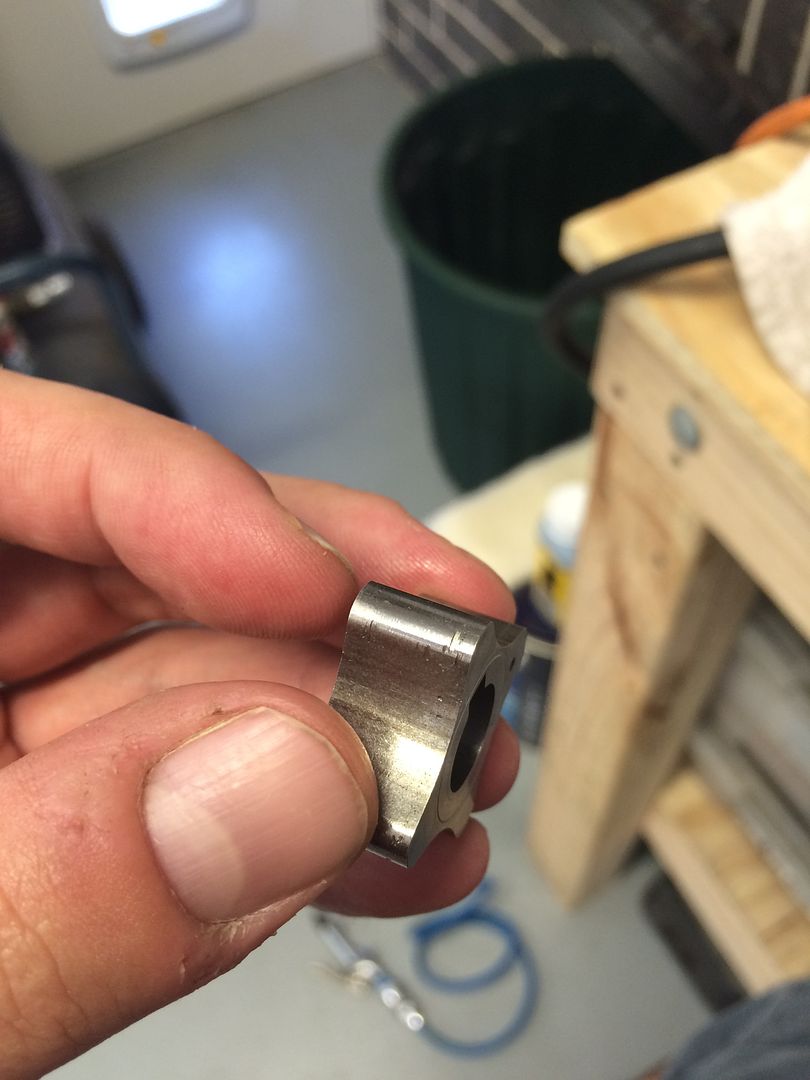
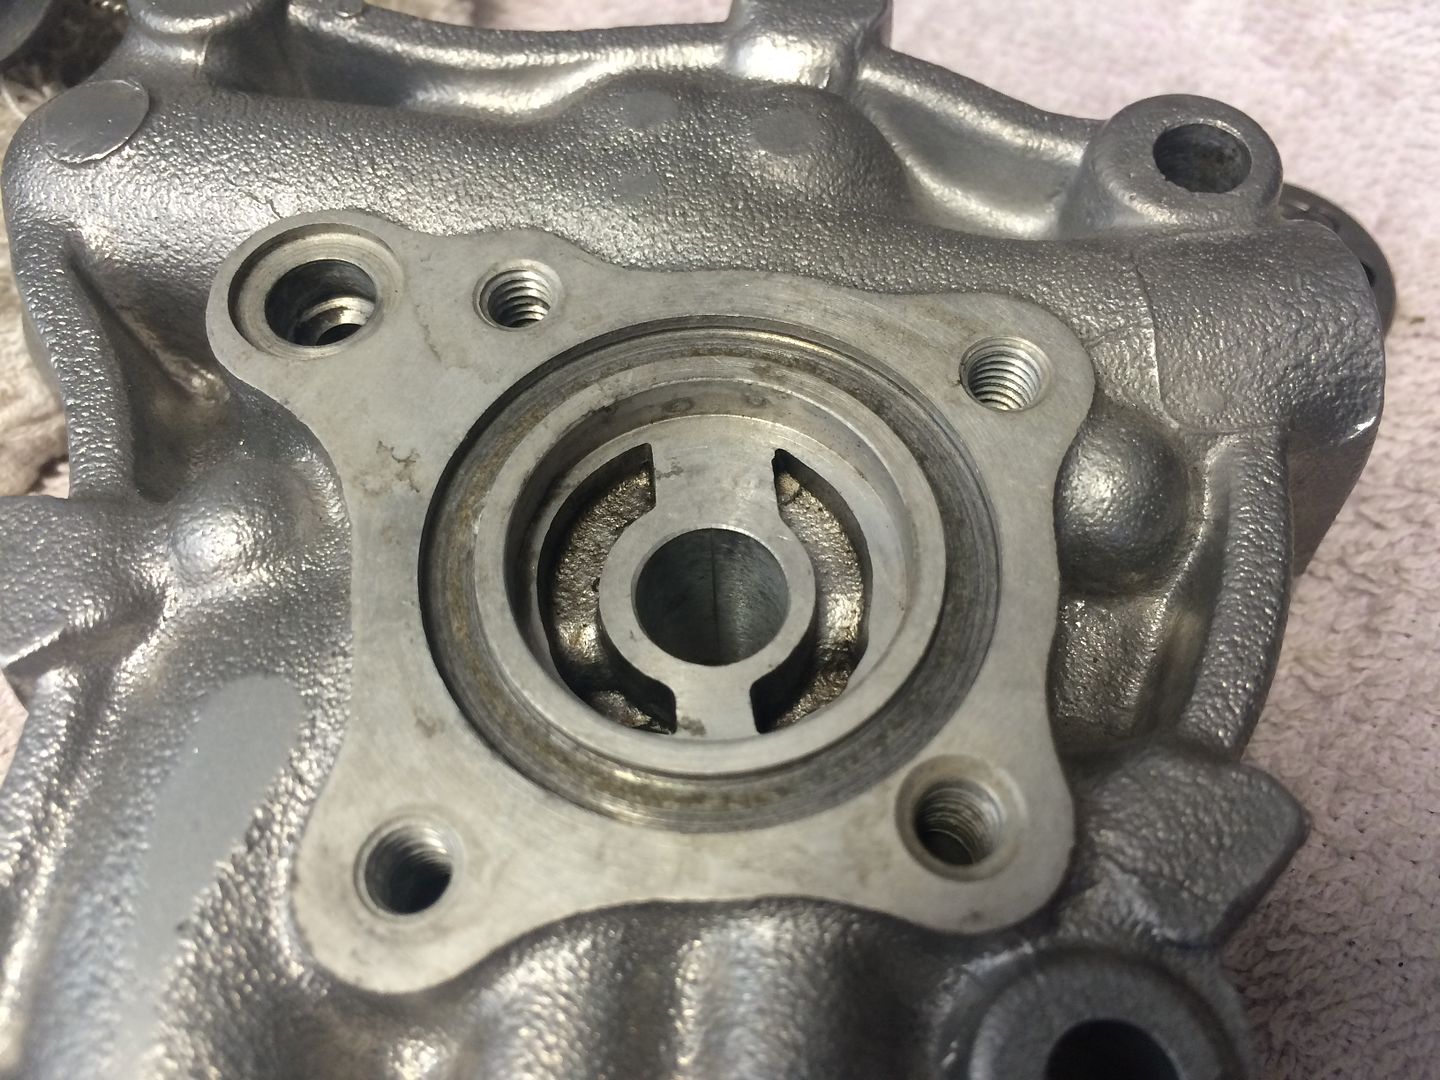
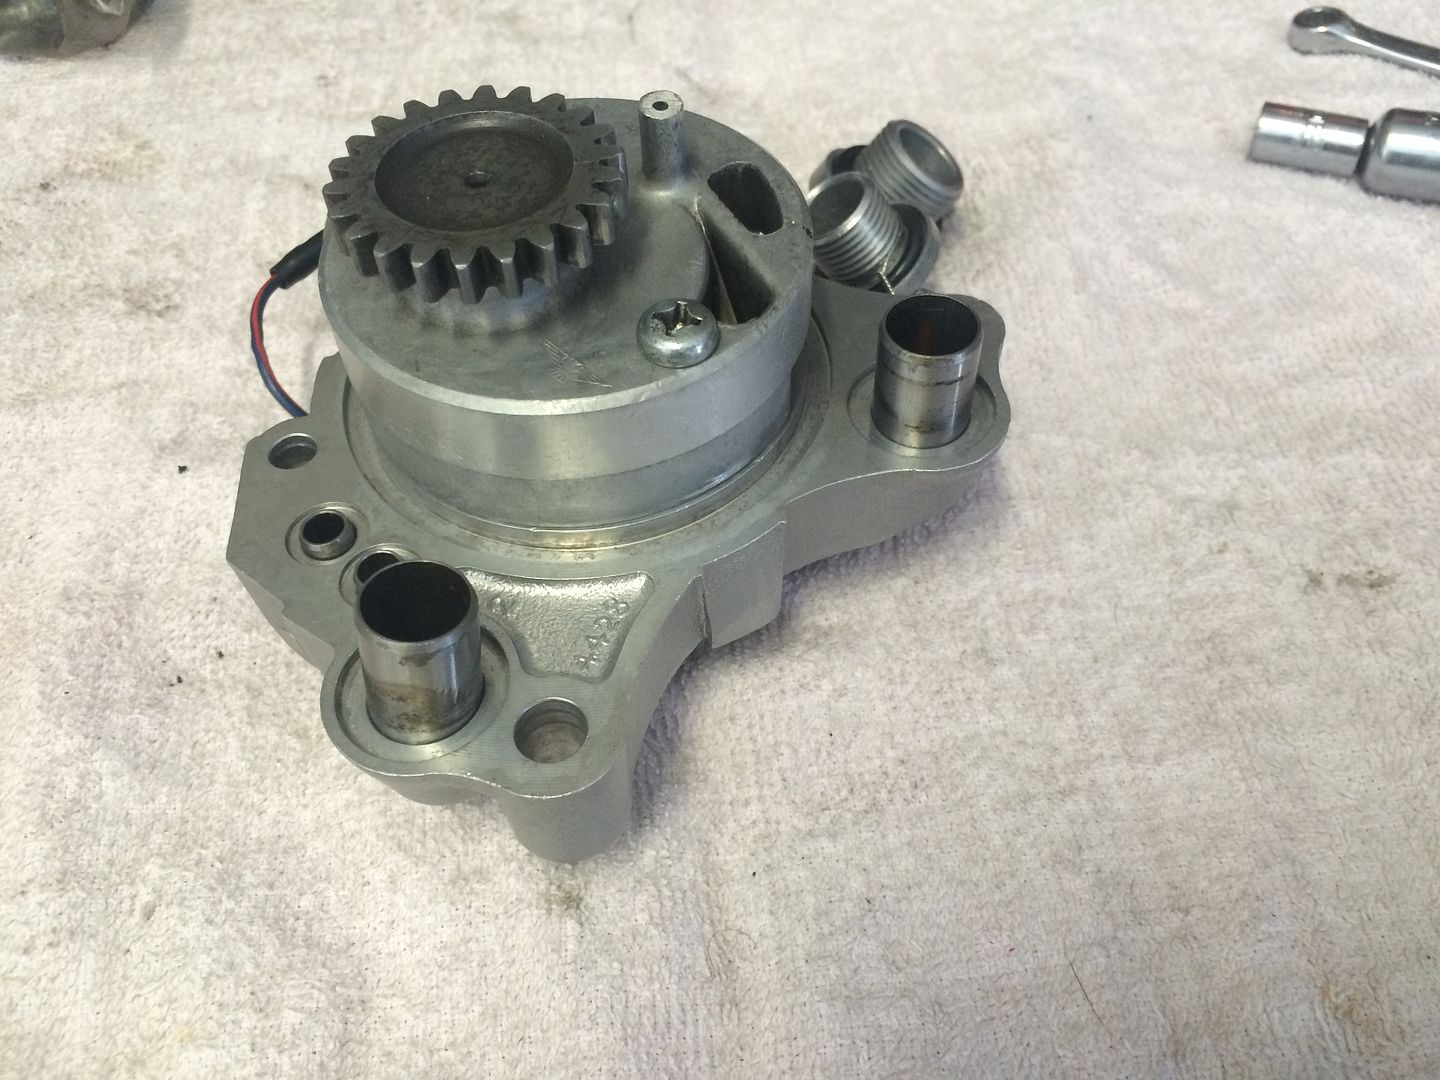
First up is the housing. This has already been vapour blasted and I picked the one with the least visible damage. There are some scuffs inside the rotor housing but nothing that catches a fingernail, so I assume these are fine to use:
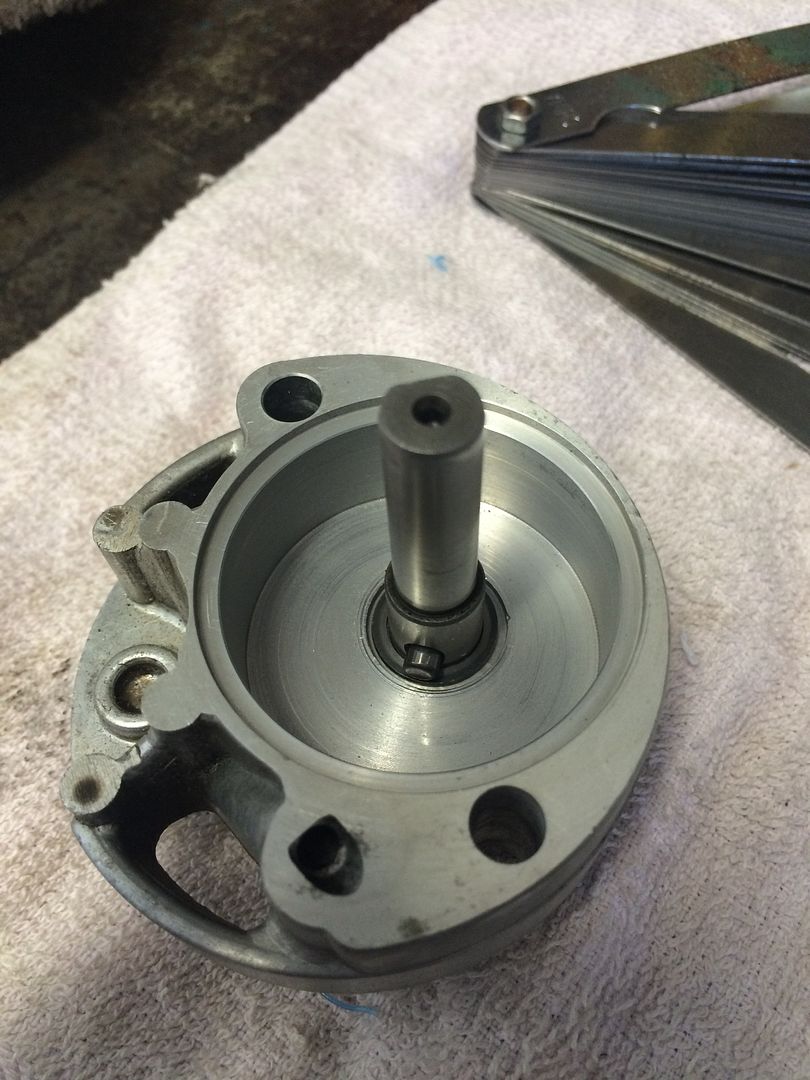
The other side has not a scratch on it and you can still see the machining marks:
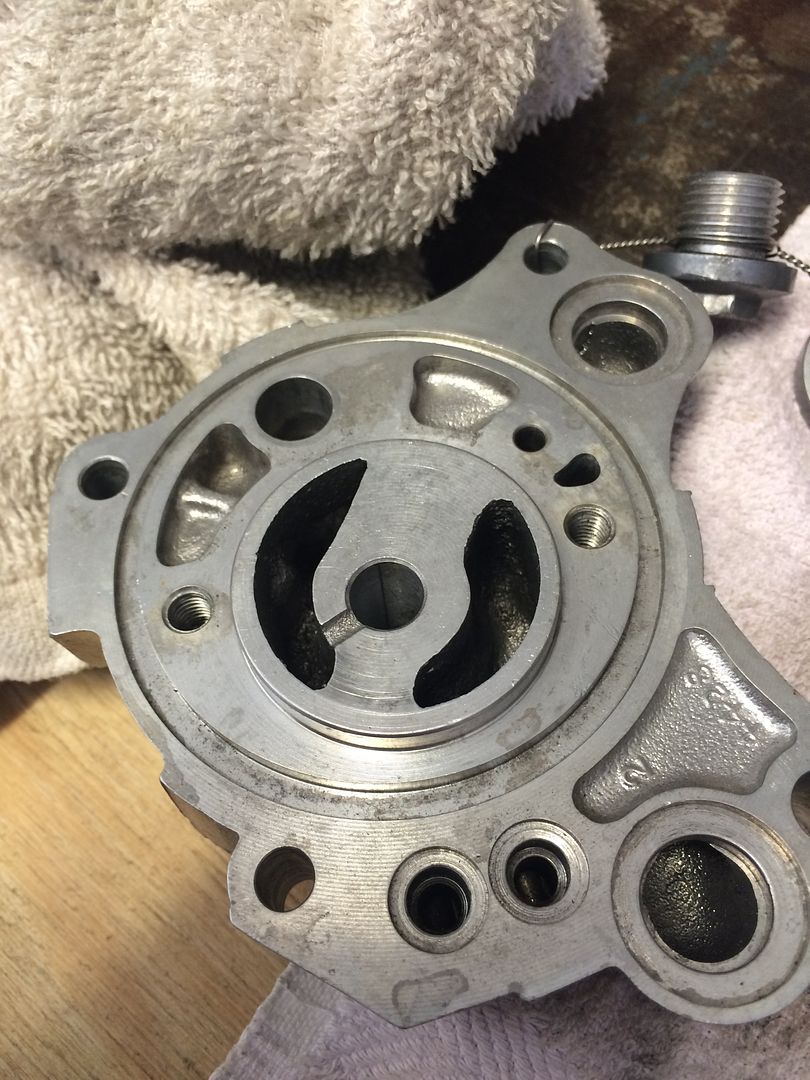
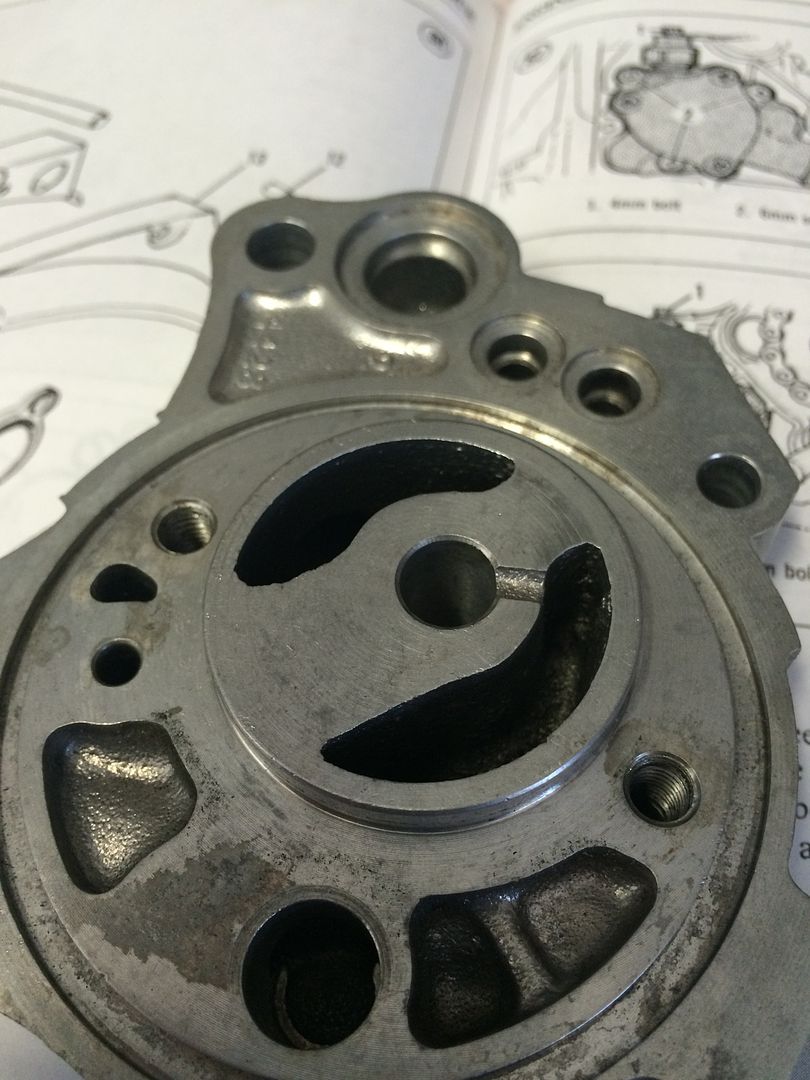
The outer rotor has some scuff marks too but again nothing to major and only 1 or 2 can be felt with the fingernail, even then only slightly:
Looking inside the rotor for pot marks in the corners, there appear to be none:
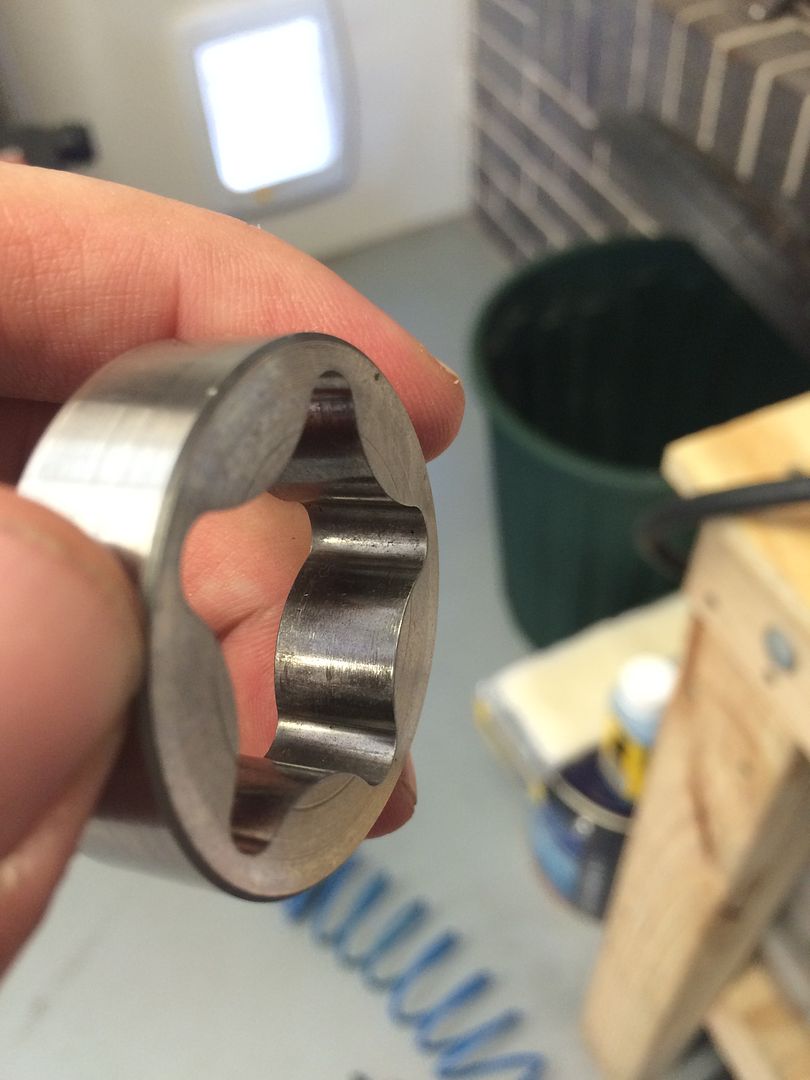
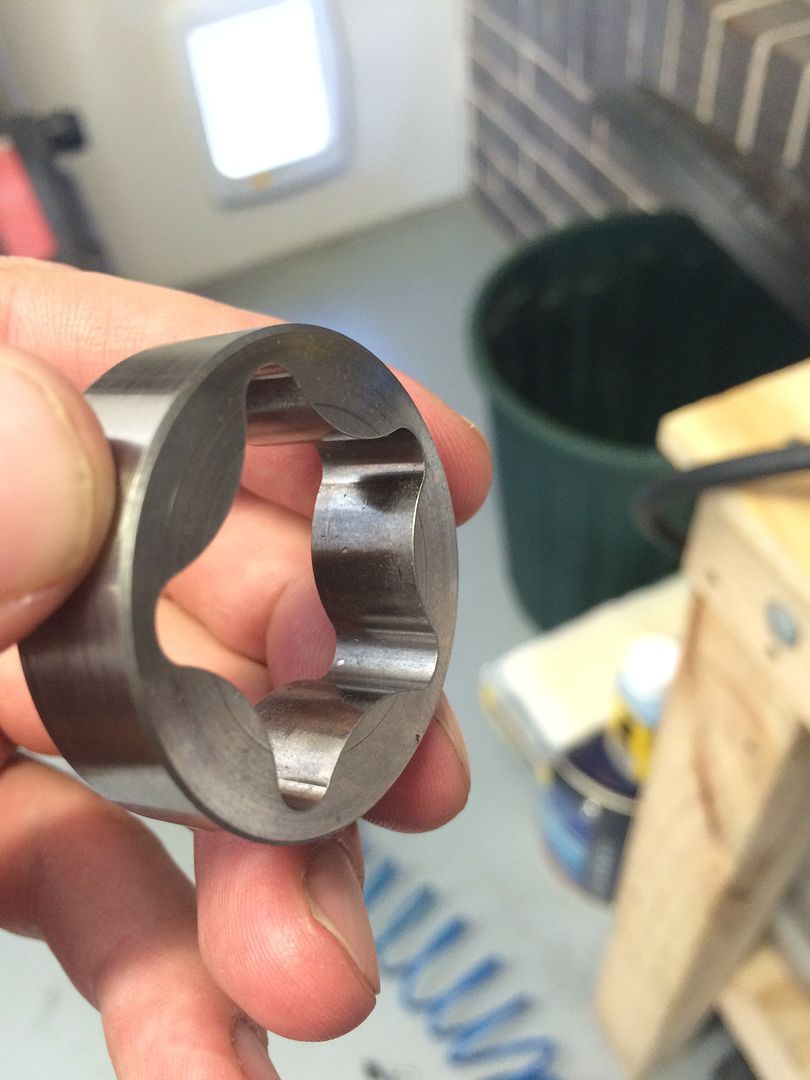
The inner rotor is pretty clean except for 1 pot mark on each rotor as its obviously sucked something through:
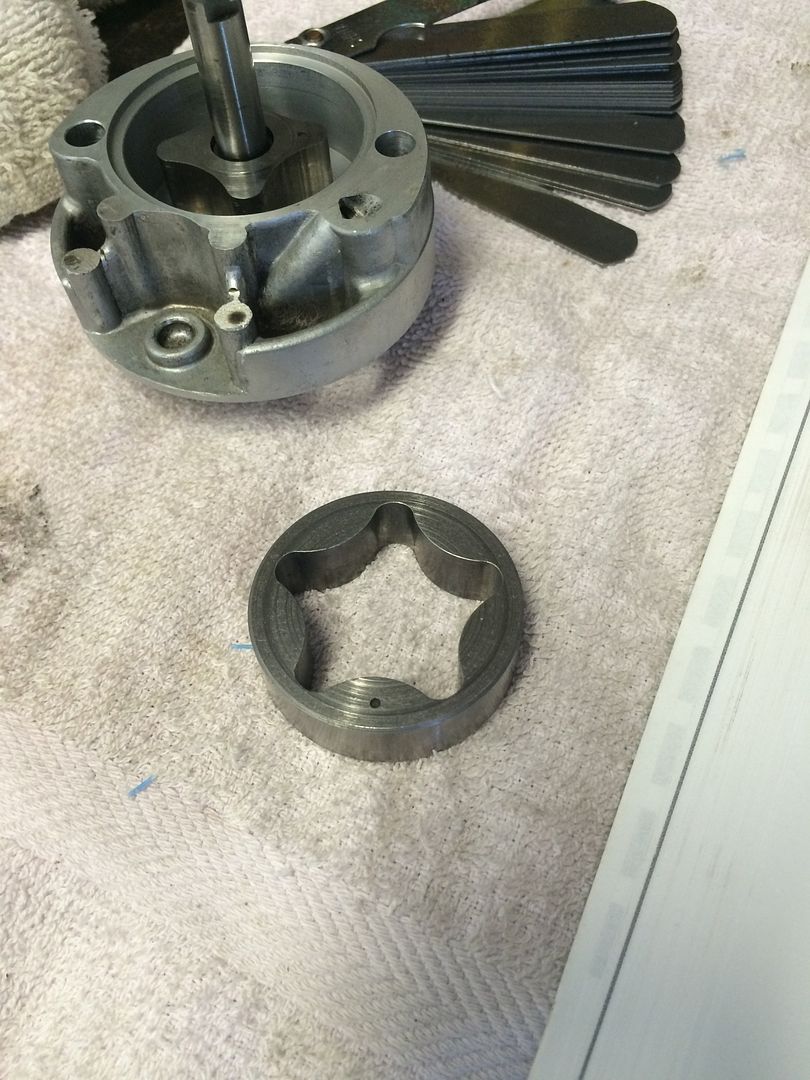
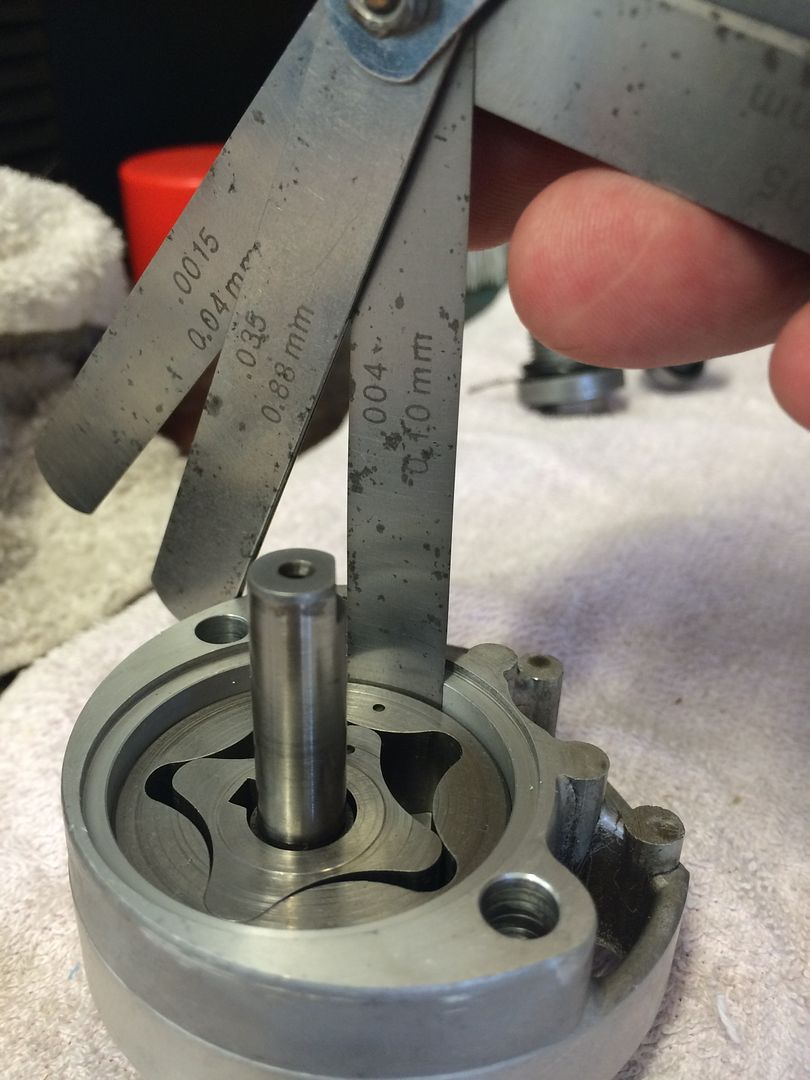
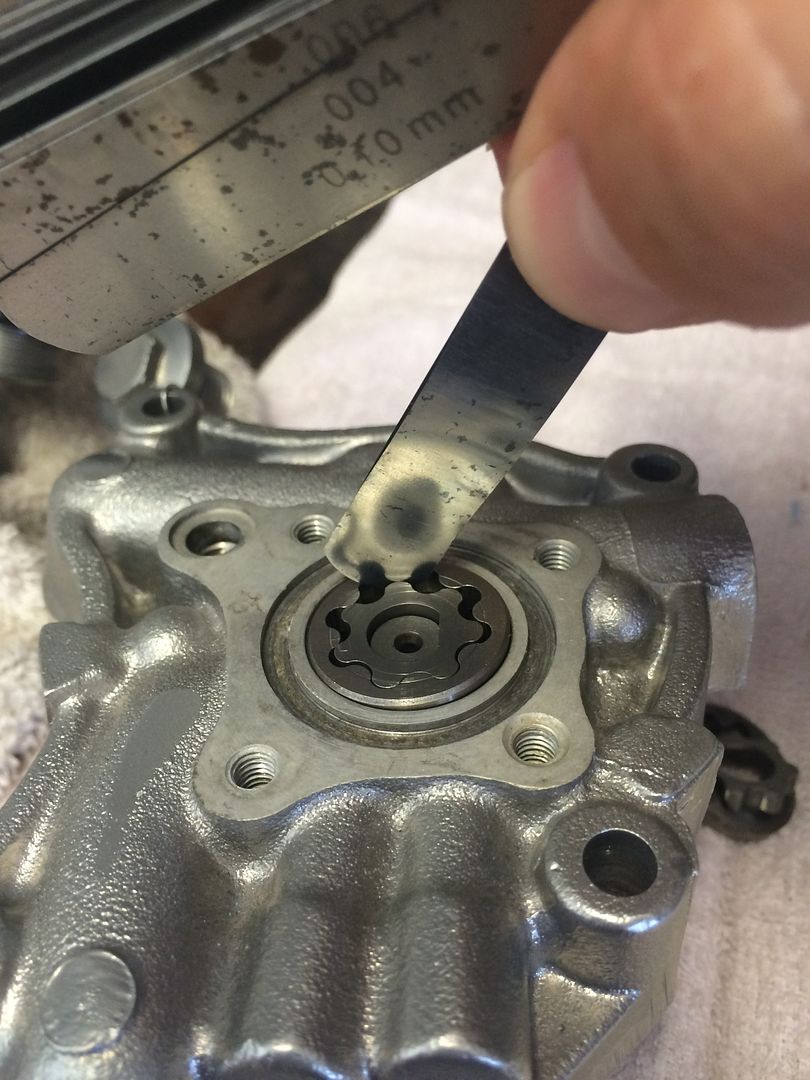
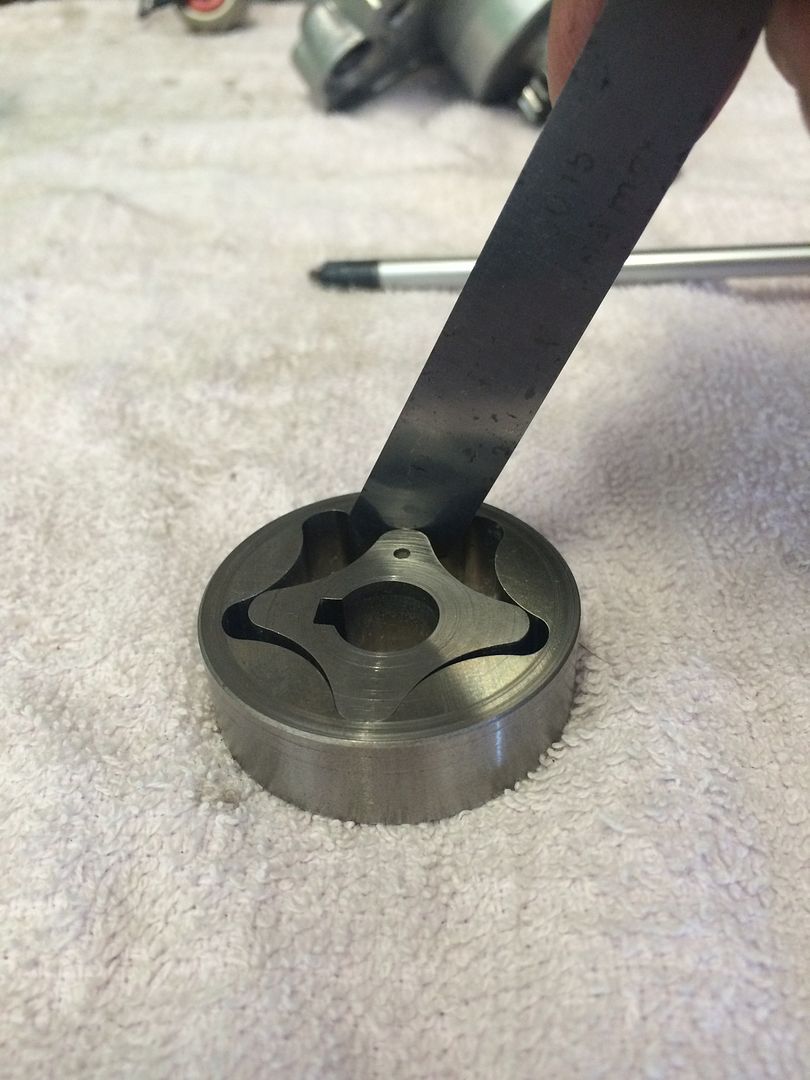
Next up I put the rotors in the housing and measured the lobe clearance. The manual states 0.35mm is maximum and I was pleased to find only 0.09mm clearance:
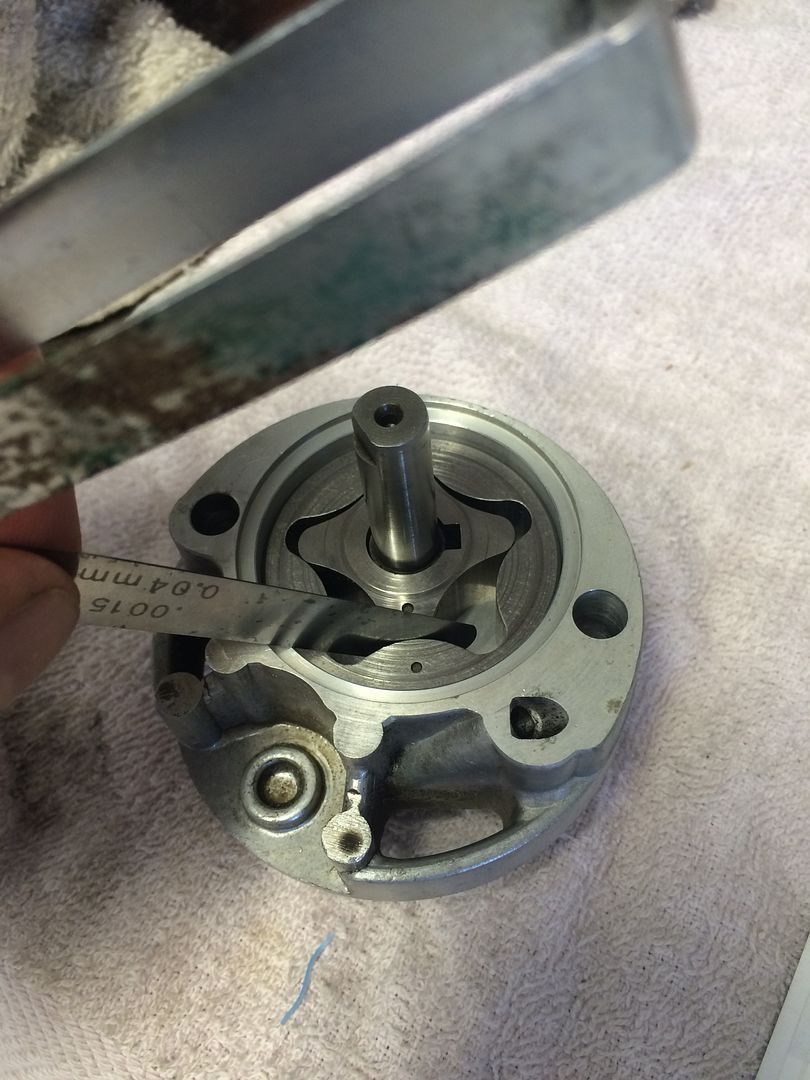
Outer rotor clearance should be within 0.3mm and it came in at 0.1mm:
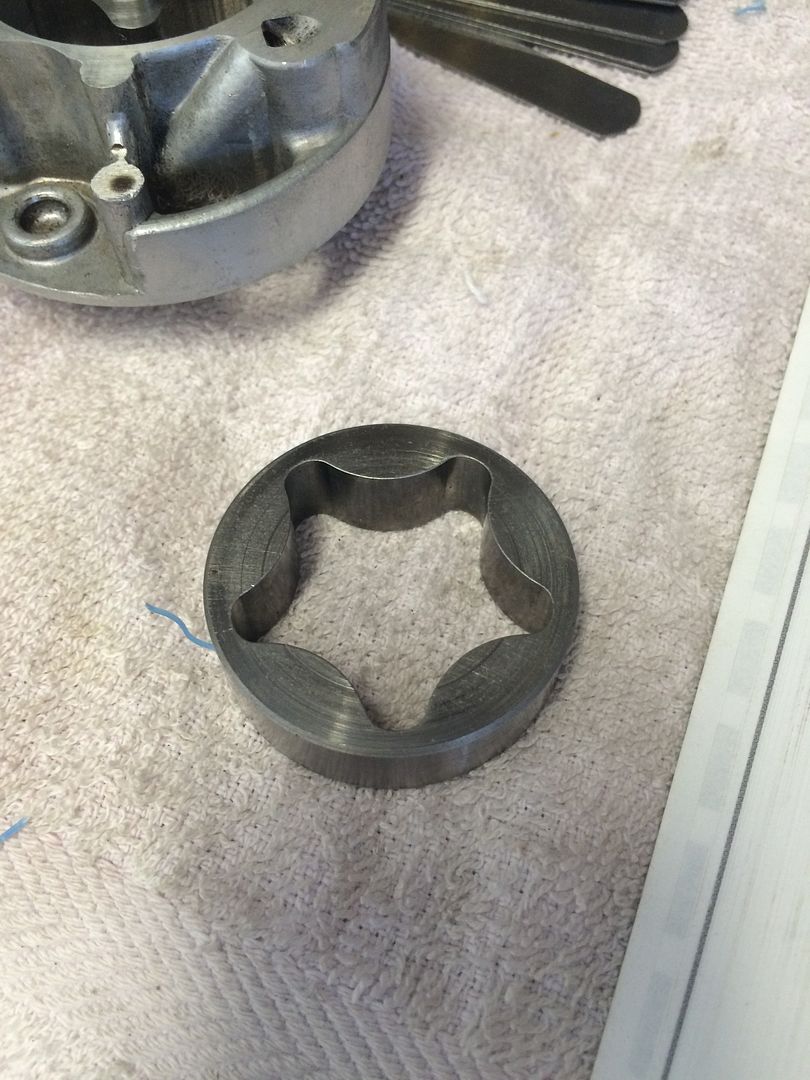
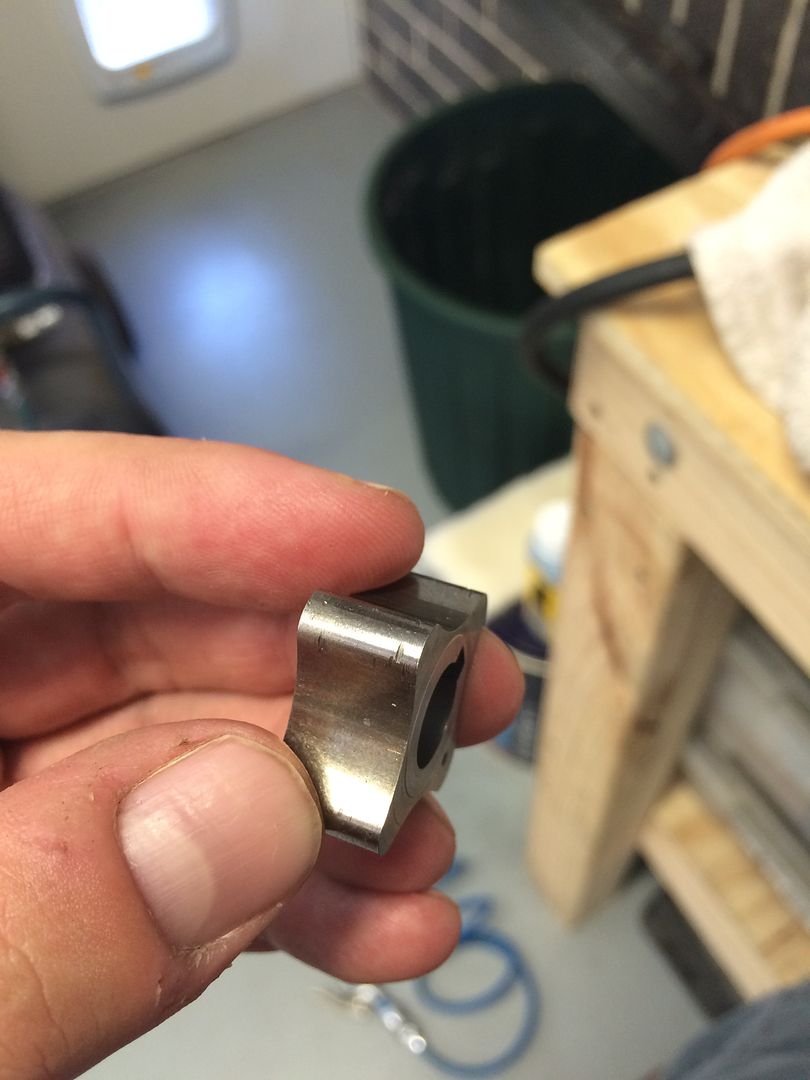
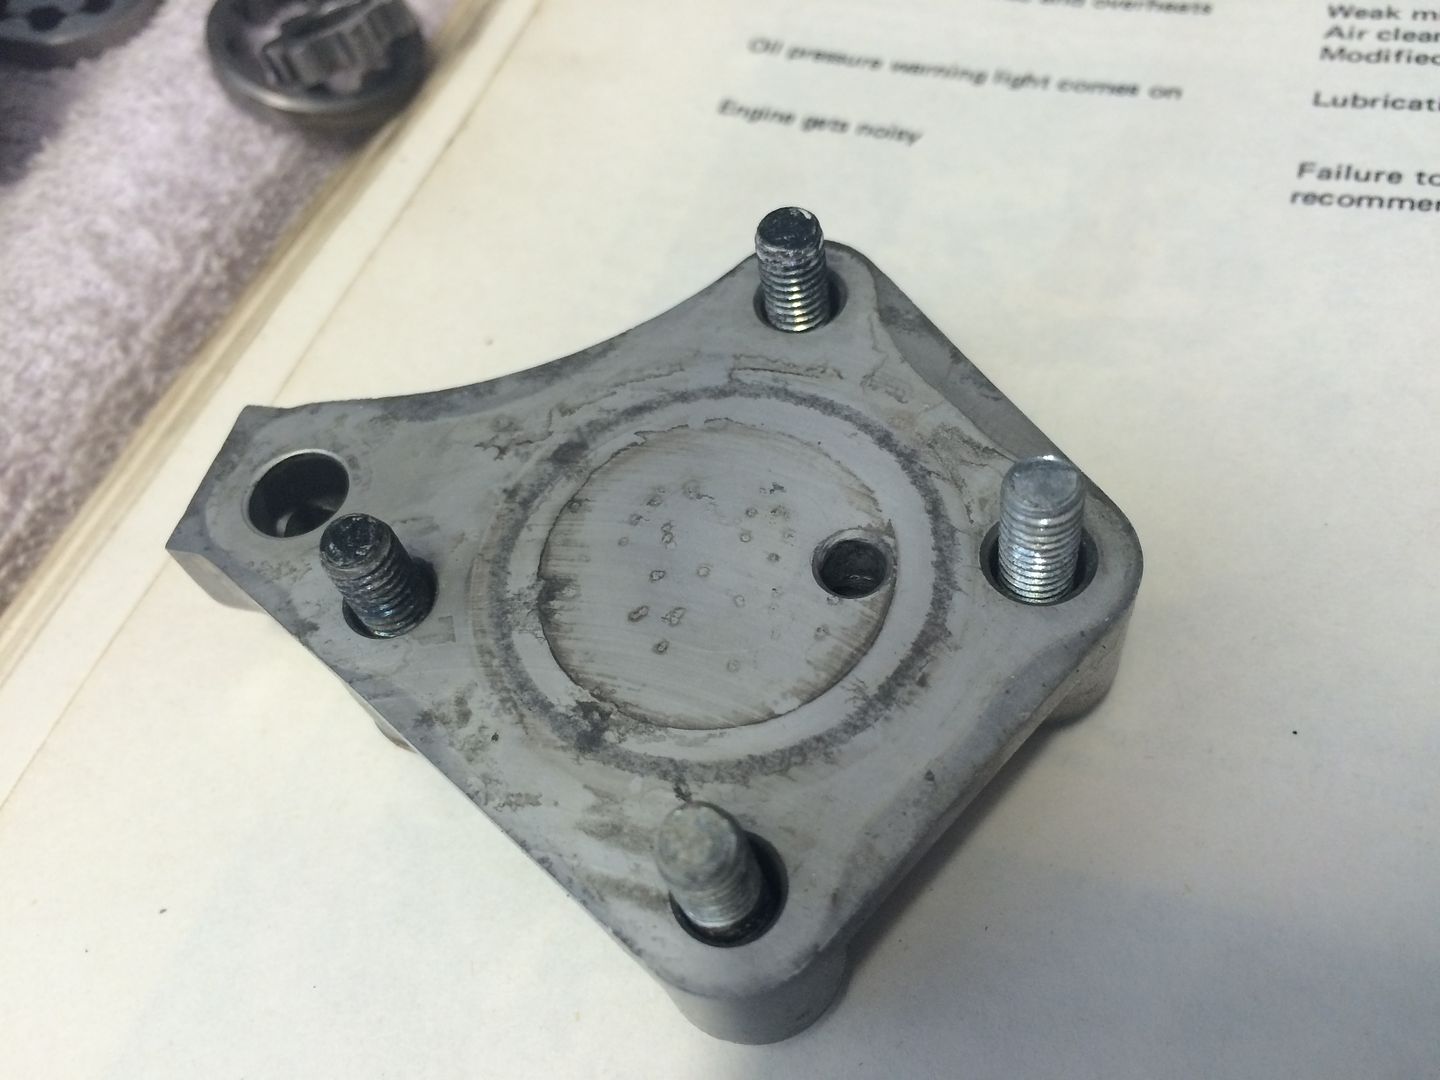
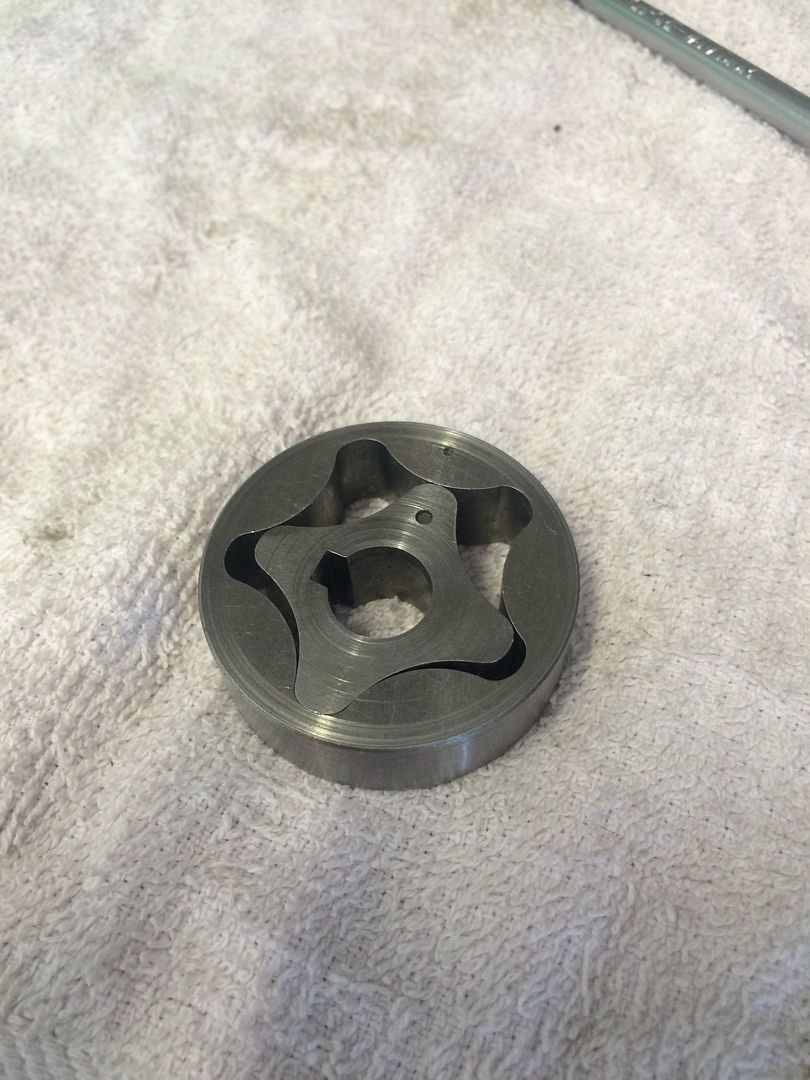
Looking at the gear rotor I was surprised to find these the most damaged. 1 had a visible but only slightly felt scratch, the other was scratched across the face and most were felt. I went with the one that only had 1 scratch as the rest of the rotor was clean and I thought the 1 small scratch would be better than lots of them (I chose the one on the left):
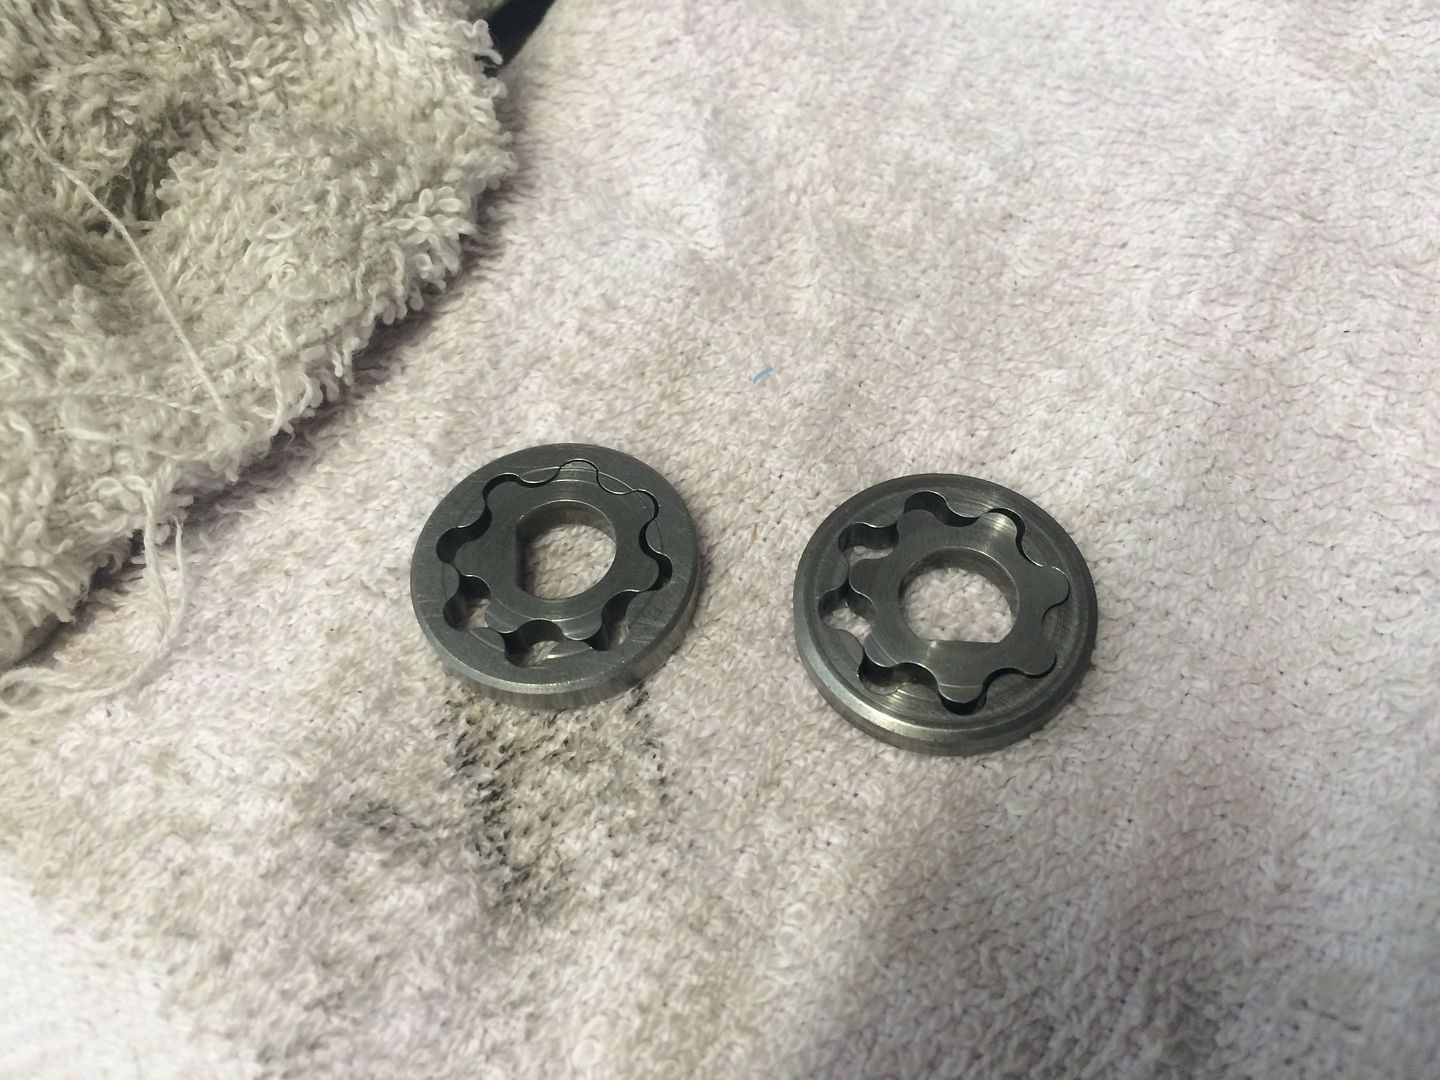
The reverse side of the one I chose was also spotless which was also the reason I went with it:
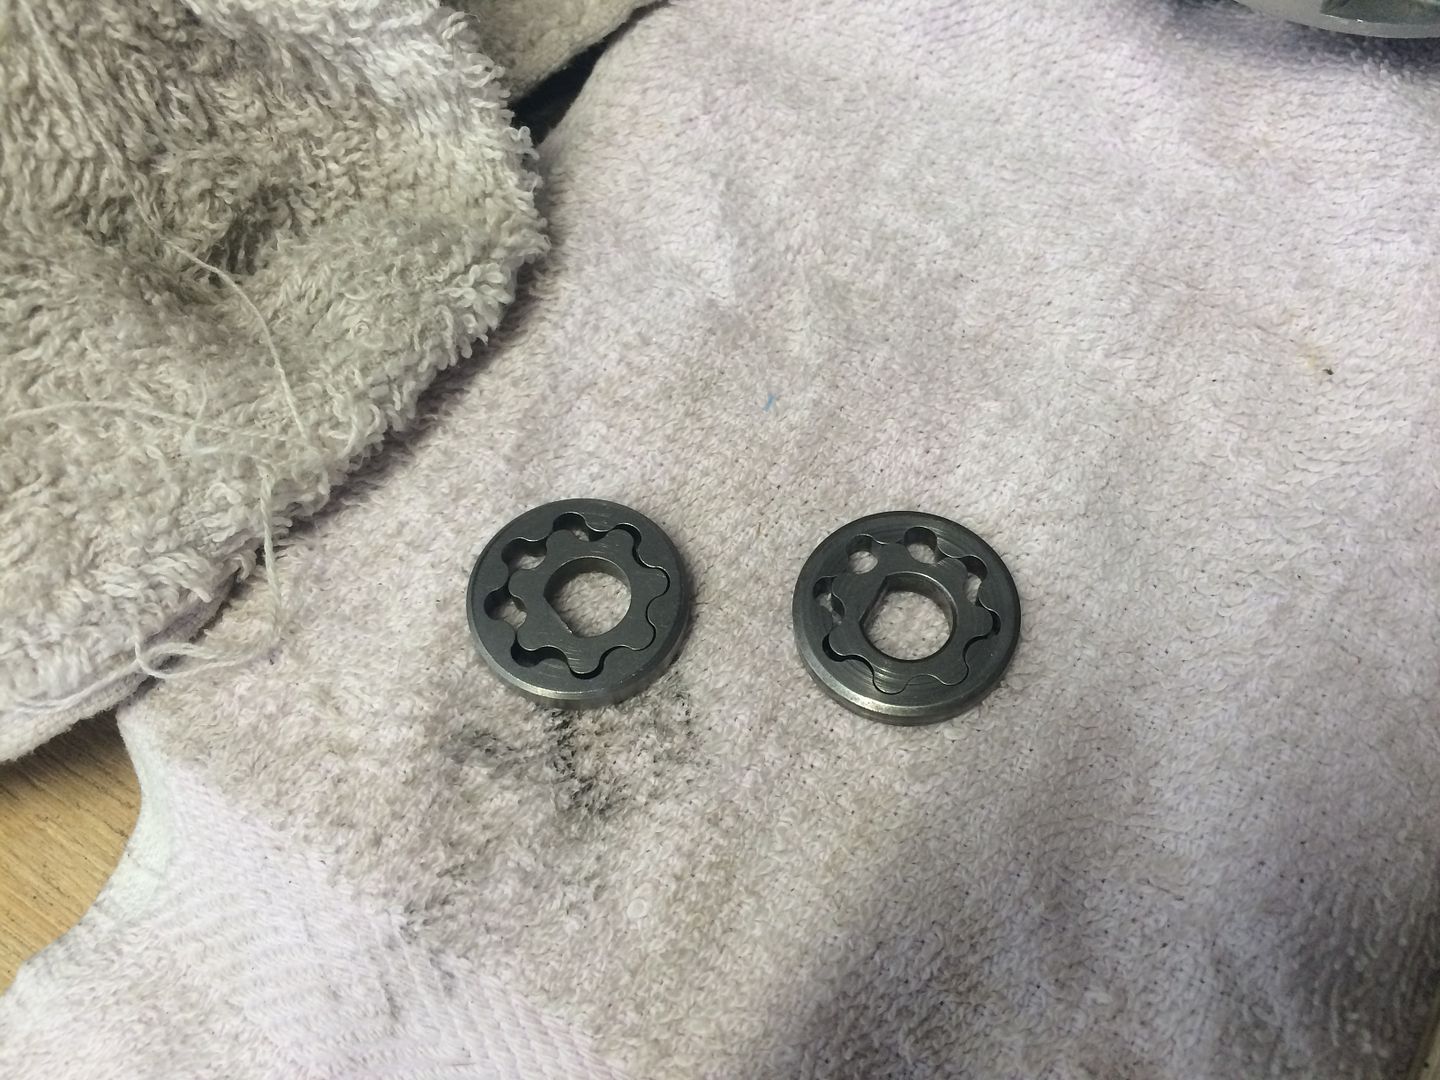
Rotors on both looked in perfect condition:
The housing also appeared fine:
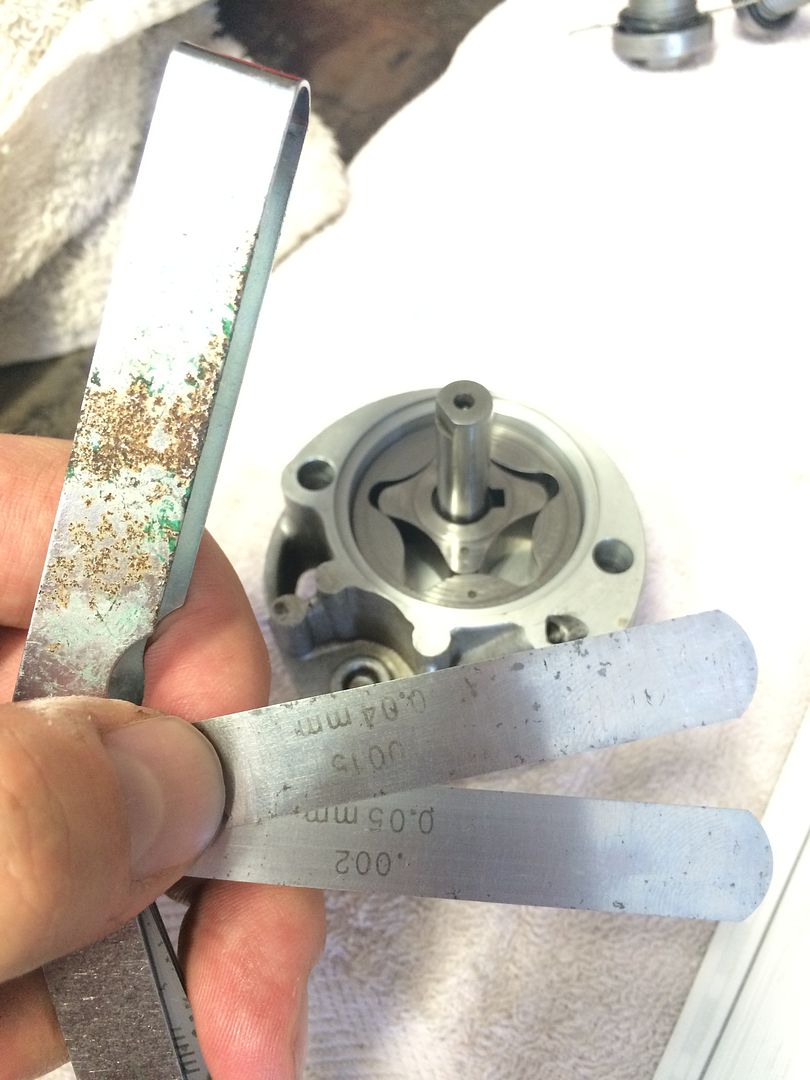
The rotor gap was larger than the others at 0.12mm but well within spec:

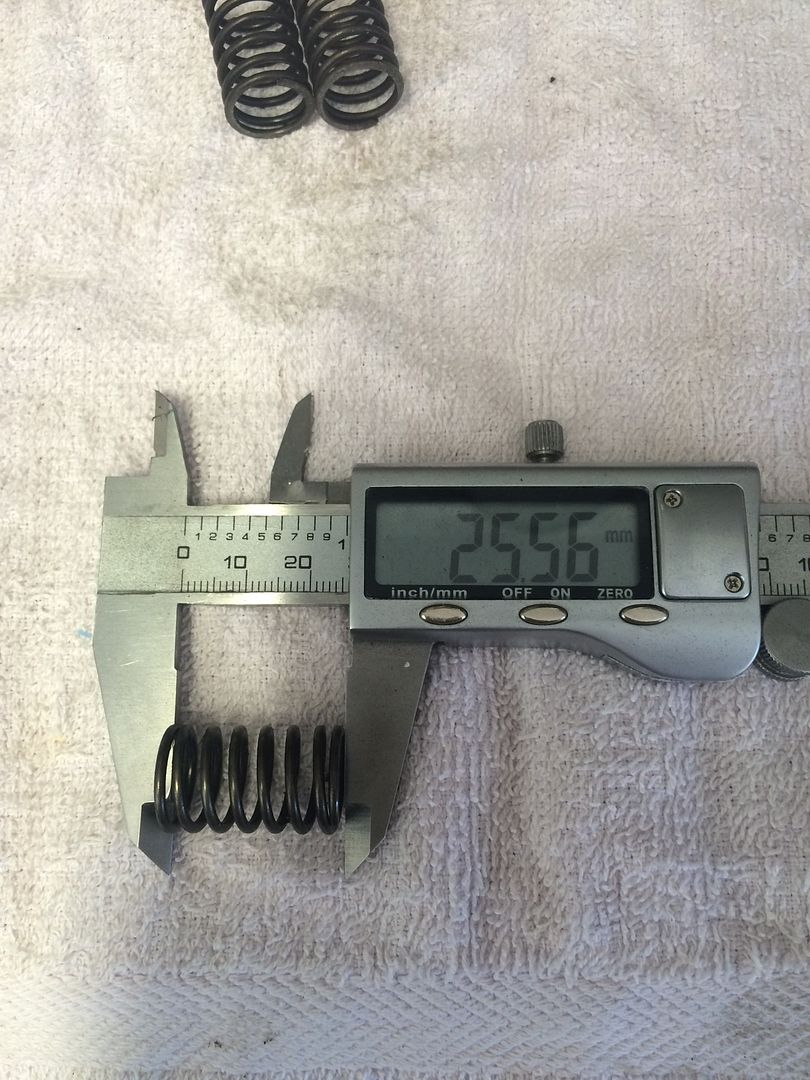
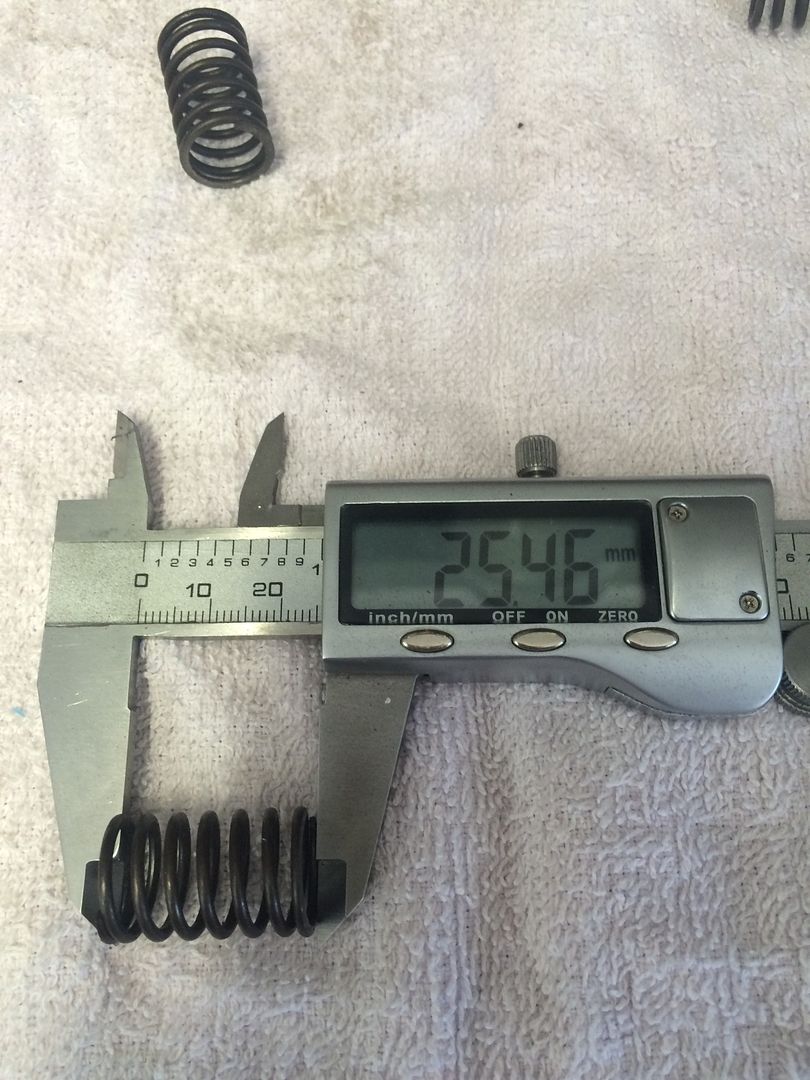
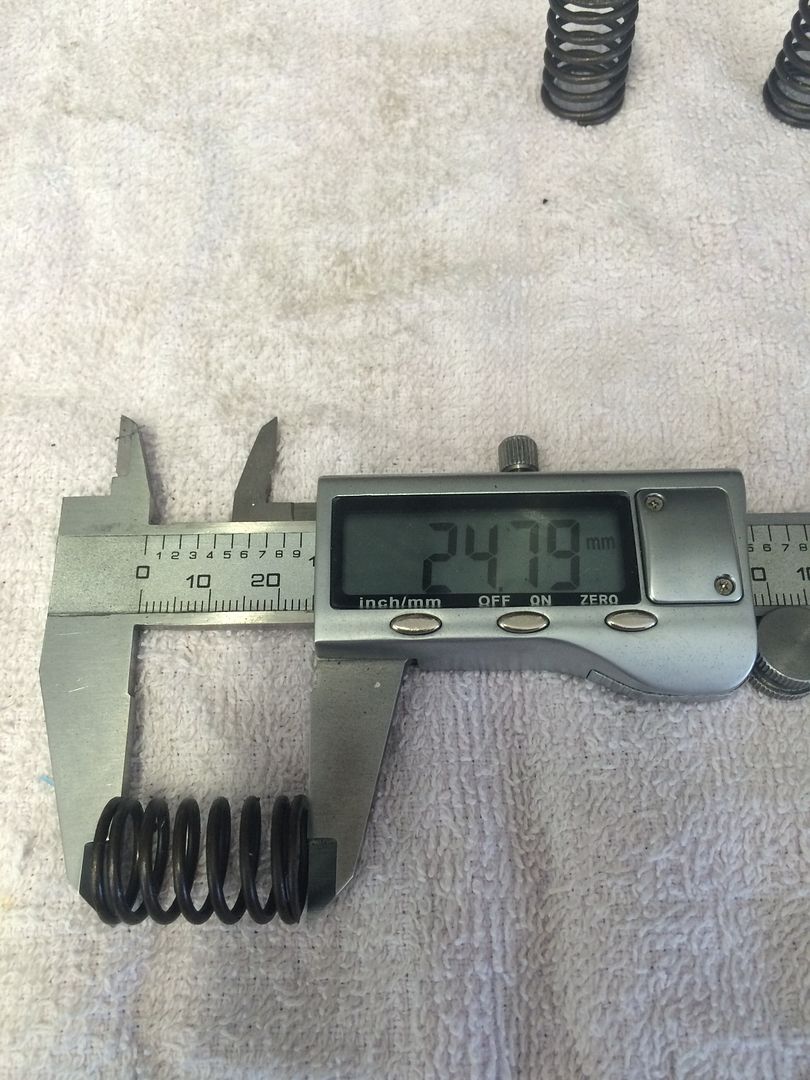
Next I measured all the blow off springs to find the lest compressed one:
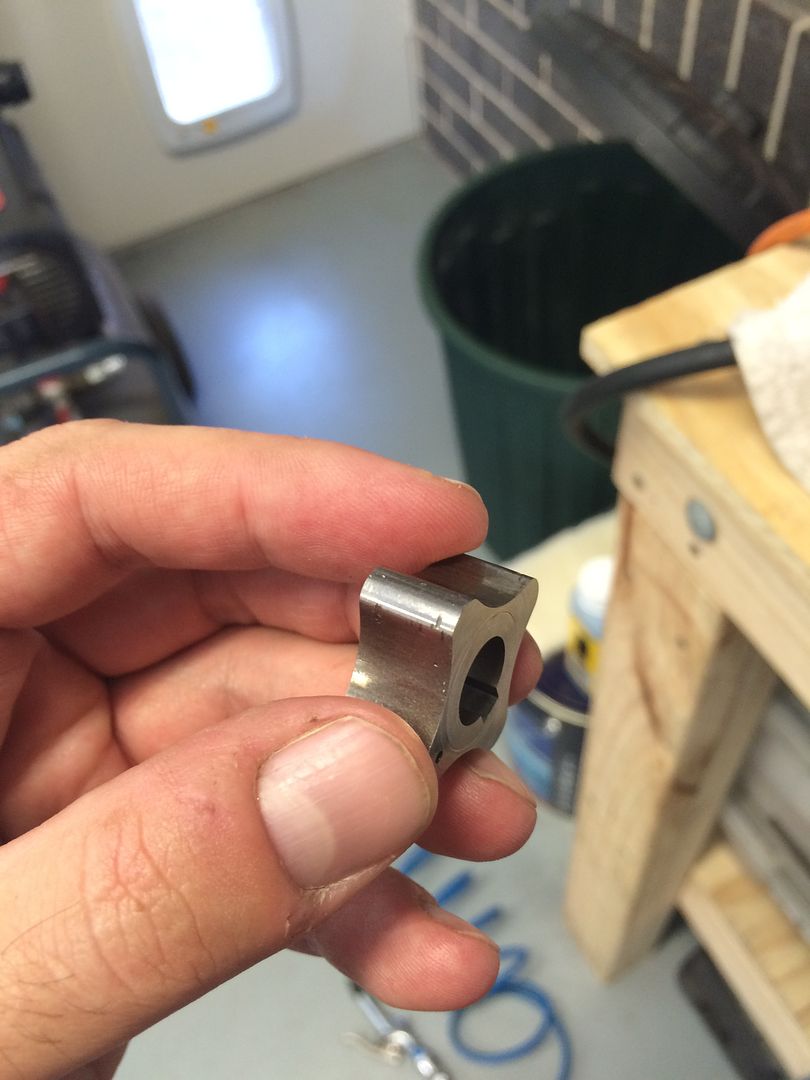
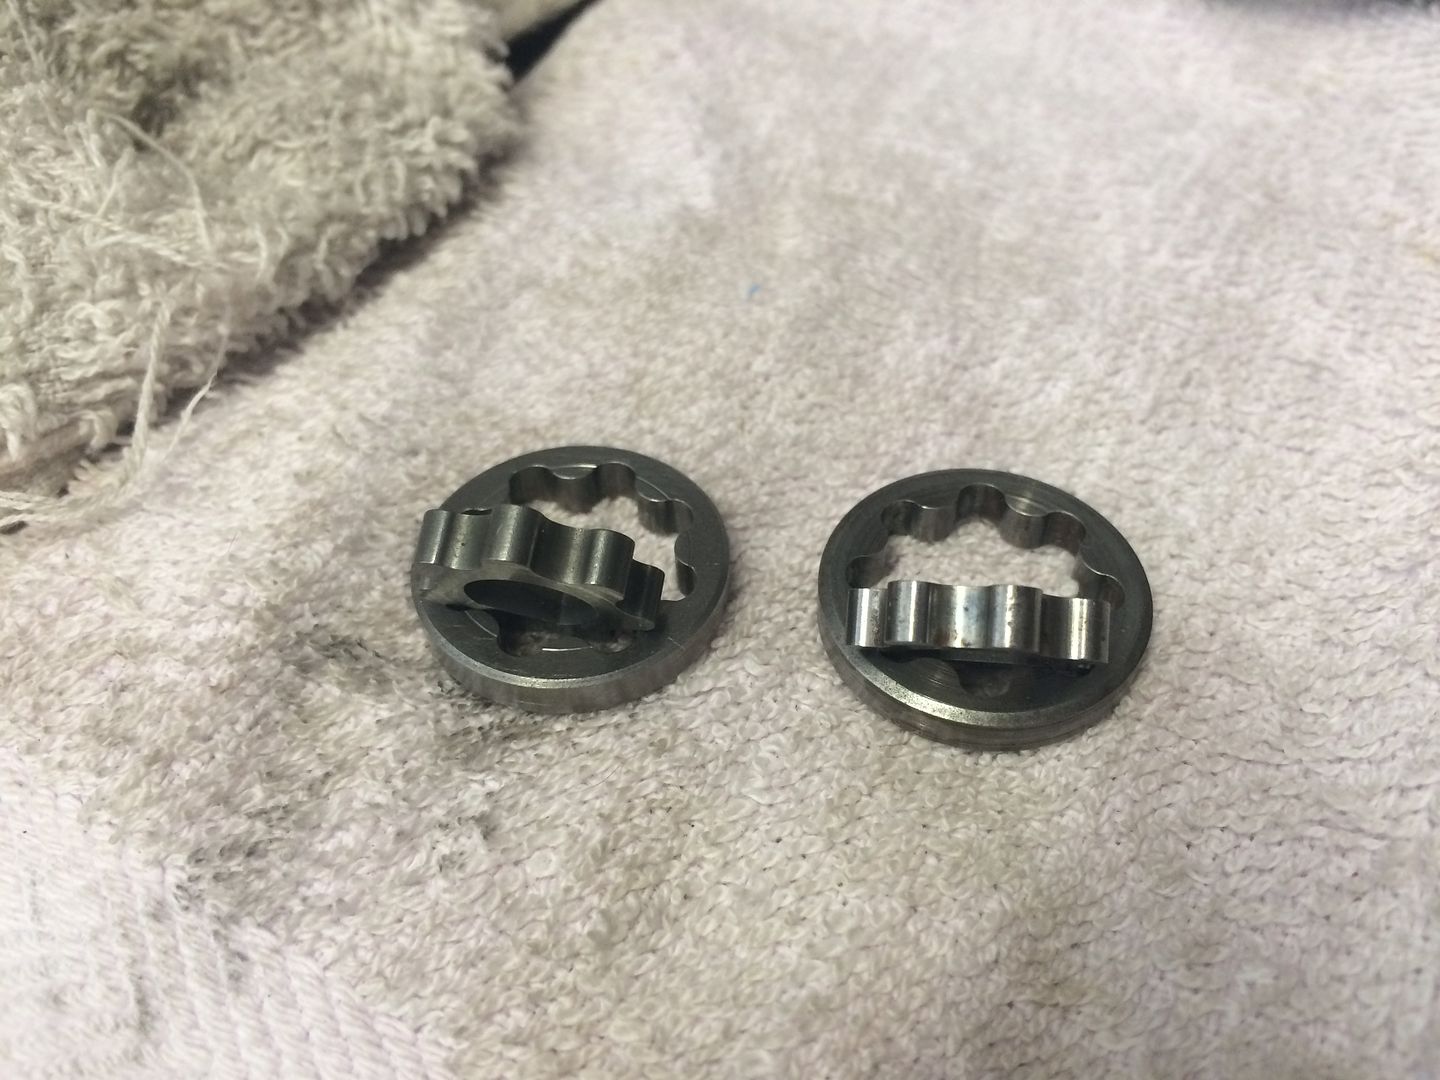
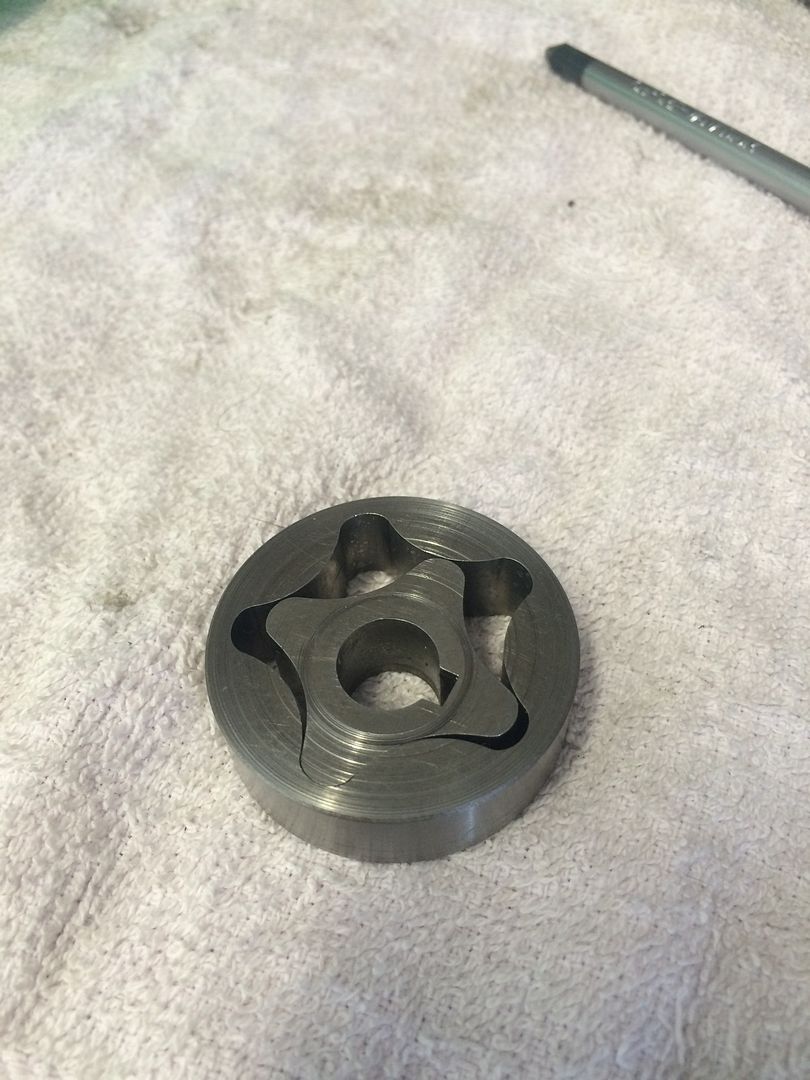
I wanted to check the other rotor before I buttoned the pump back up. On inspection the rotor had a lot more damage on the faces and it could be easily felt:
Checking with the feeler it came out at 0.12mm too so I was right to choose the other one:
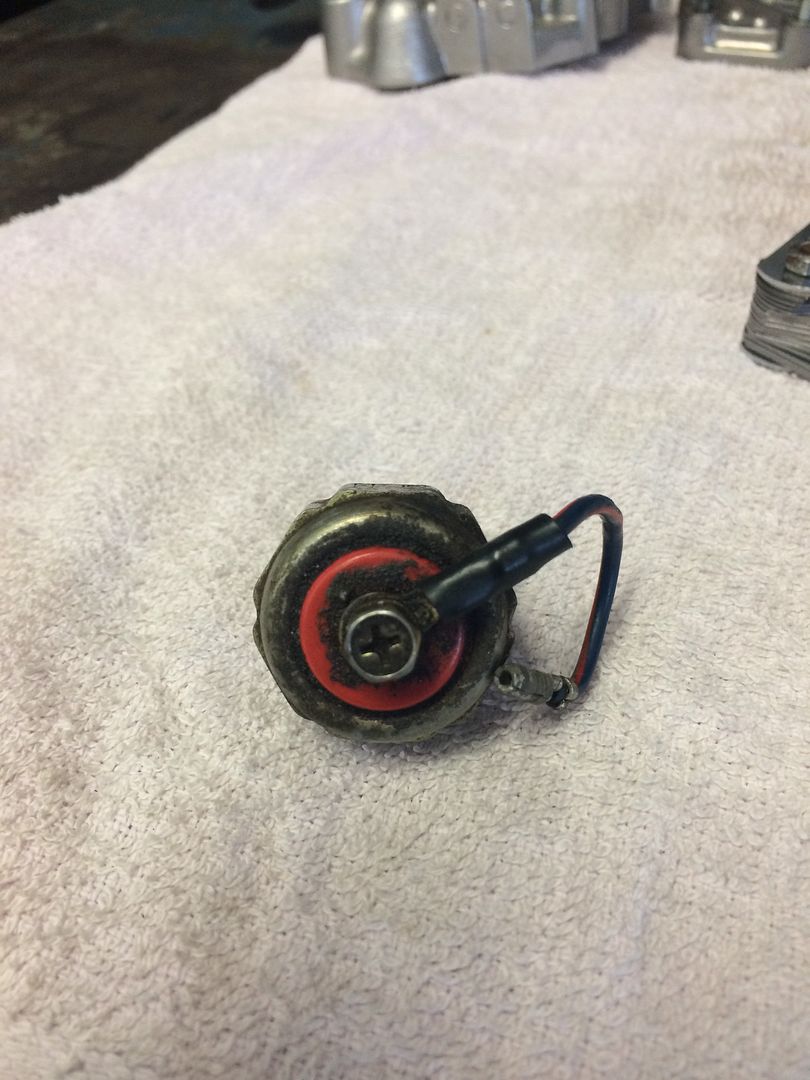
Lastly I wanted to check to see if my oil pressure switches worked. So I set the tester on the bolt and body and found a slight resistance, then shot compressed air up it and found went to infinity. Both pressure switches did this so I assume that's normal (I was expecting it to close the circuit when the pressure dropped so these appear to be working, although I don't know when they will engage):
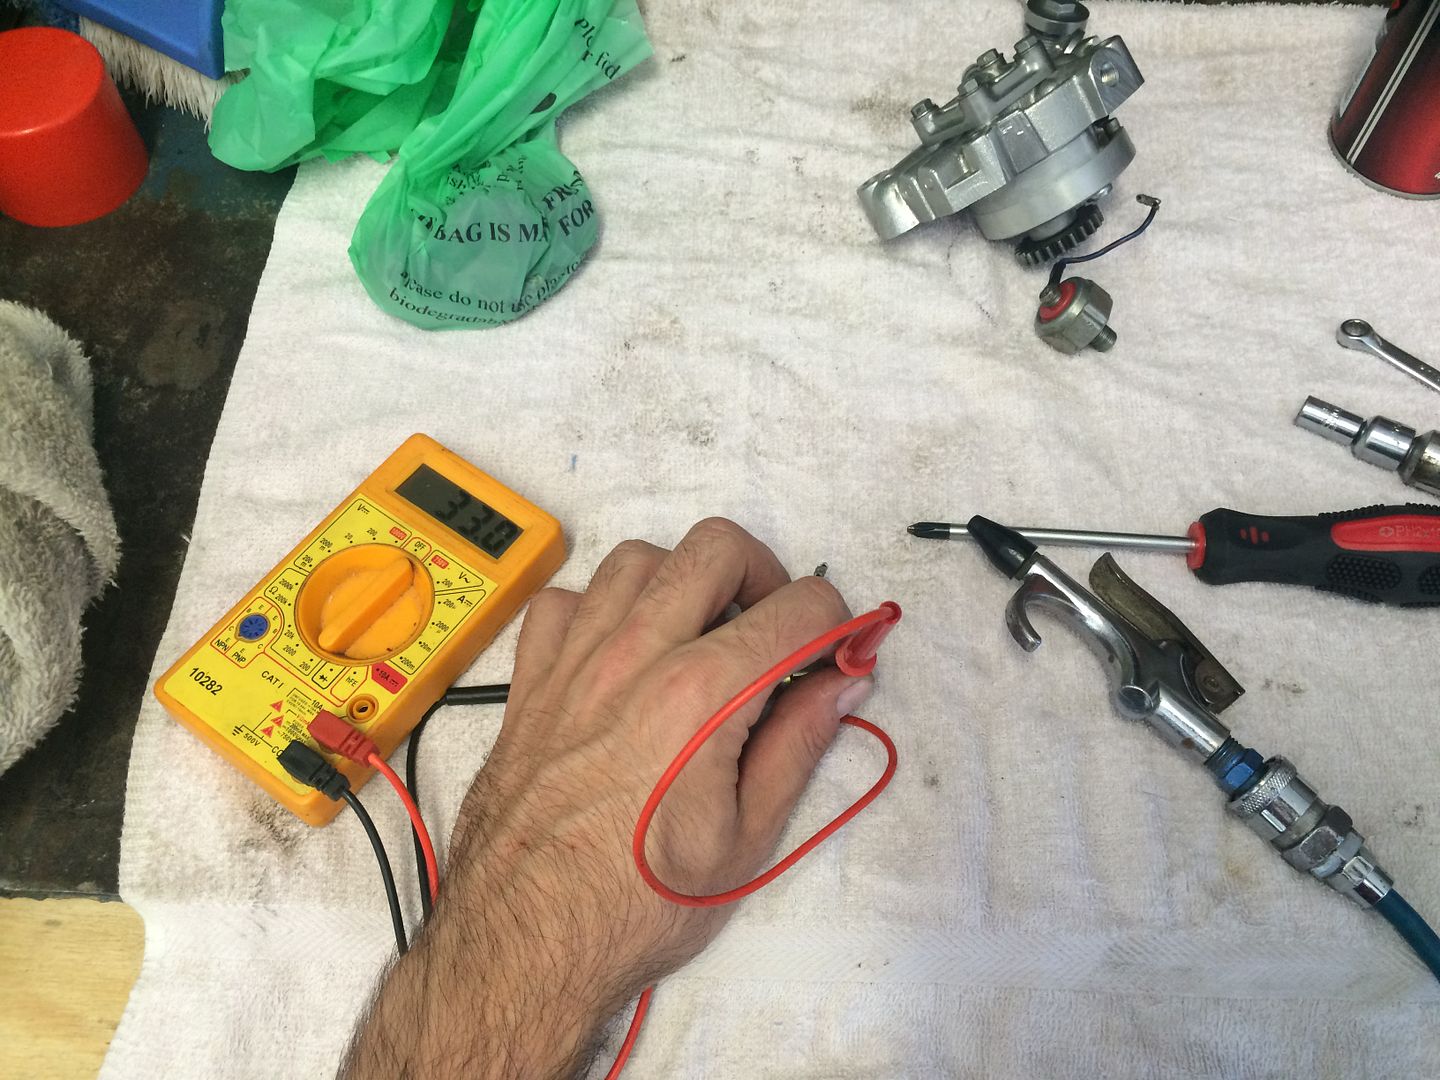
That's it!
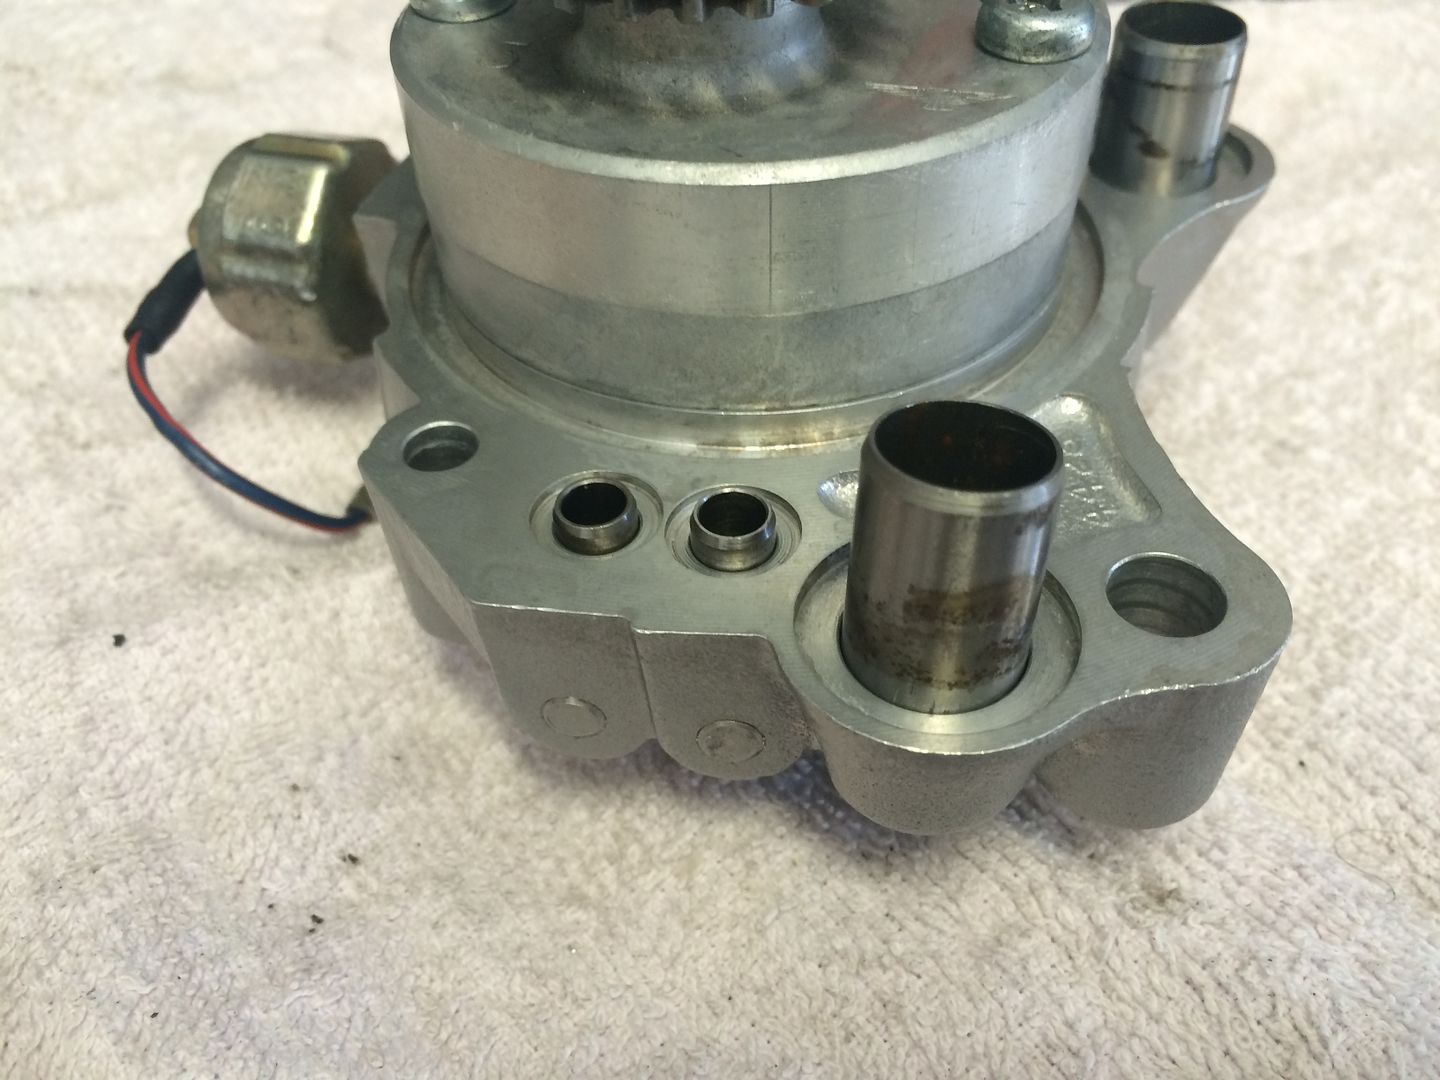
Now all I need to do is grab new bolts all round, some new o-rings and work out where the oil passage tubes should go:

First I set about giving all the bits a clean with some degreaser and a nylon brush to clear the gunk away:

All cleaned and a nice workbench I set about picking the nicest parts to build 1 pump and spec the items as I went. I got the Clymers to guide me (along with a Haynes later on):

Surprisingly the specs on the oil pump are pretty limited so I checked all those and have taken a load of pics to help guide me with those in the know as to whether this pump will be serviceable.
First up is the housing. This has already been vapour blasted and I picked the one with the least visible damage. There are some scuffs inside the rotor housing but nothing that catches a fingernail, so I assume these are fine to use:

The other side has not a scratch on it and you can still see the machining marks:


The outer rotor has some scuff marks too but again nothing to major and only 1 or 2 can be felt with the fingernail, even then only slightly:


Looking inside the rotor for pot marks in the corners, there appear to be none:


The inner rotor is pretty clean except for 1 pot mark on each rotor as its obviously sucked something through:


Next up I put the rotors in the housing and measured the lobe clearance. The manual states 0.35mm is maximum and I was pleased to find only 0.09mm clearance:


Outer rotor clearance should be within 0.3mm and it came in at 0.1mm:

Looking at the gear rotor I was surprised to find these the most damaged. 1 had a visible but only slightly felt scratch, the other was scratched across the face and most were felt. I went with the one that only had 1 scratch as the rest of the rotor was clean and I thought the 1 small scratch would be better than lots of them (I chose the one on the left):

The reverse side of the one I chose was also spotless which was also the reason I went with it:

Rotors on both looked in perfect condition:

The housing also appeared fine:


The rotor gap was larger than the others at 0.12mm but well within spec:


Next I measured all the blow off springs to find the lest compressed one:


I wanted to check the other rotor before I buttoned the pump back up. On inspection the rotor had a lot more damage on the faces and it could be easily felt:


Checking with the feeler it came out at 0.12mm too so I was right to choose the other one:

Lastly I wanted to check to see if my oil pressure switches worked. So I set the tester on the bolt and body and found a slight resistance, then shot compressed air up it and found went to infinity. Both pressure switches did this so I assume that's normal (I was expecting it to close the circuit when the pressure dropped so these appear to be working, although I don't know when they will engage):

That's it!
Now all I need to do is grab new bolts all round, some new o-rings and work out where the oil passage tubes should go:


crazypj
Split personality, I fake being smart
All looks and sounds good to me ;D
Couldn't find the article on CB750 rotor modification, it will turn up sometime though (I haven't checked laptop yet)
The only other measurement would be to get depth of rotor housing, thickness of rotor's and the depth of outer cover holding rotor down
Probably want around 0.003"~0.004" max rotor side to cover clearance as it will 'grow' when pump/motor gets hot
The oil pressure switch opens at 4psi, I've seriously thought about using an automotive one with a higher pressure (you can blow the tops off if you use 20w/50 oil, did 3 in a year )
Didn't cause any engine damage but did make rear tyre a bit slippery
Couldn't find the article on CB750 rotor modification, it will turn up sometime though (I haven't checked laptop yet)
The only other measurement would be to get depth of rotor housing, thickness of rotor's and the depth of outer cover holding rotor down
Probably want around 0.003"~0.004" max rotor side to cover clearance as it will 'grow' when pump/motor gets hot
The oil pressure switch opens at 4psi, I've seriously thought about using an automotive one with a higher pressure (you can blow the tops off if you use 20w/50 oil, did 3 in a year
)Didn't cause any engine damage but did make rear tyre a bit slippery
neevo
Over 1,000 Posts
Thanks PJ, you've put my mind at rest knowing the pump should be good. I don't have any precision tools to measure the depth of the housing or width of the rotors. Would my calipers be good enough?
Andy: you'd be surprised how simple motors are really. If I can do it I have no doubts you could have a go. How's that beautiful CB of yours going?
Andy: you'd be surprised how simple motors are really. If I can do it I have no doubts you could have a go. How's that beautiful CB of yours going?
andycafe
Northern Suburbs, Melbourne Victoria, Australia
neevo said:Andy: you'd be surprised how simple motors are really. If I can do it I have no doubts you could have a go. How's that beautiful CB of yours going?
I know :
I have done engine work but it's not my fav and my lack of time, well you know Yeah I picked up a GB 2 into 1 header recently for the little red racer, I Just need to mod the port collars to suit. I think it's gonna look/sound sweat ;D

